As a Windows user, a non-working printer could be a simple fix or a time-consuming disaster. If you see the “Error – Printing” status error on Windows, you won’t have much to go on to try and troubleshoot the problem, which can be frustrating and inconvenient to resolve.
Several factors might cause the “Error – Printing” status error, but, in most cases, simple troubleshooting steps like restarting your printer or checking your printer connections may do the trick. To fix the “Error – Printing” status error on Windows, follow the steps below.
Understanding the “Error – Printing” Status Error on Windows
The “Error – Printing” status is a simple, catch-all error code that appears when your Windows PC can’t successfully print. It can be caused by several factors, such as missing paper, outdated or corrupted printer drivers, incorrect printer settings, or issues with the Print Spooler service on your Windows PC.
It can appear in a few different ways, such as “Error – Printing,” “Printer in error state,” or “Print Spooler service not running.” The message may differ, but the result is the same—your printer can’t process or complete the print job.
If you see this error, try some of the troubleshooting fixes below.
Restart Printer and PC
First, restart your devices to see if this resolves the problem.
It’s a good idea to turn off your printer and disconnect its power cord. Next, shut down your PC and unplug its power cable as well. Wait for at least 30 seconds before plugging everything back in.
After the waiting period, reconnect the printer and PC’s power cords. Turn on your printer first, ensuring it’s up and running. Next, turn on your PC. Finally, try printing a test page to see if the “Error – Printing” status error has been resolved.
This restart process might seem obvious, but a clear shutdown and restart can often resolve minor (and unexpected) issues.
Check Printer Hardware and Connection
Printer still not working? It’s a good idea to look more closely at your printer hardware and its connection with your PC.
First, verify that your printer is turned on. Look for an LED or display indicating power, and ensure it’s connected to an electrical outlet. If you have a wired printer, inspect the USB cable connecting the printer to your PC. Make sure it’s properly secured at both ends.
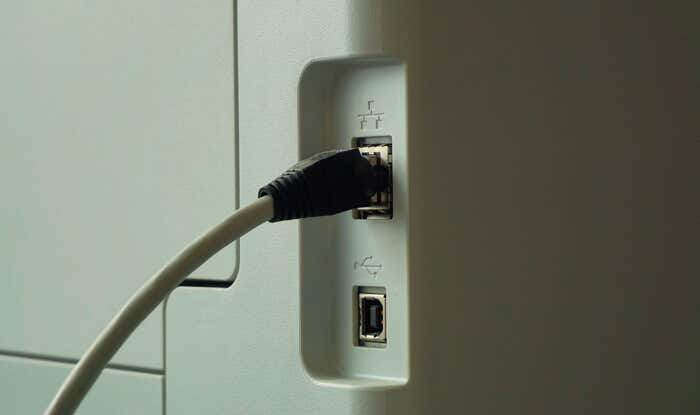
If the USB connection isn’t recognized, try a different USB port or a new cable. Likewise, if the printer is connected over a network, ensure the ethernet cable is connected and the connection is active.
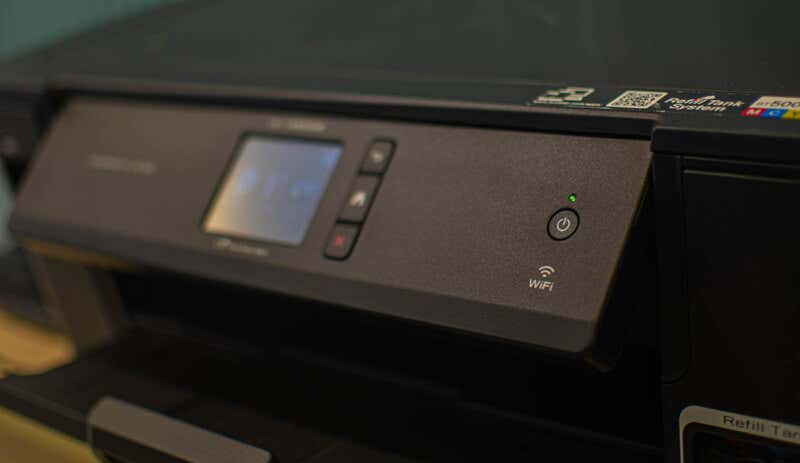
For wireless printers, double-check your Wi-Fi connection. Ensure that your printer connects to the same network as your PC. Most printers have a display or indicator light to show a successful wireless connection. If your wireless printer isn’t connecting, consult your printer’s manual for specific steps to connect to Wi-Fi.
Also, check your printer for issues such as low paper or ink. Without paper or ink, you can’t print, so replenishing the paper or ink should resolve the issue.
Clear Paper Jams
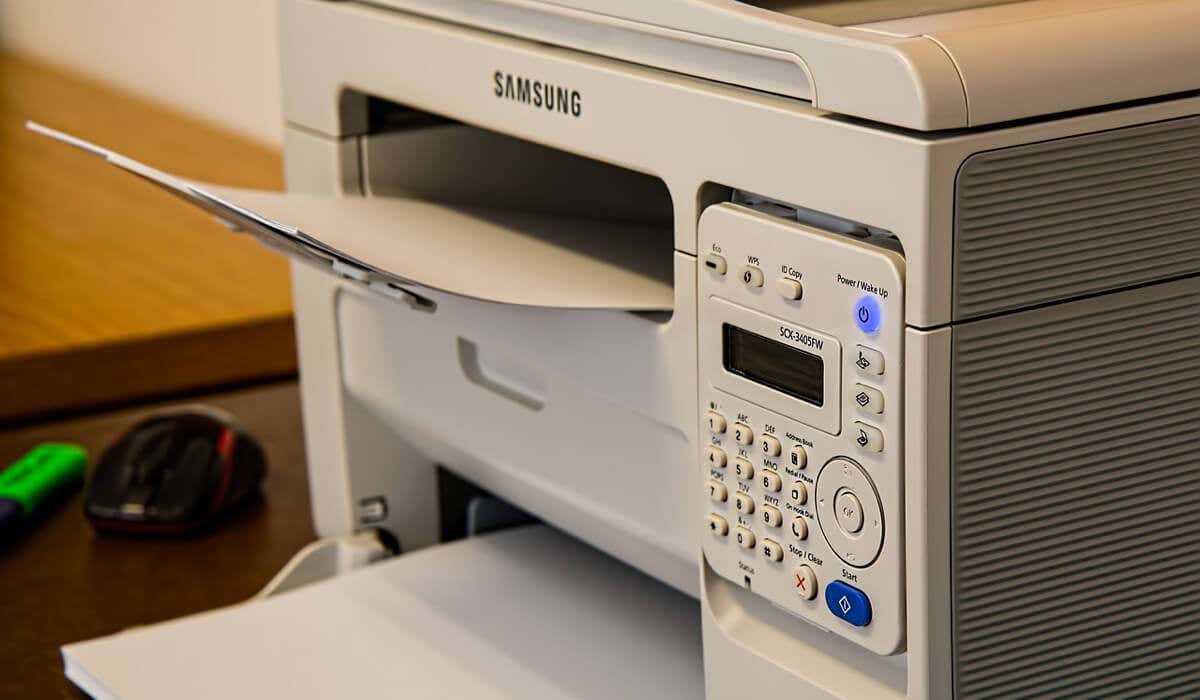
A paper jam may be causing the “Error – Printing” status message on your PC. If your printer can’t push through paper, it can’t continue the printing process.
To resolve this issue, you’ll need to clear any jams from your printer. Depending on your device, this might be difficult to do, so you may need to consult your manual first.
Start by checking the areas where paper enters and exits the printer, then remove any jammed paper. If your printer has an automatic document feeder, open the ADF cover (Automatic Document Feeder) and remove any jammed paper.
Restart Print Spooler Service and Clear Print Queue
After clearing a printer jam, it’s also a good idea to clear your print queue and restart the Print Spooler service (which your printer needs to be able to print). It’s a good idea to do this if your print queue won’t clear after an error occurs during printing.
You can also do this at any point to try and resolve printer errors like the “Error – Printing” message.
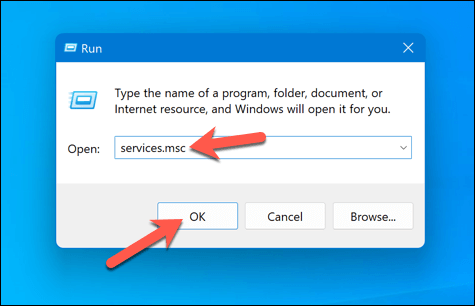
- To begin, right-click the Start menu, select Run, or press the Windows Key + R to open the Run command box.
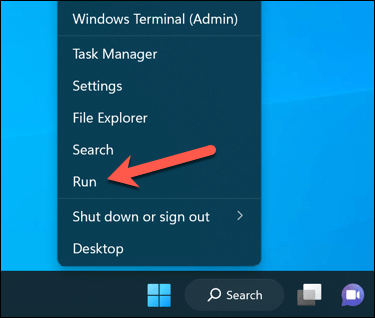
- In Run, type services.msc and press OK.
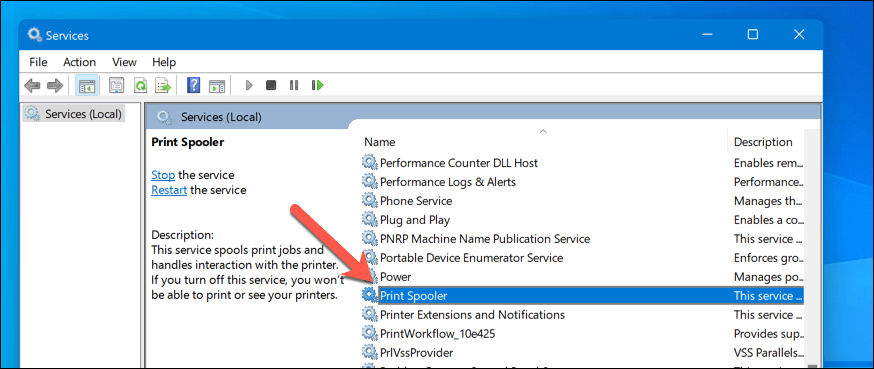
- In the Services window, look for the Printer Spooler service and double-click it.
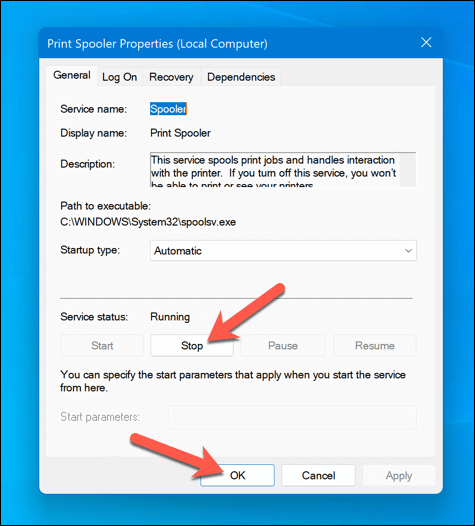
- Press Stop and OK. This will stop the print spooler service, allowing you to clear any leftover print jobs.
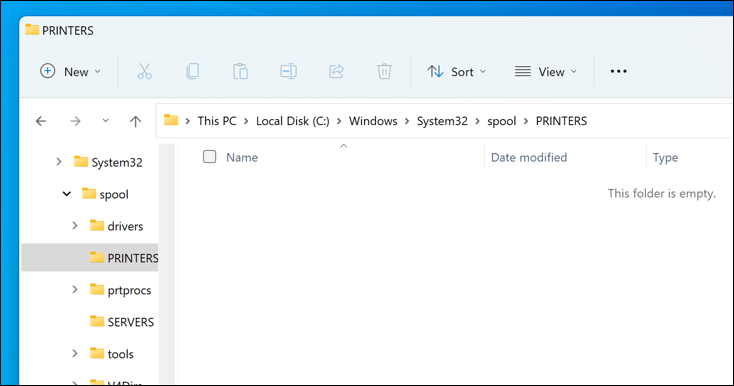
- Next, open File Explorer and navigate to the C:\Windows\System32\spool\PRINTERS folder using the address bar. Delete all files in this folder to completely clear the print queue.
- Return to the Printer Spooler service in the Services window and click Start to restart the spooler.
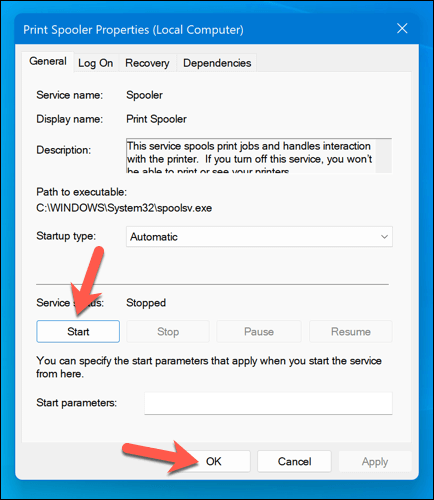
With the paper jams cleared and the print queue emptied, your printer should now return to a ready state, and you can resume printing your documents without any errors.
Update or Reinstall Printer Drivers and Software
Outdated driver software can sometimes lead to the “Error – Printing” status error in Windows. To fix this issue, you should check for new printer software (including new printer drivers) from the manufacturer.
Follow these steps to ensure your printer driver and manufacturer software are up-to-date. It may be a good idea to uninstall existing printer software before proceeding.
- Visit the printer manufacturer’s website and search for your specific printer model in the support or downloads section.
- Find any available updates or new versions of the printer driver software. Ensure the software is compatible with your version of Windows.
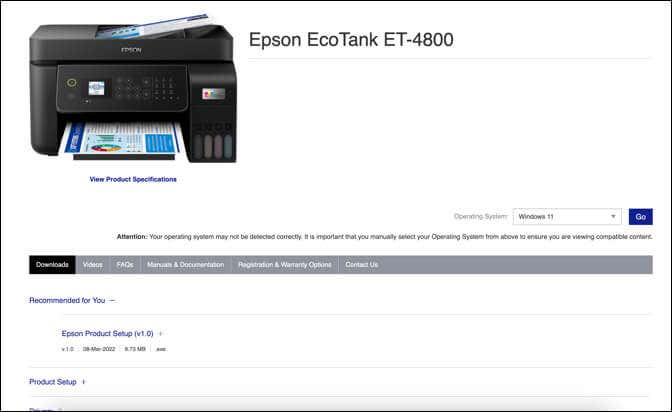
- Next, download the latest driver and printer software. If new software is available, download and save the installer to your computer.
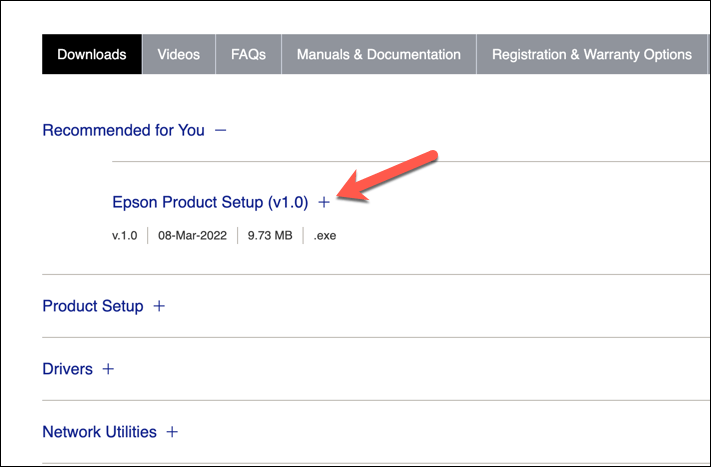
- Run the installer and follow the on-screen instructions to complete the installation.
After completing these steps, your printer should begin to start working. However, you may need to restart your PC for any changes to take effect.
Check for New Windows Updates
A new Windows update can fix bugs, and new updates can help resolve common printing issues. You can manually check for new Windows updates to try and resolve the “Error – Printing” status error on your PC.
To check for new Windows updates, follow these steps.
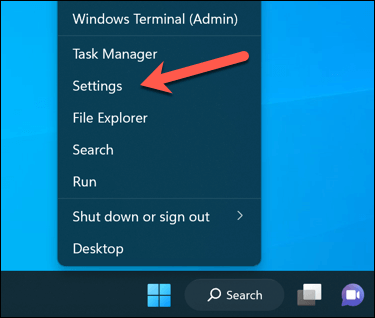
- Right-click the Start menu and select Settings.
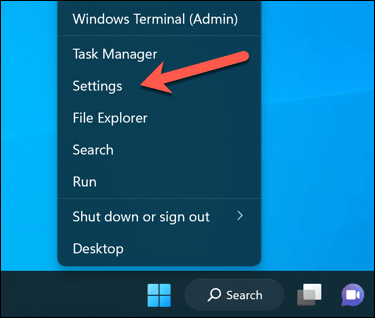
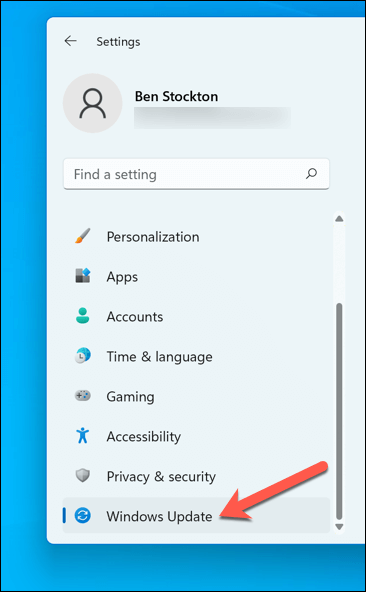
- In the Settings window, select Windows Update from the sidebar.
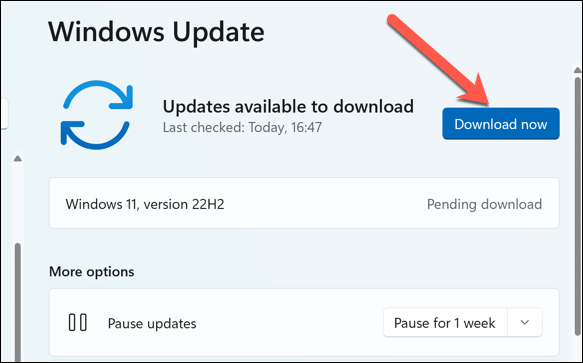
- Next, click the Check for updates button. If there are any pending updates, Windows will automatically start downloading and installing them.
- If it doesn’t, press Download Now to begin the installation.
After updating your PC, restart your computer and try printing again to see if the error is resolved.
Use the Printer Troubleshooting Tool
If you’re still struggling to resolve the “Error – Printing” status error in Windows, you can use the Printer Troubleshooter. This built-in tool helps to identify and fix common hardware and device-related issues.
Follow these steps to run the troubleshooter on your Windows PC.
- Right-click the Start menu and select Settings.
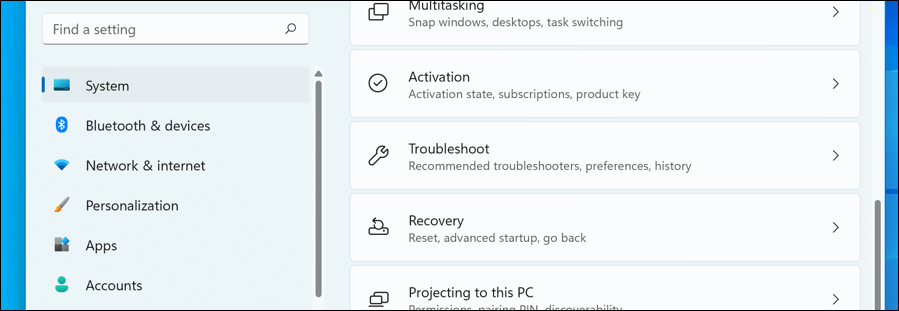
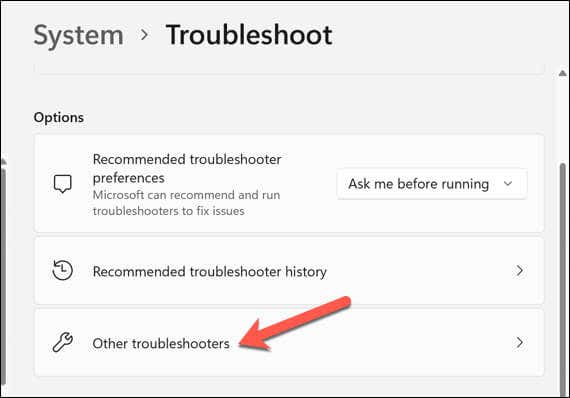
- In Settings, select System > Troubleshoot.
- Select the Other troubleshooters option.
- Next, select the Printer troubleshooter to begin running the printing troubleshooting tool.
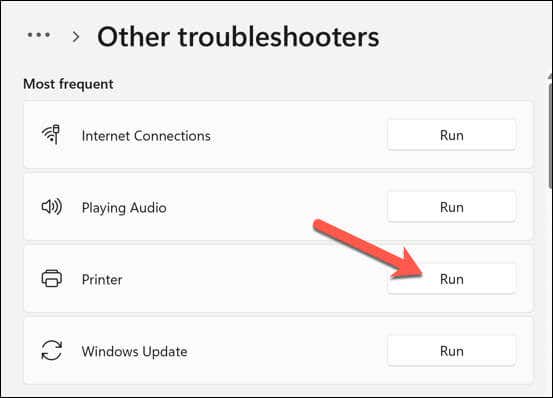
- Click Next and follow the on-screen instructions to detect and fix any problems.
After completing the troubleshooter and resolving any issues it detects, restart your computer, and then check if the “Error – Printing” issue is resolved.
Resolving Common Printer Issues on Windows 11
There isn’t a one-size-fits-all fix for resolving the “Error – Printing” status error on your Windows PC. Most of the time, however, one of the troubleshooting fixes above will resolve the problem.
However, there could be deeper problems with your printer, which means you can’t connect to your printer or print properly. For instance, if you see the error code “0x0000011b” on your PC, there could be a problem with your network that’s preventing you from printing—you’ll need to dig deeper to find and fix the problem.
Related Posts
- 7 Ways to Fix HP Printers ”Driver Is Unavailable” Error on Windows PC
- How to Fix Your Printer’s “Driver is unavailable” Error on Windows
- 7 Ways to Fix ”Windows Cannot Connect to the Printer”
- Print Job Won’t Delete in Windows? 8+ Ways to Fix
- Preparing for Windows 10 End of Support: Upgrading to Windows 11
Ben Stockton is a freelance technology writer based in the United Kingdom. In a past life, Ben was a college lecturer in the UK, training teens and adults. Since leaving the classroom, Ben has taken his teaching experience and applied it to writing tech how-to guides and tutorials, specialising in Linux, Windows, and Android. He has a degree in History and a postgraduate qualification in Computing. Read Ben’s Full Bio
