Got a new graphics card but don’t know how to install it? We’ve got you covered. In this article, we’ll take you through every step necessary to uninstall your old GPU, install a new graphics card, get your drivers up to date, and get playing.
We will also take you through all of the precautions that should be taken before, during, and after the installation process.
Hopefully, this guide should help you to feel confident about installing a new GPU, even if it’s your very first time.
Installing a Graphics Card – the Step by Step Process
- Make sure your PC and power supply can support the new graphics card
- Switch off your PC, and remove your old graphics card
- Physically install the new graphics card
- Switch your PC back on and install the new graphics card drivers
- Everything is ready to go
Ensuring your New GPU Can Be Supported By Your System
Thankfully, most graphics cards these days do not require much power output – they have been optimized to use less power, which is great because it means nine times out of ten, the power supply you have will support any new graphics card you buy.
However, you should always check to make sure your power supply can provide enough power to your new GPU. If you have a particularly low powered power supply, you may run into some problems.
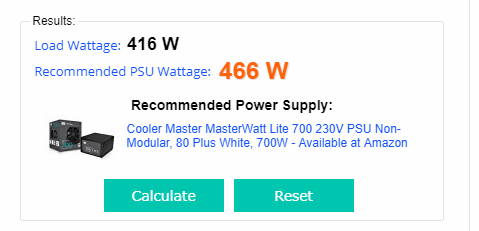
There is a tool online from Cooler Master that can tell you how many watts your power supply will need to run a certain hardware setup. Before we get into how to use that, you need to check the watts your power supply actually has.
Unfortunately, if you don’t already know this, this means you’re going to need to open up your case to have a look. No problem, though, it’s good to get familiar with the inside of your PC because you are going to need to get inside to install the new graphics card anyway. If you already know your power supply capacity, you can skip this and move to the calculator below.
Finding Out Your Power Supply Watts
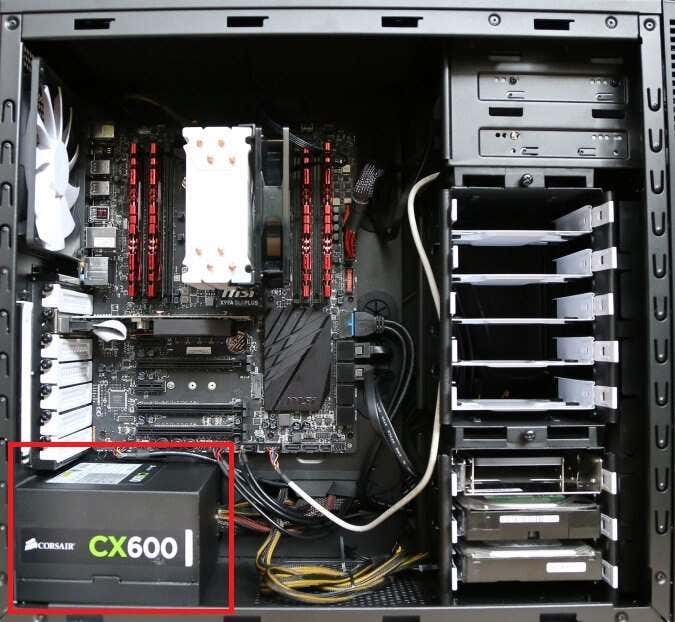
Switch off your PC. Take the screws off the side panel of your PC and then slide the side panel off. You should be greeted with something that looks a little like this.
The area highlighted in red is the power supply. There will be a label on this that tells you the Wattage of your power supply. Make note of this.
Calculating your Power Supply Usage
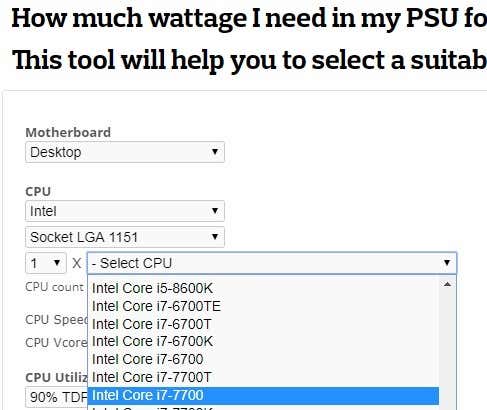
Next, visit the Cooler Master Power Supply Calculator. You need to input all of your hardware details, including fans. This includes your CPU, RAM, fans, liquid cooling, and the GPU you plan to purchase or install. You can use the dropdown boxes to choose your hardware.
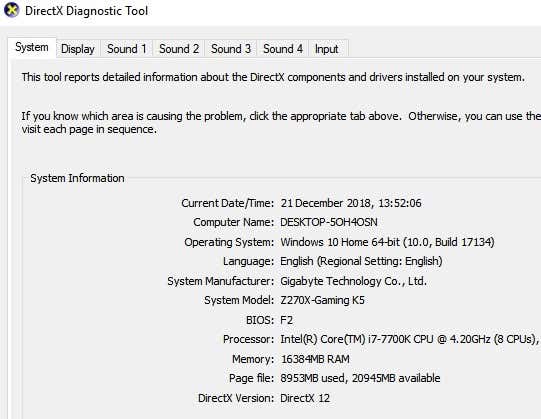
You can find CPU and memory information by opening the Start Menu and searching, then opening dxdiag.
Other hardware like hard drives and fans can be assessed visually by looking at the inside of your PC. If you don’t know your exact fan size, don’t worry, just make an estimation, as fans won’t take up much power.
Once you’ve inputted all of your information, you can press the Calculate button to be given an estimation on how much power your system needs. In most cases, a 500, 600, or 750 watt power supply should be suffice.
Removing Your Old Graphics Card
Now that you’ve checked to make sure your graphics card can be supported by your power supply, it’s time to remove your old graphics card.
Note: If you don’t already have a graphics card, you can skip this step. We’d advise reading it anyway so that you can familiarize yourself with your PC.
First switch off your PC. For extra safety, remove the power cable from your PC – this will ensure no power is able to pass through your PC.
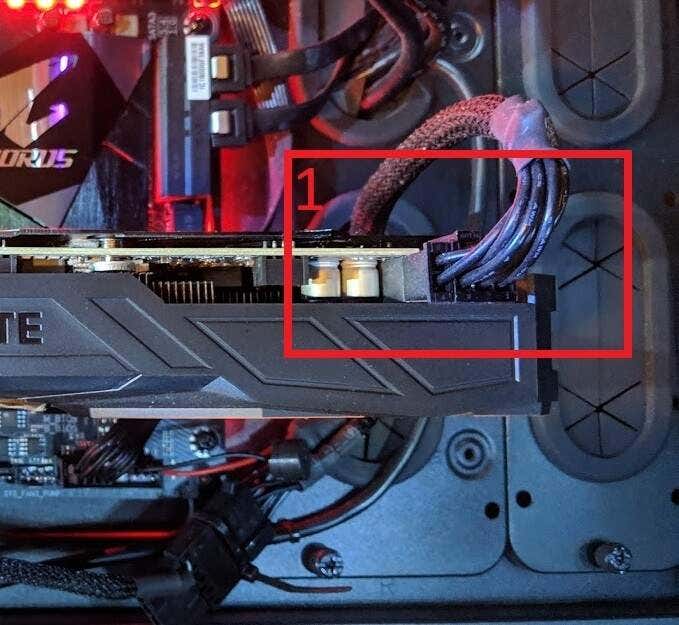
Next, slide open the side panel on your PC. Take a look at the images below – this will show you the different elements of the graphics card you will need to interact with to remove it from your system.
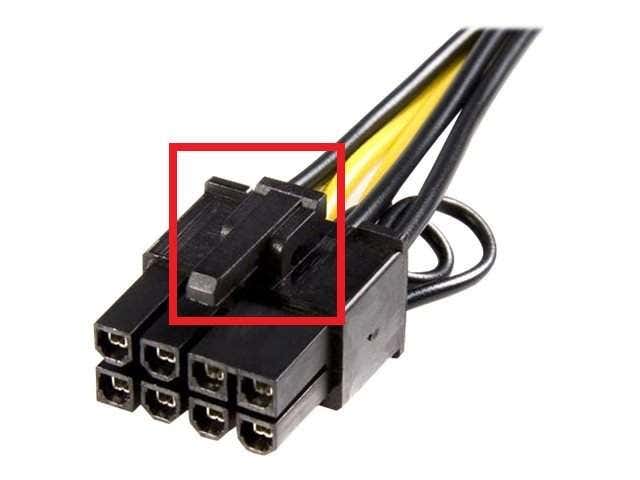
Labeled above (1), you can see the graphics card power cable. This needs to be unplugged. Press down on the clip and then pull it away from the graphics card. If it’s not budging, make sure you are pulling down on the clip. This clip keeps the power cable securely in place. An image below has been provided for reference.
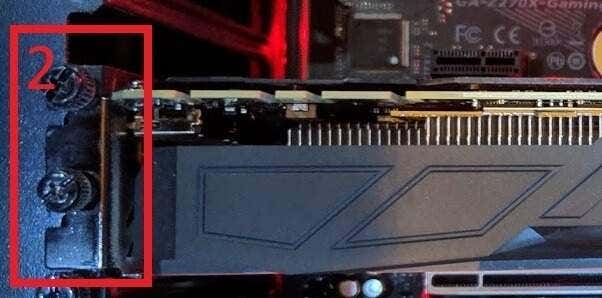
Now that the power cable is removed, it’s time to unscrew the graphics card from the motherboard I/O. As shown below (2), there should be one or two screws securing the graphics card in place. A standard phillips or flathead screwdriver will work here.
For the final step, you need to get your hands under the graphics card and pull down on the clip that is securing it to the actual graphics card slot. This is called a PCI-E slot. For an example, the image below has been provided.
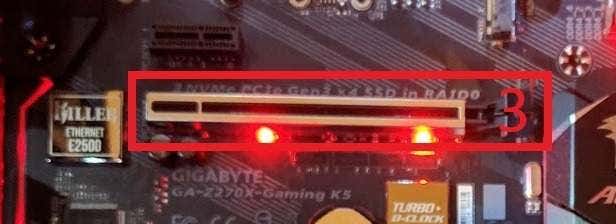
Your graphics card will be plugged into this slot but it won’t come out until you press down on the clip and then pull the graphics card away from the slot. In the image below, the clip itself has been marked by the number 3.
With these three steps out of the way, your graphics card will now be removed, and it’s time to install a new graphics card.
Installing a New Graphics Card – The Step by Step Process
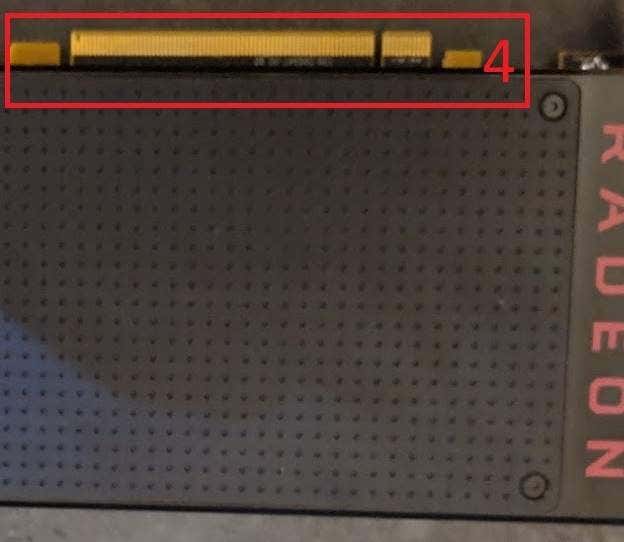
The next step involves using the same steps in the last section, but in reverse. To begin with, you must line up the PCI-E component (4) on your graphics card and slot it into a spare PCI-E slot on your motherboard. Once again, you should push down the clip so that the graphics card can fit in safely.
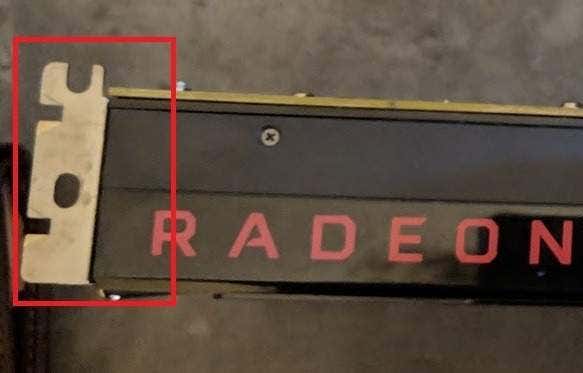
After that has been completed, your graphics card will now be slotted into the motherboard. For the next step, you should take screws and screw your new card into the motherboard I/O. This will help the GPU to stay secure. The image below shows the area you should be installing the screws into.
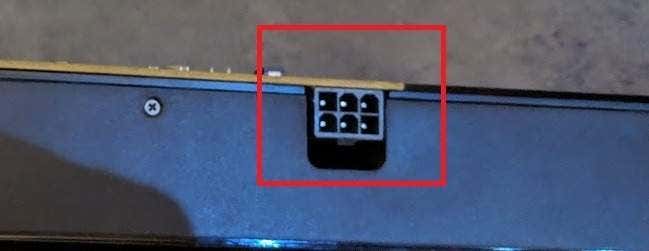
For the final step, it’s time to take the power cable and install it into your new graphics card. Below is an example of the area on the graphics card you’ll need to install the cable.
Keep in mind that not all graphics cards are the same. Some, like this one, require a six pin cable. Some require a 4 pin, and some even require an 8 pin. If you cannot find a suitable cable from your power supply, check your graphics card box for an adapter.
If you cannot find an adapter, you can search online and purchase one from places like Amazon and Ebay. In most cases though, everything you need should be available to you already.
So that summarizes how to plug in a new graphics card. Use the checklist below to ensure you’ve taken the right steps before you switch your PC on.
- Is the graphics card slotted securely into the PCI-E slot?
- Is the power cable slotted securely into the graphics card?
- Is the graphics card screwed into the motherboard I/O?
Installing New Graphics Card Drivers
Now that you’ve physically installed the graphics card, it’s time to install new graphics card drivers. It may be the case that a CD has been included with your graphics card. If that is the case, you can use that and skip the steps below.
To Install Drivers for an AMD Card
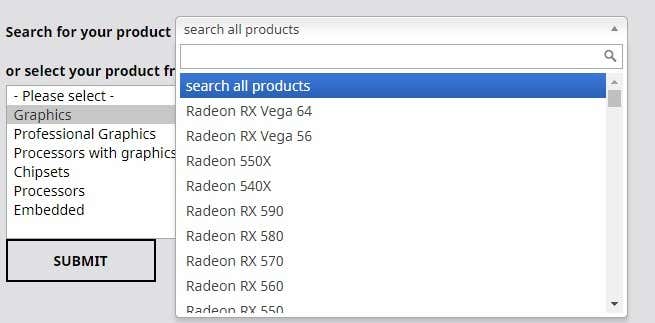
Go to the AMD support page and search for your graphics card model.
Once you’ve found it in the search box, click Submit. On the next page, click the ‘+’ next to the operating system that is suited for you.
After that, click Download. Once the installer has downloaded, open it and go through the step by step installation process.
To Install Drivers for an NVIDIA Card
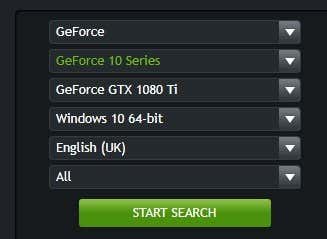
Go to the GeForce Drivers download page. Use the search tools on this page to find your graphics card model. Once you have found your model, click Search.
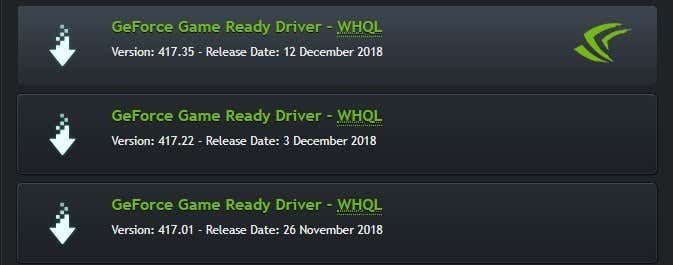
Once the search has completed, scroll down and click on the first GeForce Game Ready Driver.
On the following page, click the Download button. Once the driver installer has installed, open it and go through the step by step instructions provided by the installer.
Some final notes: Your display may flicker or turn on and off during the installation process. Don’t worry, it’s completely normal. Once the installation has been completed, you should restart your PC before playing games or using your PC. Enjoy!
Related Posts
- How to Repair a Corrupted User Profile in Windows 11
- Preparing for Windows 10 End of Support: Upgrading to Windows 11
- How to Access and Change Your WiFi Router Settings (2025 Edition)
- How to Install the Latest Large Language Models (LLMs) Locally on Your Mac
- How to Find Circular References in Microsoft Excel
