It’s quick and easy these days to set up a Ubuntu virtual machine, so you can play around with Linux without formatting your system. However, to really get the most out of your Ubuntu virtual machine, wouldn’t it be nice if the host operating could interact with the guest? That’s one of the things that you can do with VirtualBox Guest Additions, and we’re going to show you how to install it.
Essential VirtualBox Lingo
Before we get into the meat and potatoes of Guest Additions, there are a few core concepts you’ll need to know to make sense of it all. If you’re already well versed in the language of virtual machines, you can just skip to the next section, but if not, stick around for a minute.
We’ve already mentioned the two most important concepts in the opening paragraph: host and guest system.
The host operating system is the actual operating system running on the “bare metal” machine. That’s the actual physical computer. There’s nothing between your operating system and the hardware of the computer.
The guest system, the virtual machine, runs as an application within the host operating system. The guest system “thinks” it’s running on a real computer, and it sees all the “hardware” that it expects, but it’s all simulated.
By design, there’s a hard barrier between the guest and host system. That includes all the applications running on the guest system. This is why, for example, it’s safe to test viruses or do other risky things with a virtual machine. Well, as long as you don’t have a network connection to the VM active!
What Can Guest Additions Do?
The Guest Additions are, as the name suggests, software that’s added to the guest operating system so that it essentially gains spooky superpowers that no virtual machine should have.
All kidding aside, the primary purpose of guest additions is to integrate the virtual machine with the host operating system without losing the advantages of the virtualized barrier between the two. When you install the additions, you get some seriously useful features:
- Synced clocks between the host and guest so that they always show the same time.
- You can freely use the mouse pointer between host and guest without the pointer getting captured.
- Shared folders to make it simple to transfer files safely between host and guest.
- You can freely resize the guest machine’s window, and it will dynamically adjust its resolution to match.
- Better accelerated graphics can access virtualized apps that need more advanced GPU features on the host machine.
- A shared clipboard, making it easy to copy and paste things between the two systems.
There are even more really helpful features. Read the official VirtualBox Documentation for the technical details if you want to know more.
Have You Got a Working Virtual Machine?
This article isn’t about setting up an Ubuntu Virtual Machine, but you need a working and properly configured VirtualBox Ubuntu machine to install VirtualBox Guest Additions in Ubuntu. If you need to, head over to How to Install Linux on Windows With VirtualBox and make sure you’ve done everything the right way. If your Ubuntu VM is in order, we’re ready to proceed to the actual installation process.
Installing Ubuntu Guest Additions
Assuming that you have a working Ubuntu VM in VirtualBox ready to go, you can install the guest additions easily.
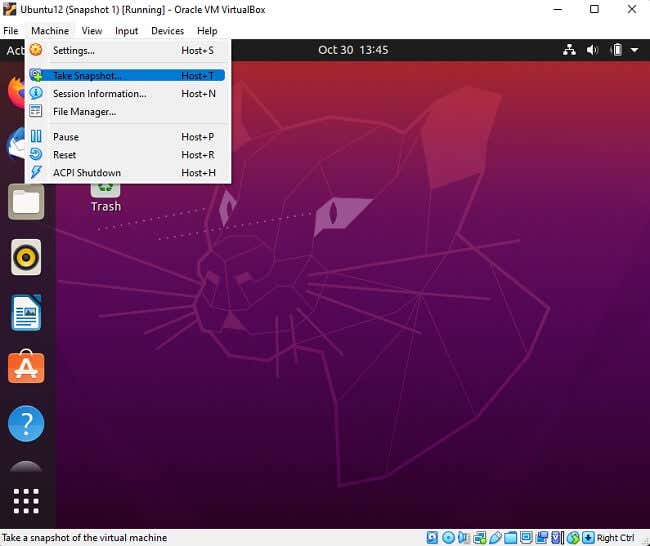
Before you do that, however, we recommend that you take a snapshot of your VM just in case something goes wrong with the guest addition installation. Remember that these are drivers and utilities installed to the VM, so it alters the virtual system.
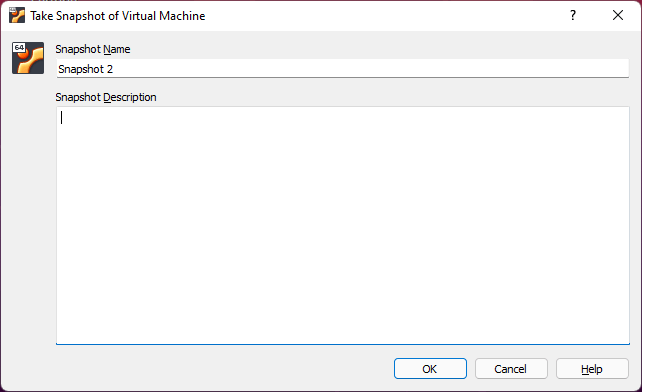
You can take a snapshot in one of two ways. The first is to press the host key + T. By default; the right Ctrl key is the host key unless someone has changed this in the settings. The current host key is displayed in the bottom right corner of the virtual machine window. Alternatively, simply use Machine > Take Snapshot.
Name the snapshot, save it and then return to your VM.
Now, select Devices and then Insert Guest Additions CD.
You’ll get this message from Ubuntu, select Run.
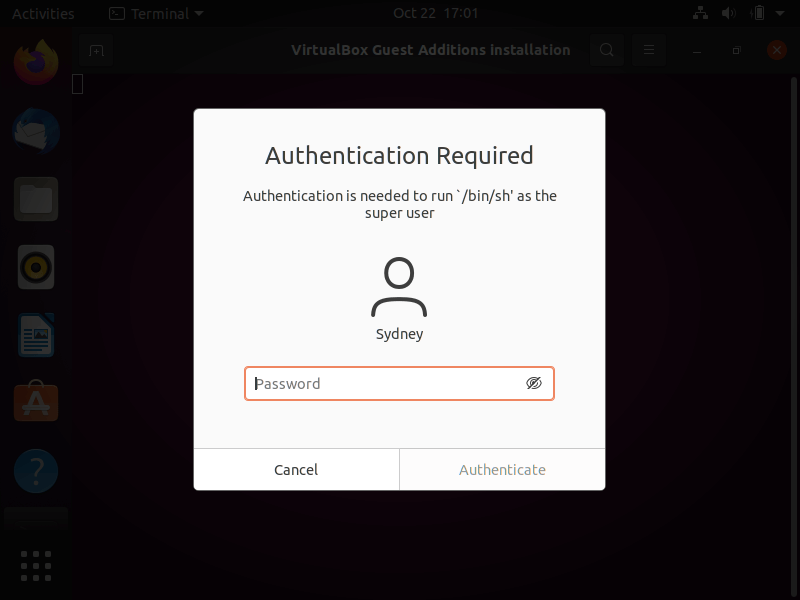
Now, type in your administrator password and select Authenticate.
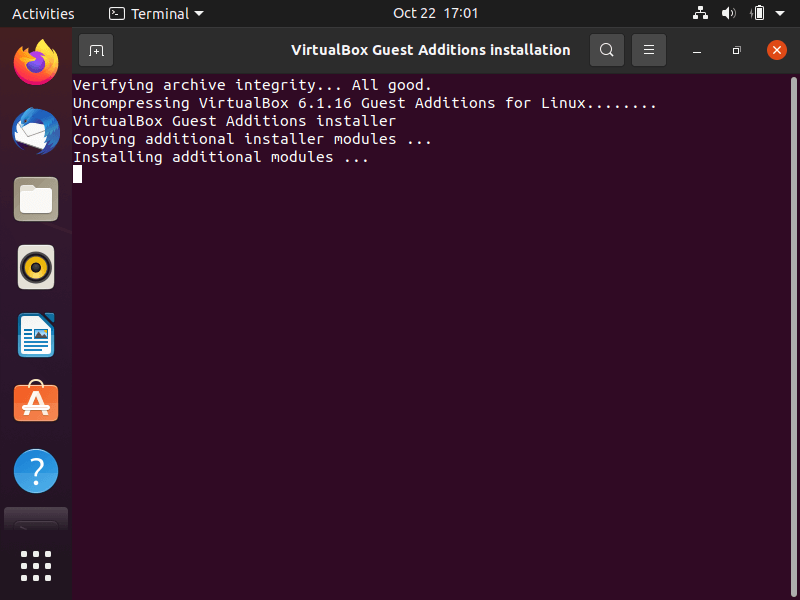
The software will run and install guest additions. You may get an error about the system not being set up to build kernel modules, just ignore it and press Enter.
Guess what? That’s all there was to it. Guest additions are now installed, and you should be ready to go. Although, you should test to see whether the installation has worked properly or not.
Testing Guest Additions
To make sure that Guest Additions is working as intended, you’re going to try a few quick tests.
First, move your mouse pointer over the desktop icons in Ubuntu from outside the virtual machine window. Do they highlight? Can you click on a desktop icon and then seamlessly move the mouse pointer to the host operating system?
Next, let’s test whether shared folders are working correctly.
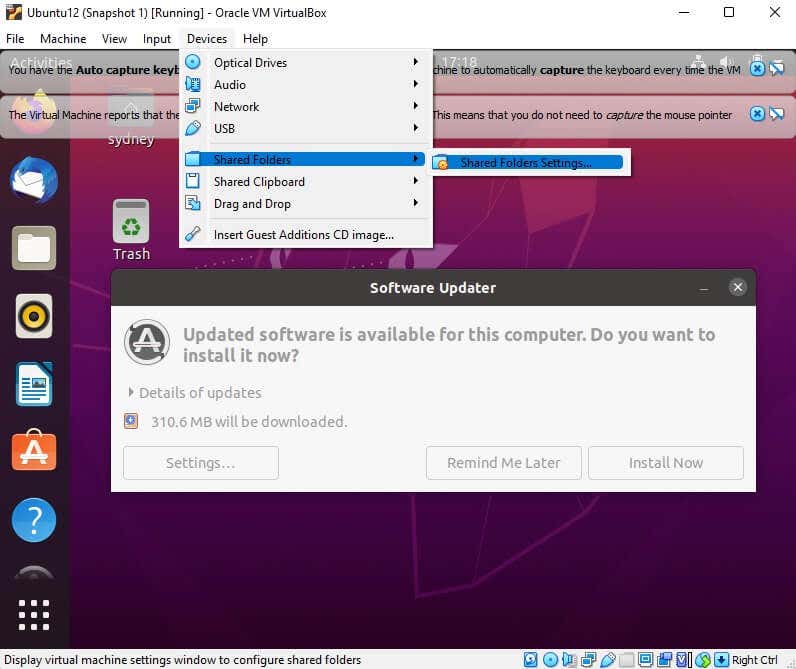
First, select Devices > Shared Folders > Shared Folders Settings from the virtual machine menu.
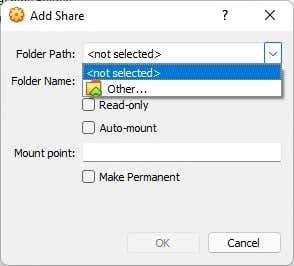
Now, select the add share icon.
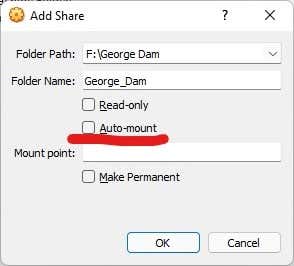
Then, under Folder Path, choose Other and then browse for and select the folder on the host computer that you want to share with the virtual machine. Be sure to choose Auto-mount so that the folder is automatically assigned a drive letter in the guest system.
When you’re done, select OK, and you should see your shared folder listed under transient folders. Remember, we’re just testing whether the guest additions are working properly; you can always go back and make your shared folder permanent.
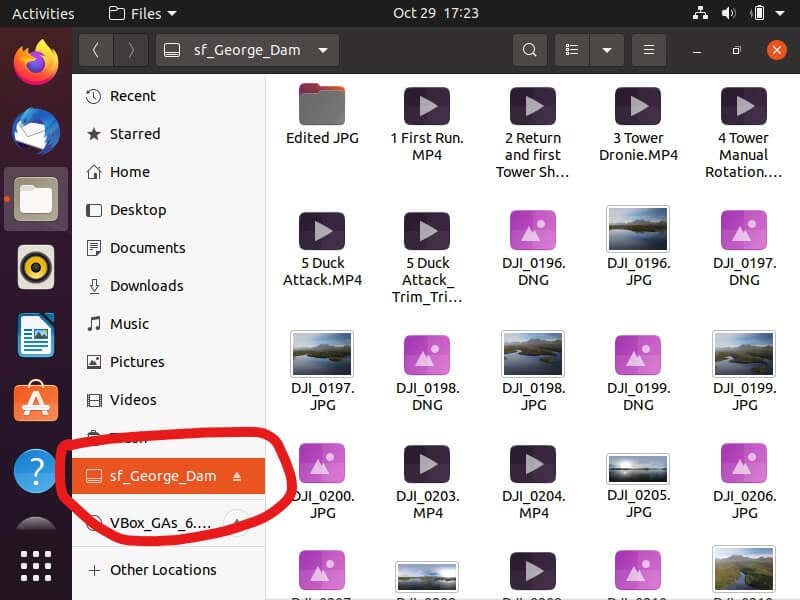
Now, select OK again and navigate to your home folder on the virtual machine, and you should see the folder and its contents. Unless you made the folder read-only, you can copy files from the guest to the host this way as well.
For a more detailed guide to shared folders, check out Share Folders between Host and Guest OS in VirtualBox.
Taking Ubuntu Beyond Virtual Machines
Having a Ubuntu Linux (or any Linux) virtual machine handy is excellent for almost any purpose. Still, you’re never going to get the same performance or compatibility that bare metal offers.
Once you feel comfortable with Linux after playing with it in VirtualBox, you could consider dual-booting Ubuntu with Windows. If that’s too much of a commitment, have a look at our list of the best portable Linux operating systems. That way, you can boot into Linux without altering anything on the computer itself.
Related Posts
- How to Repair a Corrupted User Profile in Windows 11
- Preparing for Windows 10 End of Support: Upgrading to Windows 11
- How to Access and Change Your WiFi Router Settings (2025 Edition)
- How to Install the Latest Large Language Models (LLMs) Locally on Your Mac
- How to Find Circular References in Microsoft Excel
