Microsoft Excel is one of the most versatile data visualization tools available today. It can be used to create easy-to-understand charts, graphs, and diagrams — including family tree charts. Since Excel is so widely used, it’s the perfect way to create your own family tree.
In this article, we’ll explain how to make a family tree in Excel.
How to Make a Family Tree Chart in Excel
There are two easy ways to make a family tree chart in Excel. You can use a pre-made family tree maker template from Microsoft, or create your own family tree from scratch. There are also dozens of additional free family tree templates available online to meet your needs.
1. Use the Family Tree Generator Template
The easiest way to make a simple family tree diagram is by using Microsoft’s built-in family tree templates. The simplest of these is the Family Tree Generator. To use this template:
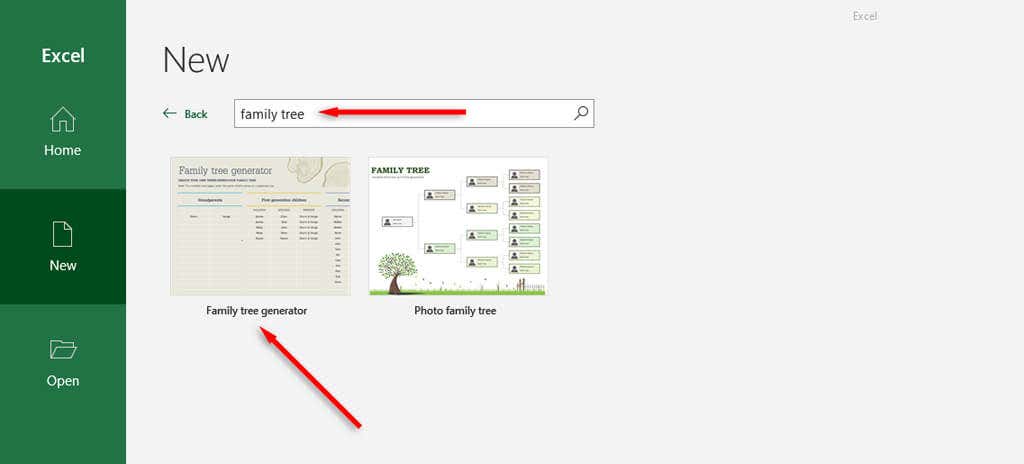
- Open Microsoft Excel and select New in the left-hand menu.
- In the search bar, type “Family tree.”
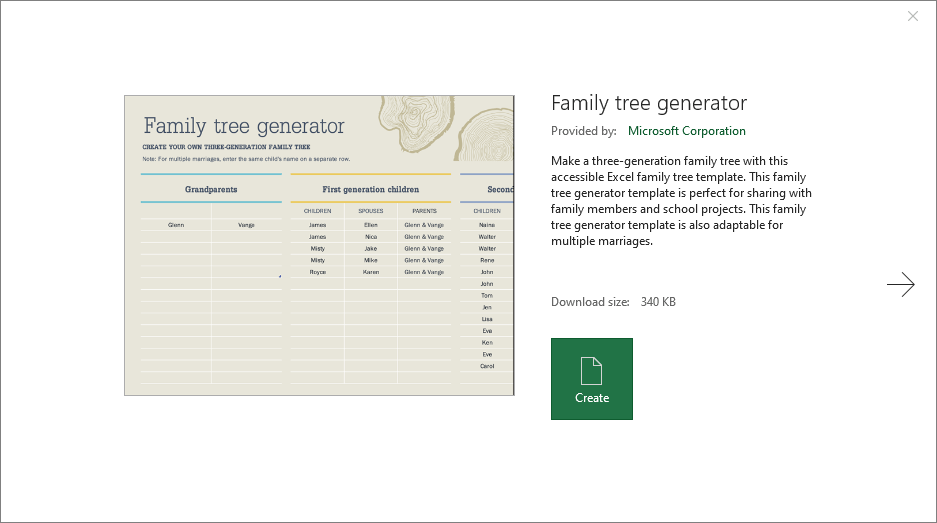
- Double-click Family tree generator, then press Create.
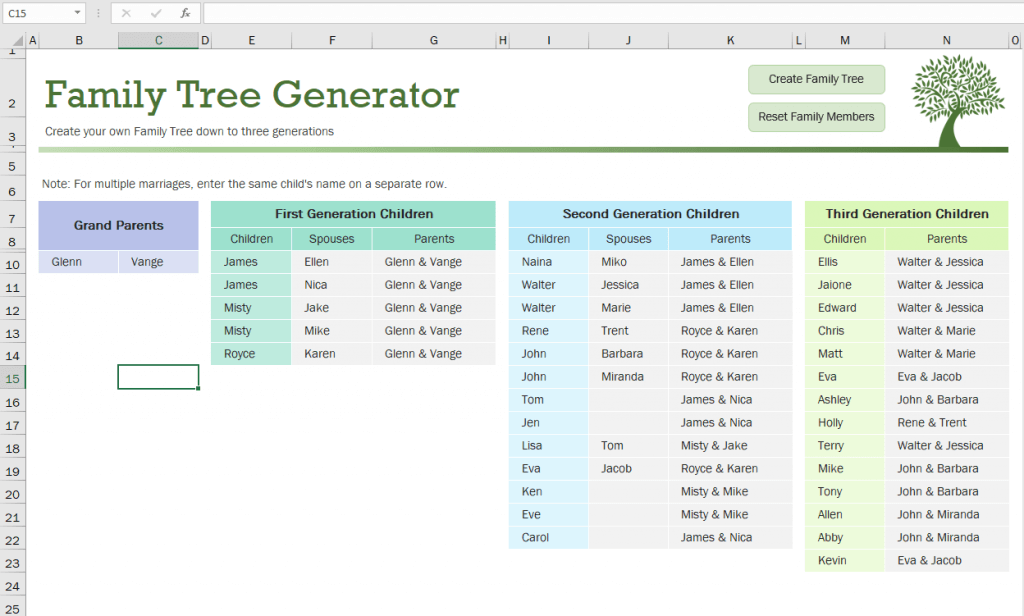
- In the workbook, you’ll see two spreadsheets. The first is the Family Members page, and the second is the Family Tree. In the Family Members page, add your known relatives in the corresponding columns for grandparents, first-generation children, and so on.
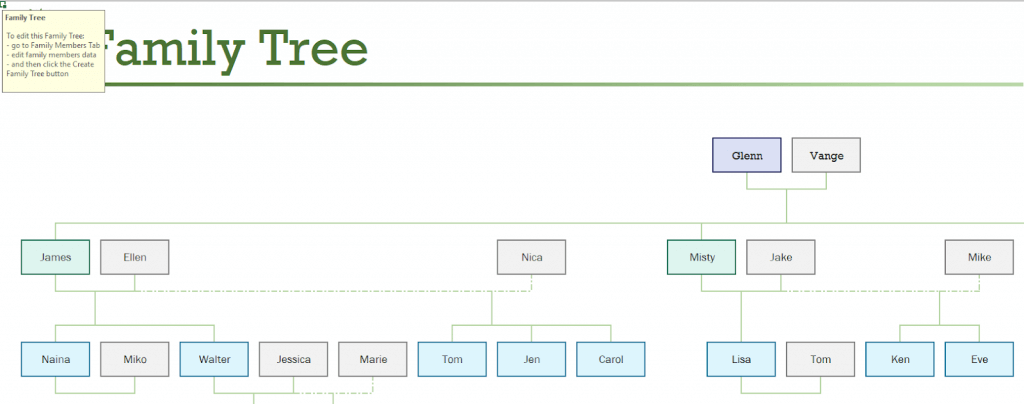
- Once you’ve added all of your relatives, switch to the Family Tree spreadsheet to see the final product.
2. Use a More Powerful Template
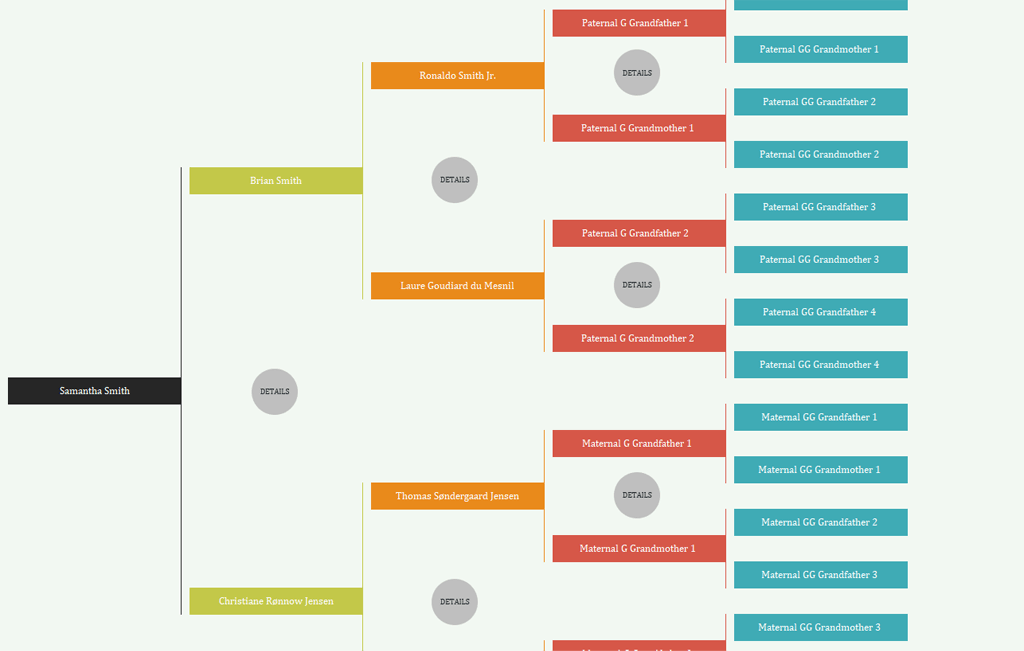
Free PowerPoint Templates provides a template that lets you create a six or seven-generation family tree, meaning you can add great-grandparents and even great-great-grandparents. This is much more powerful than Microsoft’s template and allows you to add additional information to create an in-depth genealogy chart.
To use this template:
- Head to the Free PowerPoint Templates website and download the template.
- Open the downloaded file.
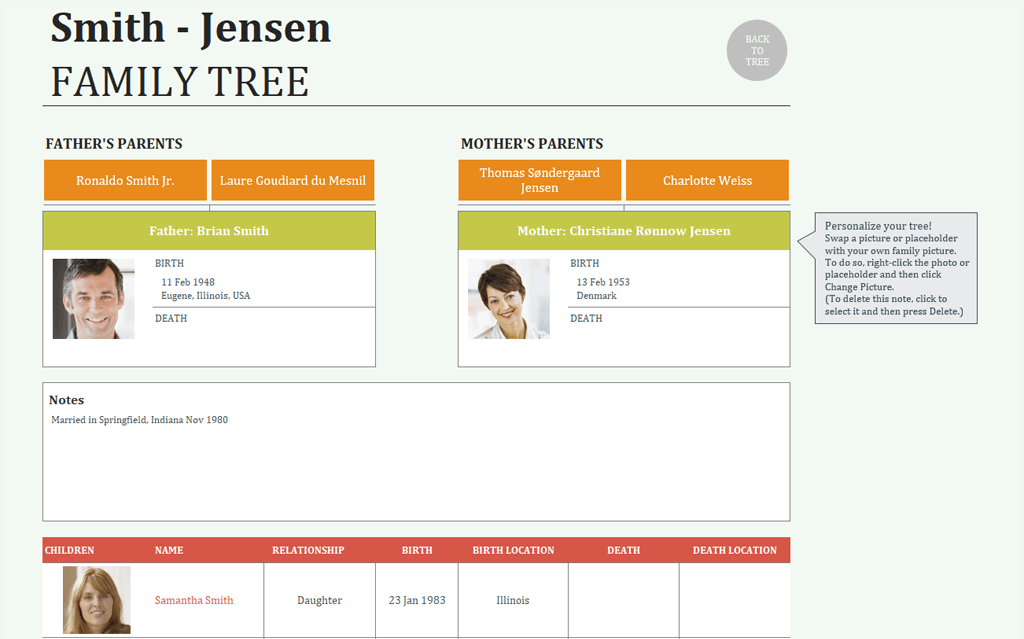
- In the Excel workbook, you’ll see seven pages for each member of your family. Select any of these to add details including middle names, birth dates, death dates, family relationships, and so on. You can also add family photos for each member.
- After you gather information and add it to the extended family tree, switch to the Family Tree tab to see a visual representation of your family tree.
3. Make a Free-Form Family Tree
If you want to create your own free-form family tree, it’s fairly easy. It might not look as nice as the family tree examples shown above, but it’ll be sufficient — especially if you just need a starting point for some basic genealogical research and you don’t need added functionalities.
- Open Microsoft Excel and create a new spreadsheet.
- Select the Insert tab in the ribbon menu.
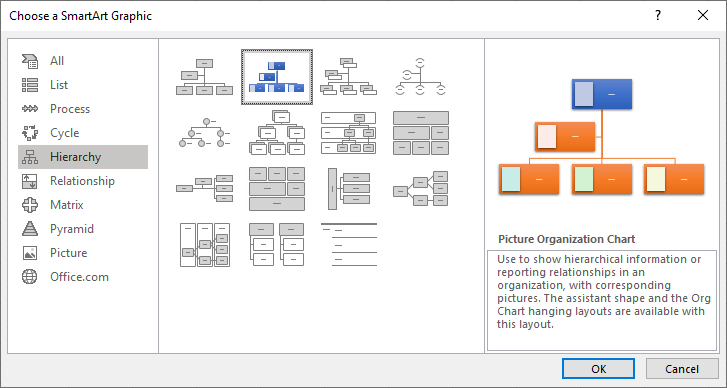
- Select Illustrations > SmartArt.
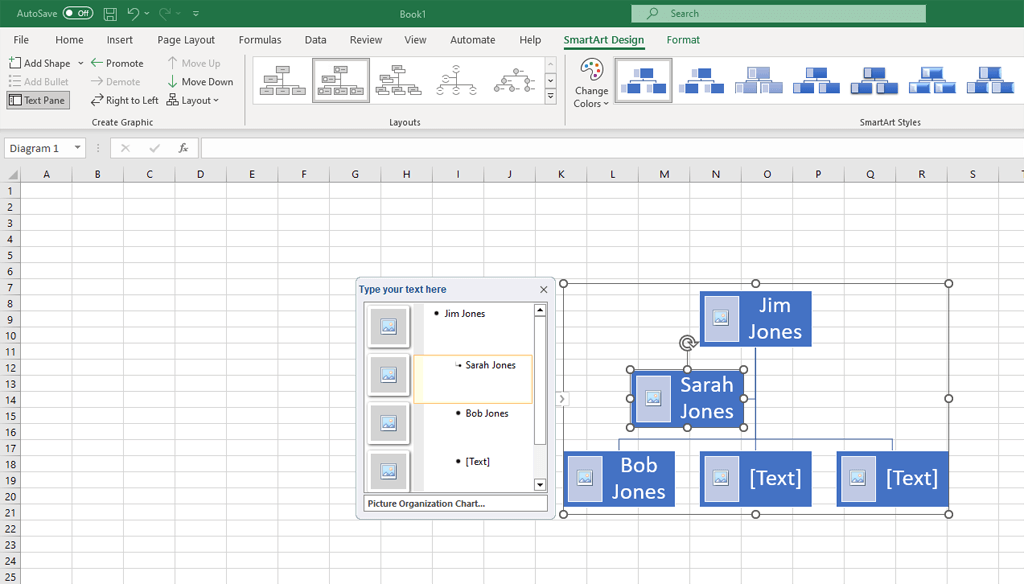
- When the window opens, select Hierarchy from the left-hand menu. This will show you a set of organizational charts you can use. If you want to add family photos, select one that allows pictures like the Picture Organizational Chart.
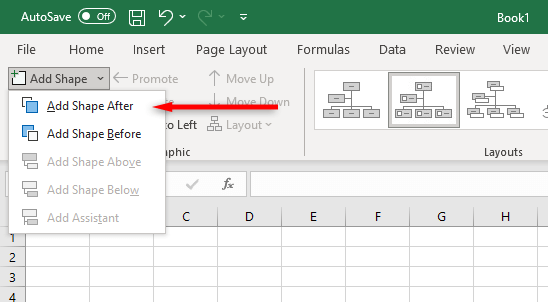
- Select the SmartArt Design tab to organize your family tree as desired. Press Add Shape > Add Shape After to add new shapes for family members in a general pyramid shape until your entire family is represented.
- With your family tree in place, all you need to do is add text to show your family members’ names. To do so, double-click on a rectangle and start typing. You can add as much additional information as you like.
- Once completed, you can adjust your tree or decorate it as you like.
Share Family Stories for Free
Don’t forget, if you don’t have access to Microsoft Excel, you can use the web version of the app (or Google Sheets) for free to create an online family tree. This is even easier to share with your family and will help you easily visualize and share your family history.
Related Posts
Jake Harfield is an Australian freelance writer whose passion is finding out how different technologies work. He has written for several online publications, focusing on explaining what he has learned to help others with their tech problems. He’s an avid hiker and birder, and in his spare time you’ll find him in the Aussie bush listening to the birdsong. Read Jake’s Full Bio
