Sometimes while deleting a file on your Windows computer, you may come across an error that says “The action can’t be completed because the file is open in a program”. When this error pops-up, it means you’re dealing with a locked file and you can’t delete your file no matter what you do. Your PC will keep on throwing the same error on your screen letting you know the file is in use in some program.
Dealing with such locked file errors is actually pretty easy, although it may not seem so initially. You’ve probably guessed by now that the reason you aren’t able to delete the file is because an app on your PC is using it. How about you go ahead and close that program, and then delete the file?
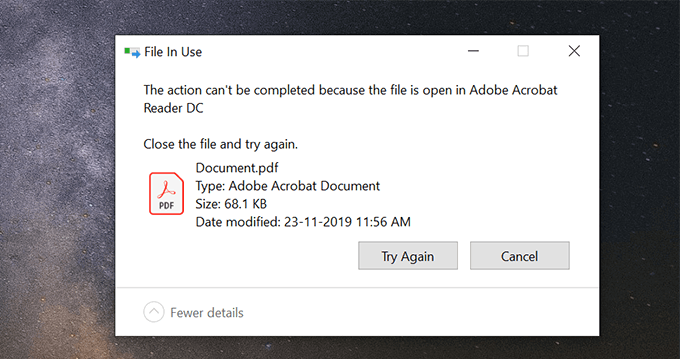
There are several workarounds like this to help you successfully delete the locked file on your computer.
Close The Program That Is Using The Locked File
The most obvious solution is to close the program that’s using the file you want to delete. If it’s a Word file open in MS Word, close the program and you’ll be able to delete the locked file.
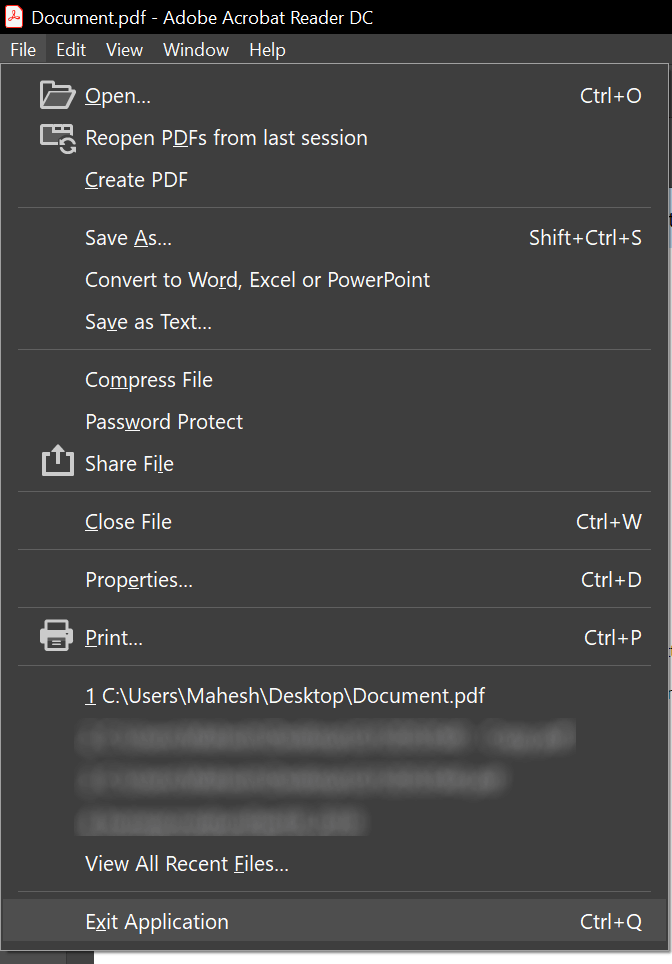
Similarly, whatever program the file is open in, simply close the program and it’ll free-up the file ready to be deleted.
Kill The Program Process Using Task Manager
It sometimes happens that the program that uses the locked file doesn’t respond to your actions and just stays stuck at some point. If this is the case with you, you might want to kill the process for the program so it can be forcibly closed on your computer.
Once the program is closed, your file should be free from any processes and you’ll be able to remove it from your machine.
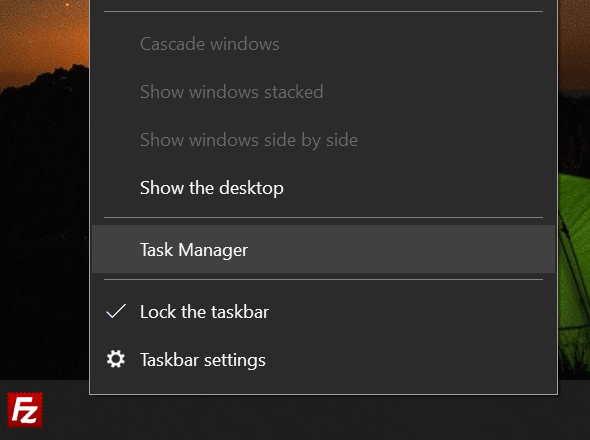
- Right-click on the taskbar located at the bottom of your screen and select the Task Manager option. It’ll launch the utility on your computer.
- If you don’t see all your processes right away when it opens, click on the More details option to expand the view.
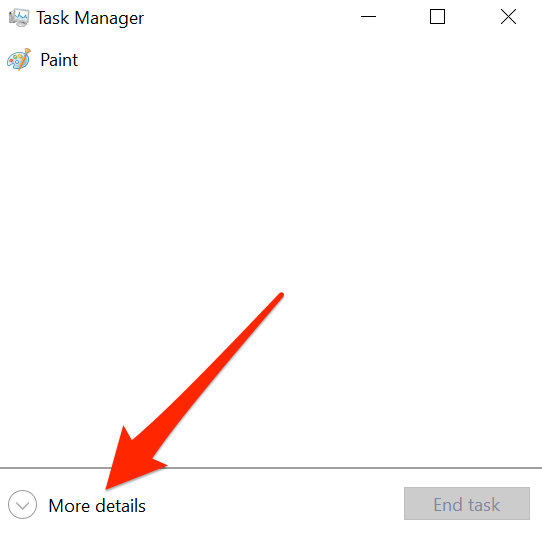
- Click on the Processes tab at the top if you aren’t already there. You should see all the processes that are currently running on your computer. You want to find the process that you think is using your file. Then click on the process to select it and then click on the End task button at the bottom-right corner.
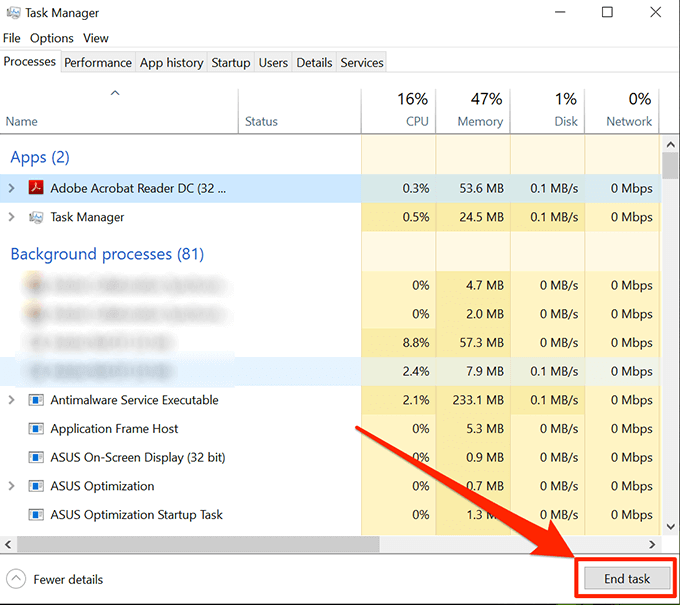
- It’ll end the process for your selected program and you should now be able to delete the file on your PC.
Turn Off The Preview Pane In File Explorer
The Preview pane in File Explorer lets you see the previews of your locked file. It may be your file is being used in the preview and that’s what’s preventing you from deleting it on your Windows machine.
Disabling the pane should fix the issue for you.
- Launch File Explorer on your PC. Opening any folder on your screen should do this for you.
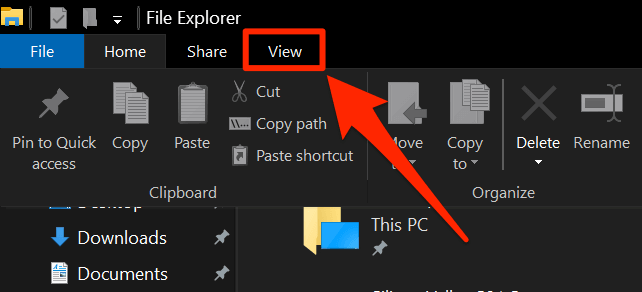
- When it opens, find and click on the View tab at the top. The option you’re looking for is located there.
- Look towards the first pane that says Panes and you’ll find an option saying Preview pane. Click on it and it’ll be disabled if it was enabled before.
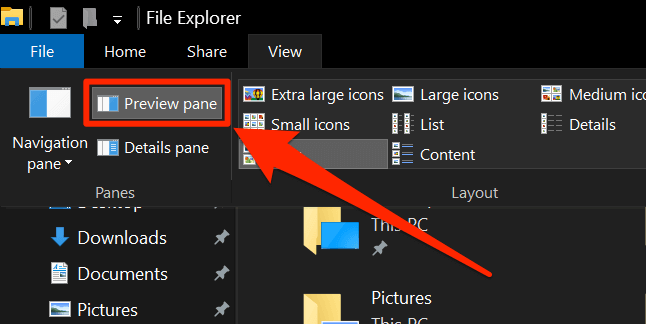
You should be able to delete the file if Preview pane had occupied it.
Toggle The Folder Process In File Explorer
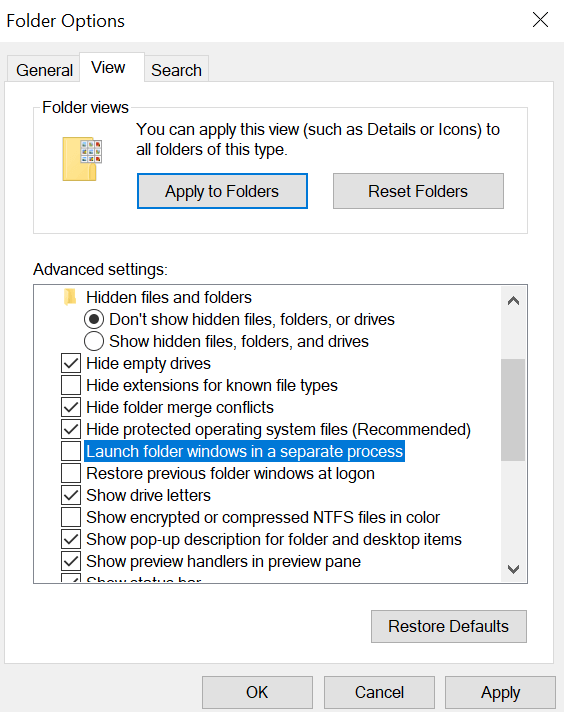
It’s possible that a File Explorer process is using your locked file and so you are unable to delete it. There’s actually an option that helps you create separate processes for each folder you open on your PC and it’s worth toggling it to see if it helps resolve your issue.
- Open File Explorer and access the View tab. Click on the down-arrow beneath the Options option and select Change folder and search options.
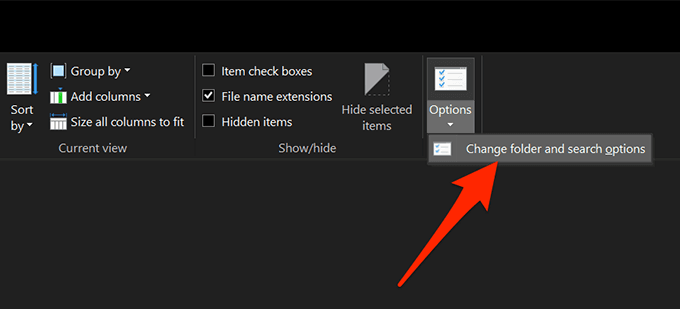
- Click on the View tab on the following screen.
- You’ll find several options that you can enable and disable for the File Explorer utility. Find the option that reads Launch folder windows in a separate process and enable it. If the option is already enabled, you should disable it.
- Click on Apply followed by OK to save the changes.
Launch & Close The Locked File
It could be the locked file wasn’t closed properly the last time you accessed it in your programs.
- To be sure, just open the file in your program and then close it properly.
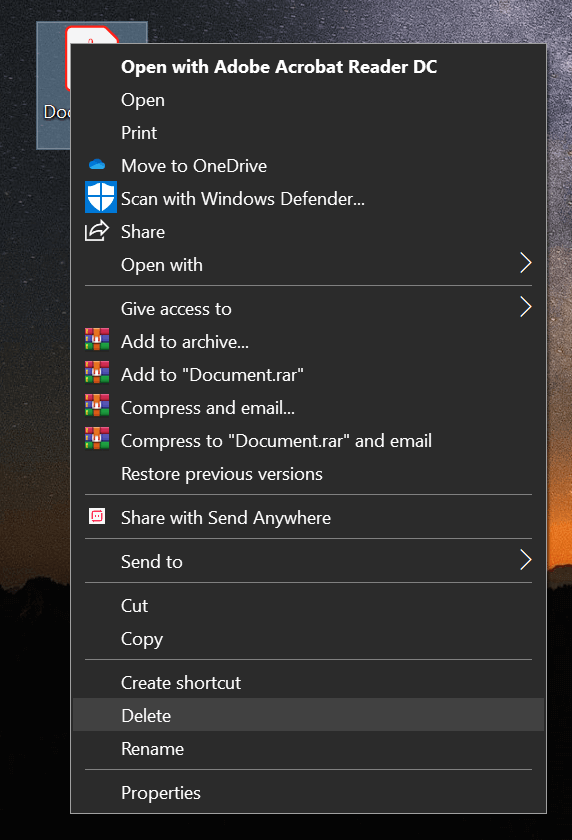
- When the file is fully closed, right-click on it and select Delete. The file will delete without throwing any errors on your screen.
Restart Your Windows Computer
Rebooting your machine closes all the processes and this includes the one that’s using your file.
- Click on the Start Menu, select the power icon, and choose Restart.
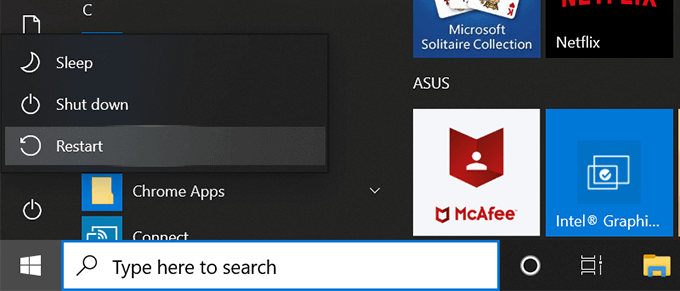
- Try deleting the file when your computer reboots.
Use Command Prompt To Delete The File
You can try using the Command Prompt utility to delete the file that can’t be deleted in graphical user interface.
- Press the Windows + R keys at the same time, type in cmd, and hit Enter.
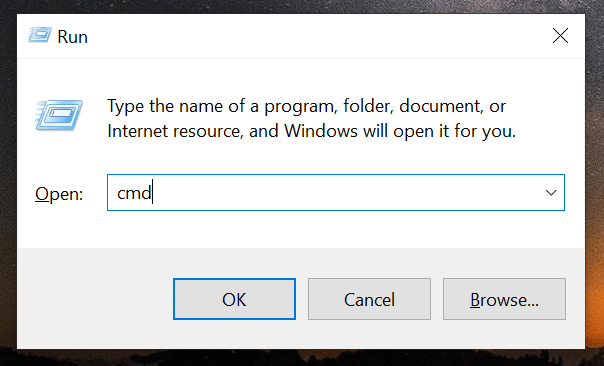
- Type in the following command and press Enter. Make sure to replace PATH with the path of the file you want to delete.
del PATH
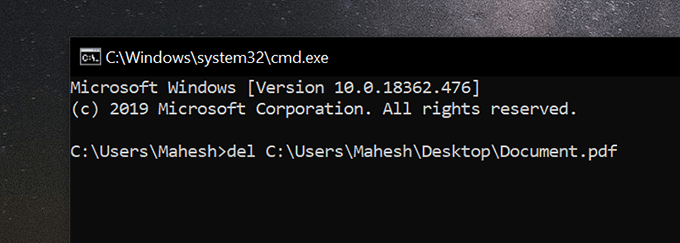
It’ll delete the file straightaway without any errors.
Use A Third-Party App To Unlock & Delete The File
For some reason, if none of the above methods work for you, you might want to use a third-party app to unlock the file and then delete it.
Unlocker is a free app that helps you unlock your files so you can then delete them.
- Download, install, and launch the app on your PC.
- It’ll ask you to select your file. Choose the file that you’re unable to delete and click on OK.
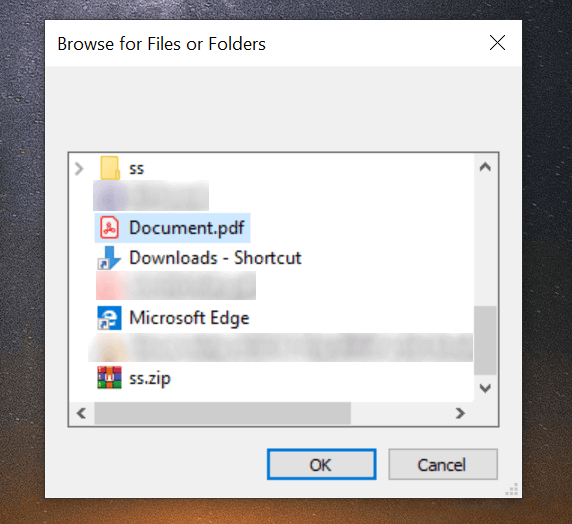
- Select Delete from the first dropdown menu and click on OK.
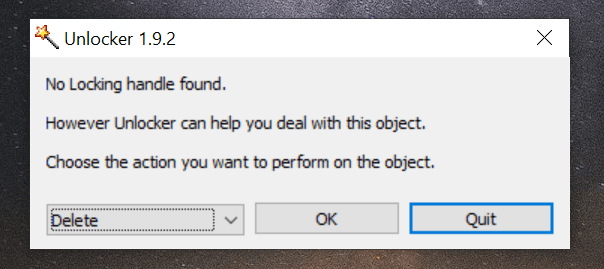
It’ll do what it needs to do to unlock your file and then get it deleted from your computer without any prompts.
Related Posts
- How to Repair a Corrupted User Profile in Windows 11
- Preparing for Windows 10 End of Support: Upgrading to Windows 11
- How to Access and Change Your WiFi Router Settings (2025 Edition)
- How to Install the Latest Large Language Models (LLMs) Locally on Your Mac
- How to Find Circular References in Microsoft Excel