If you think you’ve been infected with malware, the best thing to do is to avoid panicking. In many cases, you can recover your PC and remove the infection by using Windows’ own Microsoft Defender tool or by using third-party antivirus software like Avast to scan for and remove the infection.
Even stubborn malware infections can be removed using these tools, but you may need to run a boot-level scan using portable software on a USB drive, especially if Windows isn’t safe to run with malware. To run an offline virus scan using Microsoft Defender or a third-party antivirus solution, you’ll need to follow these steps.
Running an Offline Virus Scan Using Microsoft Defender on Windows 10
If Windows is still running and the malware infection isn’t as serious, you may be able to use Microsoft Defender to run a bootable antivirus scan without using the portable (and older) Windows Defender Offline tool.
This option is only recommended, however, if Windows is still able to run and remains isolated from other PCs on your network.
For instance, if you intend to use this method, make sure that your PC is disconnected from your local network. This will prevent any malware from potentially spreading to other PCs before you can clear the infection. You may wish to restart Windows in Safe Mode before you proceed.
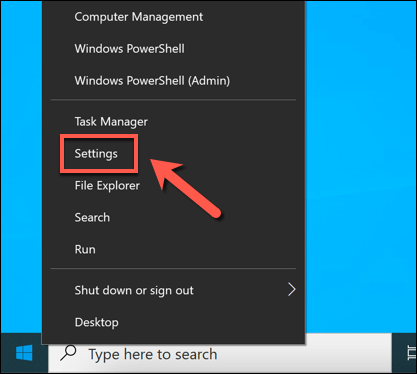
- To begin, right-click the Start menu and select Settings.
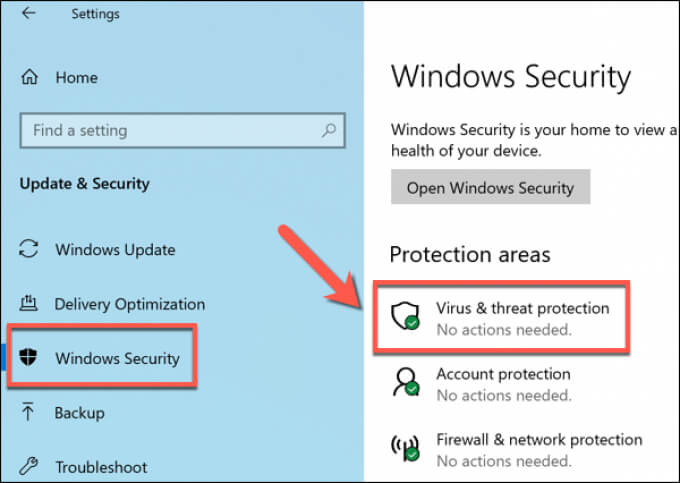
- In the Window Settings menu, select Update & Security > Windows Security > Virus & threat protection.
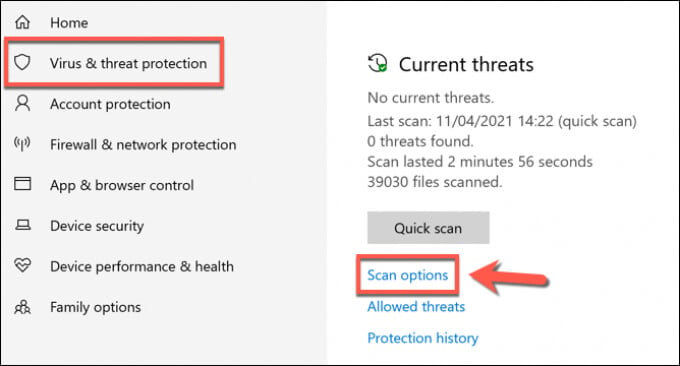
- In the Virus & threat protection menu, select Scan options.
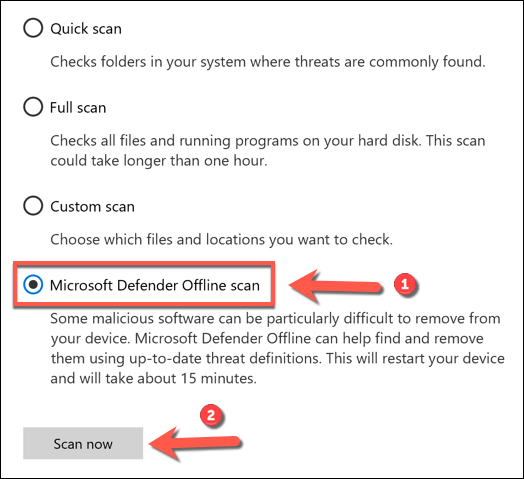
- Select Microsoft Defender Offline scan from the list provided, then select Scan now to schedule the scan.
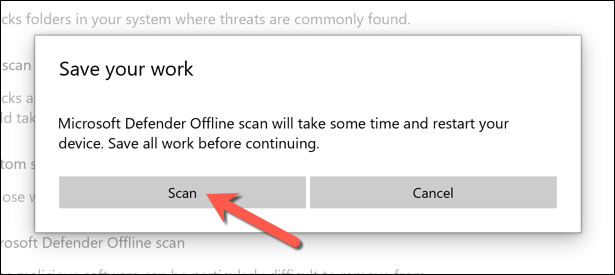
- Windows will confirm that your PC will need to restart. Close any unsaved applications at this point, then select Scan to restart your PC and begin the bootable antivirus scan using Microsoft Defender.
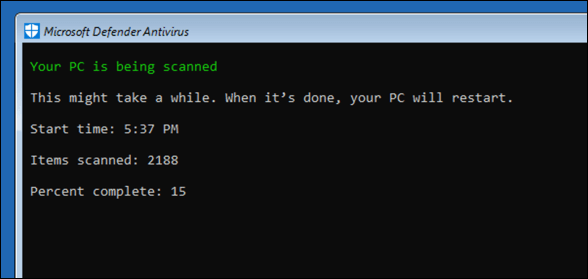
- After a few moments, Windows will restart and boot into the Microsoft Defender boot scan menu. Microsoft Defender will automatically begin scanning your PC for malware—allow this process to fully scan your PC. If it detects any malware, follow any additional on-screen instructions to confirm how you wish to fix, remove, or quarantine any infected files.
Once the offline virus scan is complete, your PC will reboot back into Windows. Any malware will be removed or quarantined based on your actions above. At this point, the malware infection should be resolved, but you may need to follow additional steps to repair or restore your Windows installation (depending on the damage).
Using the Older Windows Defender Offline Tool to Scan for Malware (Older Versions of Windows)
While Windows 10 allows you to conduct an offline virus scan using Microsoft Defender without any additional tools or hardware, you can also use the older Windows Defender Offline tool on a portable USB drive or DVD to conduct a boot-level scan when Windows can’t (or shouldn’t) boot.
While this portable version of Defender was originally made for Windows 7 and 8.1, it can still be used to scan for malware on some Windows 10 PCs, depending on the version. However, the tool itself is outdated (although the virus definitions are up-to-date) and won’t work with newer versions of Windows.
For this reason, this tool should only be used on older PCs running an older version of Windows 10 (or an earlier version of Windows). If it doesn’t work, you may need to use a third-party antivirus as an alternative, or schedule a Microsoft Defender Offline scan in Safe Mode using the steps above instead.
Creating the Windows Defender Offline Tool USB or DVD Media
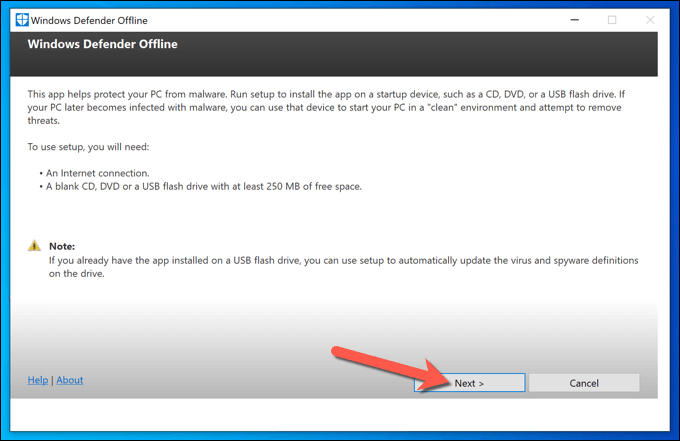
- If you want to try this method, you’ll need to download the 64-bit version of Windows Defender Offline from the Microsoft website from a non-infected Windows PC. Once the file is downloaded, run the tool and select Next.
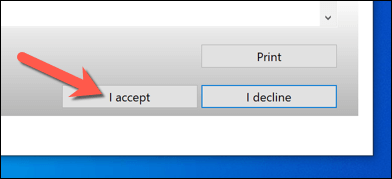
- At the next stage, confirm you accept the license agreement by selecting the I accept button.
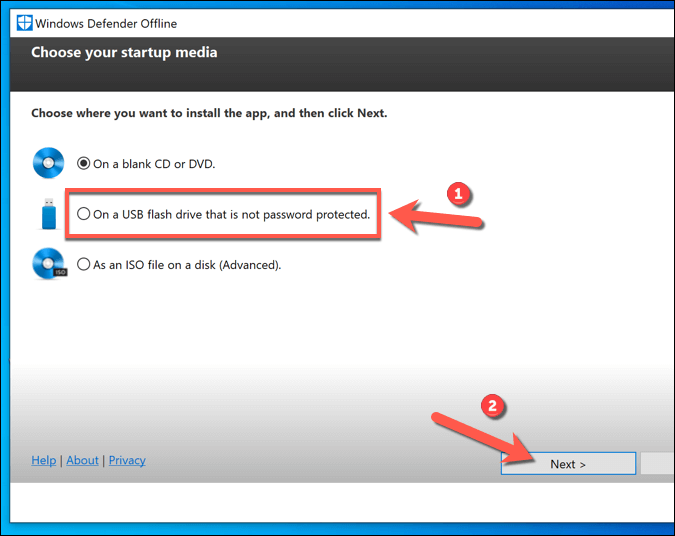
- You’ll need to select where you want to install Windows Defender Offline. Select the appropriate option (such as On a USB flash drive that is not password protected) then select Next to confirm.
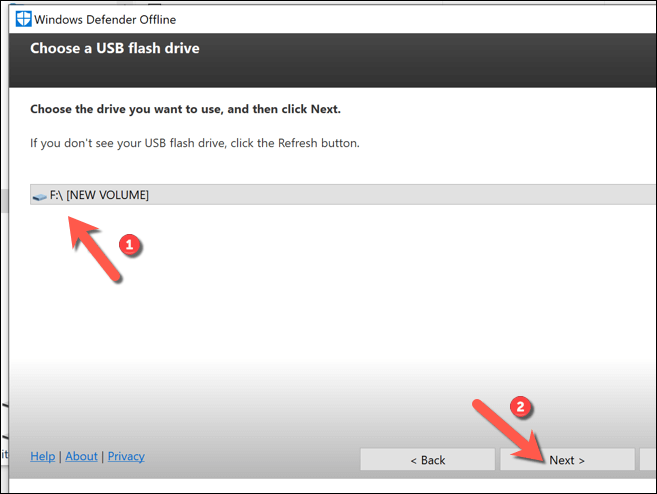
- If you’re using the USB flash drive method and you have more than one USB device connected, select the device you wish to use based on the assigned drive letter using the drop-down menu, then select the Next option.
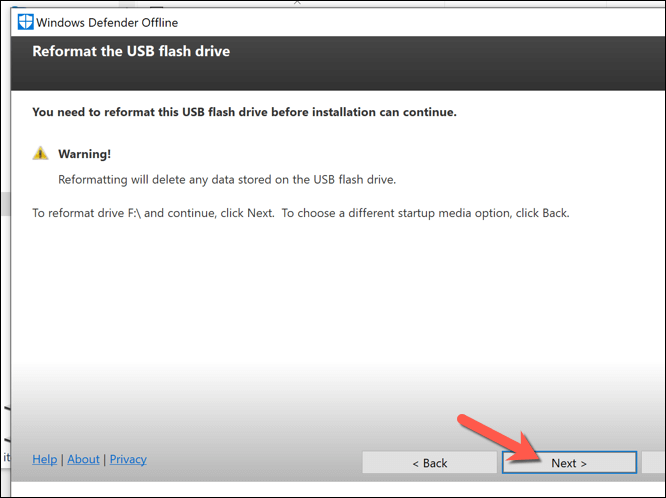
- The tool will format and reflash the USB drive you’ve selected. Make sure to back up any files previously saved to the device first, then select Next to continue.
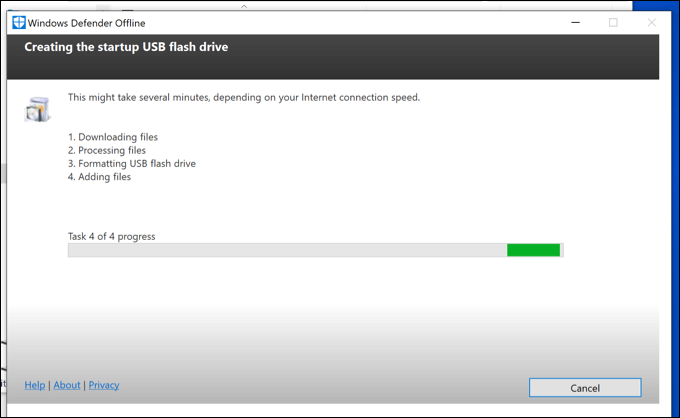
- The Windows Defender Offline creator tool will download the necessary files to flash your USB drive or DVD (including up-to-date virus definitions). Once the process is complete, you’ll need to restart your PC.
Scanning Your PC Using the Windows Defender Offline USB or DVD Media
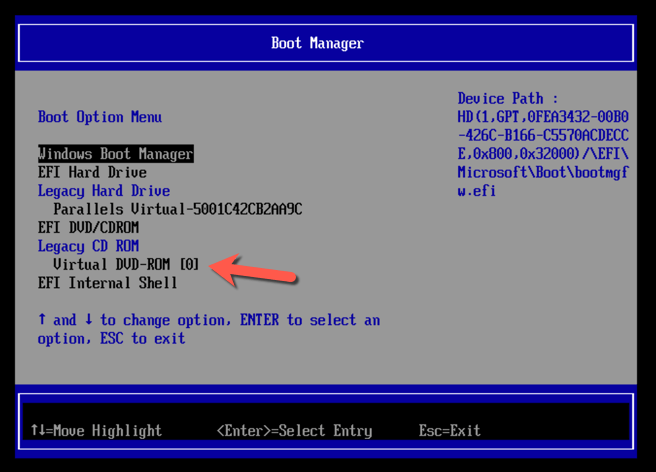
- When you restart your PC, you’ll need to configure your BIOS or UEFI bootloader to boot from your USB drive first, rather than from your Windows system drive. You’ll usually need to select a keyboard key such as F1, F12, or DEL to boot into this menu and change these settings—consult your PC’s user manual for additional information on how to do this, as the steps vary, depending on manufacturer.
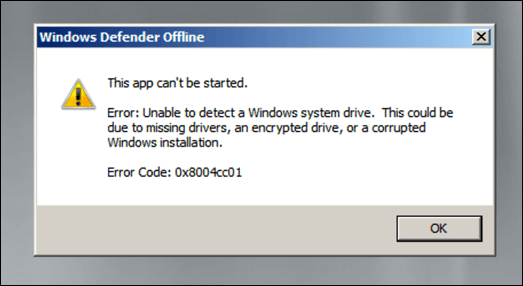
- Once you’ve changed your boot order, a minimal and isolated Windows environment running Windows Defender will boot. If your version of Windows 10 supports this tool, the scan options will become available to you. Otherwise, an 0x8004cc01 error will appear, and you’ll need to try an alternative method.
- If Windows Defender tool can run on your version of Windows 10, however, follow the on-screen instructions to scan your PC and deal with any infected files. Once the process is finished, your PC will reboot and the malware should be removed. Make sure to remove your USB drive or DVD at this point and restore the correct boot order in your BIOS or UEFI settings to ensure that Windows will correctly boot up afterwards.
Running an Offline Virus Scan Using Third-Party Antivirus Software
While Microsoft Defender is a suitable built-in antivirus for Windows 10 users, you can also use third-party antivirus tools to perform an offline virus scan of your PC. All major antivirus providers support this feature, including the free-to-use Avast Antivirus, although alternatives to Avast are available and are perfectly suitable.
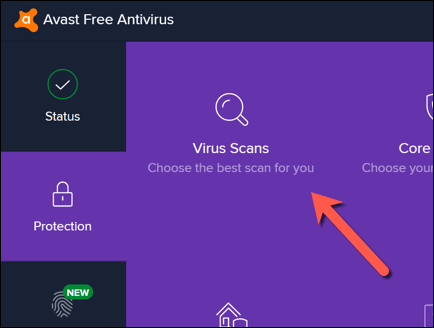
- To start, you’ll need to download and install Avast on a non-infected PC (or, if that isn’t possible, on your infected PC if your PC still boots). Once installed, open the Avast UI by selecting the Avast icon on the taskbar. From the Avast menu, select Protection > Virus Scans.
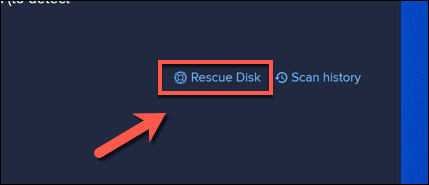
- In the Virus Scans menu, select the Rescue Disk option.
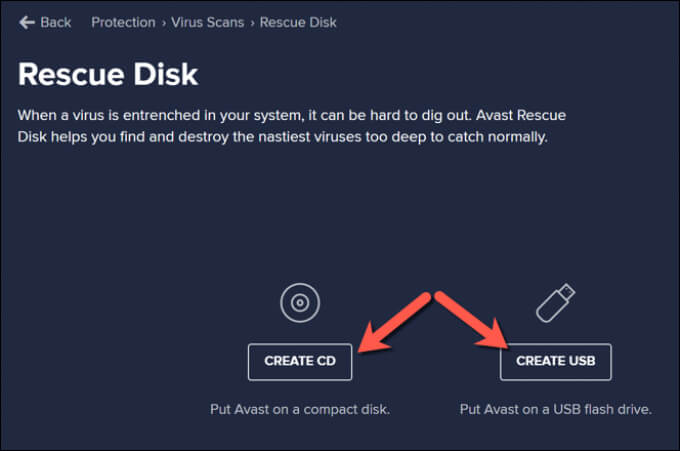
- If you’d prefer to create a rescue disk using a CD or DVD, select the Create CD. Otherwise, connect a portable USB flash drive and select Create USB instead.
- Avast will need to format and reflash your drive with the correct files. Back up any files you wish to save from the drive first, then select the Yes, Overwrite button to proceed.
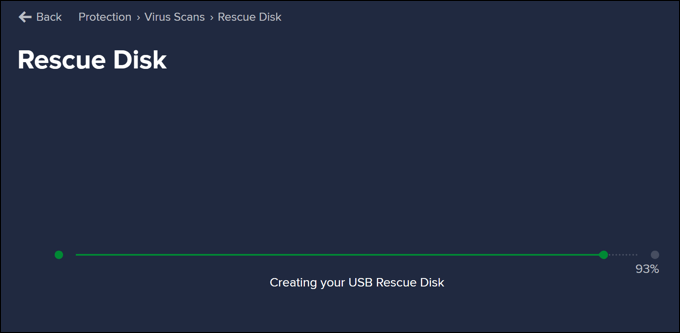
- Allow some time for the process to complete. Once Avast has created your rescue disk, safely remove it from the PC you’re using and connect it to your infected PC. If you used your infected PC to create the Avast rescue disk, reboot your PC at this point.
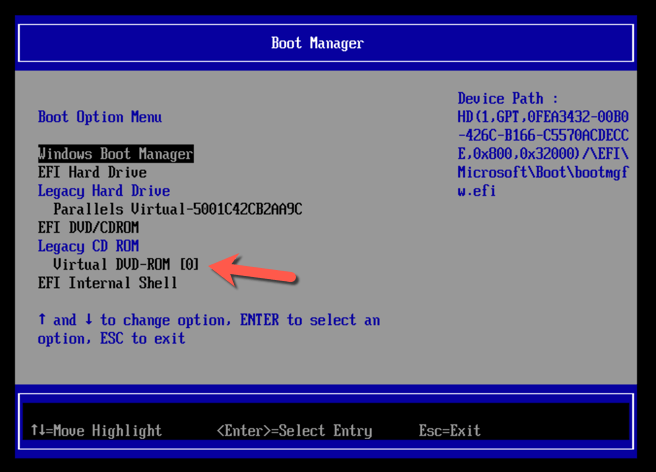
- Before you boot into the Avast rescue disk, you’ll need to change the boot order in your BIOS or UEFI settings by selecting F1, F12, DEL, or similar key (depending on your hardware) to boot into this menu. Make sure to prioritize the DVD or USB flash drive that you’ve created, then restart your PC.
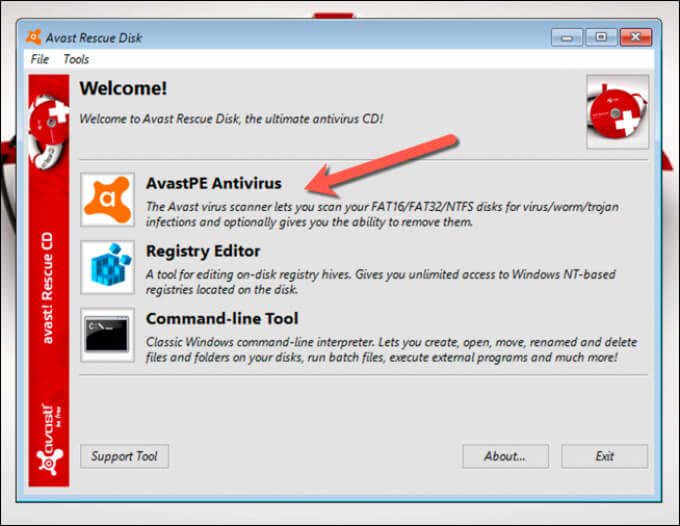
- Once you restart, select any key on your keyboard to boot into the Avast rescue disk. Using your mouse, select AvastPE Antivirus.
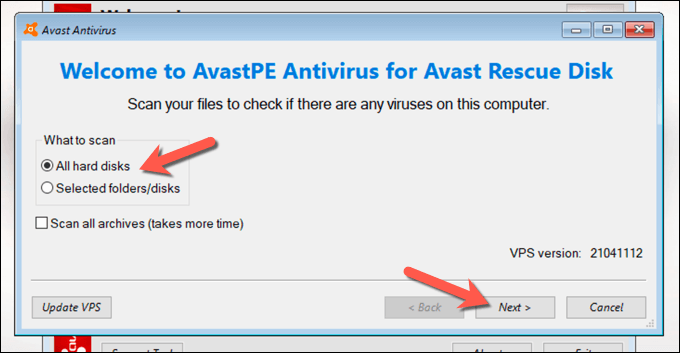
- In the Avast Antivirus options menu that appears next, you can choose to scan all connected drives or only scan certain folders/files. Select your preferred option, then select Next.
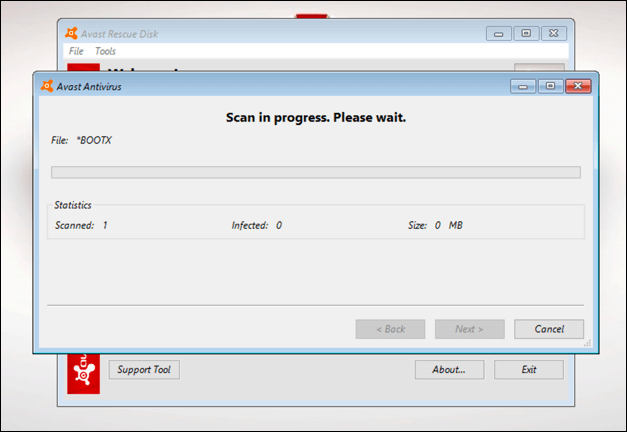
- Avast will begin to scan your drives to search for malware. Follow any additional on-screen instructions to confirm how you wish to handle infected files, such as fixing, quarantining, or removing them.
Once the process is complete, exit the Avast rescue disk software, restart your PC, and remove the rescue disk to boot into Windows. You may need to repeat the steps above to restore the original boot order in your BIOS or UEFI settings menu before you can do this, however.
Keeping Windows 10 Free From Malware
Whether you’re using Microsoft Defender or a third-party antivirus like Avast, you should be able to use these tools to free your PC from a damaging malware infection. If you’re still having issues, however, you may need to think about wiping your hard drive and reinstalling Windows to start again with no infected files.
While we’ve demonstrated how to use Avast to remove malware, it isn’t the only third-party option available. You can easily uninstall Avast on Windows and try another solution like Webroot instead. If all else fails, however, don’t forget to use Microsoft Defender to quickly remove malware from your Windows PC.
Related Posts
- How to Repair a Corrupted User Profile in Windows 11
- Preparing for Windows 10 End of Support: Upgrading to Windows 11
- How to Access and Change Your WiFi Router Settings (2025 Edition)
- How to Install the Latest Large Language Models (LLMs) Locally on Your Mac
- How to Find Circular References in Microsoft Excel
