One of Photoshop’s many simple image modifications is its use of layers that make it easier to adjust, remove, and combine image elements.
Layers in Photoshop are like separate flat panes of glass stacked on top of each other. Each contains a different piece of content.
How To Resize An Image Layer In Photoshop
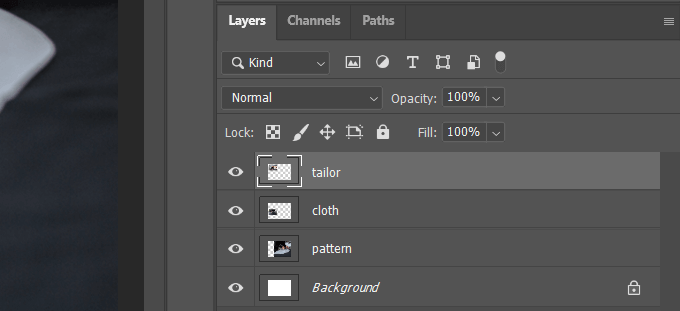
You can resize, rearrange, and merge image layers in Photoshop to get the effect you desire. Start by uploading an image to Photoshop. Choose the layer you want to resize from the lower right-hand corner of the screen.
If your layers panel isn’t showing, go to Windows in the top navigation and click on Layers to open it.
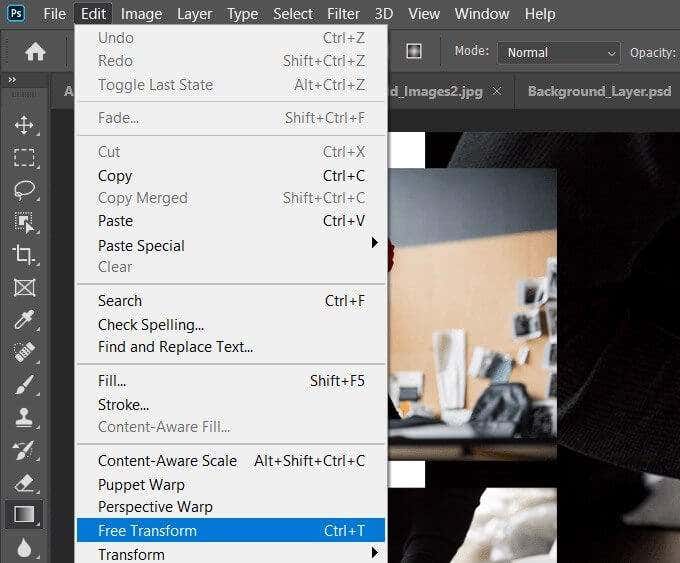
Navigate to Edit from the top bar and click on Free Transform.
You will see the resize frame around the image you are editing.
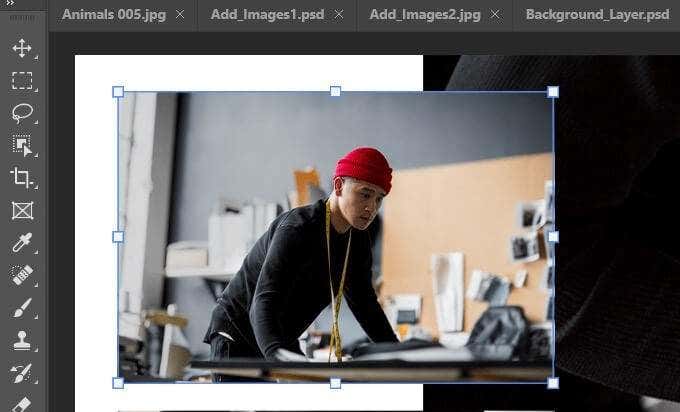
To resize the layer, click and hold down the shift key on your keyboard and drag the image to the size you want. Holding down the shift key resizes the image without distorting its proportions.
Resize Images By Percentage
Instead of using the box around your image to resize it, you can use the height and width percentage measurements from the top bar.
Select the image layer as you did before in the bottom right-hand corner of the screen.
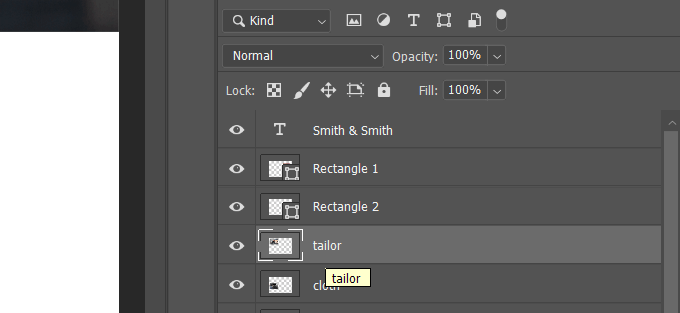
Use the top bar navigation under Edit to click on Free Transform. Look at the bar directly under the top navigation.

You can change the width and height in the menu rather than dragging the box around an image to resize it. To maintain the aspect ratio, click the icon in the yellow box above, so you don’t distort your image.
To save your changes, press Enter on your keyboard or click the check mark in the navigation.

How To Merge Layers In Photoshop By Blending Modes
In this example, we want to merge two images into one. We are starting with photos of a snowy landscape and a bison.
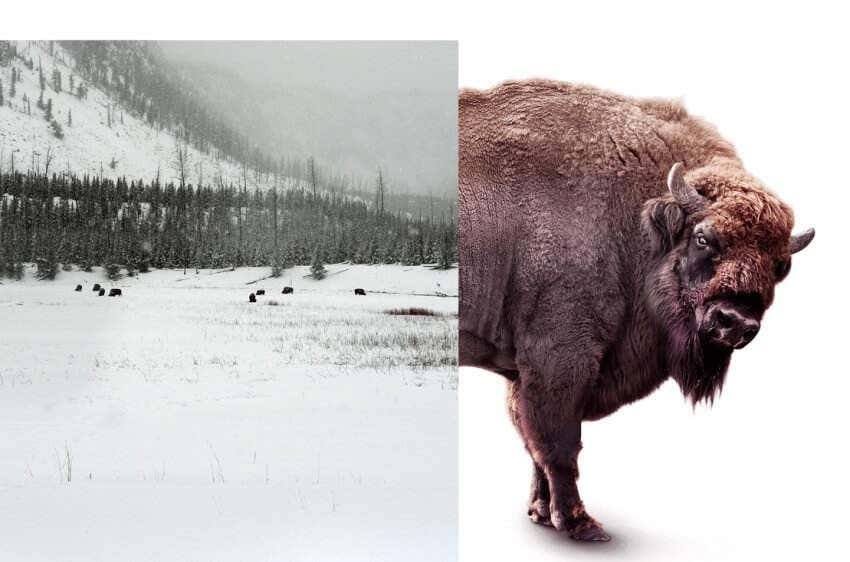
Click the Move tool from the toolbar on the left-side navigation. Then drag the landscape over to the right so that it covers the bison.
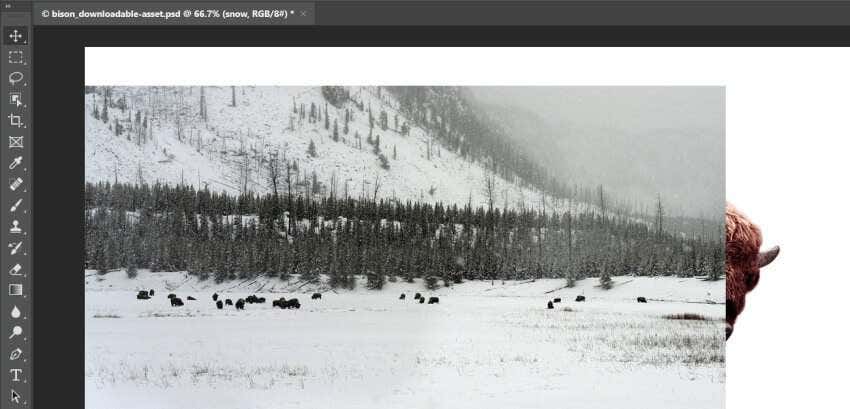
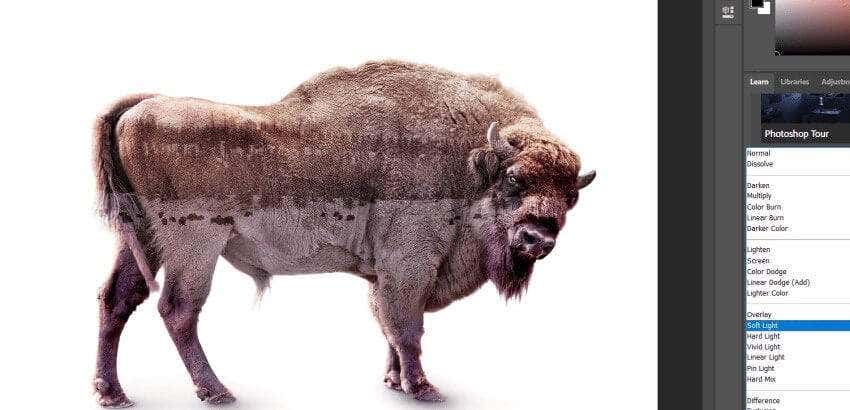
From the Layers’ panel on the right-hand side, click the drop-down menu next to Normal. Try out different blend modes to see which one looks best.
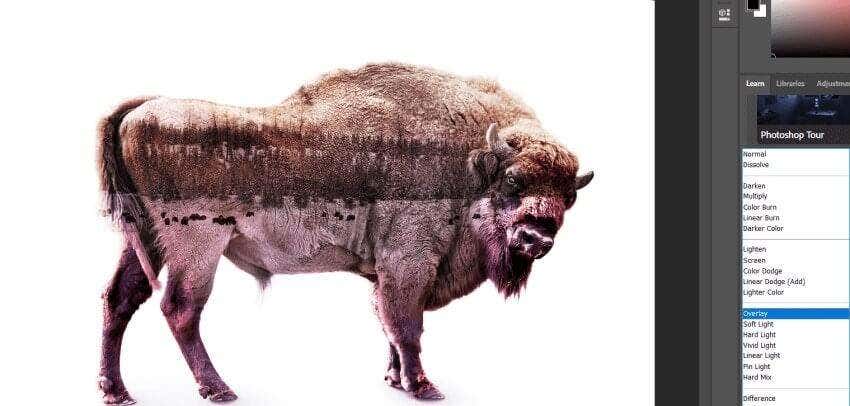
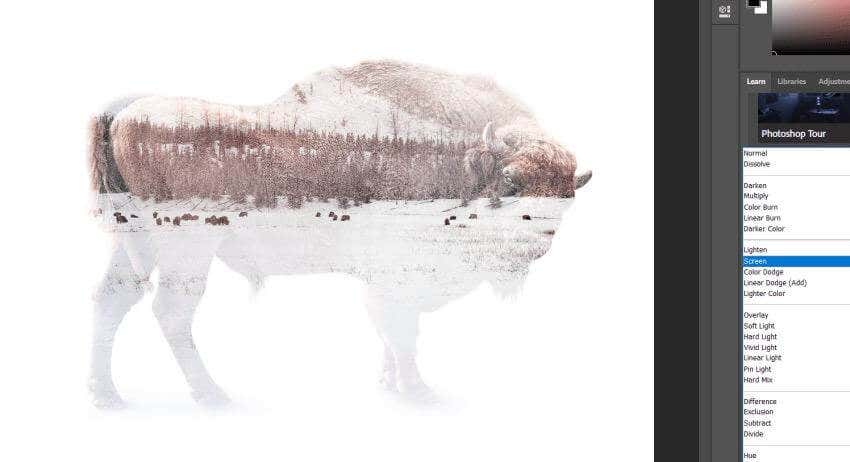
Below are some examples of how the Soft Light, Overlay, and Screen blend modes look on your merged image.
Soft Light
Overlay
Screen
To save your image, click Save As from File in the top bar navigation. Save it in the Photoshop format. Leave Layers checked in order to retain your editable layers in the working version of your file.
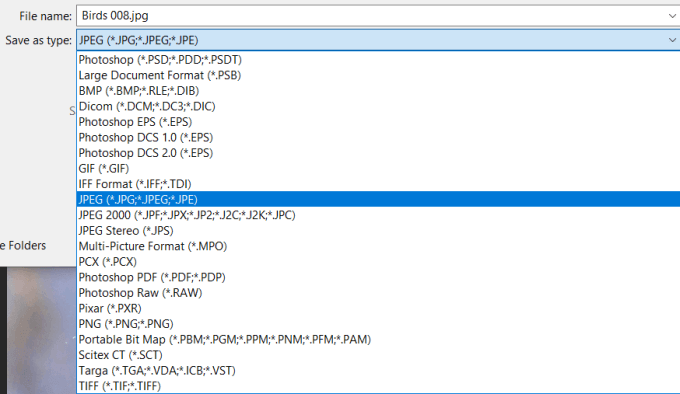
If you want to share a copy of your image, save another as a .jpg.
How To Merge Layers Into a Single Image
In this example, we will use three layers: an image, a logo, and an adjusted brightness layer.
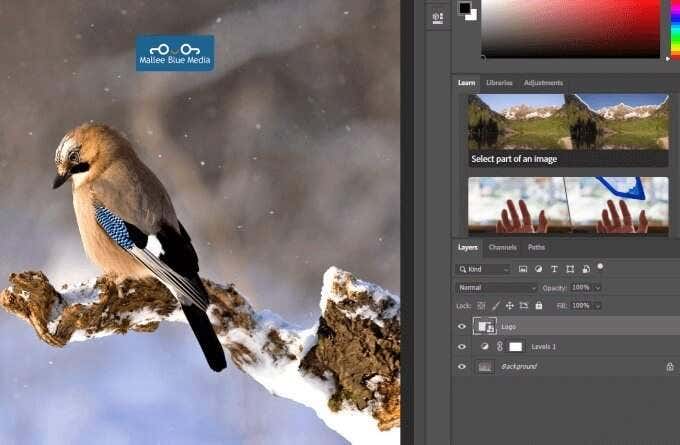
To merge them all together, first, make sure all three layers are visible. See the icon outlined in yellow below.

Right-click on any one of the layers and select Merge Visible.

Then save your image in any of the available formats. Remember to save a Photoshop version with Layers checked if you want to revisit your project.
To merge specific layers and not all of them, hold down the Control key on Windows or the Command key on Mac. To select the layers you want to merge, click on each one. Right-click any of the images chosen, select Merge Layers, and save the image.
Merge Layers To Create a Textured Image
Layer blend modes in Photoshop are a quick way to merge two images together to add a textured look.
Start by opening a photo. Go to File > Open > Select the image you want to use > click Open.

The next step is to add an image by going to File > Place Embedded, select a picture from your computer and click Place.
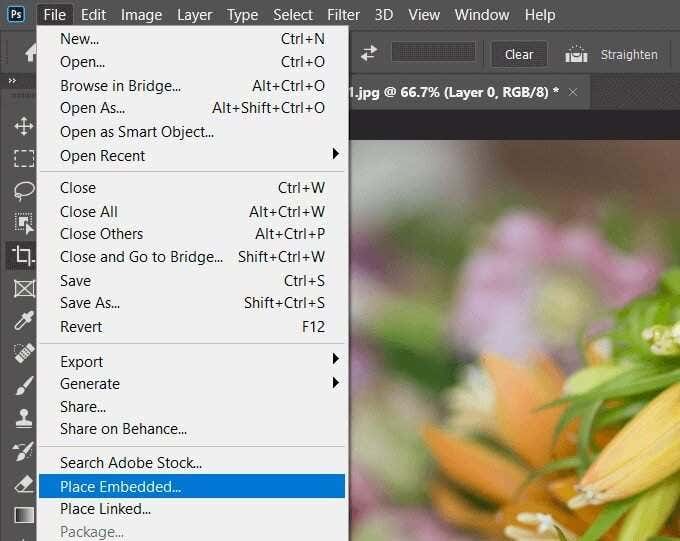
We will choose an image with a texture. To save the placement, click the checkmark on the top bar navigation.
Look at the layers panel on the right-hand side. Because we added the second image via Place Embed, Photoshop automatically made a new layer for the textured image.
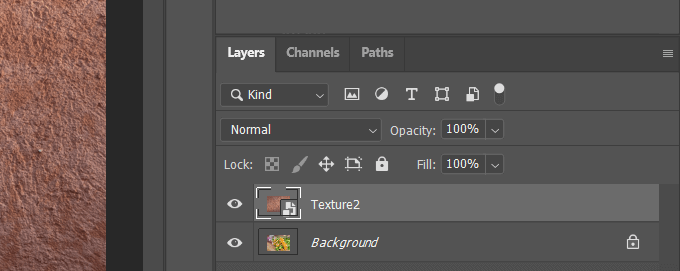
Make sure to select the new textured layer as in the screenshot above. To apply a layer blend mode, open the drop-down menu at the top of the layer panel. You will see several blend modes from which to choose.
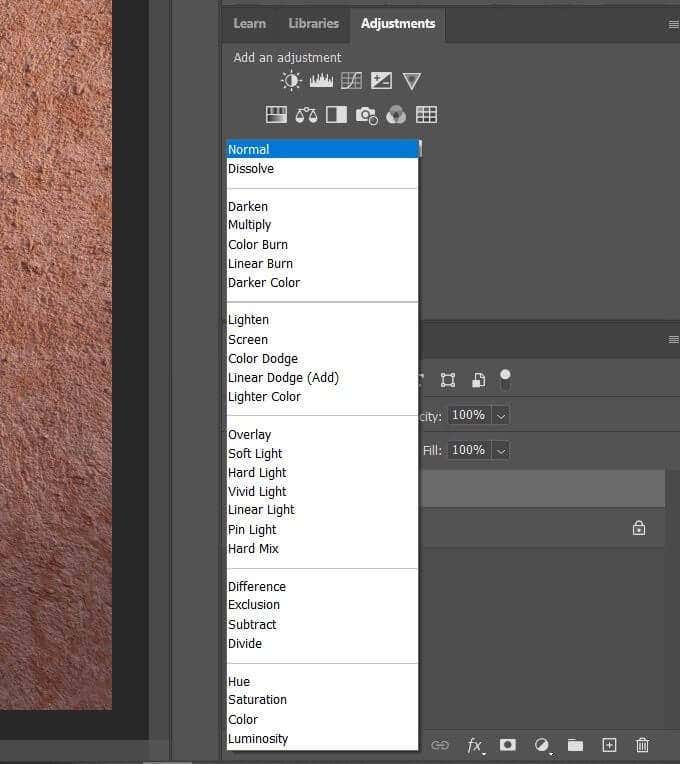
Click on any of the options to see what each filter will look like on your Photoshop background image.
Photoshop blends the color and tones in the textured layer with those on the background level below it. See an example of what the Multiply option looks like in the screenshot below.
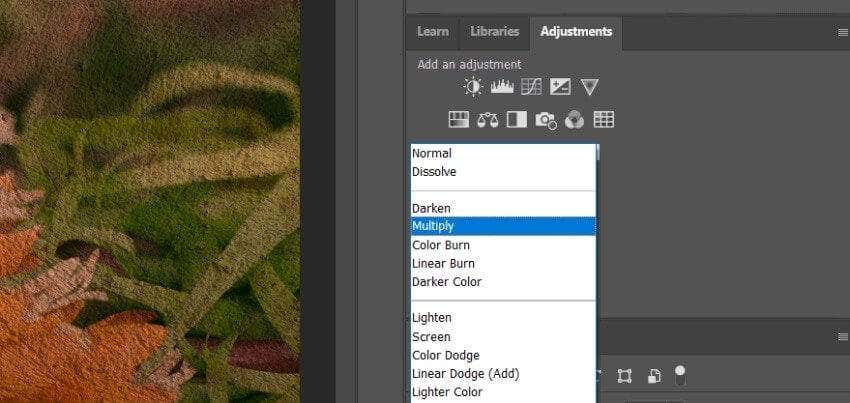
Click each blend mode in the drop-down menu until you find a combination you like. Or you can try a quicker method or shortcut to try out different blend modes.
Keep the texture mode highlighted. Cycle through the choices by selecting the Move tool from the tools panel. While holding down the Shift Key, press the Plus Key. Each time you press and release the plus key, the next blend mode in the menu is applied to your image.
While you are scrolling through the options using the shortcut, the names on the blender mode will change as well. Below are some examples of different blender modes.
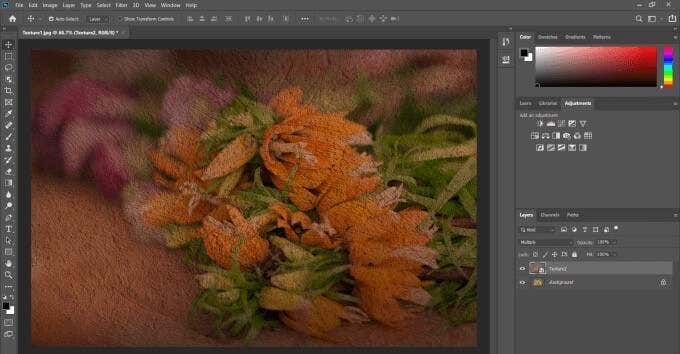
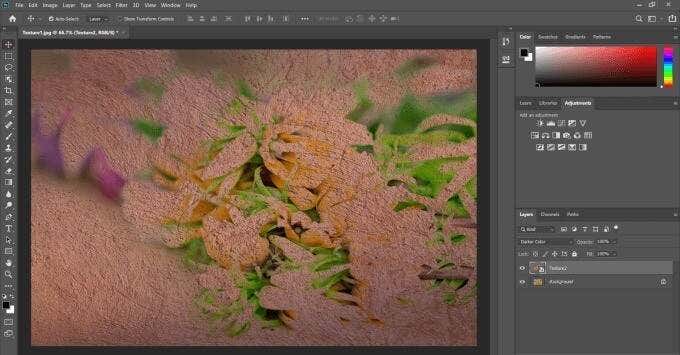
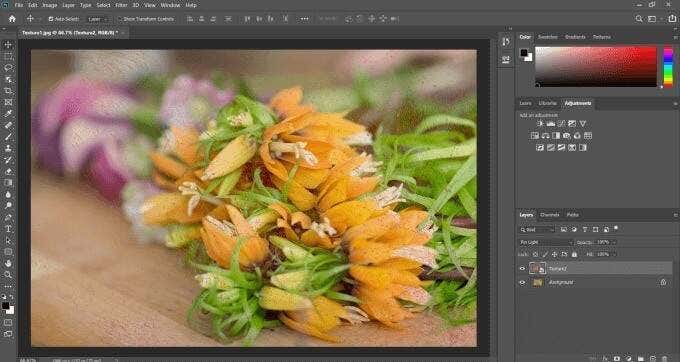
To go back up the menu options, hold down the Shift Key and press the Minus Key.
We will use the Overlay option. If you want a different look, you can change the opacity of the textured layer by adjusting the slider. It is located on the right-side of the blend mode menu.
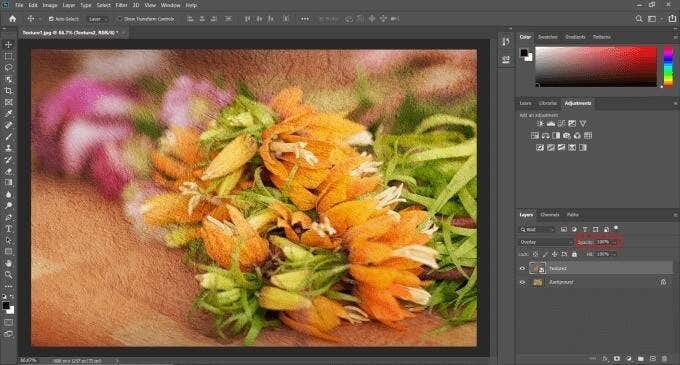
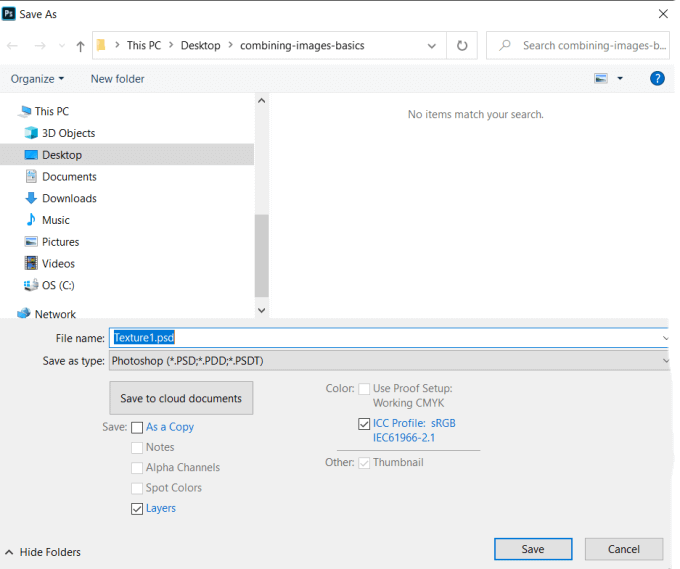
When you like the look of the blended results, navigate to File > Save As. Save the image as a Photoshop or PSD file, or any format you want. Remember to save the layers if you want to be able to edit this project in the future.
How To Merge Two Image Layers
You can also use layer blend modes to blend or merge the content of any two images together. Go back to File > Open, navigate to an image on your computer, and click Open.

Let’s add another image to the one above. Go to File > Place Embedded. Select a picture and click Place.
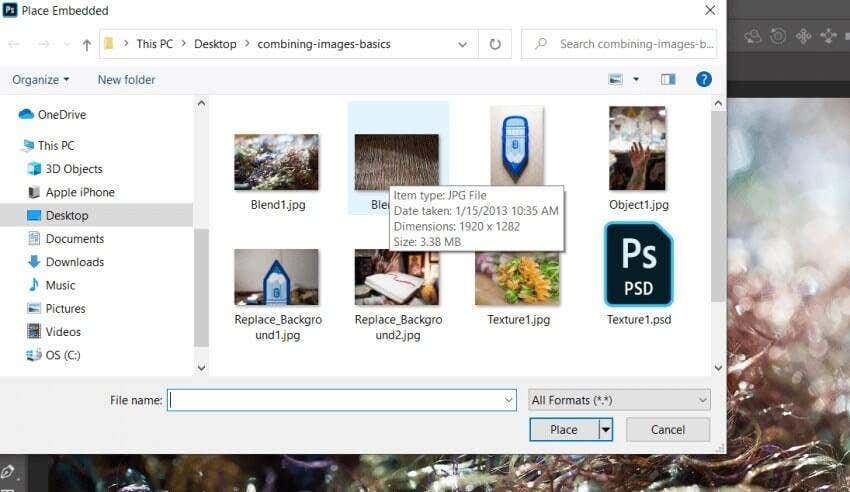
Click the checkmark from the top navigation to save your embedded photo. Now, apply a blend mode to the top layer.
Scroll through the menu or use the shortcut described above to find a blend mode you like. The screenshot below shows what the image looks like with the Lighten Blend Mode.
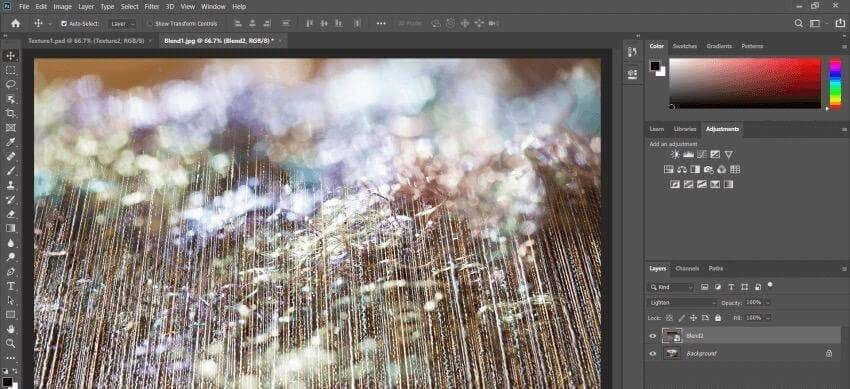
To save your image, go to File > Save As > Photoshop file or a file type of your choice.
Combine Two Photos Together
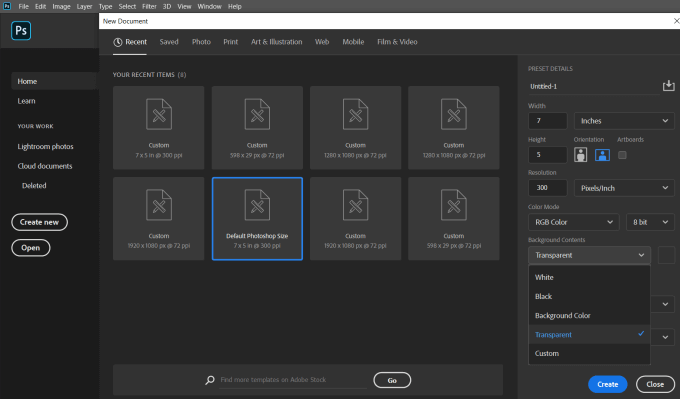
Start by creating a new document. Open Photoshop, choose File > New > Select Document Type, set Background Contents to Transparent, and click Create.
Drag an image from your computer into Photoshop. Resize the picture to make it fit the window by clicking and grabbing the handles around the edges. This will maintain the aspect ratio of your image and not distort it.
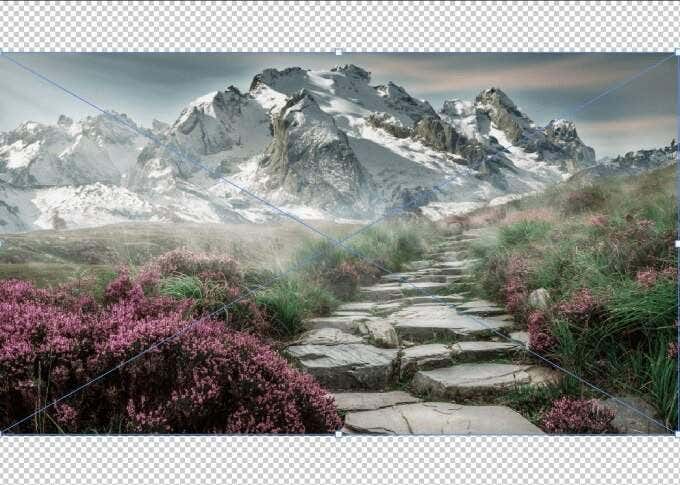
Press Enter to continue. Drag another image into the Photoshop window. Look in the Layers panel on the right-side to see that each image is now a separate layer.
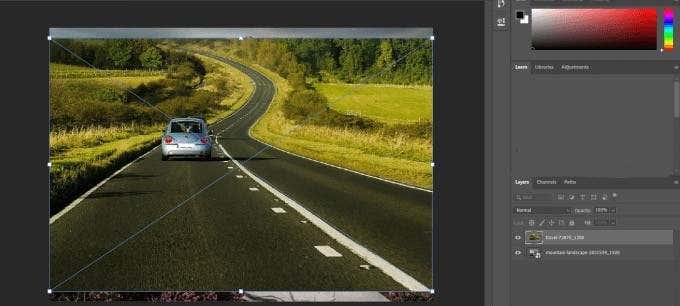
You can move images in front or behind by dragging a layer up or down in the Layers panel. To show or hide images, click the eye icon next to the layer to hide it. To make it visible, click it again.

We will merge the two images to make it look like the car is driving into the mountain. Start by grabbing the Quick Select tool from the left bar navigation.
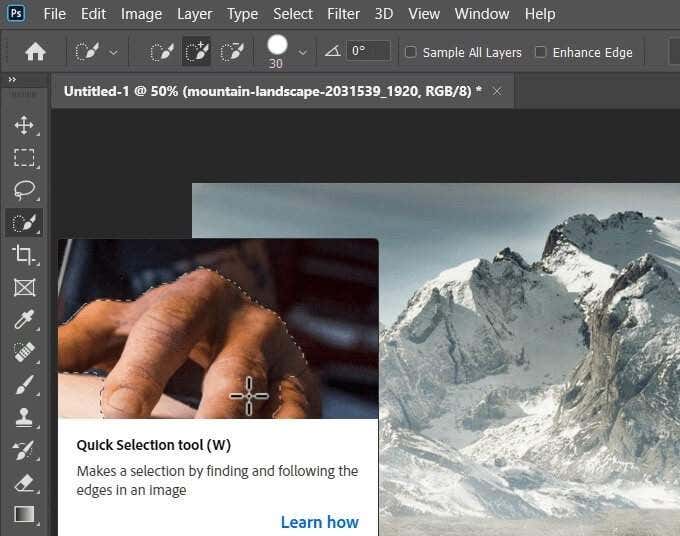
Hold down the Quick Select tool and drag it across the top part of where the car is driving in the original image.
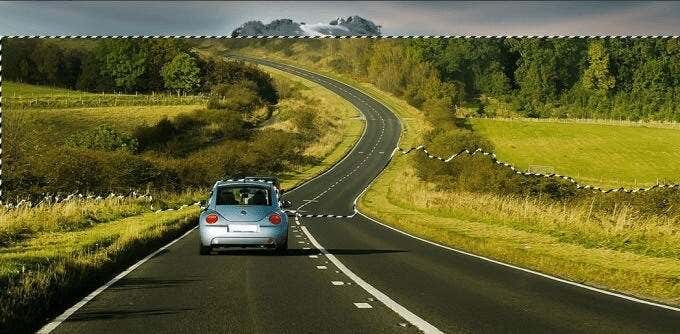
Now click on Inverse under Selection in the top bar. With this area selected, we are going to create a mask by clicking on the icon located at the bottom of the right-hand side panel.

The car now looks like it is driving into the mountains.

A powerful feature of Photoshop is the ability to resize, merge, and combine pictures to create imaginative composites.
We have only scratched the surface of Photoshop’s robust features and how you can use them to create awesome images.
Related Posts
- How to Fix App Notifications in Windows?
- Using an Old Device? 5 Account Security Settings You Should Enable
- How to Find Features Moved from Control Panel to Settings in Windows 11?
- How to Back Up Your Android Downloads Automatically?
- Camera Not Working in Zoom or Teams? Quick Fixes for Windows and macOS
David has a background in small business and lives in Australia. He is a WordPress and Ubuntu Developer who enjoys design, CSS and tech tool integration. Read David’s Full Bio
