Long gone are the days where the only way to enjoy your media collection was to break out the photo albums or the video cassettes. Thanks to streaming technology like DLNA, you can create your own media server from home, allowing you to stream your digital photos and video files to your TVs, smartphones, and other devices.
There are a few ways you can use DLNA to stream content from your PC to other devices. For instance, you could use Windows’ own built-in DLNA service or you could use a third-party tool like Plex to stream your content instead. If you want to create a DLNA media server using Windows 10, here’s what you’ll need to do.
What Is a DLNA Media Server?
DLNA stands for Digital Living Network Alliance, and refers to the group of manufacturers and developers behind the technological standard of the same name. The DLNA standard allows supported devices to stream videos and photos from a DLNA server to other devices, regardless of their size or operating system.
A DLNA media server uses this standard to stream content. The server is usually the device that holds the video or photo collection, such as your PC or attached network storage. When you connect a DLNA-supported device to your local network, it should detect any DLNA servers (and shared media content) automatically.
This is why you can stream media from a Windows 10 PC to a Linux-based set top box, or from a DVD player with a custom embedded operating system to an Android smartphone. Thanks to the DLNA standard, manufacturers have baked in the necessary support for these devices to stream media from A to B.
The technology isn’t perfect, but it means that you can easily set up a streaming service for your movies and photos without needing expensive equipment. It’s quite likely that, assuming you have fairly modern technology in your home, that your TV, PC, and smartphone can all stream content from a supported DLNA server.
How to Set Up a DLNA Media Server on Windows 10
Many devices support playback from a DLNA server, but to stream the content, you’ll need the server set up in the first place. If you don’t have a DLNA media server already, you can quickly use the built-in DLNA media server on Windows 10 to begin streaming.
This service requires a bit of configuration, so you’ll need to follow these steps to set it up first. You may need to update Windows 10 and configure your network to allow other devices to connect to your PC by setting your network as a private network on Windows.
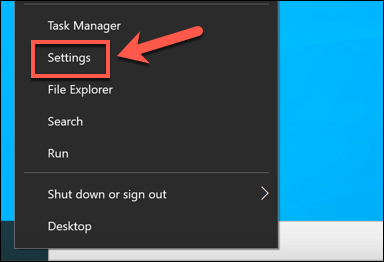
- To begin, you’ll need to access the Windows Settings menu. Right-click the Start menu and select Settings to do this.
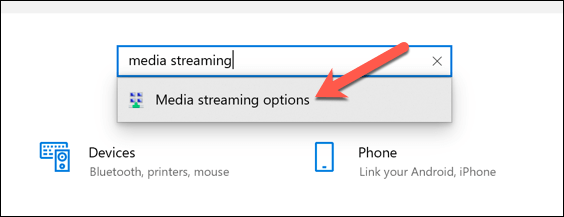
- In the Find a setting search box at the top of the Settings menu, type media streaming. Select the Media streaming options recommendation that appears in the drop-down menu.
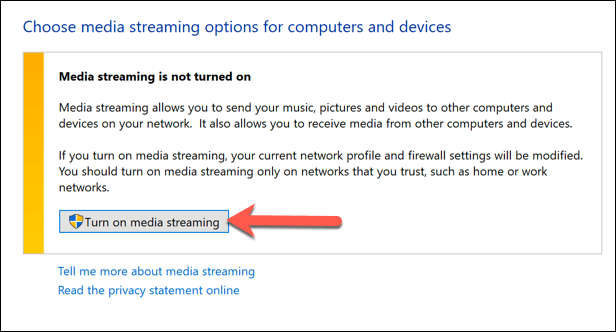
- This will open an older Control Panel window. In the Media streaming options window, select the Turn on media streaming button. This will activate the built-in DLNA media server on your PC, as well as change your firewall rules and network setup to allow for media streaming.
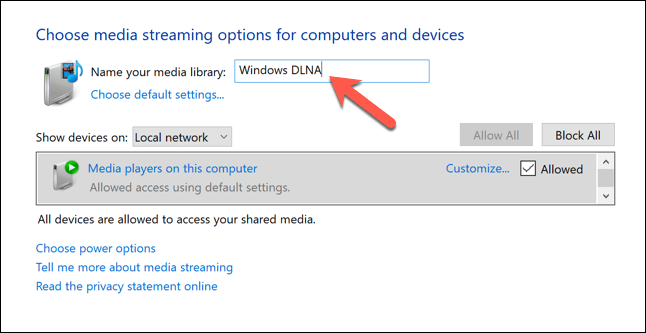
- Allow a few seconds for Windows to switch the service on. Once this is complete, you can modify your server settings. To change the name of the DLNA media server, replace the text in the Name your media library text box.
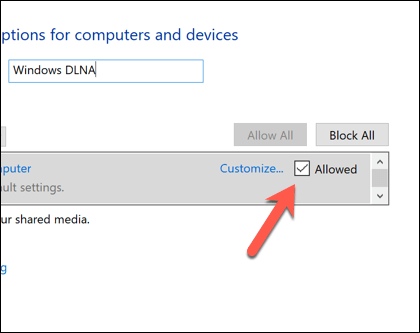
- If you want to share your media files with other DLNA-capable devices on your local network, make sure that the Allowed checkbox is enabled. You’ll see it next to the Media players on this computer option.
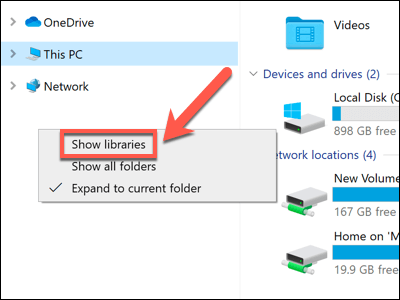
- Media is shared from your Libraries folders in Windows File Explorer. This is hidden by default in Windows 10. So to view these folders, open Windows File Explorer and right-click an empty space in the tree menu on the left, then select the Show Libraries option.
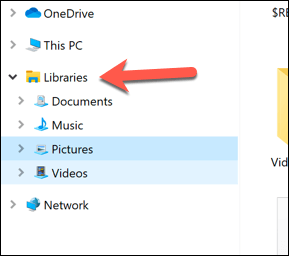
- Once Libraries are enabled, select the arrow next to the Libraries option in the left-hand tree menu, then select one of the available options (eg. Documents, Music, Pictures or Videos). This will display the list of folders within those Libraries (eg. the Videos folder in your Windows user folder).
Any of the content held in your Libraries folders (such as photos or video files) will be accessible to DLNA-capable players on your local network while your PC is switched on. Make sure to move any files you want to stream to your selected Libraries folders to allow you to stream them to supported DLNA players.
Using Plex to Create a DLNA Streaming Server
Windows’ built-in DLNA server is a great way to quickly enable DLNA streaming across your local network. However, it isn’t a well supported feature, with both the settings to enable it and the Libraries folder to manage your content hidden away.
If you’re looking for a better supported streaming solution for your Windows PC (or if you have a Mac and you’re looking to add DLNA support), you might prefer to give Plex a try. Plex is an all-in-one media server platform that allows you to manage and create a content library for your photos, home videos, TV shows, movies, etc.
While you can build a standalone Plex server to host your content, you can also set up Plex on your PC or Mac. This will enable DLNA-style streaming from your PC to other capable devices. You can also expand Plex’s features using a number of third-party Plex plugins, providing integrations with Netflix, YouTube, and more.
If you’ve downloaded and installed the Plex server on your PC, you can enable Plex’s built-in DLNA features in the settings area of the Web App, accessible from your web browser.
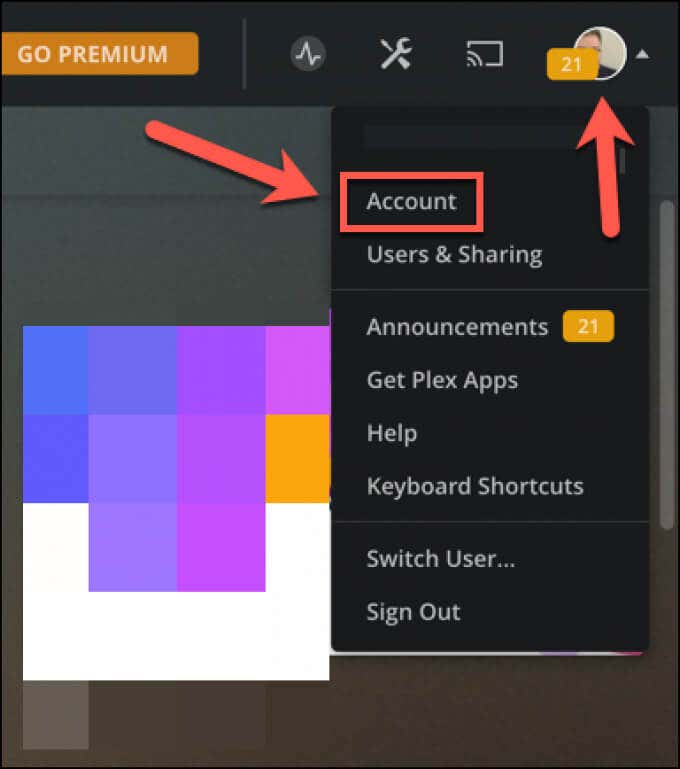
- To start, open your web browser and use the address bar to access the Web App control panel for your server (eg. Select your account icon in the top right, then select Account from the drop-down menu.
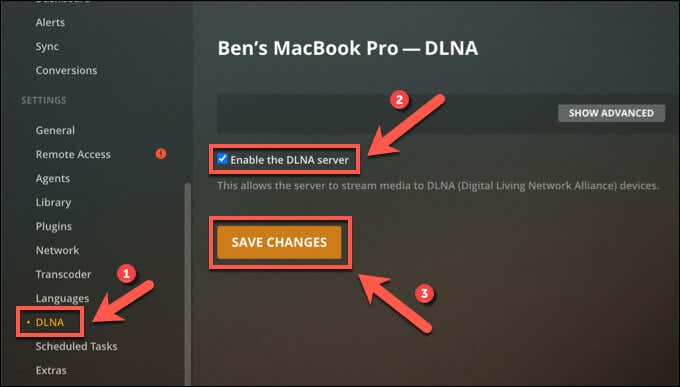
- Select the DLNA category in the left-hand menu. To enable DLNA streaming to supported players on your network, select the Enable the DLNA server checkbox, then select Save Changes to apply them to your server.
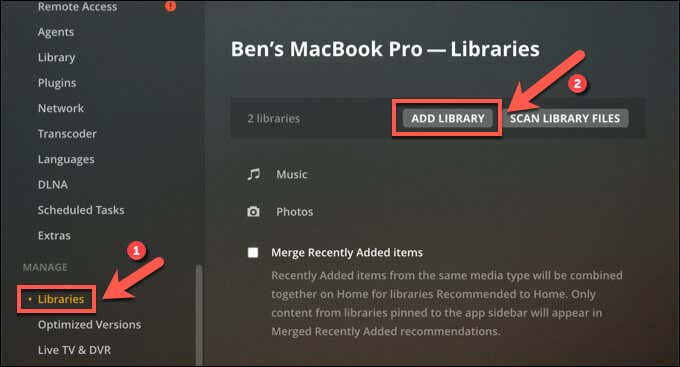
- With DLNA streaming enabled, your Plex server will stream content from its media libraries to DLNA-supported devices. To view or add new libraries containing photos or videos you wish to stream, select the Libraries category in the left-hand menu and select Add Library to add new folders.
Streaming Home Media Content on a Local Network
Creating a DLNA media server using your PC or Mac is a great way to quickly stream your movies and photo albums to your other devices. You could also think about streaming photos and videos from Windows to an Xbox. Or, if you want to use your PC elsewhere, you could stream your entire desktop using a Chromecast.
If your media collection is too large, you could also think about setting up a network attached storage (NAS) device on your network. These often come with DLNA and other media streaming capabilities built-in, including Plex support. You can also build your own Plex server with enough storage to store and stream from a single device.
Related Posts
- How to Repair a Corrupted User Profile in Windows 11
- Preparing for Windows 10 End of Support: Upgrading to Windows 11
- How to Access and Change Your WiFi Router Settings (2025 Edition)
- How to Install the Latest Large Language Models (LLMs) Locally on Your Mac
- How to Find Circular References in Microsoft Excel
