The Chromebook Recovery Utility is a browser extension for creating recovery media for Chromebook devices. A recovery media can fix Chrome operating system (ChromeOS) issues by removing and reinstalling the OS.
This tutorial will show you how to use the Chromebook Recovery Utility to create recovery media for your Chromebook. You’ll also learn how to use the recovery media to recover your Chromebook if its operating system malfunctions.
Chromebook Recovery Utility Requirements
You need a USB flash drive or SD card with at least 8GB of free storage space. The Chromebook Recovery Utility will format the storage device when converting it to a recovery media. Hence, we recommend using a new flash drive or SD card, or an old one you don’t mind erasing. If you have important files on your flash drive or SD card, back them up to the cloud or a different computer.
The Chromebook Recovery Utility works on any computer (Windows or Mac) with Google Chrome. If your Chromebook doesn’t turn on, you can create a recovery media on a different Chromebook or macOS and Windows computer.
Create Recovery Media Using the Chromebook Recovery Utility
Plug the flash drive or SD card into your Chromebook, open the Google Chrome browser, and follow these steps.
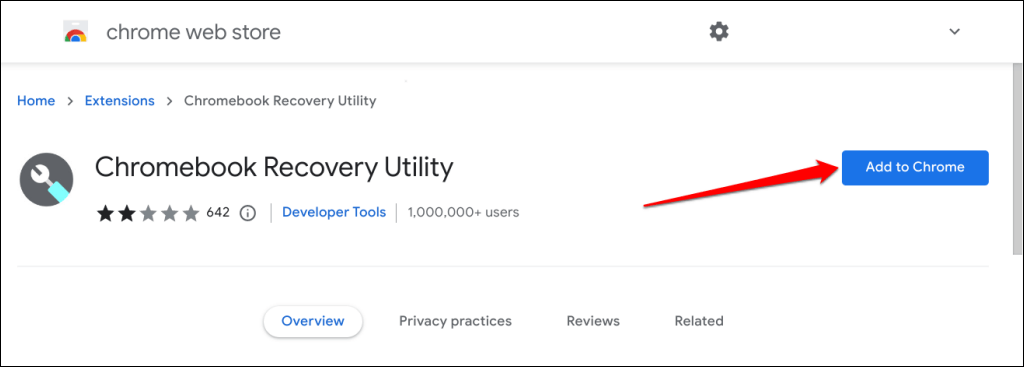
- Visit the Chromebook Recovery Utility extension page on the Chrome Web Store and select the Add to Chrome button.
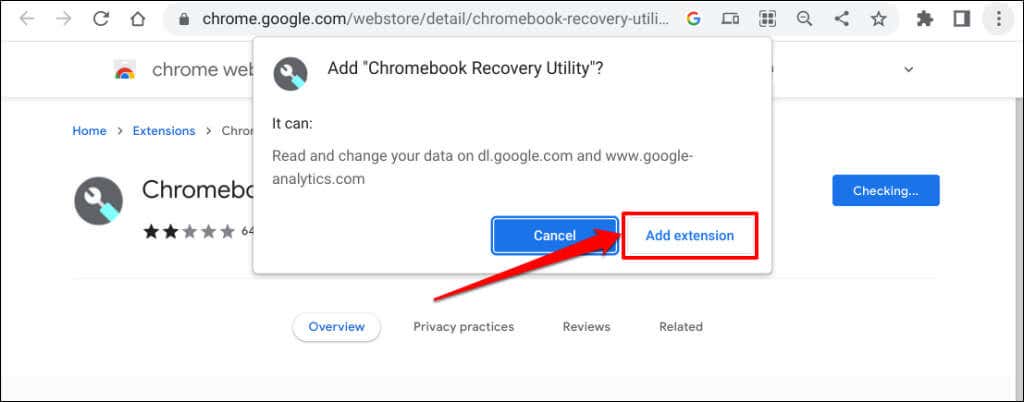
- Select Add extension on the pop-up.
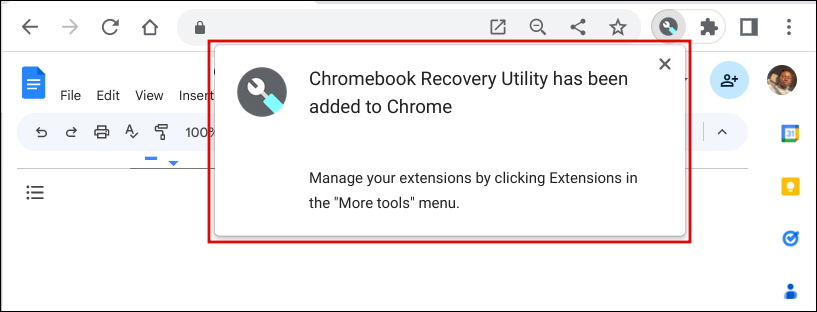
Proceed to the next step when you see a “Chromebook Recovery Utility has been added to Chrome” success message.
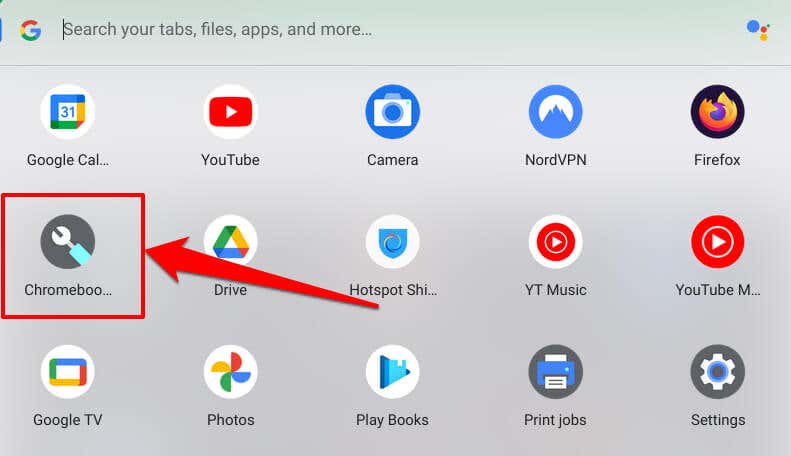
- Open your Chromebook’s launcher (press the Search key) and select the Chromebook Recovery Utility icon.
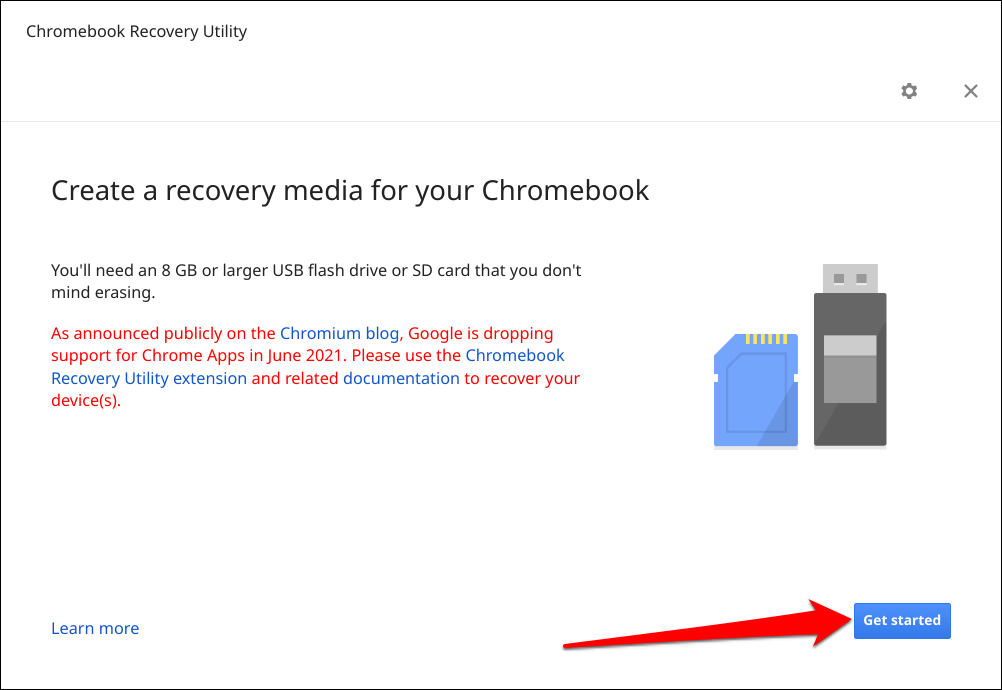
- Select the Get Started button.
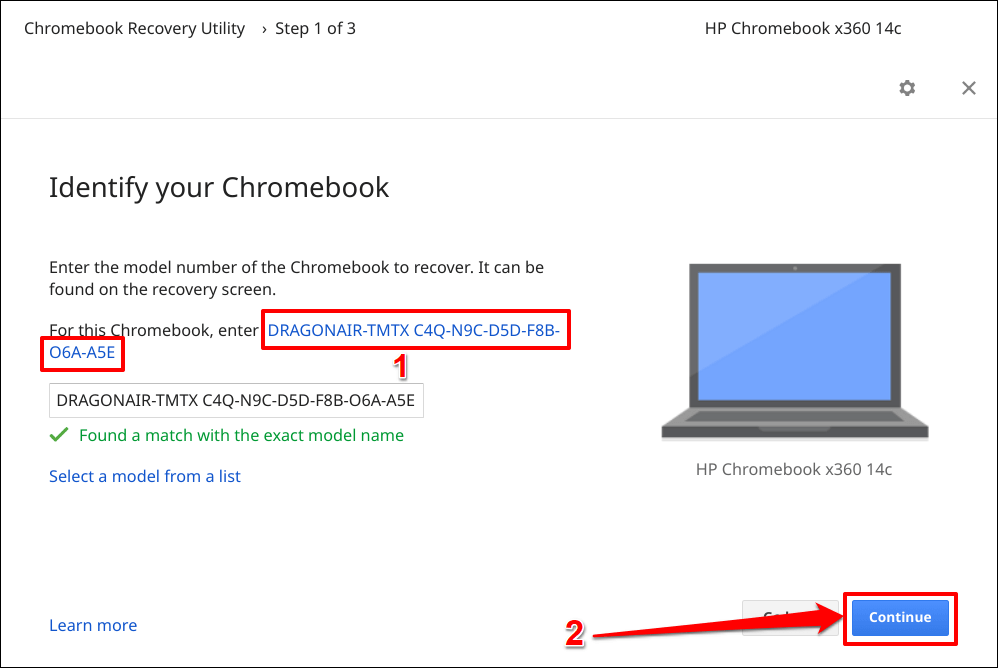
- Enter your Chromebook’s model number in the dialog box to proceed. The Chromebook Recovery Utility should auto-detect your device’s model. If it does, select the alphanumeric characters on the “For this Chromebook, enter” row and select Continue.
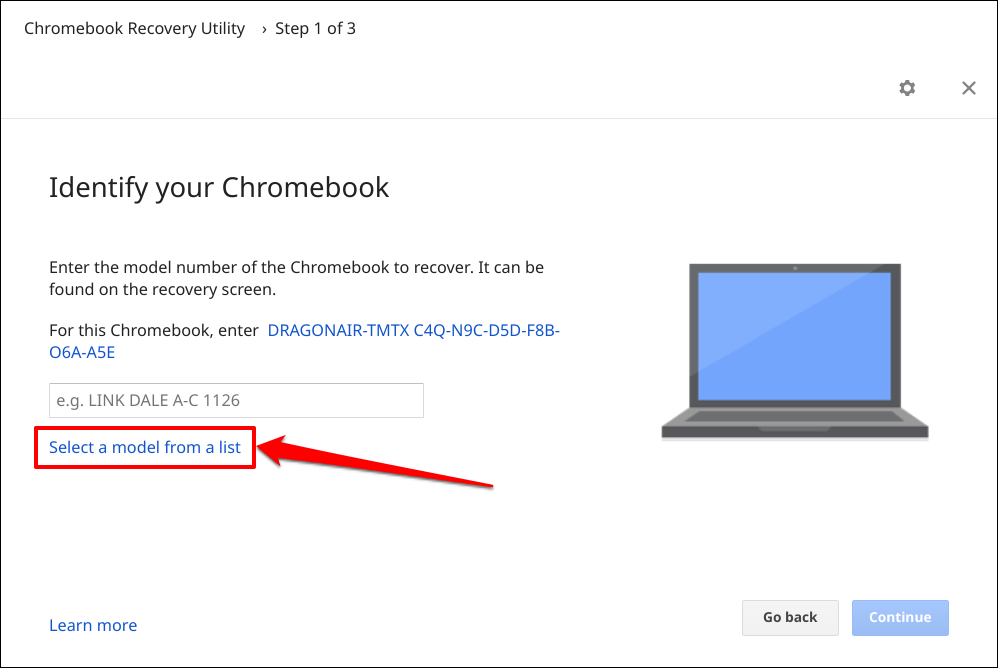
Select or tap Select a model from a list if the recovery tool doesn’t auto-detect your Chromebook’s model.
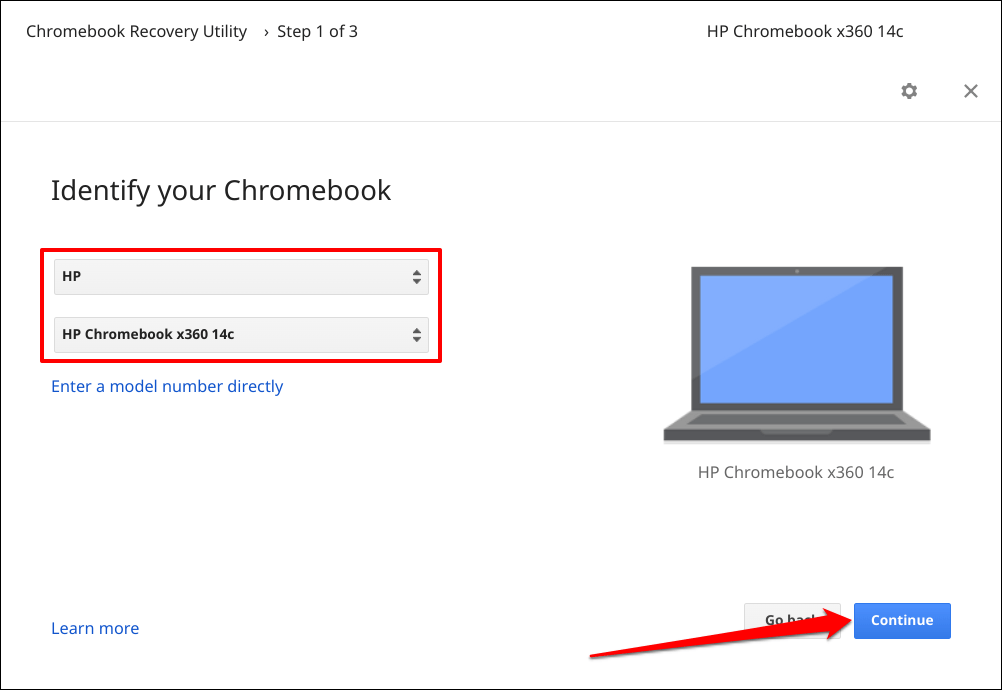
Choose your Chromebook’s manufacturer in the Select a manufacturer drop-down menu. Next, choose your Chromebook model name in the Select a product drop-down menu and select Continue.
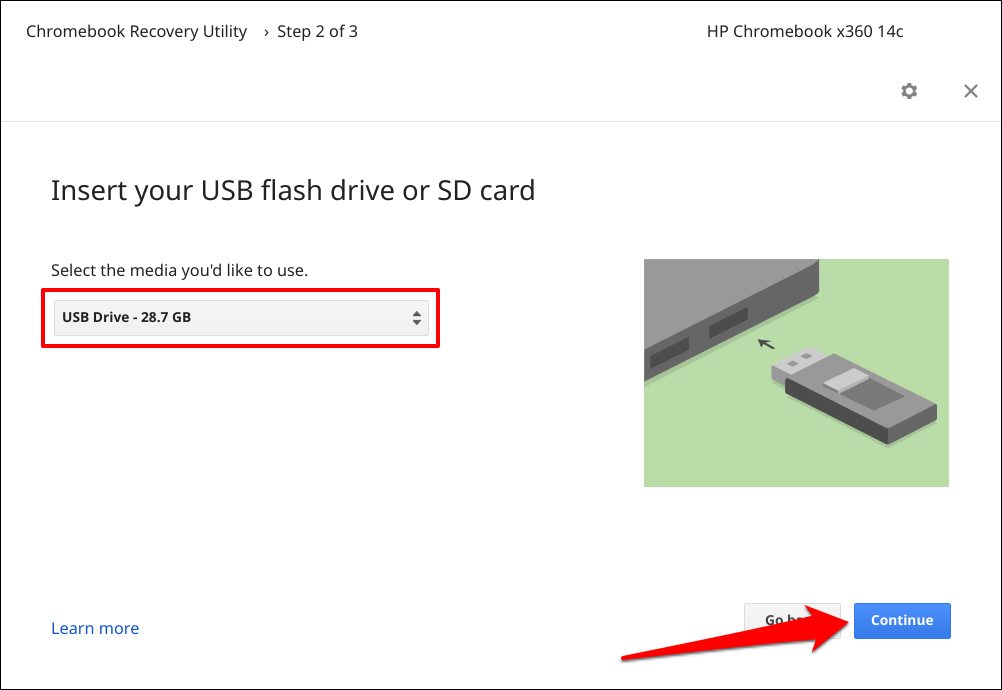
- Select the flash drive or SD card you want to use as the recovery media and select Continue.
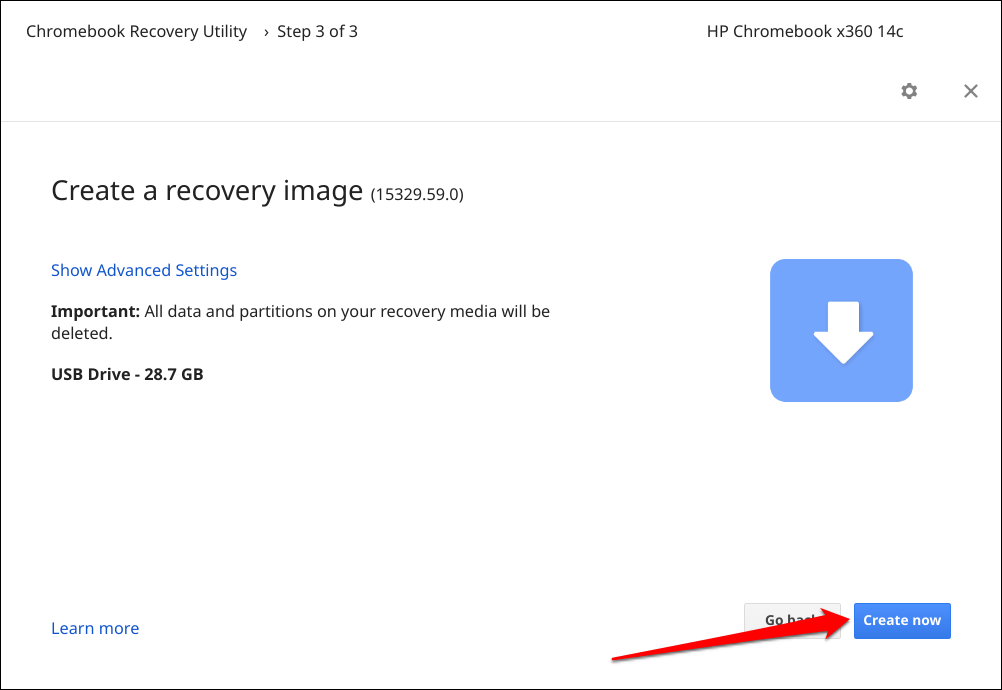
- Select the Create now button to create the recovery media on the external storage device.
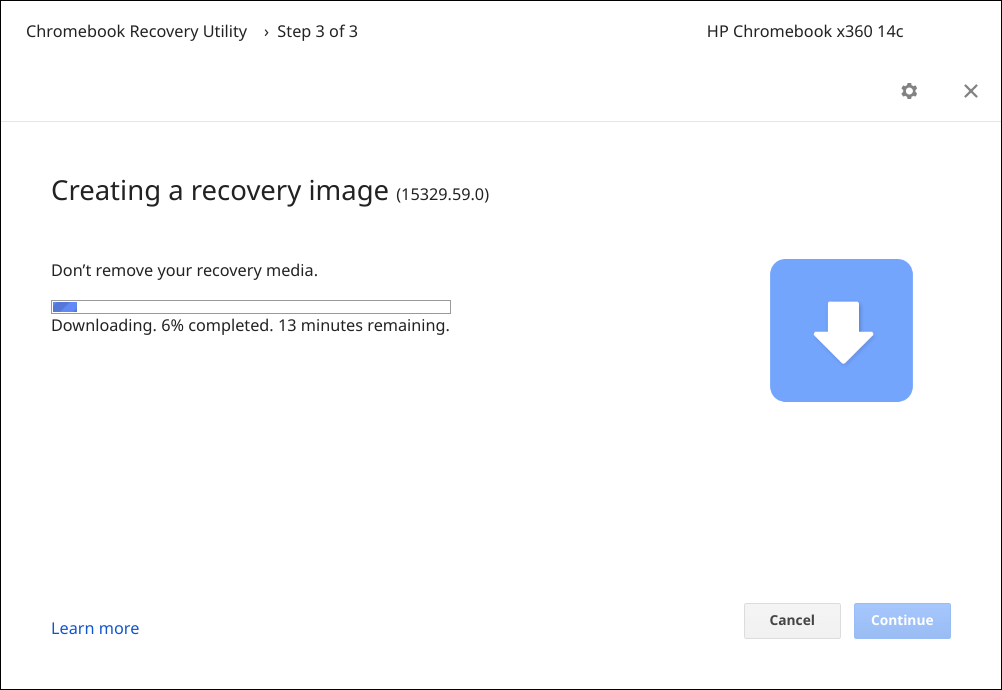
Depending on your internet speed, the Chromebook Recovery Utility takes 10-30 minutes to download, write, and create a recovery image on the storage device.
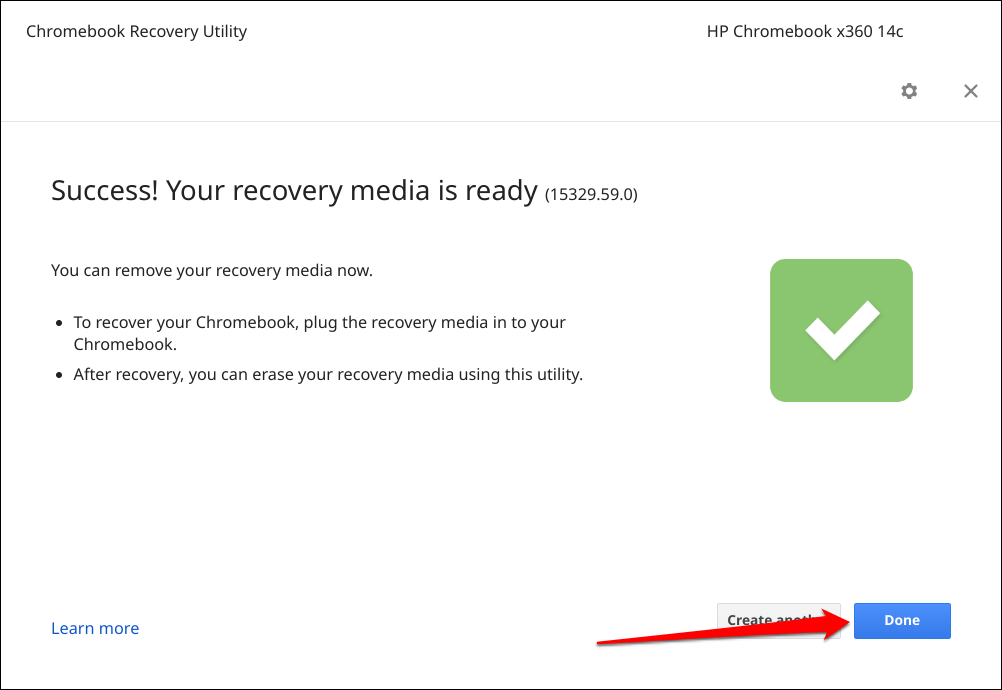
Keep your device connected to the internet and select Done when a success message appears on the screen.
Recover Your Chromebook Using the Recovery Media
Performing a recovery can fix operating system (OS) corruption and resolve issues that a factory reset or powerwash fails to fix. You can also recover your Chromebook if it doesn’t boot past a black screen.
Note: A recovery media is a backup of your Chromebook’s operating system, not a backup of your personal files, apps, or data. Recovering your Chromebook will erase everything on the device. If you can still sign in to your Chromebook, back up your files to Google Drive or an external storage device before performing a recovery.
Refer to the following steps to recover your Chromebook using a recovery media.
- Shut down your Chromebook (press the Power key for 5-10 seconds) and unplug all devices or accessories.
- Plug in the external disk containing the recovery media to your Chromebook.
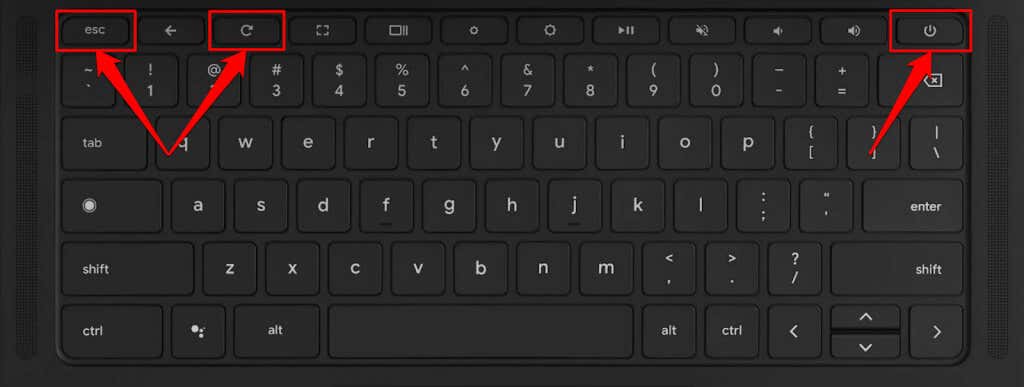
- The next step is to put your Chromebook in recovery mode. Press and hold the Esc + Refresh + Power key to enter recovery mode.
If you use a Chromebook tablet, press and hold the Volume Down, Volume Up, and Power buttons for at least ten seconds.
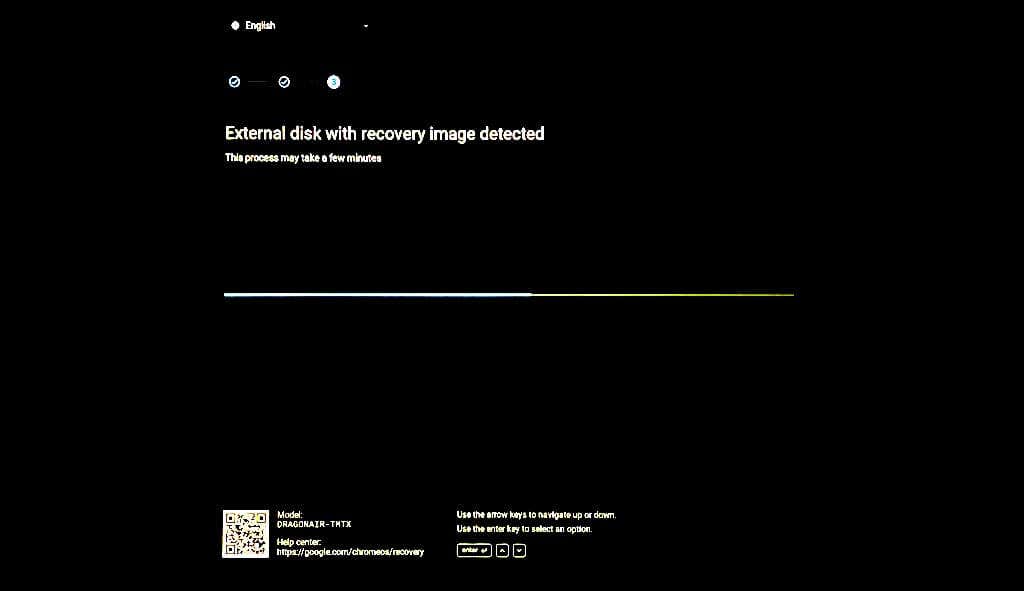
Your Chromebook should display the recovery screen with an “External disk with recovery image detected” message.
Wait for your Chromebook to start the recovery operation—this takes about 2-5 minutes.
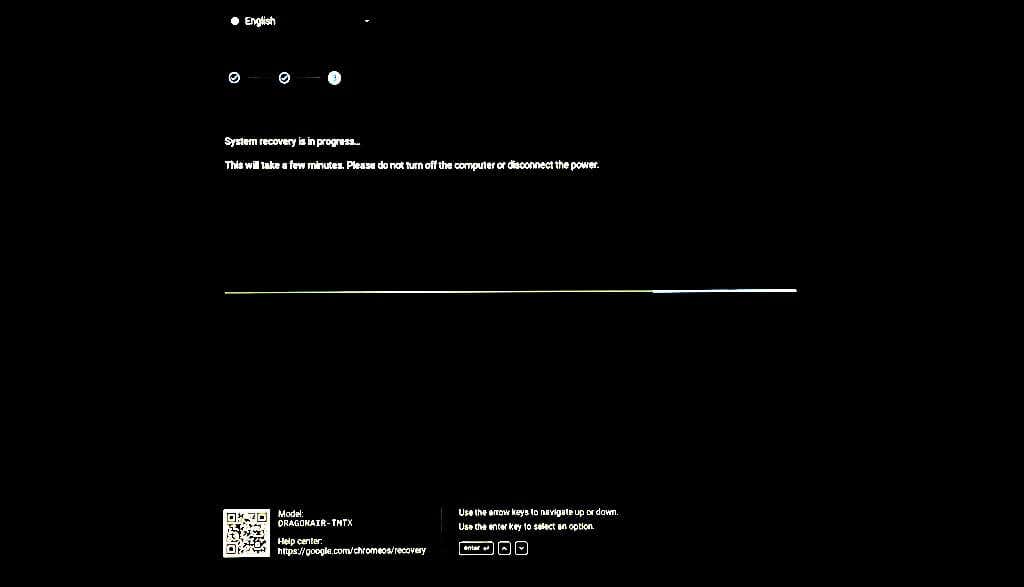
Keep your Chromebook powered on or connected to a power source. The system recovery process takes 5-15 minutes, depending on your Chromebook model.
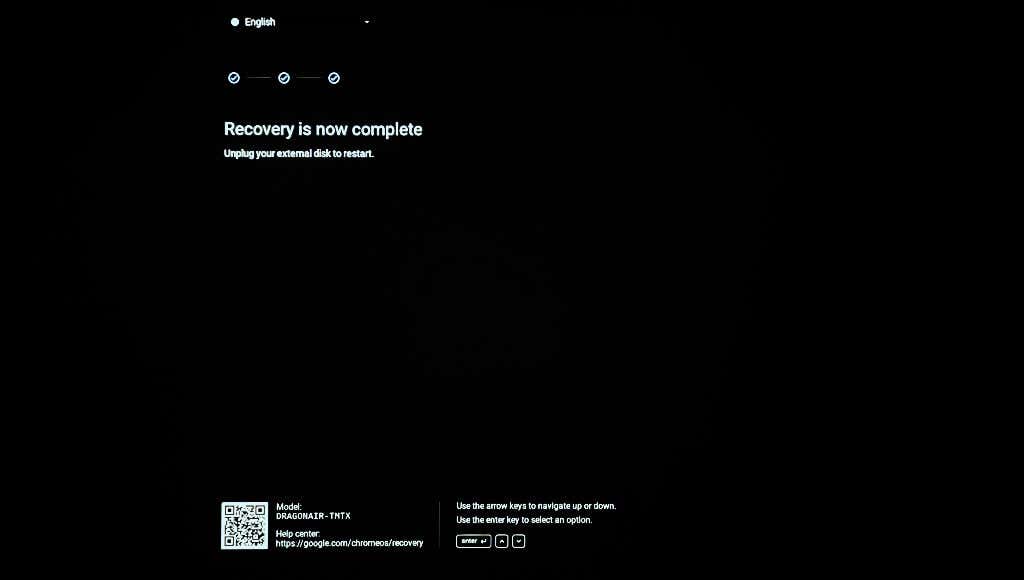
- Unplug the USB stick or SD card when you see a “Recovery is now complete” message.
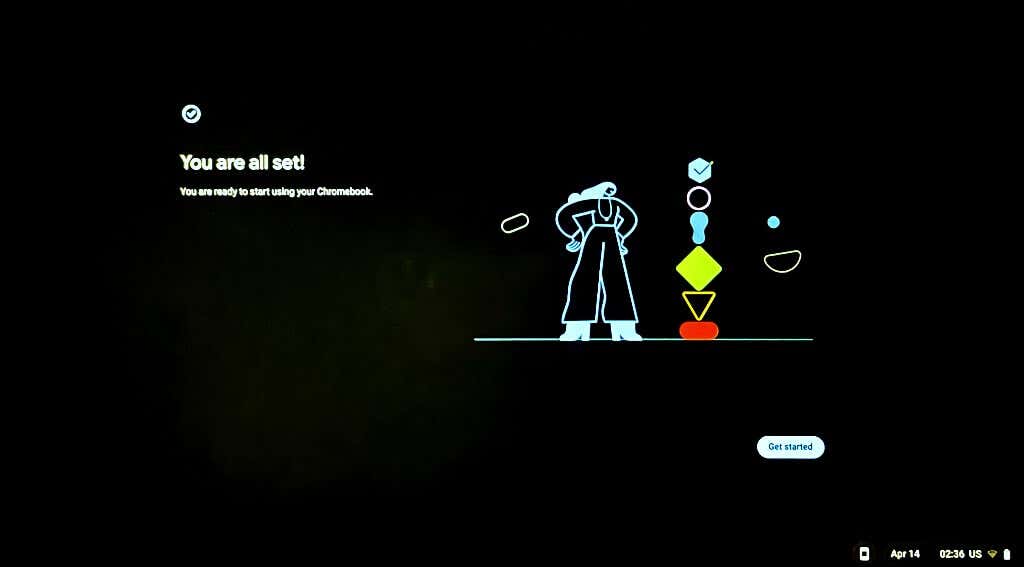
- Wait for your Chromebook to boot and follow the on-screen instructions to set up your device. Sign in to your Google account, set up a PIN, keyboard language, etc. Select Get Started to use your Chromebook.
Reusing Your Recovery Drive
You can’t use or store files on the USB flash drive or SD card containing your Chromebook’s recovery media. You must erase the recovery media to reuse the USB flash drive or SD card as a regular storage device. Connect the storage device to your computer and follow the steps below.
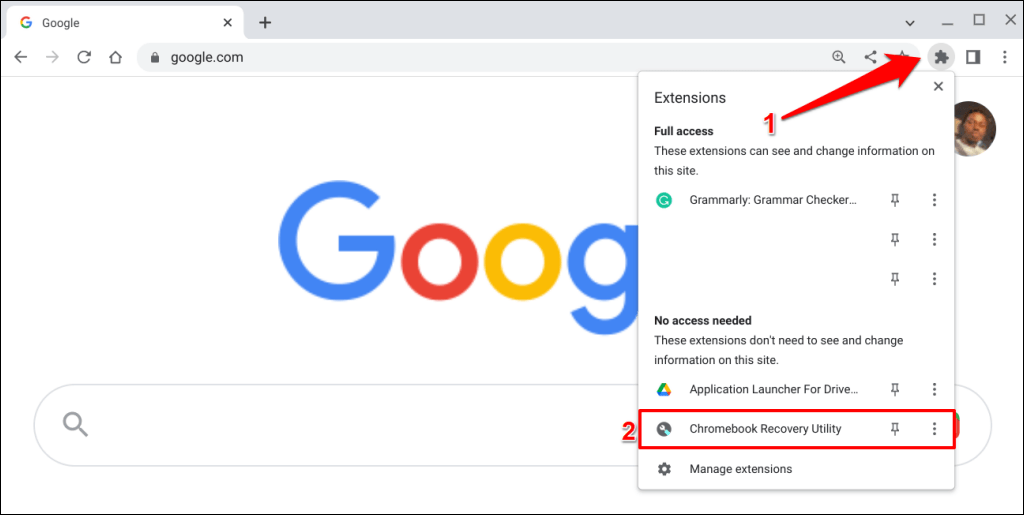
- Open Chrome, select the Extensions icon next to the address bar, and select Chromebook Recovery Utility.
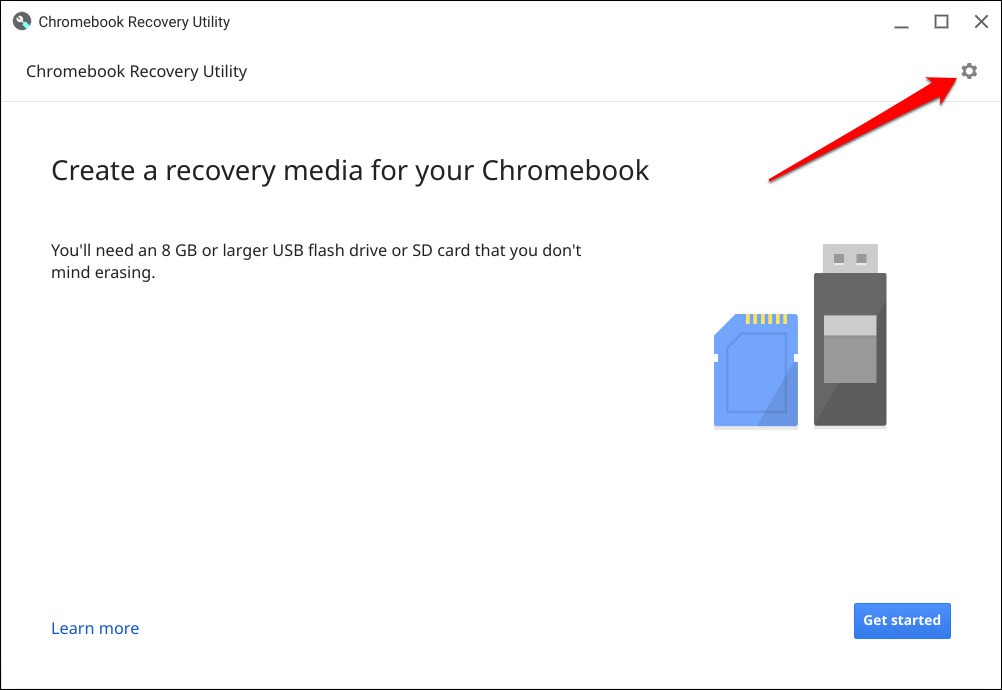
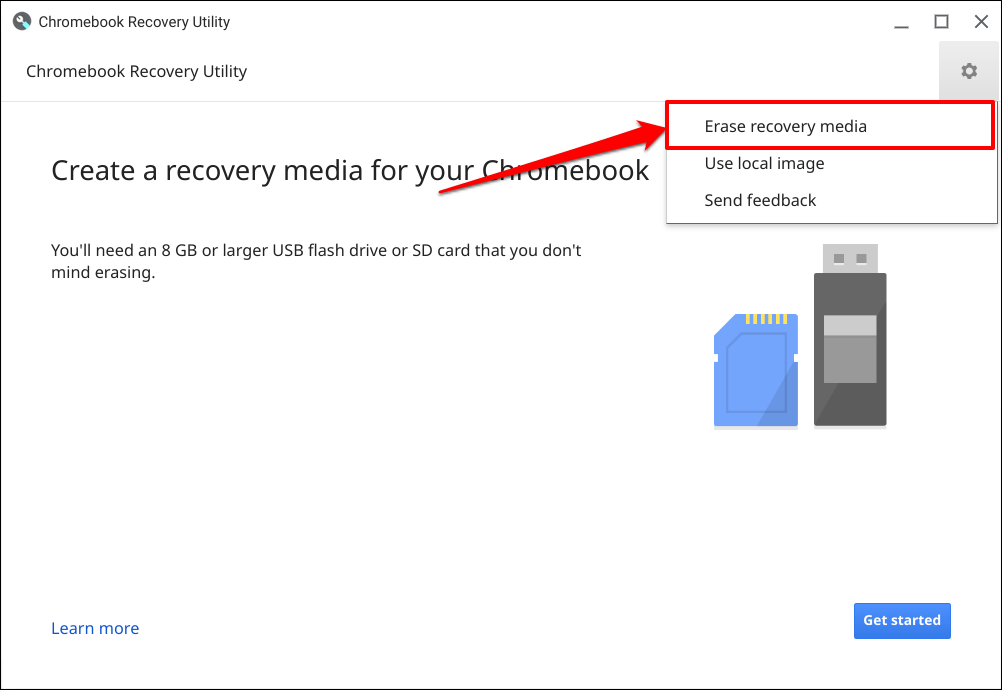
- Select the gear icon in the top-right corner of the Chromebook Recovery Utility app.
- Select Erase recovery media.
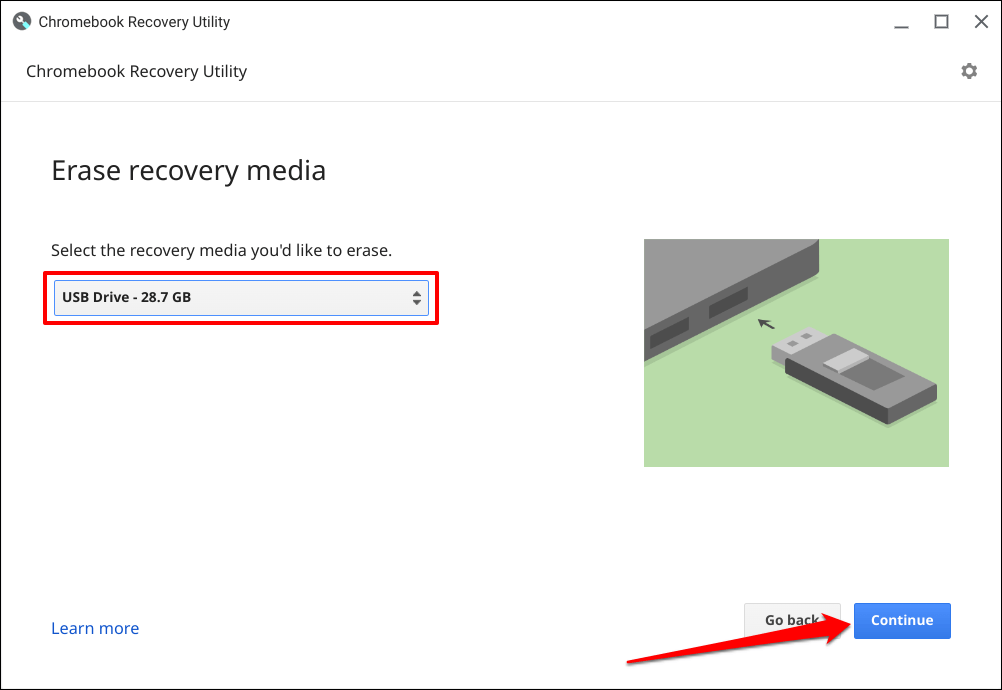
- Select your recovery USB drive or SD card in the drop-down menu and select Continue.
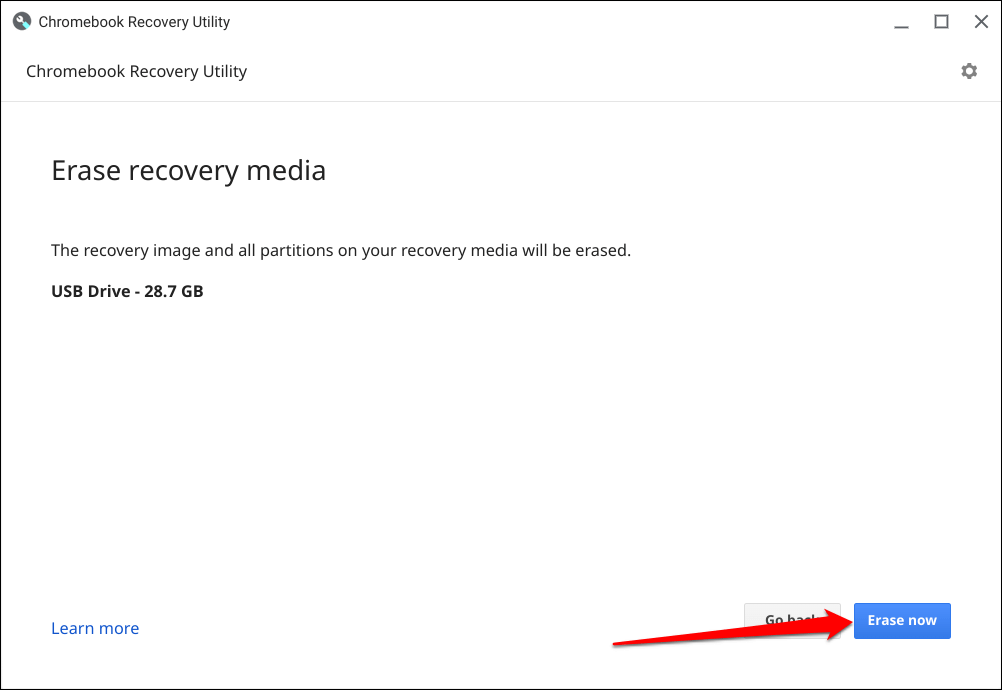
- Select the Erase now button to proceed.
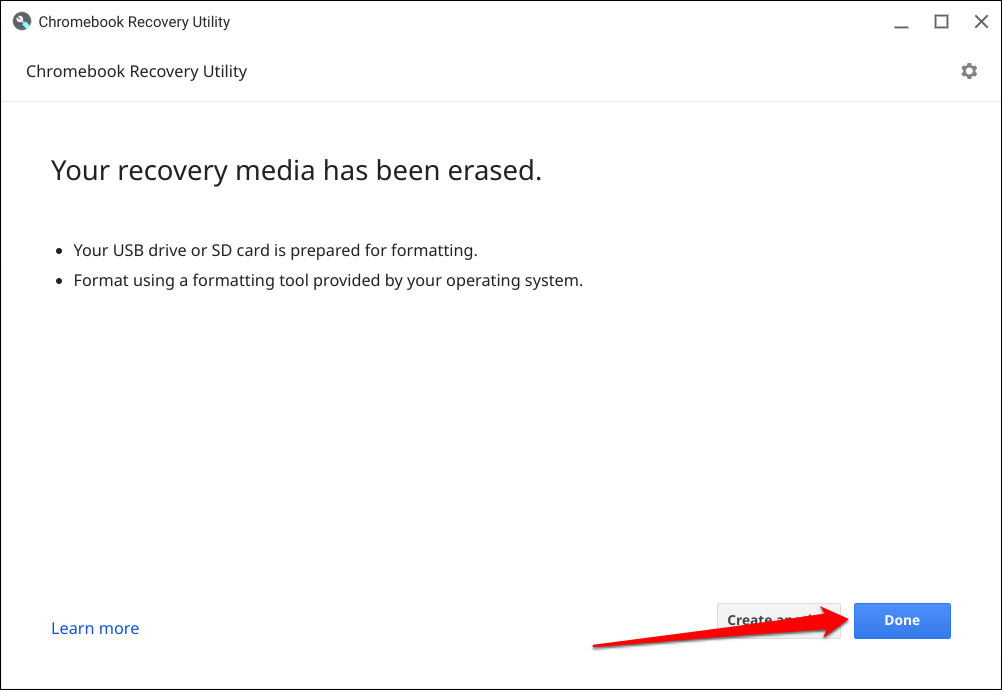
- Select Done when the Chromebook Recovery Utility displays a “Your recovery media has been erased.” success message.
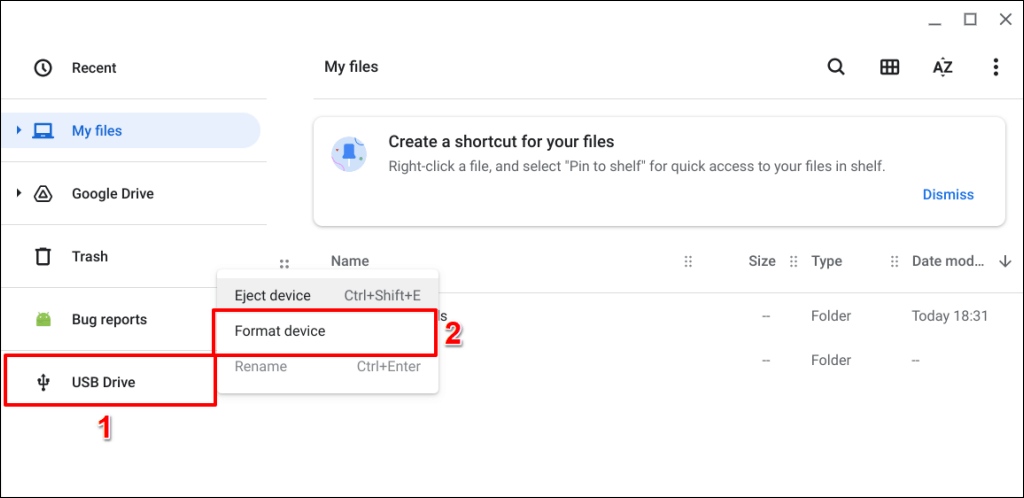
- The final step is to format the storage device. Eject the storage device and plug it back into your Chromebook. Next, open your Chromebook’s File app, right-click the storage device on the sidebar, and select Format device.
ChromeOS Recovery Made Easy
Contact your administrator to recover a work or school Chromebook. If your Chromebook displays an “An unexpected error has occurred” message during recovery, erase/format the storage device and try again. Google also recommends trying a different USB flash or SD card as some storage devices don’t work well with recovery. Contact your Chromebook manufacturer if the issue persists.
