Compressing files can save storage space on your Chromebook. Zipping files also offers a quick way to share a group of files without data loss. Like Windows, macOS, and Linux, the Chrome operating system (Chrome OS) can zip and unzip files.
This tutorial shows you how to bundle files and folders into ZIP files on your Chromebook. You’ll also learn different ways to extract the content of ZIP files in ChromeOS.
How to Zip Files on Chromebooks
Using ChromeOS’ file manager, you can bundle different file types (pictures, audio files, videos, etc.) into a ZIP file.
- Open the Files app (press Shift + Alt + M) and navigate to the folder containing the files you want to ZIP.
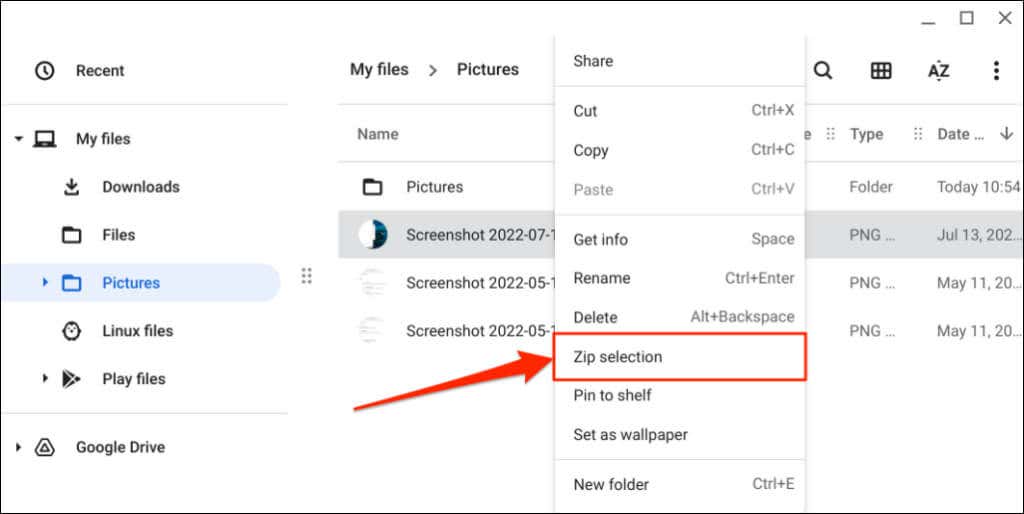
- Right-click the file you want to zip and select Zip selection.
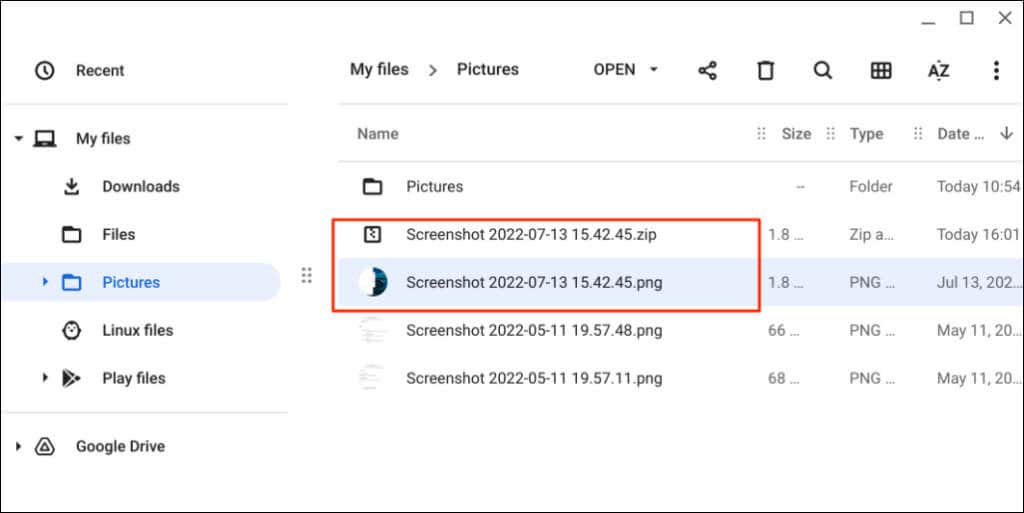
ChromeOS will create a ZIP file with the same name as the original file.
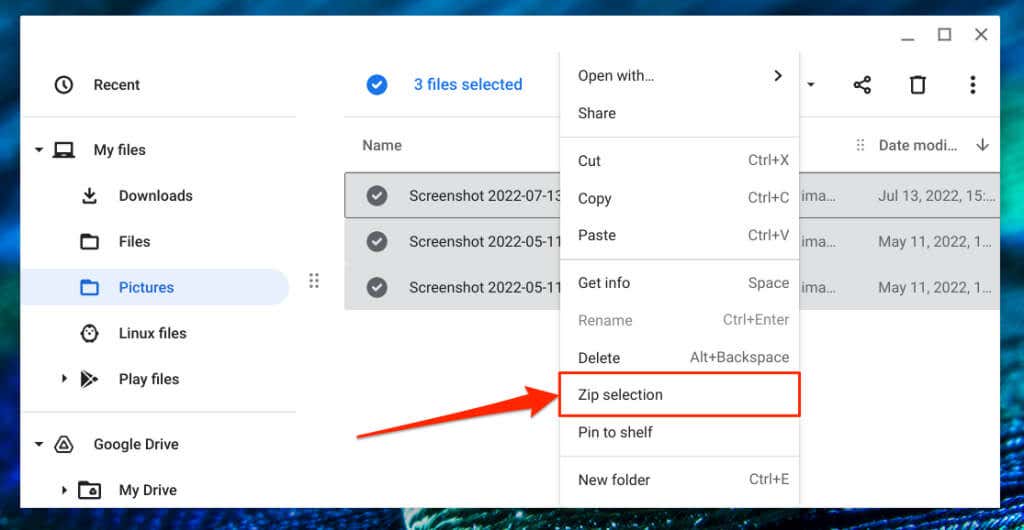
- You can also bundle multiple files into a single ZIP file. Hold the Ctrl key and use your Chromebook’s trackpad or mouse to select the files.
- Right-click the selected files and select Zip selection.
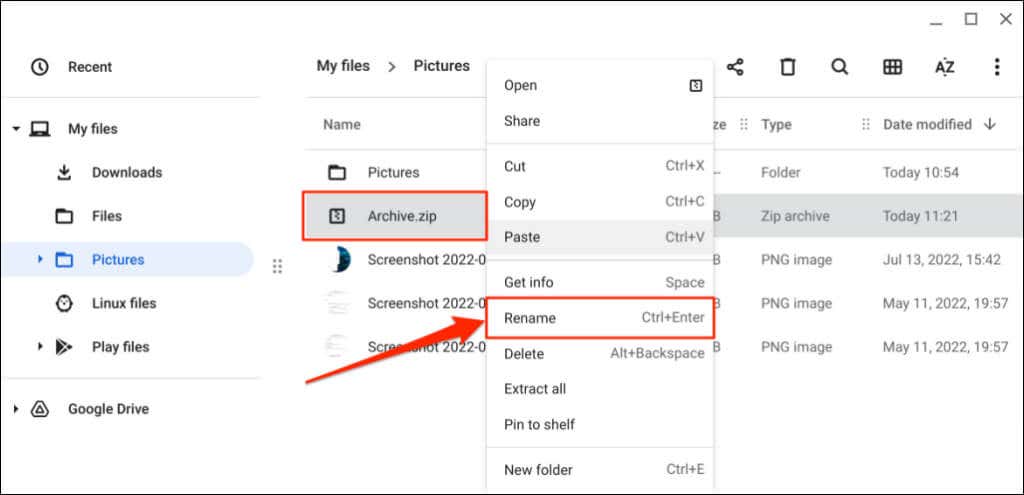
Chrome OS will compress the selection into a ZIP file titled “Archive.zip.” To change the default title, right-click the ZIP file, select Rename, and enter your preferred title. Alternatively, select the ZIP file and press Ctrl + Enter to change its title quickly.
If you zip a folder, the generated ZIP file will have the same name/title as the folder. That is, “Screenshots.zip” will be the resulting file from zipping a “Screenshots” folder.
How to Password-Protect ZIP Files on Chromebooks
ChromeOS doesn’t support the encryption of ZIP files. You’ll need to use third-party apps to secure compressed files with a password on your Chromebook. Android apps like RAR (from RARLAB) and ZArchiver will do the job.
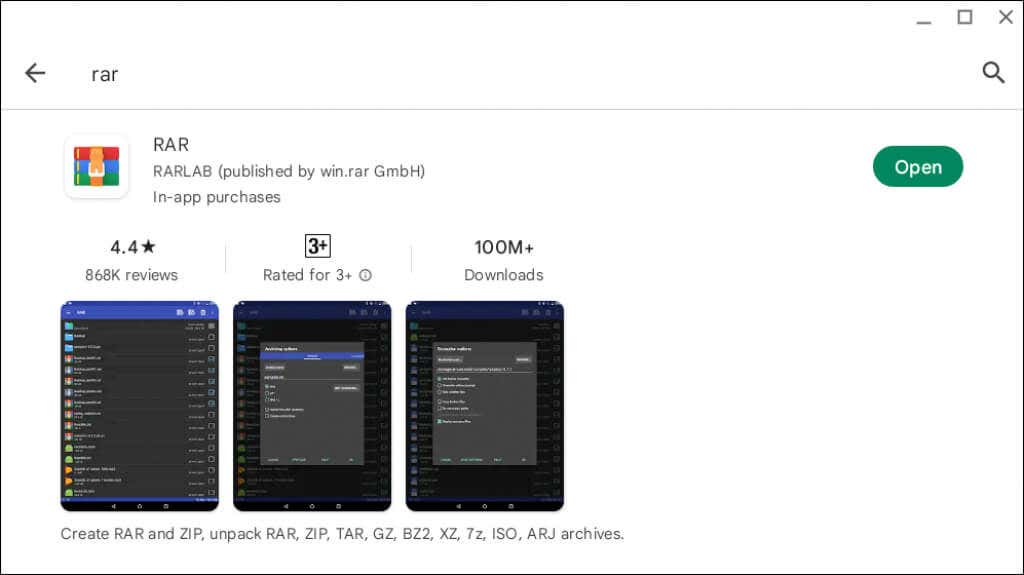
Both apps are free and easy to use, but RAR (from RARLAB) has a better interface. Follow the steps below to see how to use the app to create password-protected ZIP files on your Chromebook.
- Download and install the RAR app from the Google Playstore. Open the app and grant it permission to access your files when prompted.
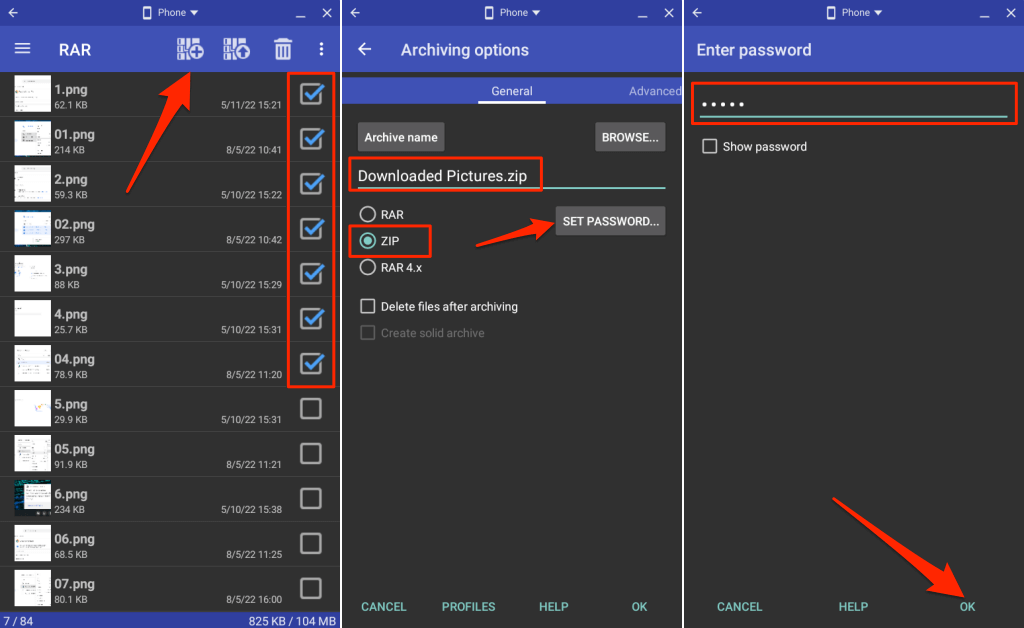
- Check the boxes next to the files or folders you want to zip. Select the Add files to archive icon on the top menu to proceed.
- Select the ZIP file format and enter a preferred title for the ZIP file in the dialog box. Select the Browse button to change the destination folder.
- Next, select the Set Password button to encrypt the ZIP file.
- Enter a password in the provided dialog box and select OK.
- Finally, select OK on the “Archiving options” page to save the password-protected ZIP file in the destination file.
Check the destination folder in the Files app and verify that RAR successfully created the encrypted ZIP file. Anyone without the encryption password cannot open or extract the content of the ZIP file on your Chromebook and other devices.
How to Unzip Files on Chromebook
There are two different ways to extract ZIP files on Chromebooks. You can either use ChromeOS’ ZIP extraction feature or manually duplicate the content of the ZIP file.
Unzip Files Using ChromeOS’ Extraction Feature
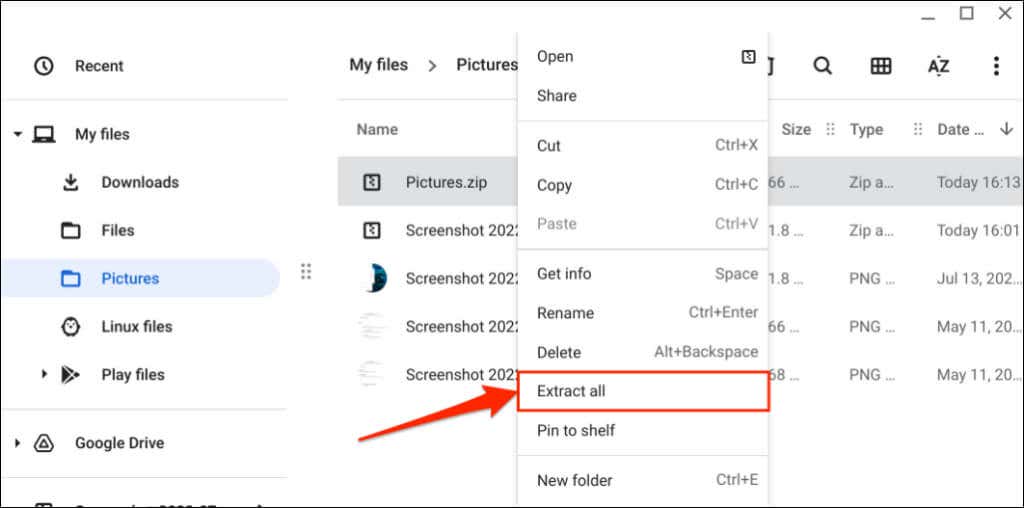
Chromebooks running ChromeOS 101 or newer can directly extract the content of archived/compressed ISO, TAR, and RAR files. Right-click the file you want to unzip and select Extract all on the pop-up menu.
ChromeOS will extract the ZIP file’s content to a folder with a similar name as the original ZIP file. If you unzip a “Pictures.zip” file, your Chromebook extracts the content into a “Pictures” folder.
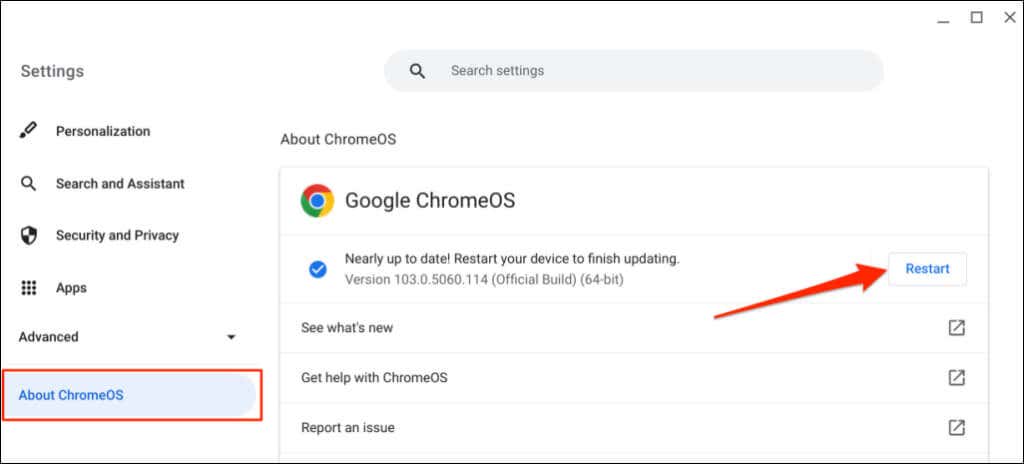
Update your Chromebook if you don’t find the “Extract all” option on the context menu when you right-click a zipped file.
Connect your Chromebook to a Wi-Fi network, open Settings, select About ChromeOS on the sidebar, and select Check for updates. Select Restart to install a pre-downloaded update on your Chromebook.
Unzip Files Manually
This method involves copying and pasting the content of a zipped file to a different folder on your Chromebook.
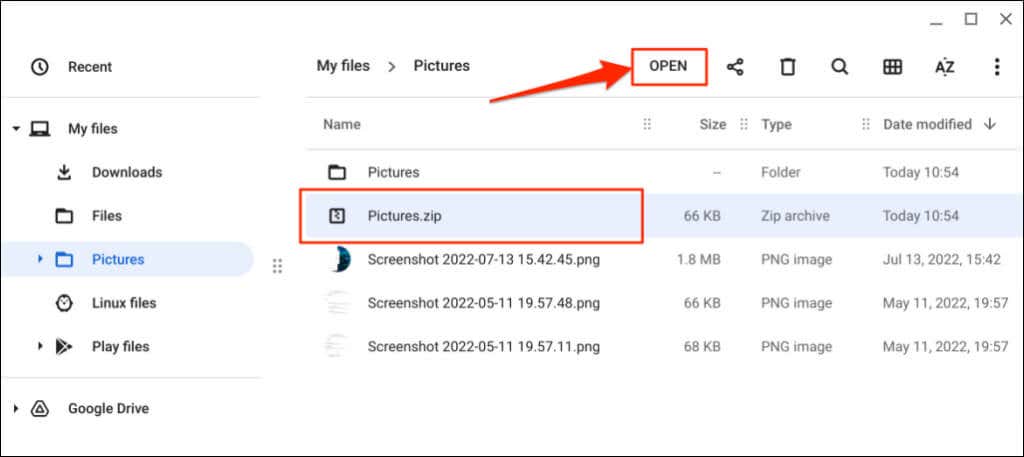
- Double-click the zipped file to access its content. Alternatively, select the zipped file and choose Open on the top menu bar.
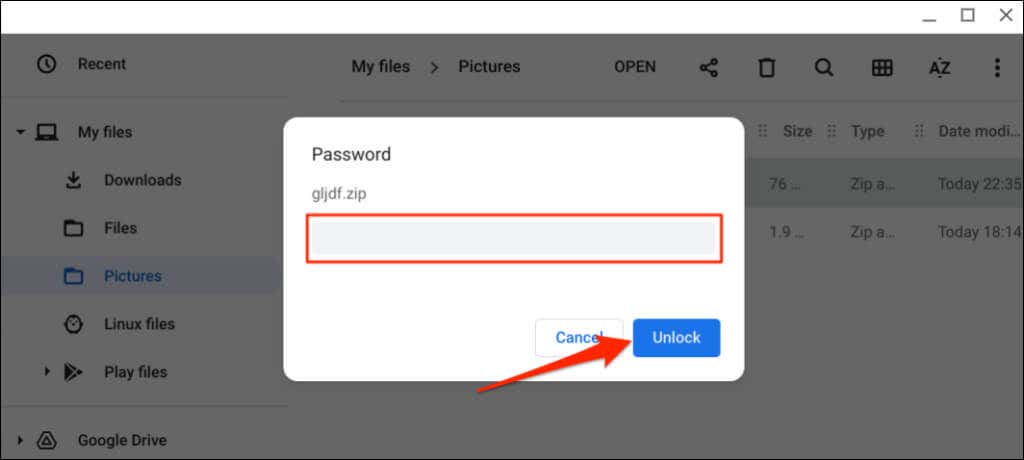
If the ZIP file is password-protected, enter the encryption password and select Unlock.
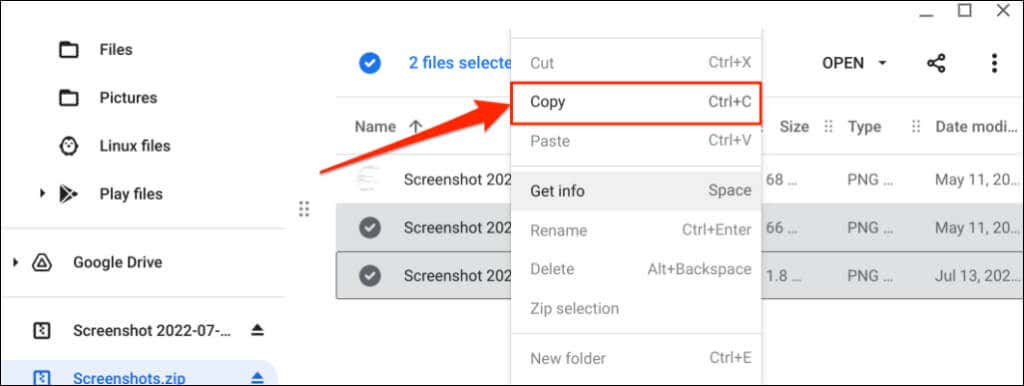
- Select and right-click the file(s) you want to extract and select Copy on the context menu.
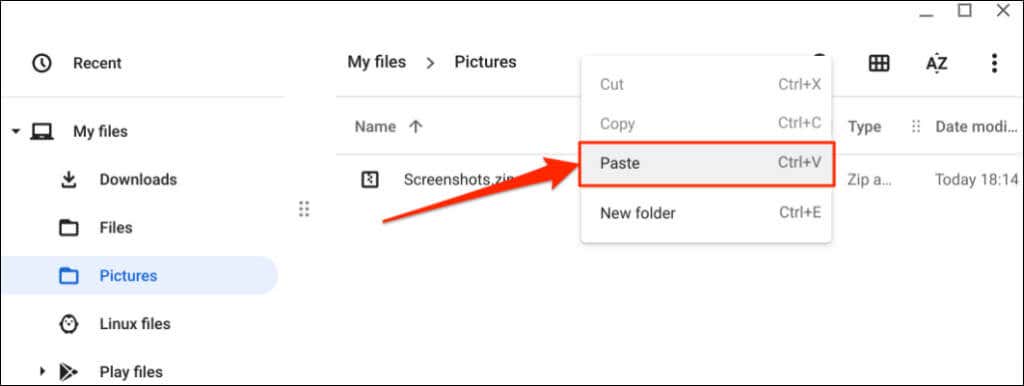
- Head to the location/folder you want to extract the files, right-click anywhere in the folder, and select Paste.
Tip: Use the Ctrl + C and Ctrl + V keyboard shortcuts to copy and paste files on your Chromebook quickly.
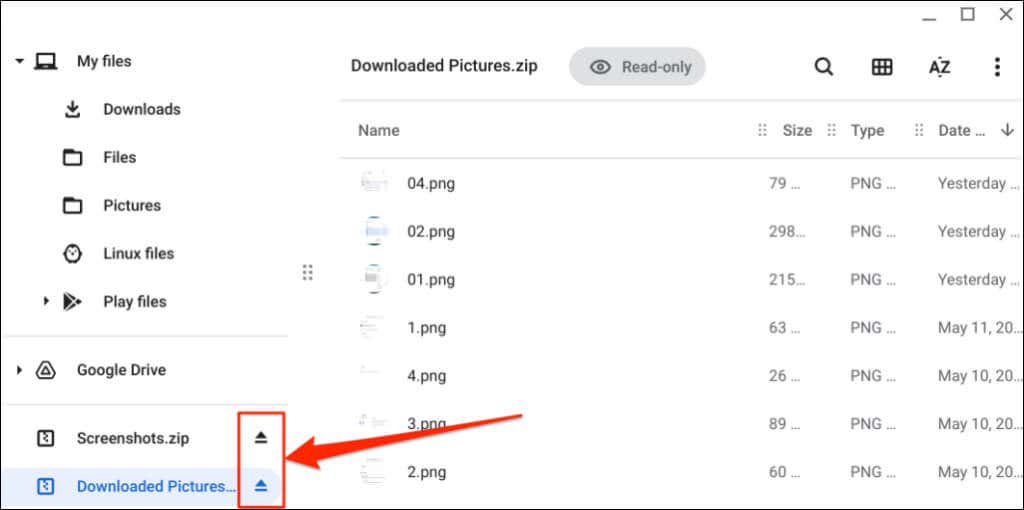
- ChromeOS mounts and displays the ZIP file as an external drive on the sidebar. Select the Eject icon next to the ZIP file after extracting its content.
Enjoy Lossless Compression and Extraction
ChromeOS doesn’t reduce the size or quality of individual files bundled into a single zipped file. There’s also no loss of quality or size reduction in the unzipping process. Restart your Chromebook or update its operating system if you’re experiencing issues zipping and unzipping files.
Related Posts
Sodiq has written thousands of tutorials, guides, and explainers over the past 4 years to help people solve problems with Android, iOS, Mac, and Windows devices. He also enjoys reviewing consumer tech products (smartphones, smart home devices, accessories, etc.) and binge-watching comedy series in his spare time. Read Sodiq’s Full Bio

