In another article, we explained computer ports and what they’re used for. Other than that, what can we do with port information? Since all traffic in and out of the computer goes through ports, we can check on them to see what they’re doing. Maybe the port isn’t listening for traffic? Maybe something is using a port that shouldn’t be?
We’re going to use the Windows command netstat to see our listening ports and PID (Process ID). We’re also going to see what we can do with that information.

What Is Netstat?
The netstat command is a combination of the words ‘network’ and ‘statistics’. The netstat command works in all versions of Windows from Windows XP right up to Windows 10. It’s also used in other operating systems (OS) like Unix and Linux, but we’ll stick to Windows here.
Netstat can provide us with:
- The name of the protocol the port is using (TCP or UDP).
- The local IP address and name of the computer and the port number being used.
- The IP address and port number to which we’re connecting.
- The state of a TCP connection. For details on what these states are, read the Event Processing section of RFC 793.
Using Netstat To See Listening Ports & PID
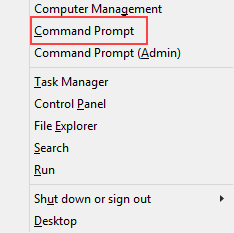
- Use the key combination Win Key + X. In the menu that opens, select Command Prompt.
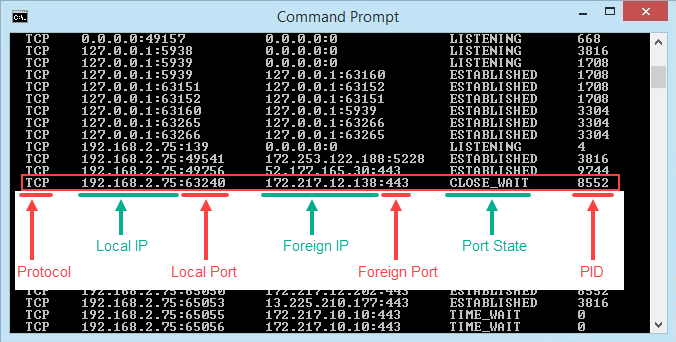
- Enter the command <pre>netstat -a -n -o</pre>. The parameters for netstat are preceded with a hyphen, not a forward slash like many other commands. The -a tells it to show us all active connections and the ports on which the computer is listening.
The -n tells netstat to show the IP addresses and ports as numbers only. We’re telling it to not try to resolve the names. This makes for a quicker and neater display. The -o tells netstat to include the PID. We’ll use the PID later to find out what process is using a specific port.

- View the results and take note of the addresses, port numbers, state, and PID. Let’s say we want to know what’s using port 63240. Note that its PID is 8552 and it’s connecting to the IP address 172.217.12.138 on port 443.
What’s Using That Port?
- Open Task Manager. That’s most easily done by using the key combination Ctrl + Shift + Esc.

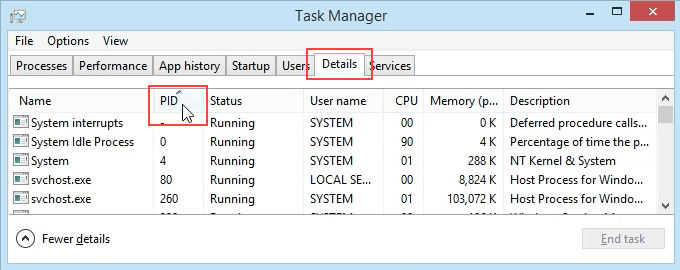
- Click on the Details tab. To make this easier to find, click on the PID column header to sort the PIDs numerically.
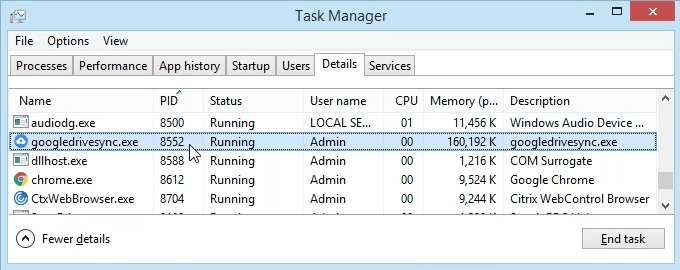
- Scroll down to PID 8552 and see what process it is. In this case, it’s googledrivesync.exe. But is it really? Sometimes viruses can make themselves look like legitimate processes.
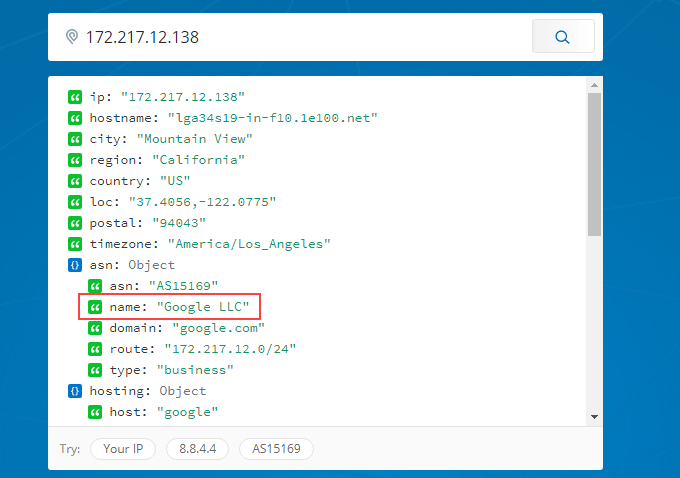
- In a web browser, go to ipinfo.io. Enter the IP address 172.217.12.138. As we can see, the IP address is registered to Google. So this googledrivesync.exe is a legitimate one.
How To Get Port, PID, & Process Name In PowerShell
PowerShell is Microsoft’s newer way to use a command-line interface with Windows. We say newer, but it’s been around for several versions. You should learn PowerShell even if you’re a home user.
Most Windows commands also work in PowerShell, plus we can combine them with PowerShell’s cmdlets – pronounced command-lets. Joe at Winteltools.com provides the script for this method.
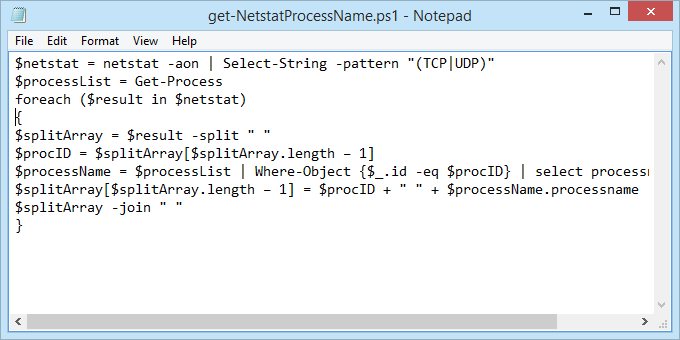
- Open Notepad and enter the following code:
$netstat = netstat -aon | Select-String -pattern "(TCP|UDP)"
$processList = Get-Process

foreach ($result in $netstat) {
   $splitArray = $result -split " "
   $procID = $splitArray[$splitArray.length – 1]
   $processName = $processList | Where-Object {$_.id -eq $procID} |    select processname
   $splitArray[$splitArray.length – 1] = $procID + " " +      $processName.processname
   $splitArray -join " "
}
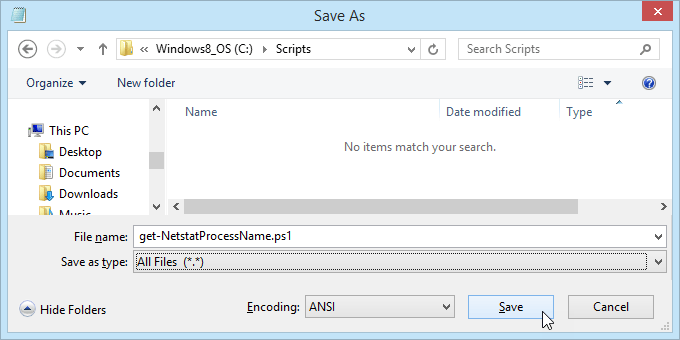
- Save the file as get-NetstatProcessName.ps1. Make sure to note where it’s being saved. It’s important to change the Save as type: to All Files (*.*) or it will get saved as get-NetstatProcessName.ps1.txt and it won’t work for us.
- Open PowerShell and navigate to the location in which the script was saved. In this case, it’s <pre>cd C:\Scripts</pre>. Hit Enter to run the command.

- Run the script using dot-sourcing to make it work. That means use ./ before the name of the file. The command will be <pre>./get-NetstatProcessName.ps1</pre>

- Now we can see all the traditional netstat info plus the process name. No need to open Task Manager anymore.

Go Get Them
We’ve covered two ways to use the netstat command to see listening ports. It can be used either in the old Command Prompt or within a PowerShell script. With the information it can give us, we’ve looked at how it can help us figure out what our computer is doing.
If you thought netstat is a great utility, take a look at some other Windows TCP/IP utilities like tracert, ipconfig, and nslookup. Or use Resource Monitor to get a better look into hidden website and Internet connections. There is a lot you can do to see exactly what your computer is doing.
Have you used netstat to solve a problem? Please tell us what you did. Any questions about how to use netstat? Please ask us in the comments below.
Related Posts
- Preparing for Windows 10 End of Support: Upgrading to Windows 11
- How to Fix a “This file does not have an app associated with it” Error on Windows
- How to Fix an Update Error 0x800705b4 on Windows
- How to Resolve “A JavaScript error occured in the main process” Error on Windows
- How to Fix the Network Discovery Is Turned Off Error on Windows
Guy has been published online and in print newspapers, nominated for writing awards, and cited in scholarly papers due to his ability to speak tech to anyone, but still prefers analog watches. Read Guy’s Full Bio
