Every time you install Linux, you’re given the option to partition your hard drive. This is necessary because – in most cases – Linux needs its own partition to operate.
Partitioning a hard drive is basically slicing the hard drive into separate, discreet sections, each of which is viewed by the computer as an individual hard drive. Partitioning allows Windows to say “this is my disk,” and Linux to say “this is my disk” and since each operating system needs its own file system, problem solved.
Sometimes, however, you may need to partition your hard drive during times when you’re not installing. Maybe you purchased an external hard drive and you’re getting it ready for installation, or maybe you just need to convert some unused space to something usable. For KDE users, a program called KDE Parition Manager, is a fantastic option.
A Few Notes About Partitioning Hard Drives
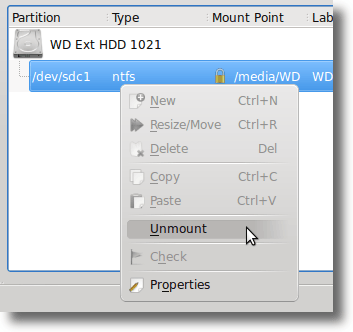
Before talking about KDE Partition Manager, there are a couple things to keep in mind regarding partitioning. First is that you can’t modify an active partition, so if you need to modify a partition, be sure and unmount it first. If you want to modify something on your boot partition, you’ll need to boot your computer using a flash drive or Live CD.
Second, partitioning can cause damage to your files, sometimes accidentally, but other times because of user error. Converting a partition from Ext3 to NTFS, for instance, will effectively erase your hard drive. All those files? Poof. Gone. So be sure to have a backup of your drive before you begin.
Installing KDE Partition Manager
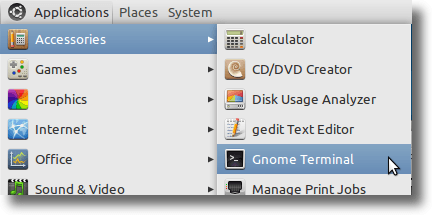
In spite of its name, KDE Partition Manager can be used on any variety of Linux, so whether you use GNOME, KDE, xfce or any other desktop environment, as long as the KDE libraries area available, KDE Partition Manager will work. In Ubuntu, KDE Partition Manager is launched by the “partitionmanager” command, so intalling it is just as easy. First, open up a Terminal:
Then type the following command:
sudo apt-get install partitionmanager
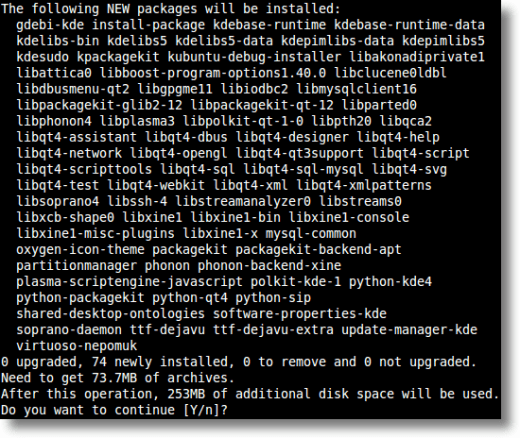
If you’re running a KDE-centric distro, you probably won’t need to install much other than the actual KDE Partition Manager, but if you’re using Ubuntu (which uses GNOME) or Xubuntu (which uses xfce), you’ll likely need to grab a few KDE libraries – which will be installed automatically – in order for KDE Partition Manager to work properly). This is what gets pulled in when installing in Ubuntu:
Once installed, the KDE Partition Manager will be found under the System Tools menu (in GNOME). In KDE, it will be in the System menu. In either environment, it can be launched by typing “partitionmanager” in a Terminal window.
Using KDE Partition Manager
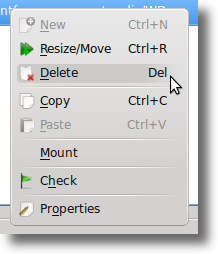
What can KDE Partition Manager do? It can be used to delete partitions, move partitions, resize partitions, and convert partitions.
Once again, be sure to unmount any active partition before doing any work.
Deleting partitions is what you’d expect it to be. Before you start, you have a partition with data on it and when you’re finished, the partition (and data) is gone, leaving only unused space.
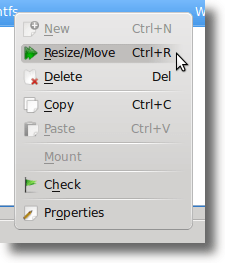
Moving or resizing partitions can be done for a couple different reasons. Maybe you just deleted a partition and want to fill the now empty space with one of your existing partitions.
Or maybe you have a large, mostly-empty partition that you want to shrink to make room for another. In this case, you would resize the partition. Simply choose the Resize/Move option from the menu when the partition you want to edit is highlighted.
Now simply choose whether you want to have free space before or after your partition, and the new size the partition should be.
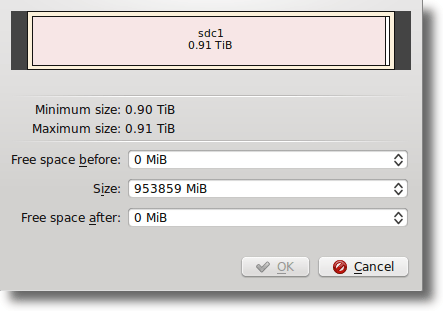
KDE Partition Manager scans your drives before any operations, so if you have more data on your drive than would fit on your resized drive, the operation won’t succeed and wouldn’t be allowed to proceed.
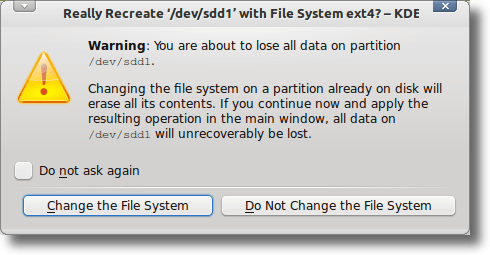
Converting partitions from one file system to another is basically two steps in one. There are many different types of file systems used in computers. Windows uses NTFS, Macs use HFS+, and most Linux distributions use one of the extended file systems: Ext2, Ext3 or Ext4 (and there are many others available, such as XFS and ReiserFS).
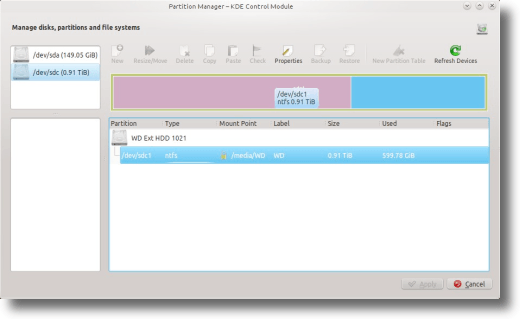
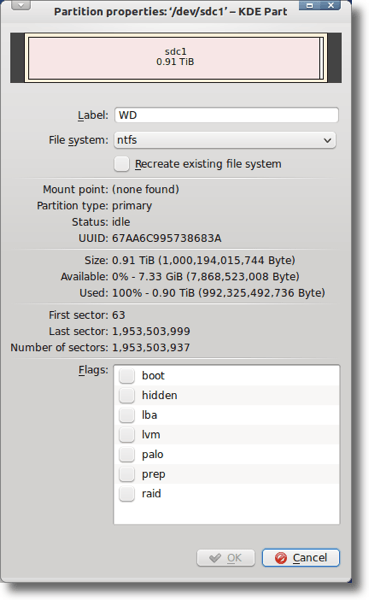
When you convert from one to the other, you’ll lose all the data on the partition, so converting file systems generally means you want to keep a partition in place, but want to use it differently. To access this tool, highlight the partition you want to change, then click the Properties button in the toolbar.
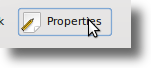
You can also right-click the partition you want to modify, and choose the Properties option from the menu that appears.

This will bring up a large Properties window, which offers the ability to change your partition’s label, file system, view partition information (such as mount point, UUID, size and sectors), and to change flags.
Make your changes and click the OK button, which will bring up a warning dialog like this:
The KDE Partition Editor allows you to do all this and more. You can use it to work on your local hard drives or portable drives. It can make changes as well as check your drives for errors.
You’ll be asked with every step to verify that you want to do an action, and the KDE Partition Manager provides a step-by-step list of actions for each process, so if something does go wrong you can see where the error happened.
Again, partition managers aren’t for the faint of heart. Many people will never use one, or won’t feel comfortable using one even if the need is there. But that’s okay… partitioning isn’t something that’s done on a daily basis.
But the KDE Partition Manager is there, and it’s a good piece of software. If you’re using KDE as your desktop environment and need something to help manage and modify your system’s partitions, the KDE Partition Manger is a great choice.