A picture is worth a thousand words—or so the cliche goes. The right picture, in the right format, can help elevate your Word document.
However, what happens if the picture is correct, but the sizing isn’t? A good way to fix this problem is to crop pictures in Word. You don’t need third-party software to do this, as Word has some built-in tools to help you edit images in your document.
To crop a picture in Word, follow the steps below.
What Is Cropping and Why Do You Need It?
Cropping is the process of cutting out parts of an image that you don’t want to show. You might want to crop a picture of a person to focus on their face or to remove others from view, for instance.
Cropping can help you improve the composition, clarity, and relevance of your pictures. In Word, you might prefer to crop your pictures to help you focus on something important to the section of the document the image is placed in.
You can also crop images to help you free up space in your document or to reduce the file size.
How to Crop from the Margins of a Picture in Word
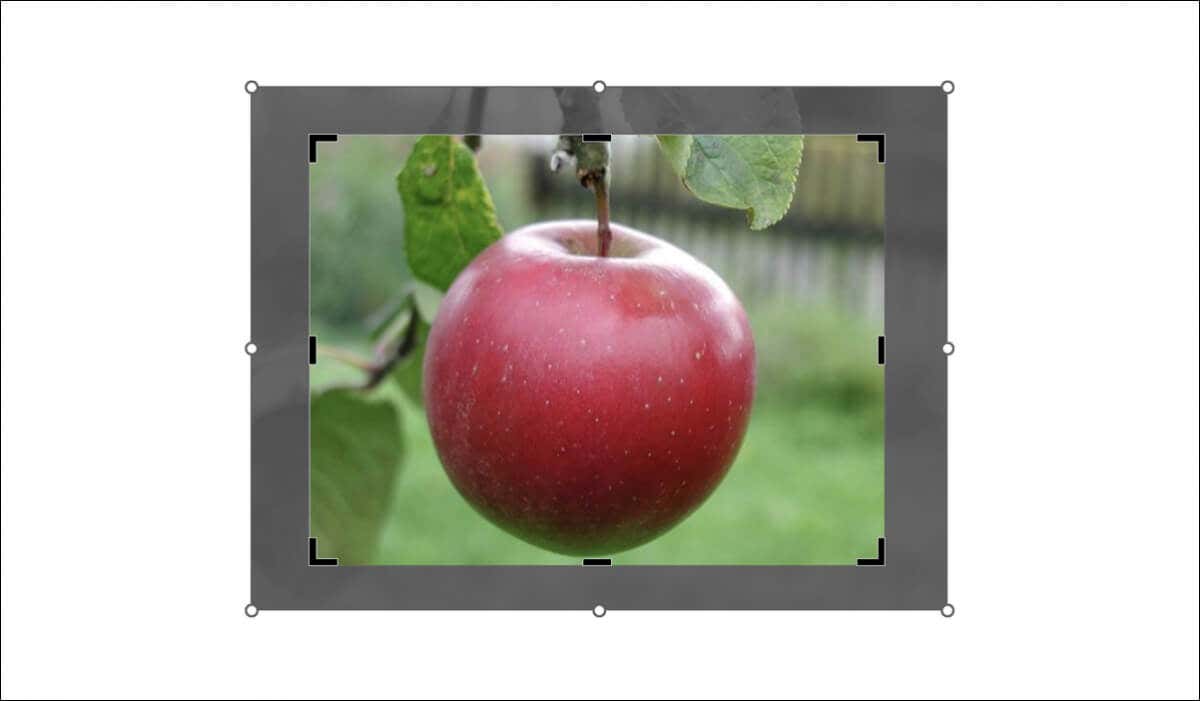
The easiest way to crop a picture in Word is to crop from the margins. This means you can cut off the outer edges of an image, keeping only the section that you want.
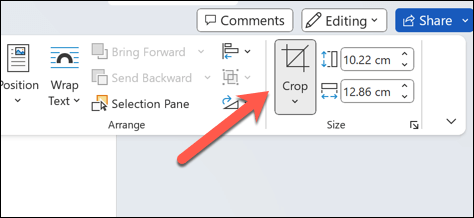
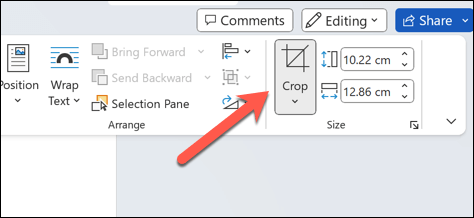
- To do this, select an image in your Word document and press Picture Format > Crop from the ribbon bar. You can also crop a picture by right-clicking on it and choosing Crop from the menu.
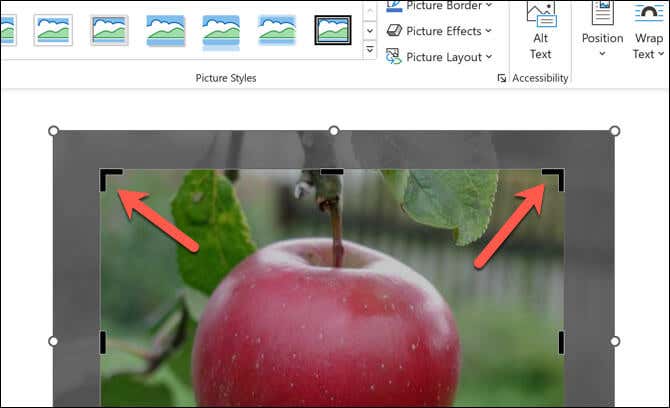
- You’ll see some black handle icons around the image. Drag the handles inward or outward to adjust the cropping area. You can also use the corner handles to maintain the aspect ratio.
- When you’re happy with the result, press Crop again or press Enter to apply the changes.
- The changes will apply instantly. To reverse the changes, press File > Undo before saving the file.
How to Crop to an Image to a Shape
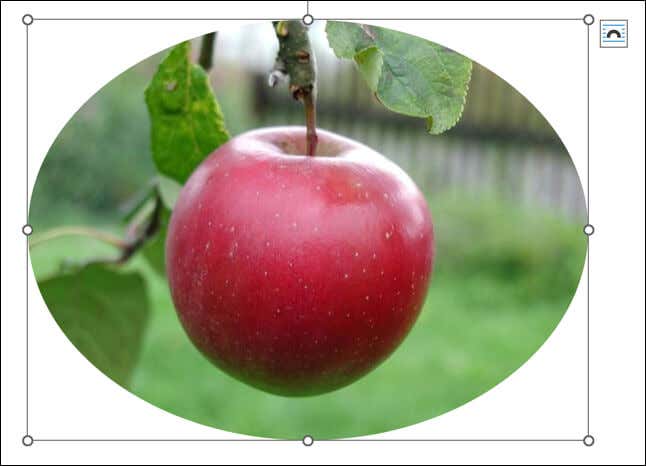
Another built-in method for cropping images in Word is to crop it to a shape. This means you can make your image look like a circle, a star, a heart, or any other shape you want—as long as it’s a shape that Word uses.
- To do this, open your Word document and select your image.
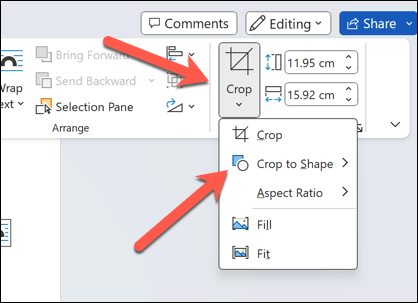
- From the ribbon bar, select Picture Format, then press the arrow next to the Crop option.
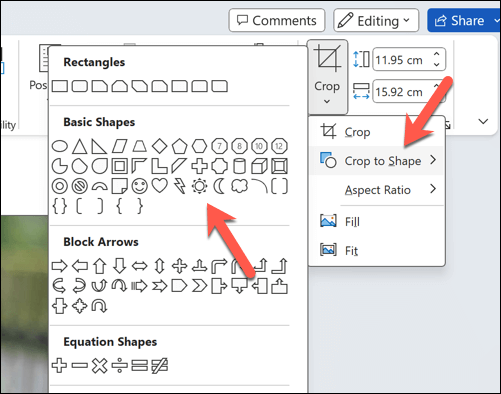
- Hover over Crop to Shape from the drop-down menu. Alternatively, right-click the image and select Crop > Crop to Shape.
- You’ll see a list of shapes you can choose from. Select a shape that suits your image and your document. The image will be cropped automatically according to the shape.
- The change will be applied to the image immediately. To change the shape, repeat these steps to choose a new shape.
How to Crop to an Image to a Common Aspect Ratio
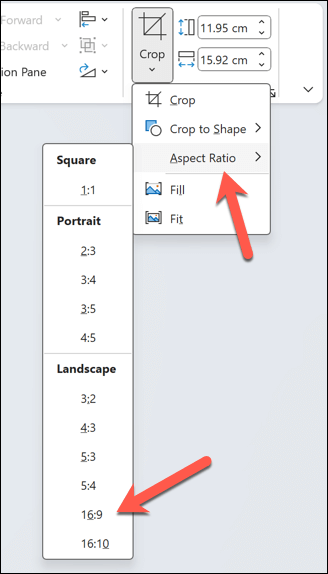
If you have a preferred aspect ratio in mind, you can also crop your image to support that. For instance, you could choose to make your image appear more cinematic by choosing a 16:9 aspect ratio for the image crop area.
This can also be useful if you want to match the dimensions of your image with other elements in your document. To crop an image this way, follow these steps.
- Open Word and select your image.
- Select the Picture Format menu on the ribbon bar.
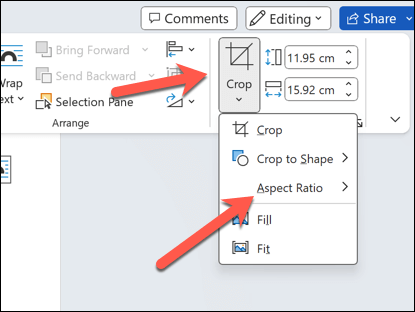
- Press the arrow next to the Crop button and hover over the Aspect Ratio menu.
- You’ll see a list of common aspect ratios you can choose from—select an aspect ratio that works for your image and your document. The image will be cropped automatically according to the ratio.
- Once applied, press the Crop button again or press Enter to save the change.
Editing Your Content in Microsoft Word
Using the steps above, you can quickly crop pictures in Microsoft Word using the built-in cropping tools available to you. If the built-in tools aren’t good enough for what you need, however, you’ll need to edit your images using third-party software like Photoshop or GIMP instead.
Is the image that you’re using in Word in the wrong format? You can convert your Word images to help you use and edit them. You can even save your Word document as an image.
Related Posts
Ben Stockton is a freelance technology writer based in the United Kingdom. In a past life, Ben was a college lecturer in the UK, training teens and adults. Since leaving the classroom, Ben has taken his teaching experience and applied it to writing tech how-to guides and tutorials, specialising in Linux, Windows, and Android. He has a degree in History and a postgraduate qualification in Computing. Read Ben’s Full Bio
