PowerPoint isn’t just a tool for boring, text-heavy presentations. You can use PowerPoint to share all kinds of information, whether it’s an important video you’ve created or a timeline for your current project.
That’s where inserting a calendar into your PowerPoint slides can prove helpful. By inserting a calendar into PowerPoint, you can set up your audience with a list of important dates you need to share in a format they’ll be familiar with (and can easily digest).
There are two easy ways you can insert a calendar in PowerPoint. You can use a pre-made PowerPoint template or manually create your own calendar using a table. We’ll explain how to use both methods below.
How to Insert a Calendar in PowerPoint Using Templates
The easiest method for creating a calendar in PowerPoint is to use a pre-made template. PowerPoint offers several templates you can use and adapt to suit your needs, with pre-applied colors and formatting.
Several calendar templates exist for PowerPoint that you can use as a starting point for your presentation. You can customize the calendar slides to add your information.
There is one major downside, however. First, you’ll need to copy slides from the template into an existing presentation. Secondly, if you have an existing presentation with a design, the template you use won’t match, and you’ll need to adapt it. Alternatively, you can manually create a template using the next steps.
To use a PowerPoint calendar template, follow these steps.
- Open a new or existing PowerPoint presentation and select File > New.
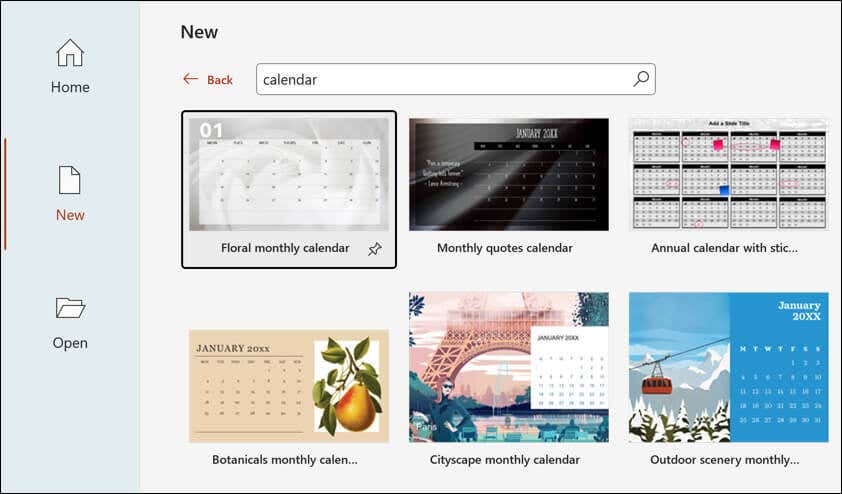
- Type calendar into the search box and press Enter.
- Browse through the available templates and select the one you like the most. Alternatively, you can visit the Microsoft PowerPoint design template website, where there are other calendar templates you can download and use, or find free third-party PowerPoint templates online to use instead.
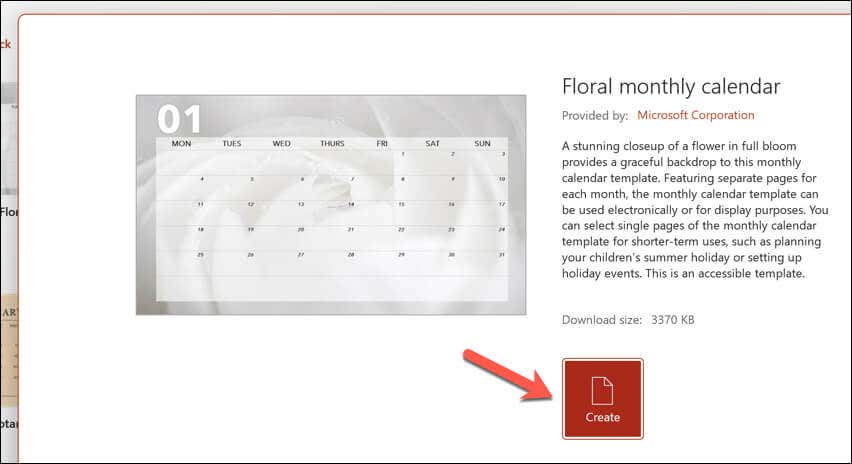
- Once you’ve selected a template, press Create to open the template in a new presentation.
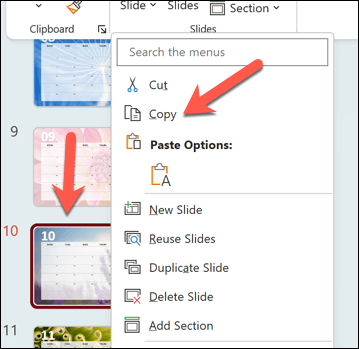
- Right-click the slide that contains the month you want to use and select Copy.
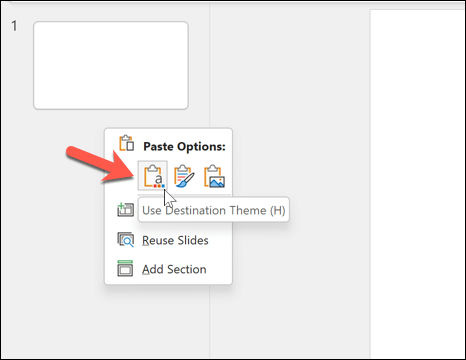
- Go back to your original presentation and right-click between the two slides where you want to place the copied slide, then select Use Destination Theme. This will apply some (but not all) of your PowerPoint theme to the slides, such as the font and formatting styles.
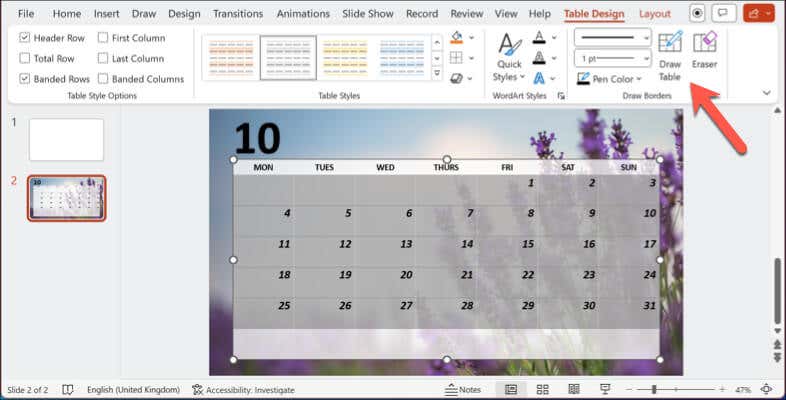
- Once the slide is inserted, make adjustments to the calendar slide you’ve inserted directly or by using the options in the Home, Design, and Table Design tabs on the ribbon bar. For instance, edit the calendar details to include any important events or dates you want. You can also customize the font, colors, and design used on the slide.
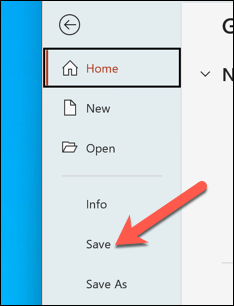
- Repeat these steps to insert further calendar months into your existing presentation. Press File > Save or Save As when you’re ready to save the changes.
How to Manually Create a Calendar in PowerPoint
While a template is a time-saving way to insert a calendar in PowerPoint, it also has one disadvantage—it won’t match your existing slide style. If you can’t find a matching template but prefer to use a calendar in your presentation that fits your style, you’ll need to create one manually.
The easiest way to manually insert a calendar in PowerPoint is to use a table. The grid-like format of a table will allow you to insert a calendar with the necessary dates and information you need to share in a format your audience will instantly recognize as a calendar. You can then format the calendar to match your existing presentation.
Creating a calendar manually using a table gives you more control and flexibility over your design and content. However, completing it requires more time and effort than using a template.
To create a calendar manually using a table in PowerPoint, follow these steps.
- Open your existing PowerPoint presentation and select the slide where you want to insert the calendar.
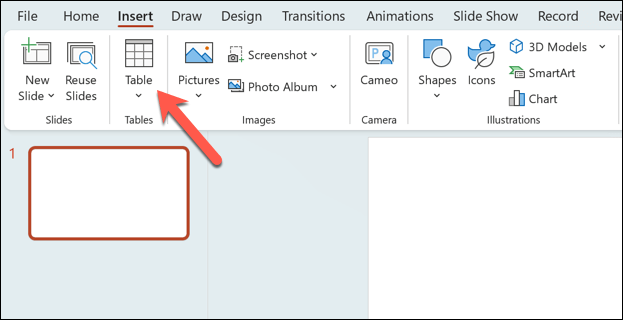
- On the ribbon bar, select Insert > Table.
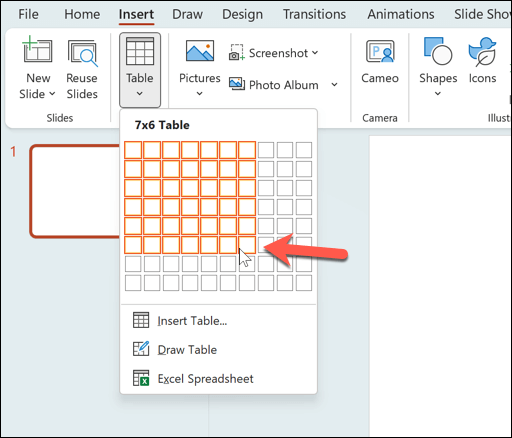
- In the Insert Table pop-up, select enough cells to cover a typical calendar month (with an extra row for the header). You can also choose a longer period to create a non-standard calendar design. For instance, for a typical 7-day week, over five weeks, choose a 7×6 table layout. This will ensure enough room for each day in the month and space for the header row.
- Once the table is inserted, resize and reposition the table on your slide to suit your requirements. You can also add the month’s name to the slide’s text box. If this is missing, press Insert > Text Box to insert a new text box to allow you to do this, or add it to the slide header.
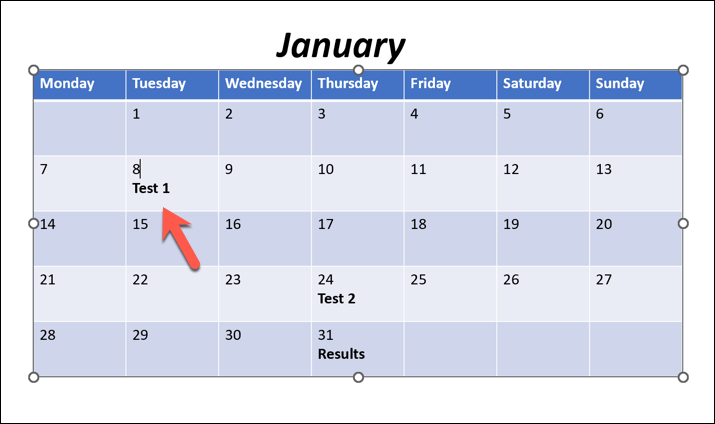
- Next, fill in the table cells with the days of the week or month and any important dates or events you want to make clear to your audience. You can also format the table cells with additional colors, borders, and shading.
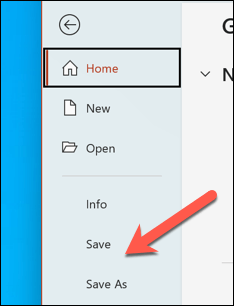
- Press File > Save to save the changes.
Also, you can repeat these steps to create additional slides with tables for further calendar months that you want to insert into your presentation.
Tracking Dates in Microsoft PowerPoint
Thanks to the steps above, you can quickly insert a calendar into your PowerPoint slides. This will allow you to share important events with your audience, but you’ll need to remember to keep your slides up-to-date. Unlike Google Calendar, your slide won’t update automatically—you’ll need to update it for future months and events.
Are you a PowerPoint beginner? You can do other things to get your information across quickly to your audience. For instance, you may want to configure the slide master in PowerPoint to make changes to your entire presentation simultaneously.
Struggling with complex information in your slides? You can also add audio narration to PowerPoint, allowing you to share your slides with your audience to review again later.

