Horizontal lines are a visually appealing way to separate parts of a text and help the document flow better. Lines are one of the easier ways to make your document eye-catching and easy to read.
Here’s how you can insert a line in Microsoft Word to organize your document.
Draw a Line Using Shapes
The first method for adding a horizontal line (or vertical line) in Word is to draw it using the shapes option. To do so:
- Open your Microsoft Word document.
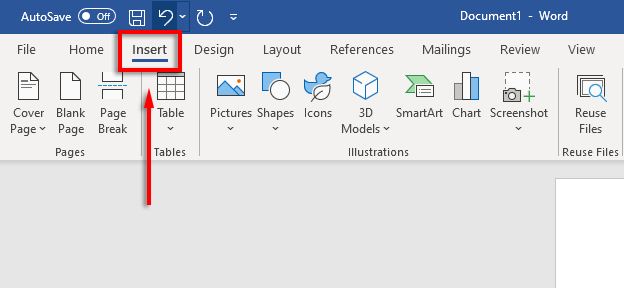
- Select the Insert tab.
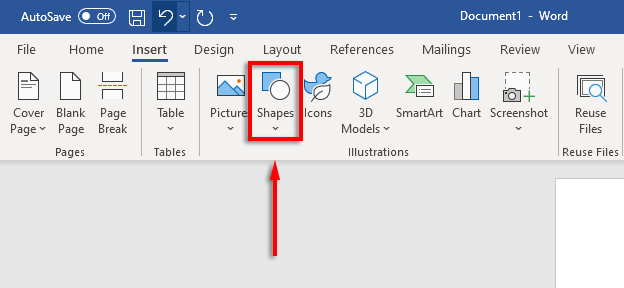
- Click the dropdown arrow under Shapes.
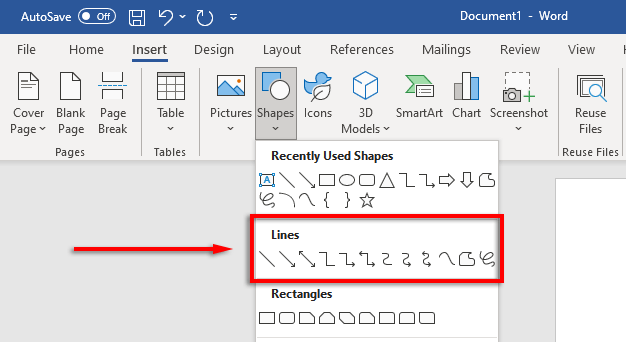
- In the drop-down menu, under Lines, select the line style you would like—the straight line option is usually the best choice.
- Place your cursor where you would like the line to start, then hold and drag the line to where you would like it to end, finally releasing the mouse button. Hold Shift while dragging to ensure that the line stays horizontal.
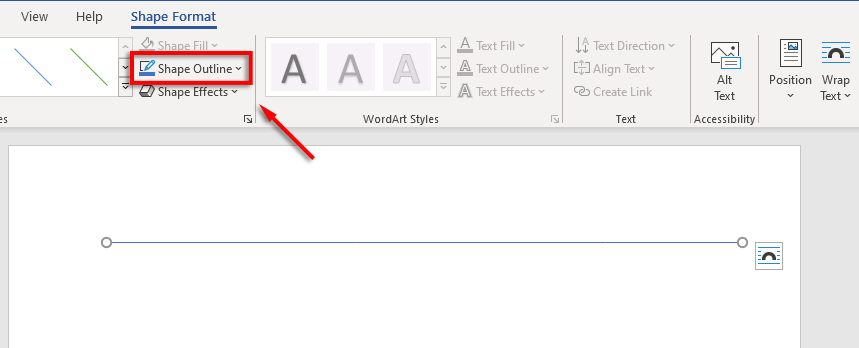
You can then format the horizontal line by selecting the line and then clicking the Shape Format tab (or double-clicking the line).
On the Shape Format tab, you can format the line as follows:
- Add an outline: Select Shape Outline to create an outline for your line.
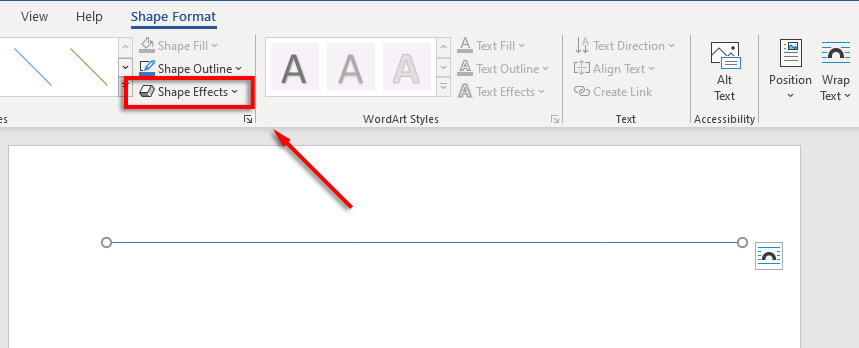
- Add effects: Click Shape Effects to add shadows, reflections, and more to your line.
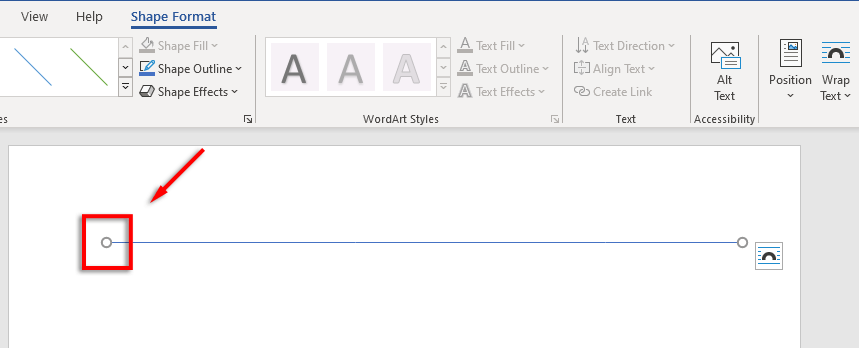
- Change the line size: At each end of the line, you will see two small circles. Click and drag these circles to change the length of the line.
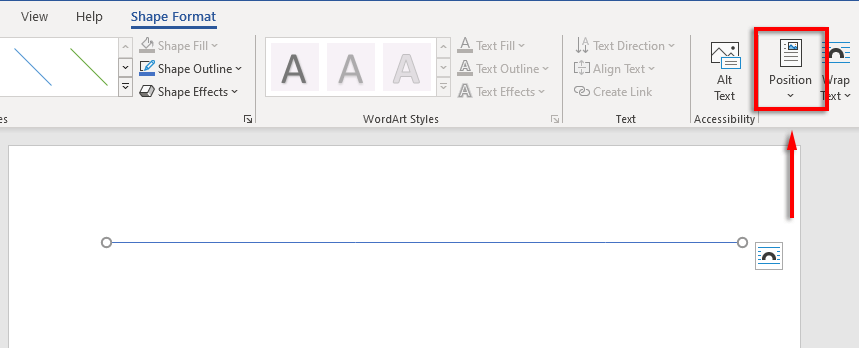
- Align the line with the text: Click Position to set an alignment for the line. For example, if you want it to move with the text, select In Line with Text.
Related: Pesky horizontal lines showing up and you don’t know where they came from? Learn to remove unwanted lines in your Word documents.
How to Insert a Line With Shortcuts
You can also add lines in Word using the AutoFormat feature. Type a few characters, press Enter, and you have a line. This method doesn’t let you format the line, so you just get the basics. But, if that’s all you need, it’s very fast.
To add a line with AutoFormat:
- Place your mouse pointer where you would like to insert the horizontal line.
- For a single, straight line, type three hyphens in a row and press Enter.
- The line will be inserted at the full width of your page.
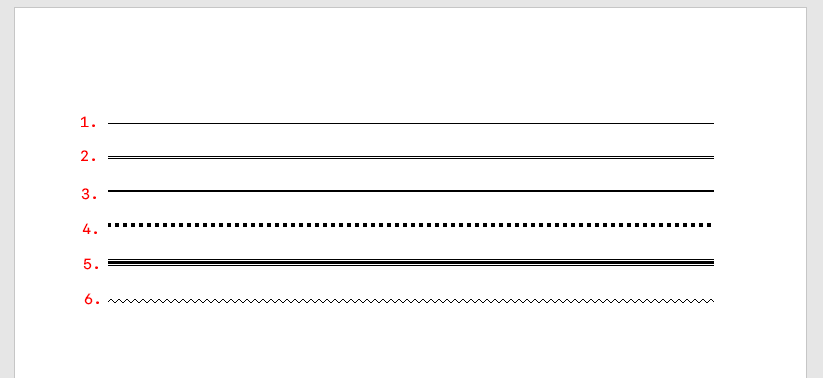
You can also add different line shapes by typing other types of characters and pressing Enter. You can create the following types of lines this way:
- Three hyphens (—) create a single plain line.
- Three equal signs (===) create a plain double line.
- Three underlines (___) create a single bold line.
- Three asterisks (***) create a dotted line of interspaced squares.
- Three number signs (###) create a triple line with a thicker centerline.
- Three tildes (~~~) create a wavy line.
You can then move the line by placing your cursor above the line and pressing Enter as many times as you would like. You can also delete the line by pressing Delete or Backspace.
Note: This feature is only available on the desktop version of Word and is not available in Microsoft Office Online.
Place Horizontal Lines Using Borders
The final way to insert horizontal lines in Word is by using borders. You can use this to easily add borders wherever you like in a page by adding a border to the top or bottom of a paragraph.
To add page borders, place your insertion point in the paragraph where you’d like to add the border and then follow these instructions:
- Click the Home tab.
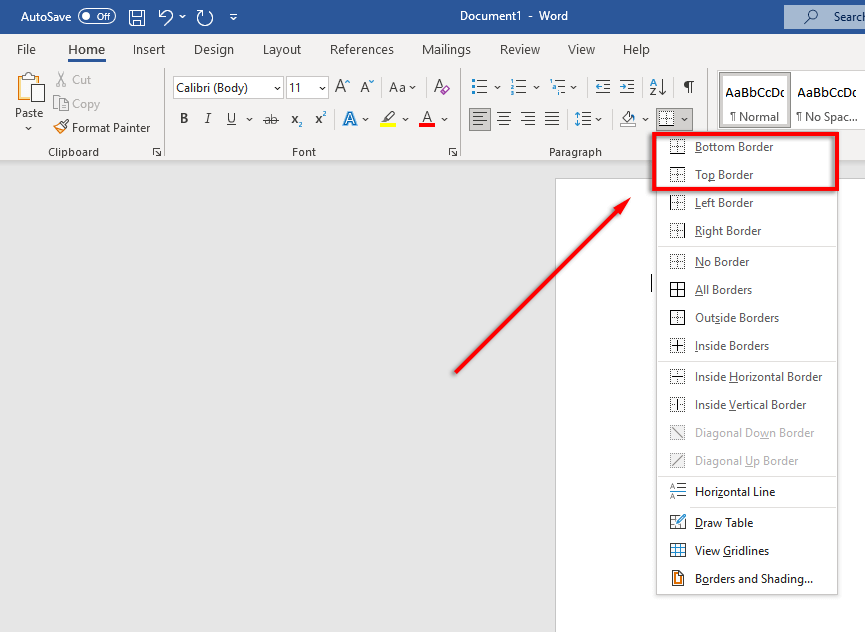
- Select the Borders button.
- Select Top or Bottom Border to insert a border. Alternatively, you can select Horizontal Line.
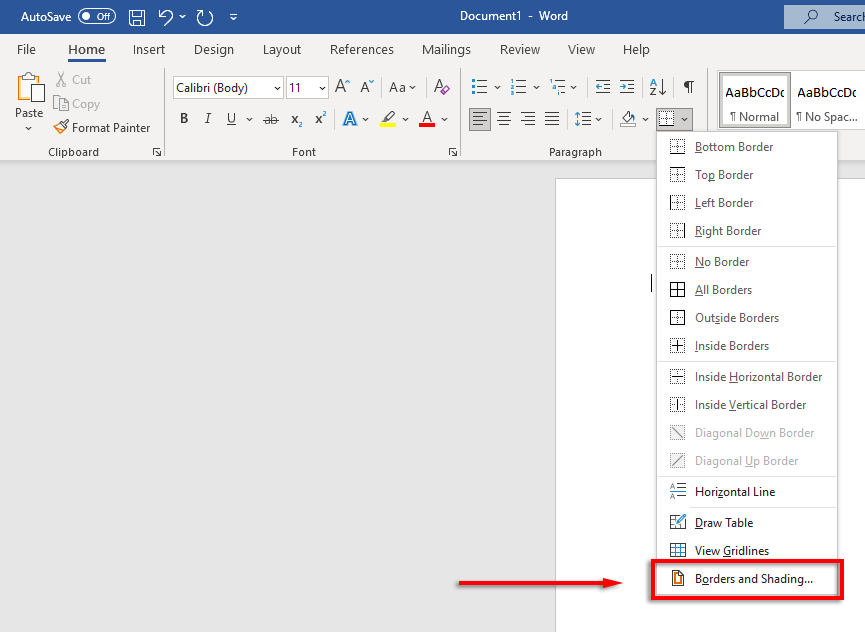
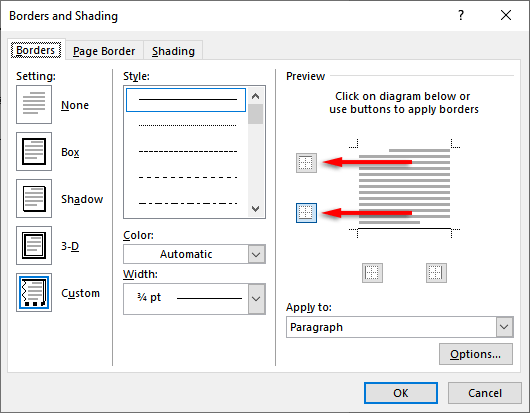
- To alter the border’s width, color, and so on, select the Borders button again and click Borders and Shading…
- You can then use the Borders and Shading window to control the width, color, and style of your border.
Beautiful Documents Here We Come
Learning to format well in Word can convert bland and hard-to-read texts into beautiful, flowing documents. Adding horizontal lines is just one of the many tricks you can use to take your Word documents to the next level.

