Have you ever been working on a Microsoft Word document and wanted to make a comment or annotation? Or perhaps you’ve completed some work on your document, and now need to edit or delete an existing comment? If so, don’t worry, in this article, we’ll show you how to insert comments into your Microsoft Word documents as well as how to edit or delete existing ones.
Where Are the Comment Tools in Word?
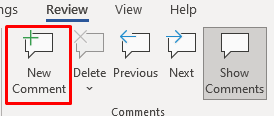
Once you open Microsoft Word you’ll find the comment tools in the Review tab. There are two different groups of tools dedicated to commenting. The first one is the Comments group, which lets you add a new comment, delete one, navigate to the next or the previous comment, and display all comments at once. The second is the Tracking group, which is dedicated to tracking the changes to the text and comments. But it also contains tools for changing how the comments are displayed in the document.
How to Insert a Comment
There are three ways to leave a comment in newer versions of Microsoft Word. You can use the “New Comment” tool in the Review tab, the “Comment” tool in the Insert tab, or you can use a keyboard shortcut. So let’s start with the first method:
- Select the text you want to comment on. The selected text will be marked as a comment scope. It is a part of the text to which the comment refers to.
- Go to the Review tab.
- Select New Comment.
That’s all that there is to it. You successfully inserted a new comment. You’ll now see a dialog box, also known as the markup area, opened in the margin of the document. This margin is referred to as the Reviewing Pane. Go ahead and type your comment. When you are done with the comment, press the Esc key to return to the text of the document. You can also just click your mouse anywhere in the text of the document.
Now here’s the alternative way to insert a new comment:
- Select the text.
- Go to the Insert tab.
- Select Comment.
Now leave your comment.
And finally, you can insert a comment by using the Alt + Ctrl + M shortcut on the selected text.
How to Reply to a Comment
Adding a reply to an already existing comment is pretty straightforward.
- Select the comment box of the already existing comment.
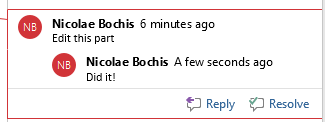
- Select the Reply button below the comment text.
- Type your reply and press Esc when finished or left-click anywhere in the document’s text area.
Replies to a comment are displayed below the original comment.
You can add as many replies as needed. But keep in mind that all second-level comments will be displayed on the same level. It will appear as if they are all replies to the original comment, even if you click on the Reply button under the already existing reply comment.
How to Edit a Comment in Word
Editing a comment is simple. Just click anywhere in the markup area of the comment you want to edit and make the changes you see fit. You can add more text, delete what’s extra, or modify it in any other way.
Resolving a Comment
In Microsoft Word, you can mark a comment as resolved. Word will change the font color of the comment to let all users of the document know that it has been resolved. Marking comments this way can help you keep track of your edits.
To mark a Word comment as resolved follow these steps:
- Select the comment you want to mark as resolved and click anywhere on its text.
- Select the Resolve button that appears below the comment text.
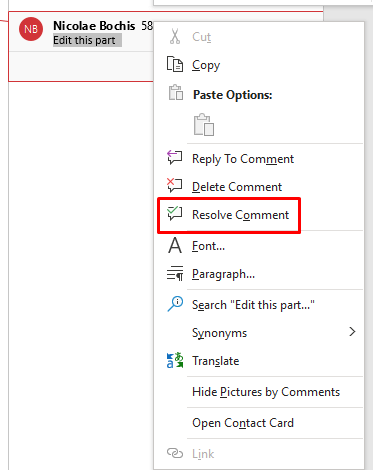
You can also right-click on the comment and select Resolve Comment from the drop-down menu instead.
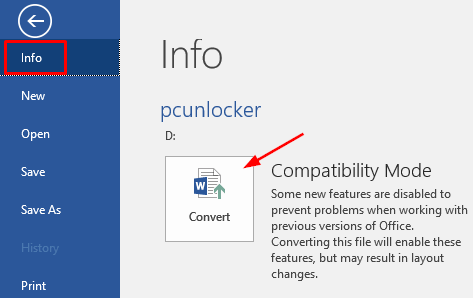
Note that the Resolve button may be grayed out. In that case, you can’t resolve the comment. When this happens it can mean that the document was made in Word 2010 or an earlier version. “Resolve comment” is a feature introduced in Word 2013. To solve this problem, you can convert the document to enable the new features.
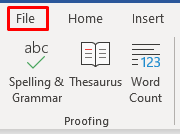
- Go to the File tab in the ribbon.
- Choose Info in the side menu, and then select Convert.
- Save the newly converted document.
Remember that converting a document can result in some unexpected changes in its formatting. The most common change is the width of tables due to the difference in handling the cell margins between different Microsoft Word versions.
How to Delete a Comment in Word
You can delete one comment at a time, or delete them all at once from the same document. If you delete a comment that had replies, all the replies will be deleted as well. However, if you only delete the reply, the main comment will remain intact.
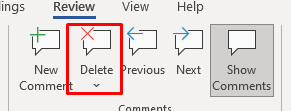
To delete a single comment follow these steps:
- Click anywhere in the comment text.
- Go to the Review tab and select Delete.
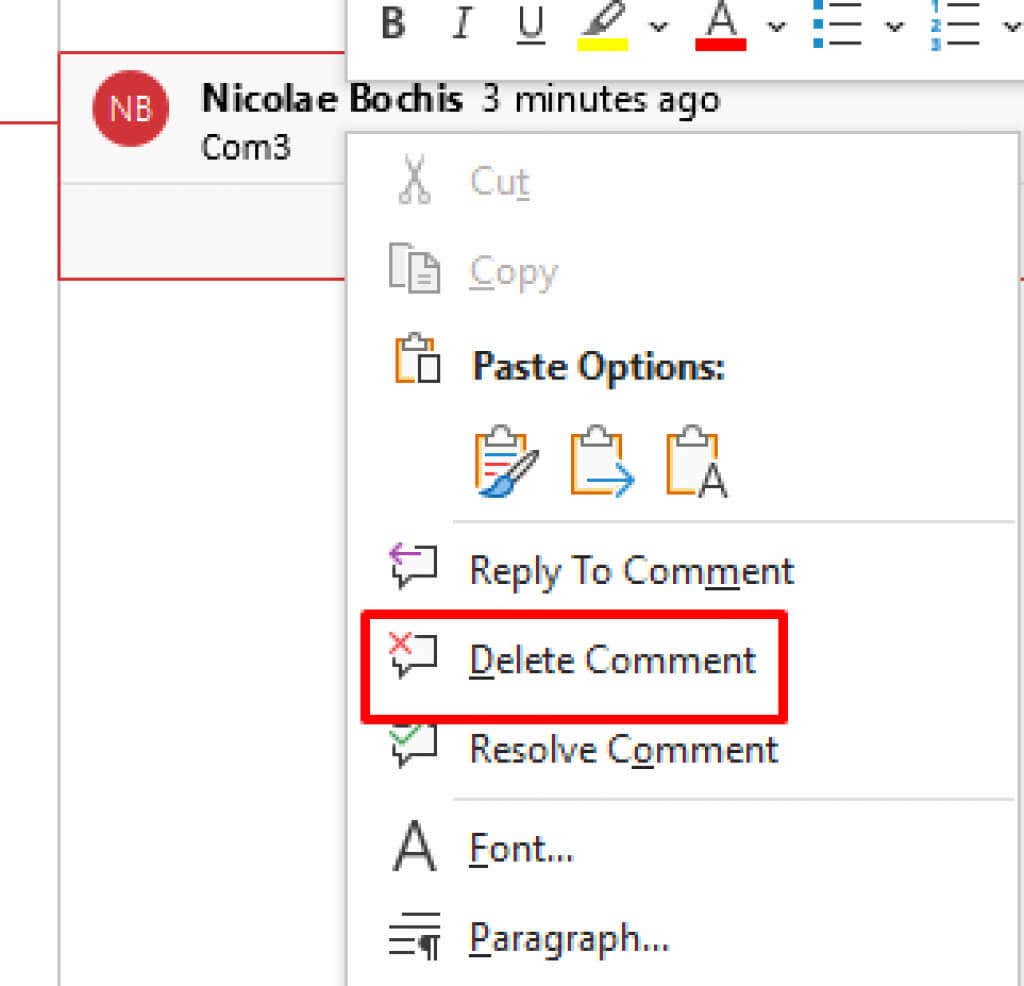
The alternative is to right-click on the comment you want to delete and select Delete Comment from the menu.
You can repeat this step to delete as many comments as you want.
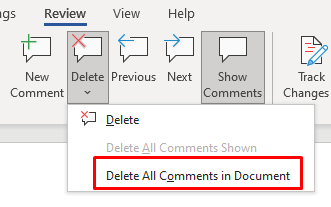
To delete all the comments in a single document at once follow these steps:
- Go to the Review tab without selecting any comment.
- Click the down arrow under the Delete button.
- Select Delete All Comments in Document from the drop-down menu.
Note that no version of Microsoft Word has a tool to delete only the resolved comments. To do this, you’ll have to manually delete individual comments that are marked as resolved.
How to Hide Comments
If you need to hide the comments temporarily instead of deleting them you should opt to hide them. There are two methods to do this. The first one will hide comments, but continue displaying changes marked as tracking changes. The second method will hide comments as well as tracked changes.
Method 1:
- Go to the Review tab.
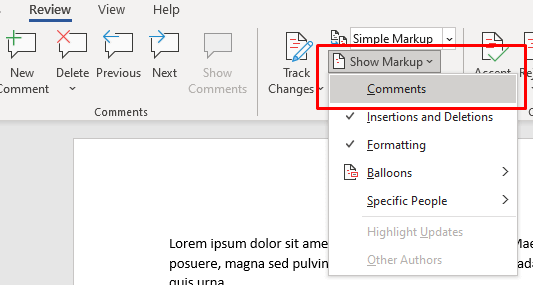
- Go to the tracking group and select Show Markup.
- Choose Comments. Now if you go back to the same menu, you’ll see “Comments” without a check mark, which means they are now hidden.
Method 2:
- Go to the Review tab.
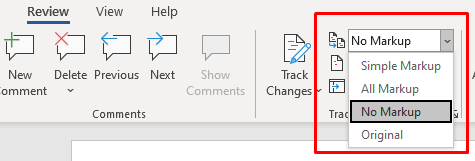
- Go to the tracking group and choose No Markup in the Display for Review section.
What if You Can’t See Comments?
If you know that your Word document has comments, but you can’t see them, they are probably hidden. This also applies to the revisions made with track changes. The following steps will set the comments to be displayed:
- Go to the Review tab.
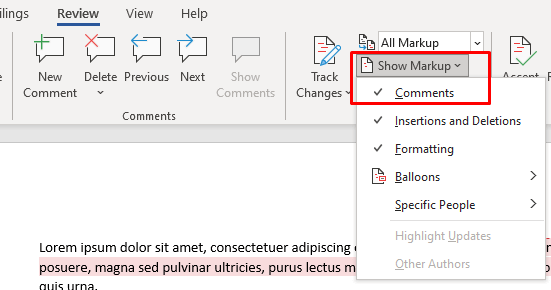
- Go to the tracking group and choose All Markup or Simple Markup.
- Then select Show Markup, and make sure that Comments are checked.
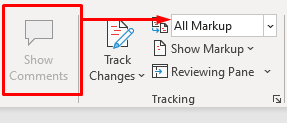
By following the steps described above you should be able to see the comments in your Microsoft Word document. But if they still won’t display go to the Comments group in the Review tab and check if the Show Comments feature is grayed out. If it is, you won’t be able to use it. This happens sometimes if the Display for Review section is set to All Markup.
To fix this, set it to Simple Markup.
Now that you know how to insert, delete, or edit a comment in Microsoft Word, you can make changes to your document with ease. If you have any other questions about using Microsoft Word, leave us a comment down below and we’ll try to help you out.


