If you’ve ever struggled to keep your carefully positioned images from moving around when editing Microsoft Word documents, you’re in the right place. Images tend to move after you add text. If your image moves, it can change the whole layout of the document and ruin all your formatting.
Knowing how to lock an image in Word is a game-changer, especially when you want to maintain precise layouts, create professional-looking documents, or protect your content’s visual integrity.
1. Lock an Image in Microsoft Word with the Position Anchor Tool
The anchor tool literally anchors the image to the fixed position in the Microsoft Word file. Once anchored, the image won’t be able to move, not even if you try to move it manually. You’ll first have to remove the anchor.
Follow these steps to lock an image into the position with the anchor tool:
- Open the Microsoft Word file you’re working on and place a cursor where you want to insert the image.
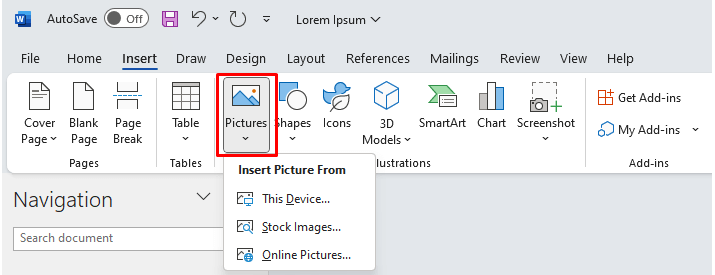
- Select Insert from the Ribbon at the top of the document.
- Select Pictures, and choose to insert an image from your device, or from stock images.
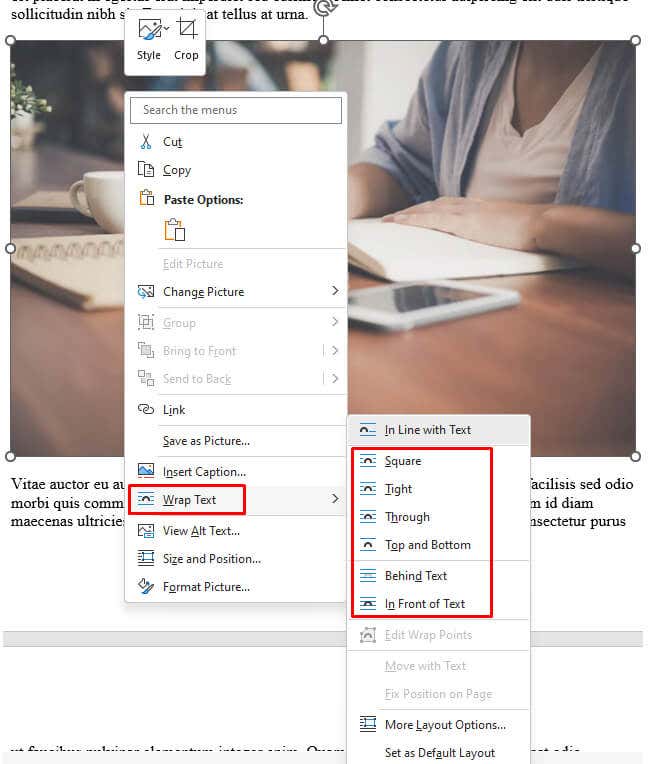
- Once the image is in the document, right-click it and select Wrap Text from the menu.
- Choose the text wrapping style, it can be any except In Line with Text (the default setting).
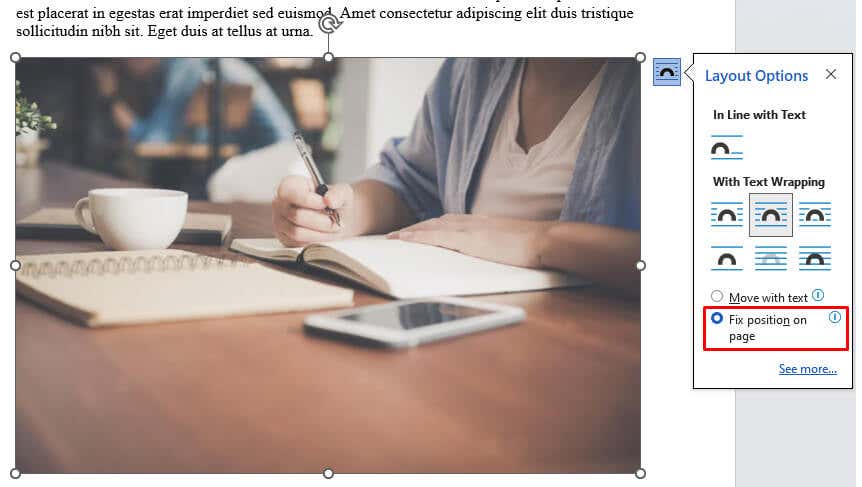
- Select the image so that the semi-circle icon shows up.
- Click on the semi-circle icon and tick the Fix Position on Page option. This will ensure your image stays fixed in the position.
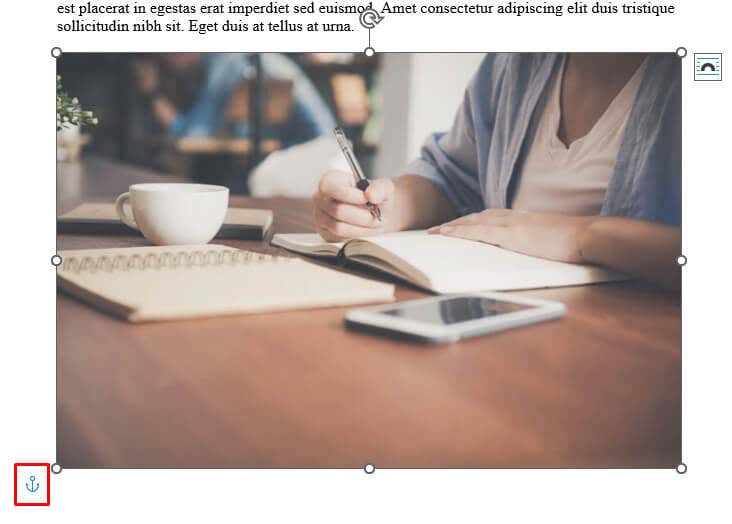
You’ll notice a little anchor to the bottom-left side of the picture each time you select it. It means that the image is anchored to this specific position in the Word document.
2. Lock an Image in Microsoft Word with the Watermark Feature
This method is preferred if you have an image set as the background of your document. The Watermark feature will secure it in place, and prevent you from accidentally dragging the background image around. Here’s how you can use the watermark feature in MS Word to set an image as locked background:
- Launch your Microsoft Word Document.
- Select the Design option from the Ribbon.
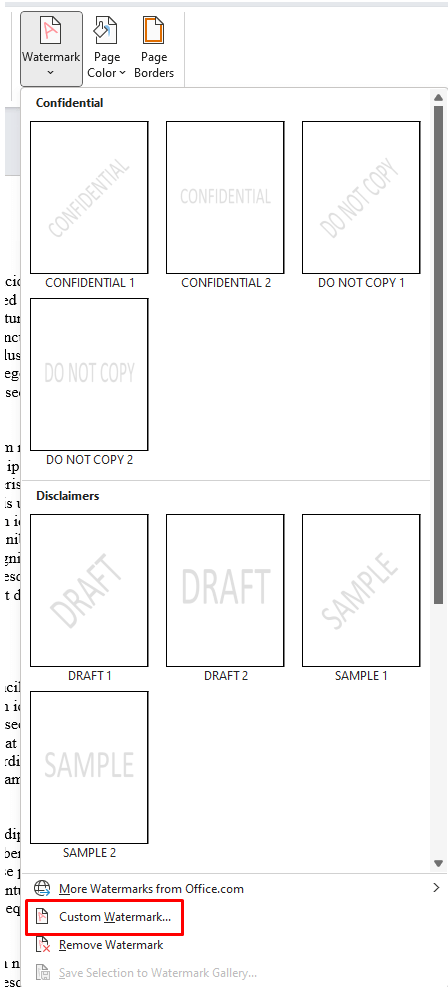
- Select Watermark from the Page Background section.
- Select Custom Watermark from the drop-down menu.
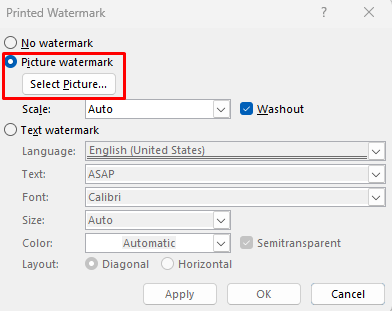
- A dialog box will pop-up. Select the Picture watermark and then click on Select Picture just underneath.
- Choose the preferred image source (file, Bing, or OneDrive) from where you’ll import it.
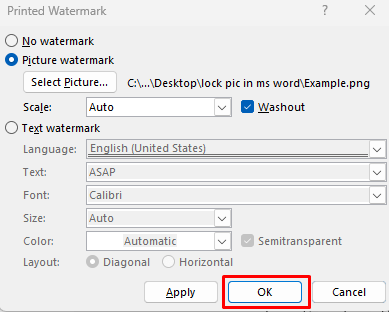
- Click the OK button once the Watermark feature records the chosen path to the image.
The selected picture will now be displayed as a locked Document background image.
3. Lock an Image in Microsoft Word with Restrict Editing Feature
If you want to protect an image so that other people who have access to your document can’t move it around, you can use the Restrict Editing feature. This will put password protection on the selected image. However, other content of the document will also be locked. That’s why you should use this feature if you intend to share your document with others, but don’t want them to make any changes.
Here’s how you can password-protect your document with Restrict Editing feature:
- Open the MS Word document you are working on.
- Select Insert from the Ribbon.
- Select Pictures, and find the image you want to insert in the document.
- When the image is placed in the document, select the Review tab from the Ribbon.
- Select Restrict Editing in the Protect group.
- From the side panel that just launched, tick the Formatting Restrictions and Editing Restriction checkboxes.
- Click Yes, Start Enforcing Protection option at the bottom of the menu.
- In the dialog box that opens, enter the password of your choosing and click OK to save it.
Make sure to remember the password you just set so you can edit this MS Word document at a later time.
4. Lock an Image in Microsoft Word with Developer Tab’s Picture Content Control Feature
The Developer tab is available in Microsoft Word versions 2010, 2013. 2016, and 2019. It’s also available on Word for Microsoft Office 365. If you don’t see it on your ribbon, perhaps you just need to set it to be displayed. Here’s how:
- Open the Microsoft Document you are working on.
- Select File from the Ribbon.
- Go to the Options, at the very bottom of the MS Word.
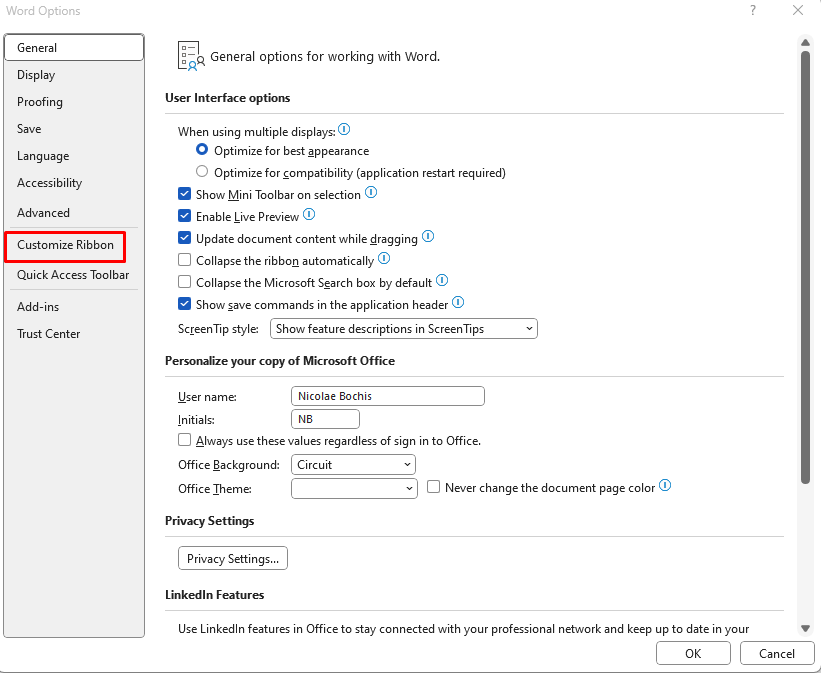
- Select Customize Ribbon from the side menu.
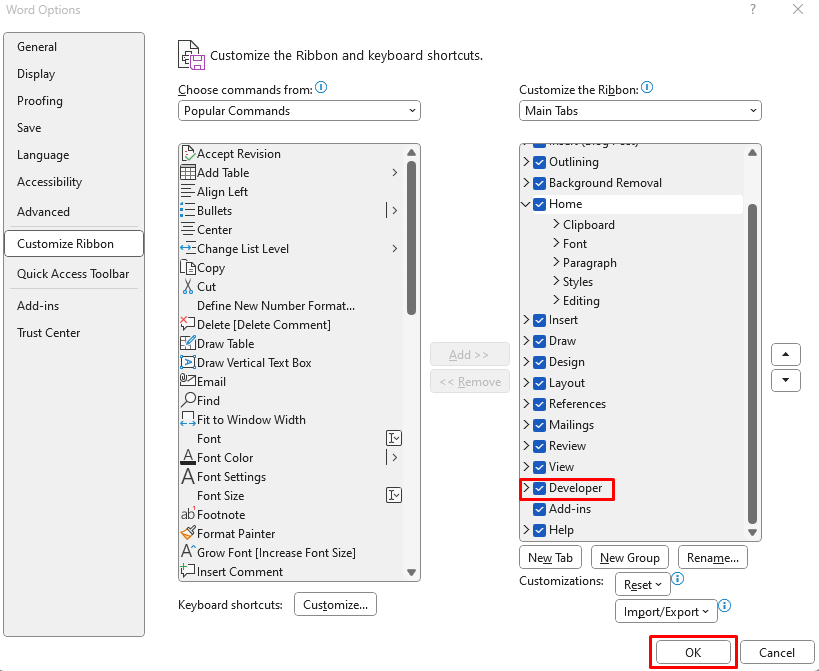
- Check the box next to the Developer in the right column called Main Tabs, and select OK at the bottom to save the change.
Now that you have the Developer tab on the Ribbon, you can proceed to use it to lock an image in your Microsoft Word document. Here’s how:
- Select the image in the document you want to lock.
- Select the Developer tab from the Ribbon.
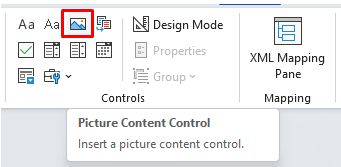
- Select Picture Content Control from the Control Group. It’ll be represented by an image icon.
This is enough to lock the image in the fixed spot in the document.
5. Lock an Image in Microsoft Word with Header and Footer
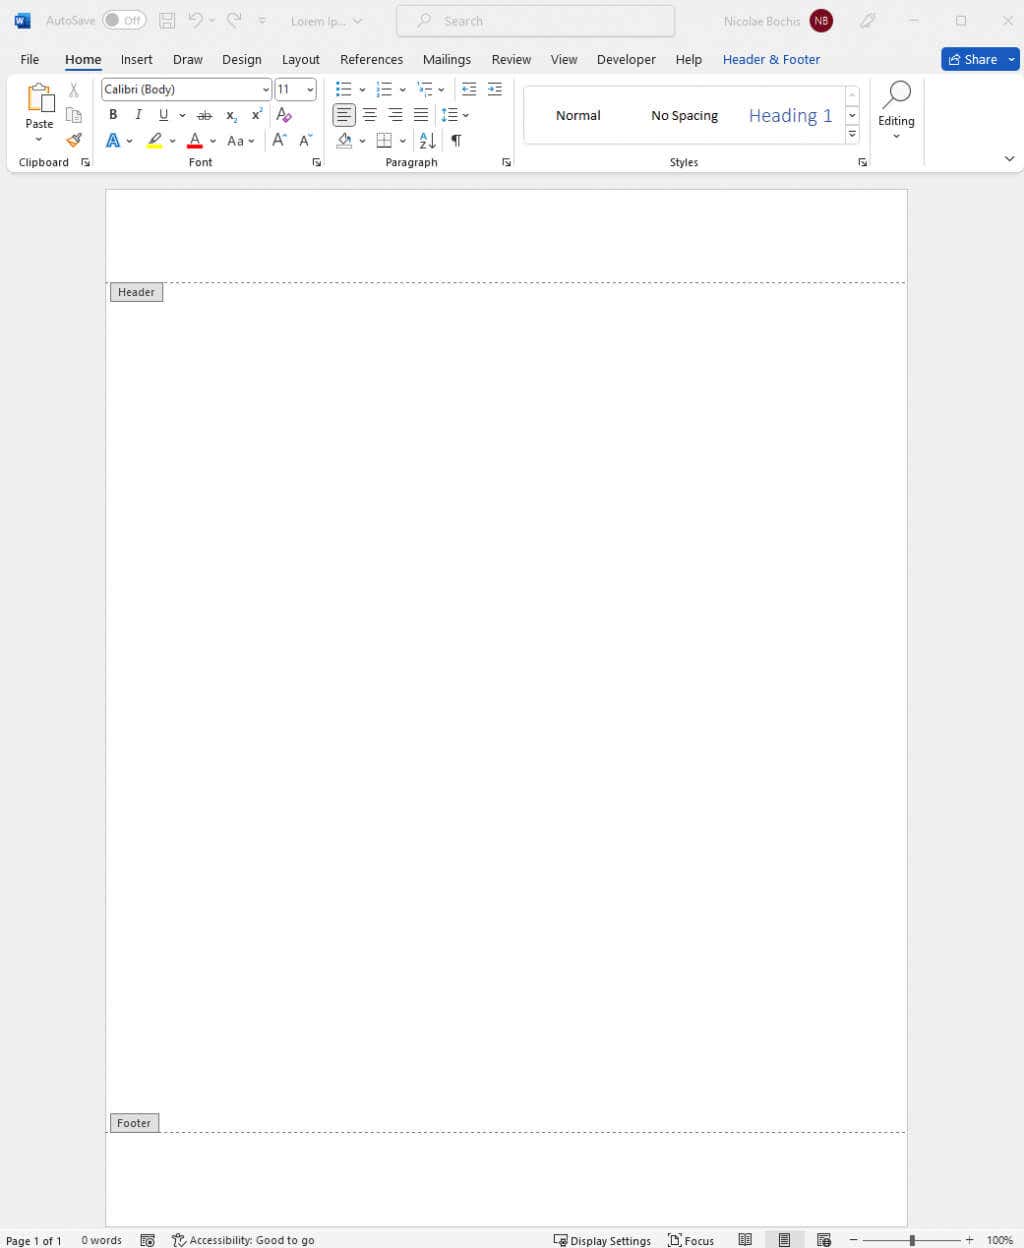
You can use Header and Footer options in Microsoft Word documents to lock an image in place. If you do that, you need to understand that your images will be displayed at the very top or the very bottom of the page, and you won’t be able to move them around. That’s because the header is the topmost area of the page and the footer is the bottom area.
This is a good method of locking an image in place while still being able to manipulate other content as you want.
- Launch your Microsoft Word Document.
- Double-click the Header or Footer area to open it. Place your cursor inside the Header or Footer, wherever you want your image to be.
- Go to the Insert tab on the Ribbon and select Pictures.
- Proceed to insert an image as explained in the first described method.
Your image will appear inside Header or Footer, depending on which one you placed your cursor in.
Close the Header and Feature by double-clicking the document page. This will allow you to continue working on your Microsoft Word file.
And that’s it! Always lock your images in Microsoft Word to prevent messing up your page layout later on. Manipulating images in Word has always been tedious, but it doesn’t have to be any longer if you apply the steps above.
Related Posts
Nicolae is a Jack of all trades technology writer with a focus on hardware, programming languages, and AI image-processing software. Over the last five years, he has ghostwritten numerous tech how-to guides and books on a variety of topics ranging from Linux to C# programming and game development. Nicolae loves everything that has to do with technology and his goal is to share his knowledge and experience with others. Read Nicolae’s Full Bio
