Making a table in Microsoft Word can be tricky, but with just a few simple steps, creating and customizing one for your needs is easy. In this article, we’ll teach you how to make a table in Microsoft Word and customize it perfectly.
Tables are a handy tool for organizing data, making data calculations using formulas, displaying information in an eye-catching way, or even creating visually appealing charts and diagrams to help break up long paragraphs of content.
How to Create a Table
There are seven ways to import a table into an MS Word document. You can create them from scratch by drawing, inserting a graphic grid, using the insert function, adding a new Microsoft Excel spreadsheet table, inserting an existing Excel Spreadsheet table, using Quick Tables, or converting the existing text into a table.
No matter which option you choose, you’ll have to first open your Word document, find a spot where you want to insert the table, and click your cursor on that spot. Let’s use the above-mentioned methods to create a table in Microsoft Word.
Create a Table with Graphic Grid
This is one of the simplest ways of creating a Microsoft Word table. Follow these simple steps:
- Go to the Insert tab on the ribbon and click the Table button.
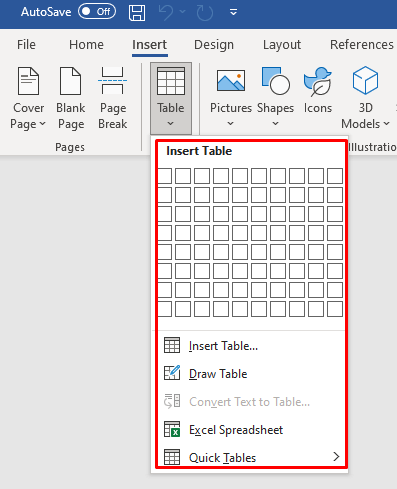
- When the Insert Table dialog box opens, it’ll show a basic grid pattern and menu options below it.
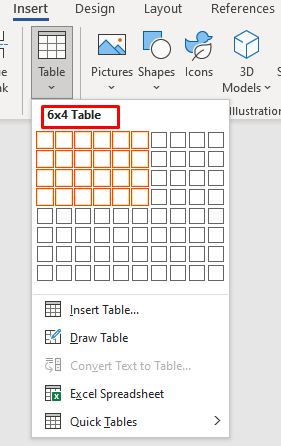
- With the cursor, select the first grid cell and slide it down to select the number of columns and rows you want. As an example, choose six columns and four rows.
- The table will be automatically created in the document.
Once there’s a table in your document, you’ll notice two new tabs on the ribbon: Table Design and Layout. You can use these tabs to modify and stylize your newly created table. More on that later.
Create a Table with the Insert Function
Using the insert function is as easy as selecting your table layout from the grid. Here’s how it works:
- Go to Insert, then press on Table.
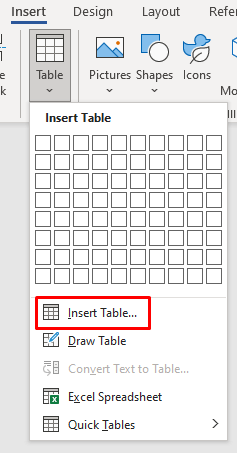
- Instead of dragging your cursor to select the grid, select Insert Table from the menu just below the grid.
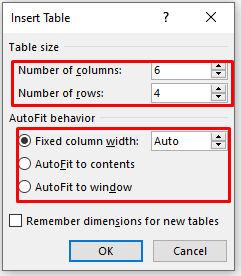
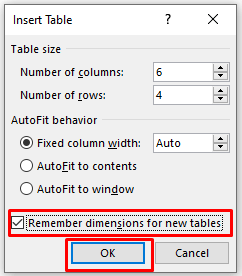
- A dialog box will appear where you can enter the number of rows and columns you want in your table under the Table Size panel. In the AutoFit Behavior panel, select Auto. You can also experiment with other options to see how you like them. AutoFit to Contents will produce a narrow column that changes in size as you enter data. AutoFit to Window will expand your table to fit the size of your document.
- If you want your future tables to remain this size, check the Remember dimensions for new tables option. Click the OK button to finish and create a table.
Draw a Table
You can manually draw a basic table in Word. Here’s how:
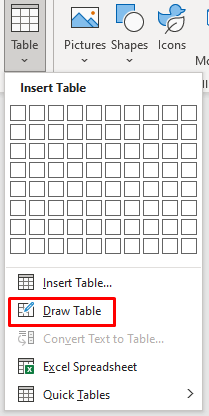
- Go to Insert, select the Table button, and choose Draw Table from the menu below the Grid.
- Your cursor will turn into a pencil. Drag it down and across the document to draw a box. You don’t have to worry about the dimensions; you can modify them later.
- Now you can start drawing cells and columns inside it. Simply drag the cursor to draw them one at a time.
- If you need to add or remove columns or rows later, you can go to the Layout tab and select the Draw Table or Eraser button. This’ll allow you to continue drawing lines with a pencil cursor or to erase existing lines with an eraser cursor.
Insert a New Excel Spreadsheet in Word
You can create an Excel spreadsheet directly in Word. Follow these simple steps:
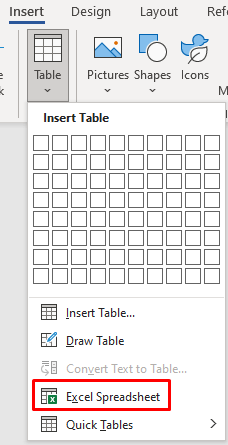
- Go to Insert, select Tables, and choose Excel Spreadsheet from the menu.
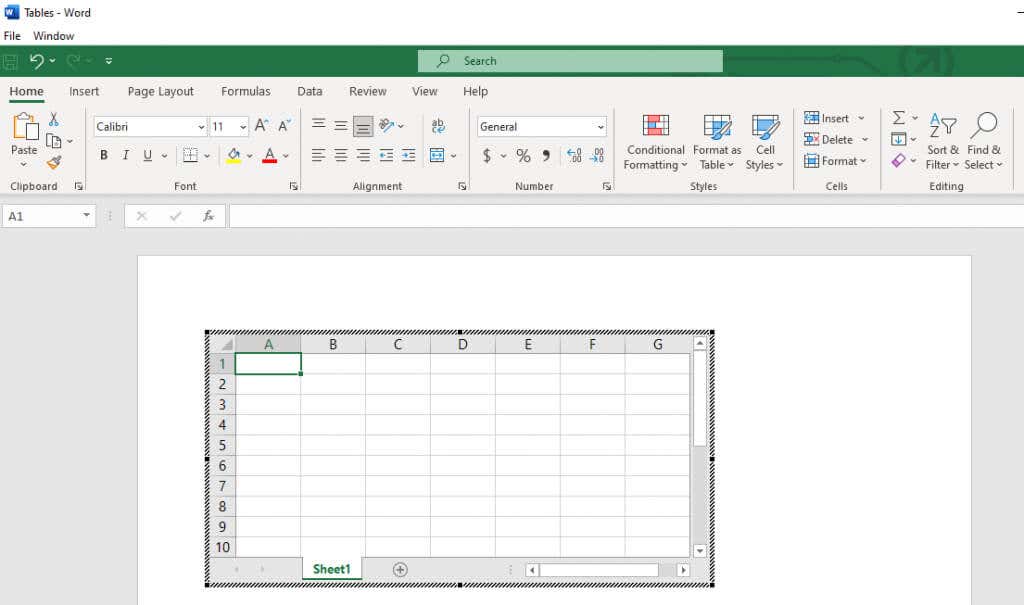
- The new spreadsheet will be created where your cursor is set.
- Excel’s menu and commands will also be available to you, and you can use them to edit your table.
Copy and Paste an Existing Excel Spreadsheet
If you have prepared data in an Excel spreadsheet but need to move it to your Word document, you can simply copy and paste it.
- Open your Excel Worksheet, highlight the spreadsheet you need, and select the Copy button.
- Open Word and position your cursor where you need to insert the spreadsheet.
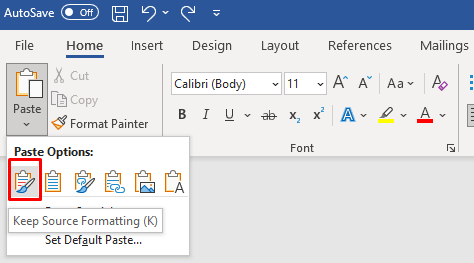
- Select the Paste drop-down menu on the Home tab in Word and choose Keep Source Formatting.
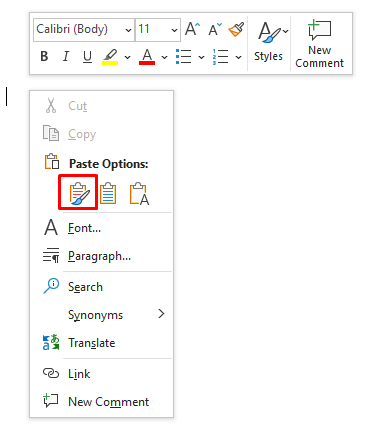
- You can also right-click your mouse and select Keep Source Formatting under Paste Options.
Quick Tables
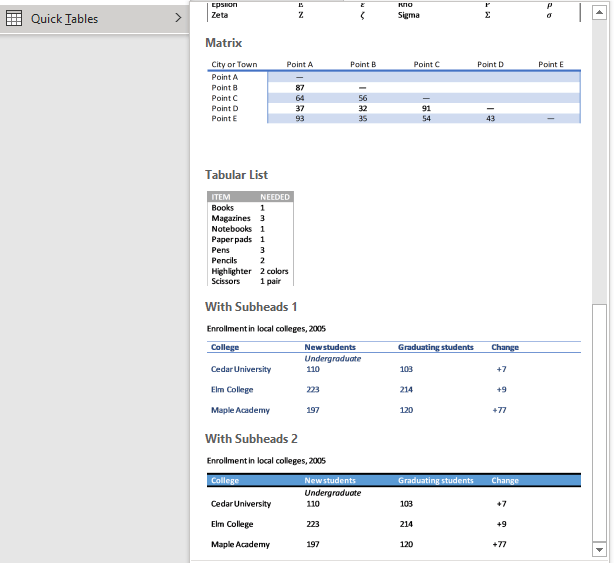
If you don’t want to customize your tables, choose one of Word’s templates from the Quick Tables menu. You can also create your own design and save it in the Quick Tables Gallery for later use.
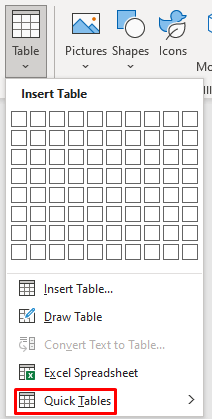
- Go to Insert, then select Tables, and Quick Tables.
- Select the template from the Quick Tables menu that fits your project.
- You can continue modifying it if you want to change the details.
Convert Text to Table
Converting text to a table used to be messy in Word. The data in a table would end up misplaced. That’s because previously, we had to use tabs to separate the data in individual cells.
Microsoft improved this feature, and now you can separate the table fields with commas, paragraphs, or any other separation characters. Let’s see how to convert a simple grocery shopping list into a table.
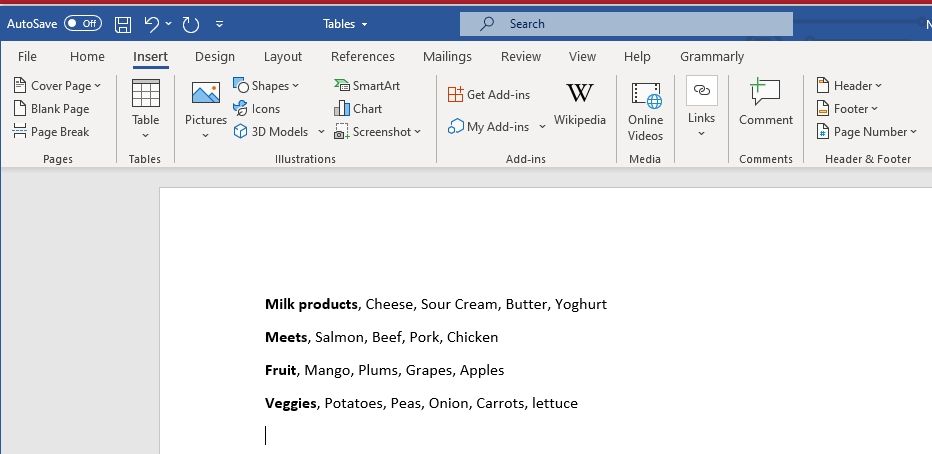
- Enter your data in a Word document. Remember to separate each data entry you want into individual cells with a comma. The rows will be separated by hitting enter and starting a new paragraph. Your list should look something like this:
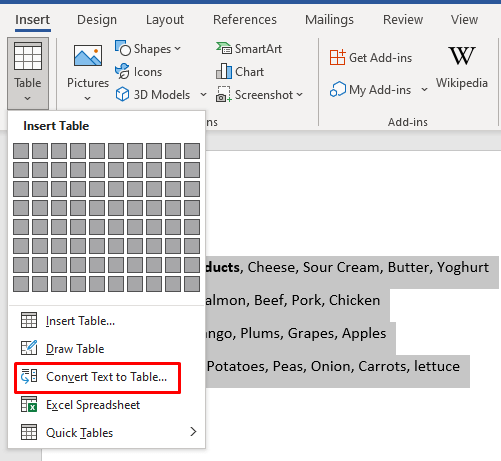
- Select the list, go to Insert, Tables, and choose the Convert Text to Table option.
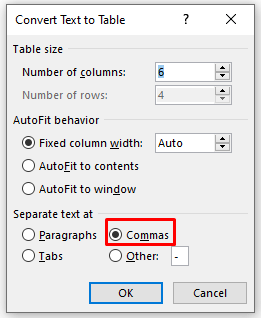
- In the dialog box, make sure that Commas are selected under the Separate text at the panel. Then click OK.
- Word will do the conversion for you, and a table will appear. You can then use the Table Design and Layout tabs to modify it.
How to Customize a Table
Table Design and Layout tabs are filled with helpful table tools you can use to format tables. Use Table Design to stylize your table and change its looks. Here you’ll find tools for shading, painting borders, and setting their thickness, style, and color. You can also select one of the many offered table styles.
In the Layout tab, you’ll find tools to add or remove cells, rows, and columns, merge cells, split them, or split the whole table into several ones. You’ll also use this tab to set other table properties, such as the table’s dimensions, or to align the text.
However, there are quicker ways to achieve anything these tools allow you to do. Let’s see how to quickly resize, align, add, or remove columns, rows, cells, and much more in Word tables.
How to Resize a Microsoft Word Table
Resizing the table manually means you can adjust its size or modify rows and columns individually. It’s as easy as dragging and dropping.
Resize the Whole Table
You’ll have to grab and drag to make the entire table larger or smaller.
- Select your table.
- Grab the little square that appears at its bottom-right corner.
- Drag the table to the size you want.
That’s it.
Resize a Column or a Row
Adjusting only the column or a row is just as easy.
- Place your cursor over a column or a row border until you see a double-sided arrow. The arrows will face left and right for columns and up and down for rows.
- Click and drag the arrow right or left to resize a column and up and down to resize a row.
- When you are done, simply release the mouse button.
How to Align the Table in MS Word
You can align your table to the left, center, or right to best fit your Word document. This is especially useful if you resize the table to fit text around it. Here’s how:
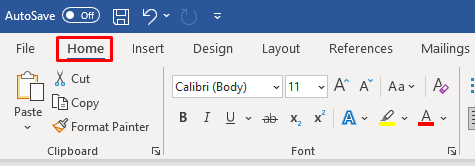
- Select the table and go to the Home tab.
- In the Paragraph section you’ll find Align Left, Center, and Right buttons. Use them to align your table.
How to Insert or Remove Columns and Rows
If your table has too few or too many rows and columns, you can easily fix it.
Add Columns and Rows
Adding a single column or a row is simple:
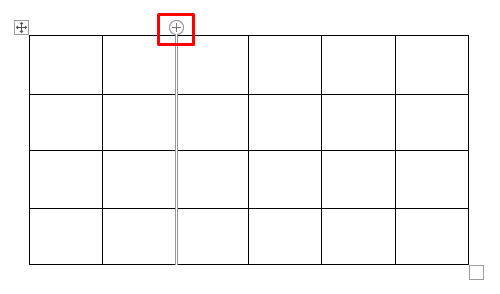
- Place your cursor on top of the columns or on the left side of the rows until a plus sign appears.
- Click this plus sign to add a new column or row.
If you want to insert multiple rows and columns:
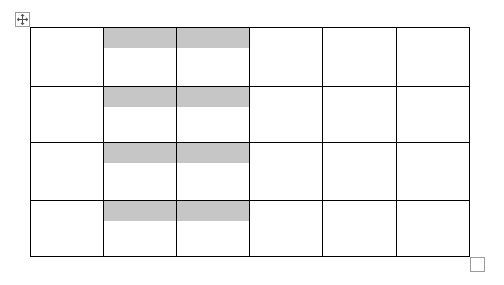
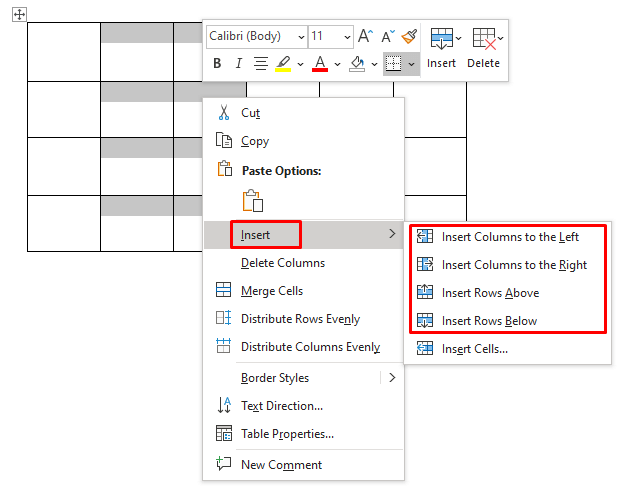
- Select the same number of already existing rows or columns (if you want to add two columns, select two existing ones).
- Right-click, then go to the Insert menu and select to insert columns to the left or right and rows above or below.
Remove Columns or Rows
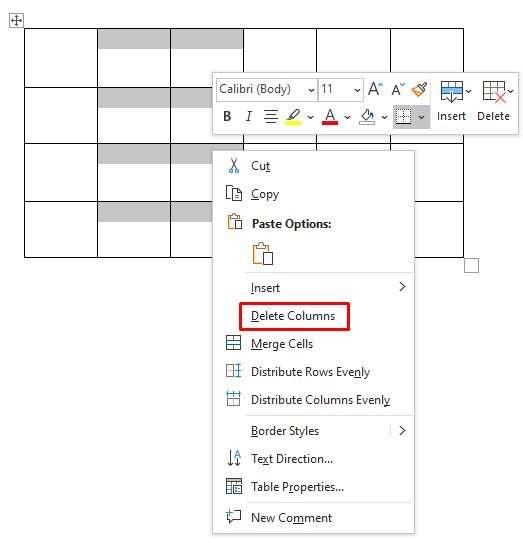
To delete rows or columns, select them, right-click, and select Delete Columns (or rows).
How to Add Borders or Shading
Table borders and shading are crucial to making your table look professional. With these simple tools, you can make your table stand out and make it easier to read. You’ll find both tools in the Table Design tab.
Adding Borders
Go to the Table Design tab and:
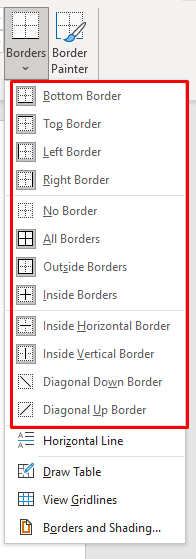
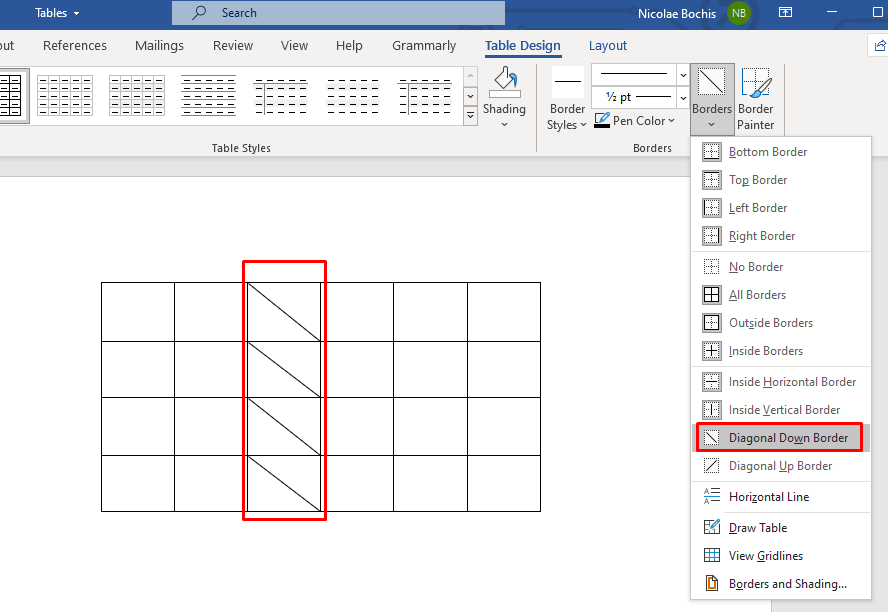
- Click Borders. A drop-down menu will let you choose the type of borders you want to add. Add them around each cell, or only highlight the outside of the table with borders. Place the cursor over the options, and you’ll get a preview of how each one changes your table.
- Once you decide on the border style, click it to apply it to your table.
- To place borders around a specific cell, row, or column, first select it and then choose the border style.
Add Shading
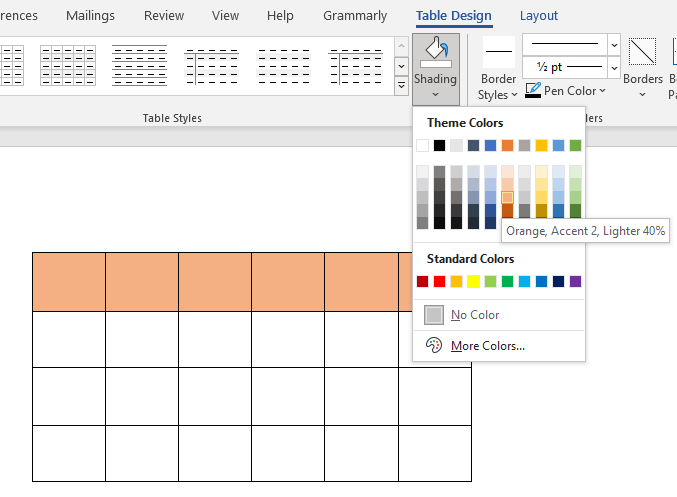
Spice things up by adding a background color to your tables. Use the shading drop-down menu to choose a color with which you’ll shade your table. You’ll find it in the Table Design tab.
If you want to shade a specific row, column, or cell, first select it and then choose the color. You can also shade only the selected cells.
How to Apply a Style
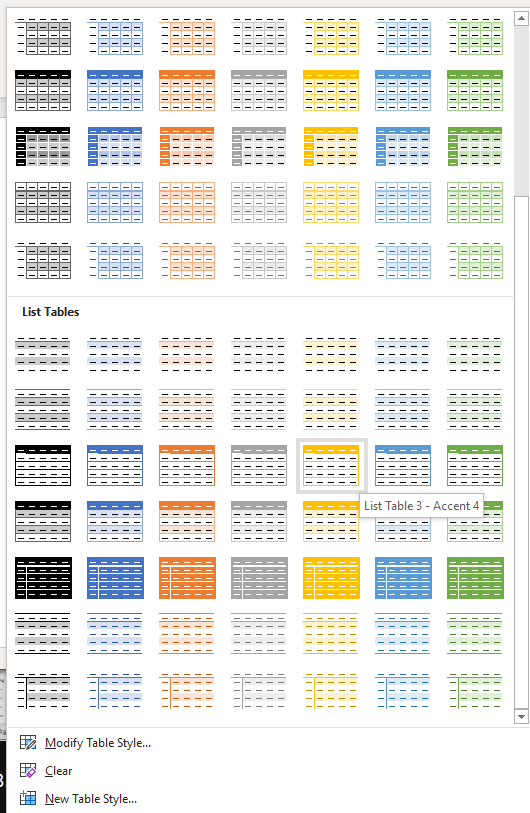
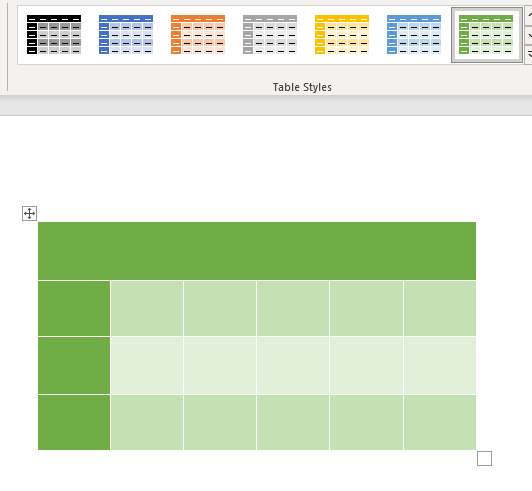
Microsoft Word has many table styles to offer, and you can choose one to make your table look professional. You can also do this to skip adding border style and shading.
- Select the table and go to the Table Design tab.
- Locate the Table Style box at the top of the window, and use the up and down arrows, or the “More” arrow, to browse the gallery.
- If you place your cursor over a specific style, you’ll see its preview on your table.
- Click on the selected style to apply it to your table.
To adjust the premade table style, go back to the Table Design tab and check or uncheck the boxes in the Table Style Options section. By doing this you can add or remove the Header Row, First Column, or Banded rows. There are more options so you can experiment with them and see how they influence your table design.
Use Table Properties
If you need to set a specific row height and a column width, you should use Table Properties. Here’s how:
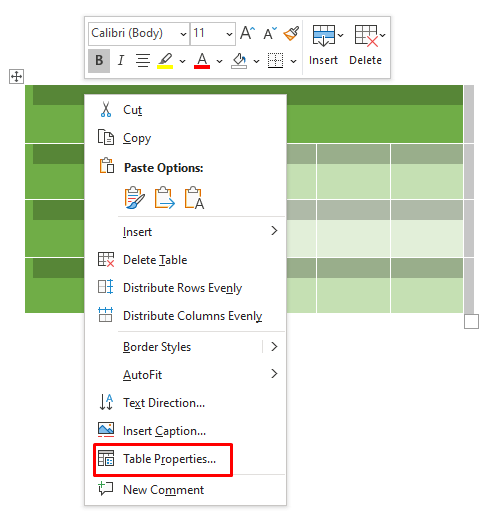
- Select your table and right-click it. Then, choose Table Properties from the menu.
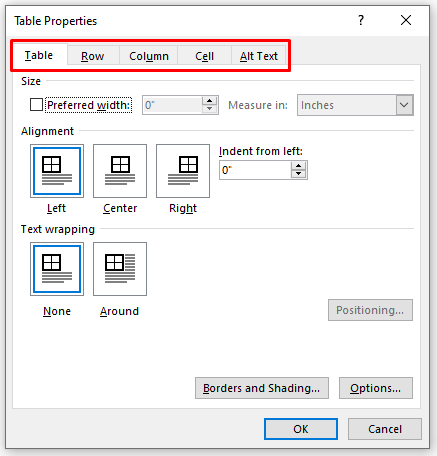
- When a dialog box opens, use the Table, Row, Column, Cell, and Alt Text to adjust their size, text wrapping, alignment, and more.
- When you’re done with adjustments, click the OK button to apply them to your table.
Word offers you a lot of tools, but creating and customizing tables is a quick and easy task. Not only can you use the pre-formatted table templates, but you can also easily customize your own table based on the needs of your project. Whether it’s adding new rows or columns for different parts of your data or varying the widths and heights of cells, you have all the tools you need to create a professional table. Let us know in the comments below if you have any questions!


