Microsoft Outlook now has the option to move the navigation toolbar that lets you move between your mail, calendar, contacts, and more from its default side position on the left to the bottom of the screen. You might consider doing this to improve your workflow and make navigation more accessible on your screen.
Follow the steps below to move the Outlook toolbar from the side to the bottom.

Why Should You Move Microsoft Outlook’s Toolbar From the Side to the Bottom?
You should consider moving Microsoft Outlook’s navigation toolbar from the side to the bottom for several reasons.
- Screen Area: One of the biggest is screen real estate optimization. If you work on a computer with limited screen space, having the toolbar at the bottom may help maximize the vertical space available. This can be especially useful when viewing long email threads, as it allows more content to be displayed.
- Accessibility: For users who may experience difficulties interacting with the side toolbar, moving it to the bottom can make it more reachable and easier to use.
- Productivity: Those who frequently switch between different modules in Outlook, such as Mail, Calendar, Contacts, and Tasks, might find that having the toolbar at the bottom allows for a more streamlined workflow.
Want to take things further? You’ll need to customize Outlook’s view to be able to rearrange on-screen elements.
Using Outlook Options
You can use the built-in Outlook options menu to move Microsoft Outlook’s toolbar from the side to the bottom. This option is available in Outlook if you’re a Microsoft 365 user.
If these steps don’t work, you’ll need to use the Windows Registry modification method listed below instead. You may also need to check that you have the latest version of Microsoft 365 installed before you proceed.
To move Outlook’s toolbar, follow these steps.
- Open Microsoft Outlook on your computer.
- Select the File tab located in the top-left corner of the Outlook window.
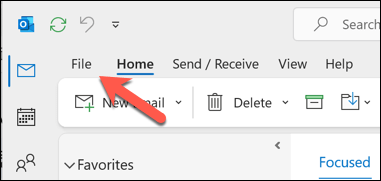
- From the File menu, select Options.

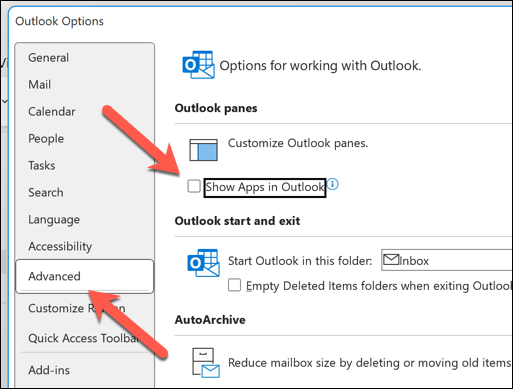
- In the Options window, select the Advanced tab to access the advanced settings.
- In the Outlook panes section, uncheck the Show apps in Outlook checkbox.
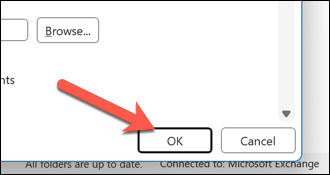
- Press OK to save your changes.
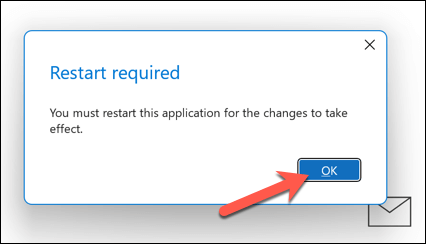
- Outlook will want to restart—confirm this by pressing OK in the pop-up, then exiting Outlook manually.
After restarting, Outlook’s view will change to show the navigation toolbar appear at the bottom.
Modifying the Windows Registry
Don’t see the option above in your Outlook settings? You’ll need to make a change to the Windows Registry instead. Make sure to back up the Registry before you begin, as the wrong change could cause system instability.
This method may not work for all versions of Microsoft Outlook, but it should be effective for Outlook version 16.0 and later. To move the Outlook toolbar to the bottom using a Registry change, follow these steps.
- Close Microsoft Outlook if it’s currently open.
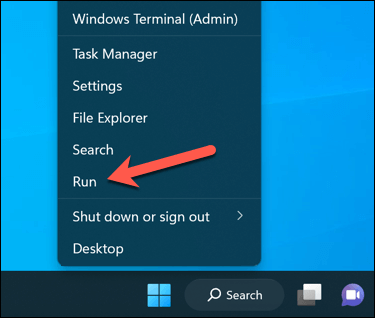
- Right-click the Start menu and select Run (or press the Windows key + R).
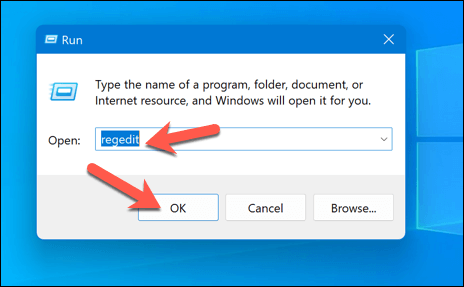
- In the Run box, type regedit and press Enter to launch the Registry Editor.
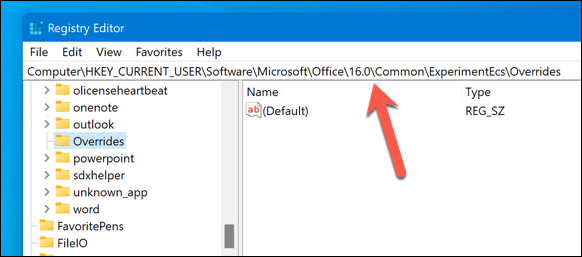
- In the Registry Editor window, use the navigation bar or tree menu to locate the following registry key: ComputerHKEY_CURRENT_USERSoftwareMicrosoftOffice16.0CommonExperimentEcsOverrides.
- If you don’t see the Overrides key, create it by right-clicking on the ExperimentEcs key, selecting New, and then choosing Key. Name the new key as Overrides.
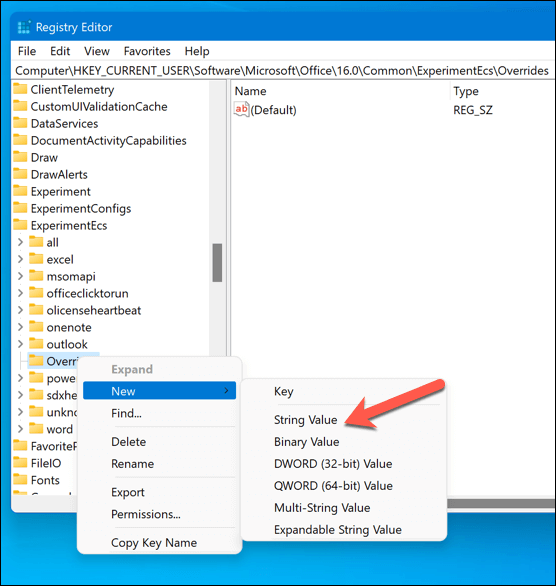
- Once you’ve selected the Overrides key, right-click it, choose New, and then select String Value.
- Name the new String key as Microsoft.Office.Outlook.Hub.HubBar and set its value to False. You can set the value by double-clicking on the String key and entering False in the Value data field, then pressing OK.
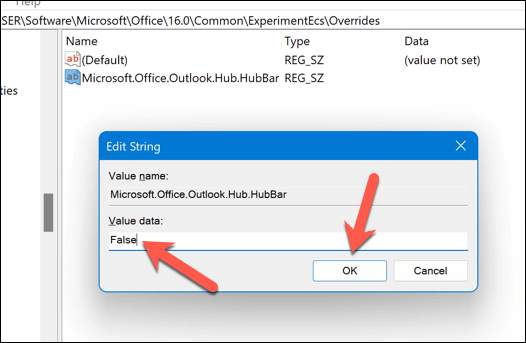
- Close the Registry Editor and restart Microsoft Outlook.
Your toolbar should now be at the bottom of the Outlook application window in the bottom-left corner.
Changing Your Outlook Settings
Thanks to the steps above, you can quickly move Microsoft Outlook’s toolbar from the side to the bottom. You can also make further changes to your Outlook layout. For instance, you can easily change Outlook’s theme to match your personal preference.
Also, consider customizing the Outlook ribbon bar to add, remove, or rearrange tabs and buttons, allowing you to access frequently used tools and settings more efficiently.
