Have you ever been frustrated when trying to format a Microsoft Word document, only to find that section breaks keep popping up? Section breaks in MS Word let you split up your document into separate parts and apply different formatting to them. You can format these parts separately without changing the rest of the document.
That said, cumbersome and unnecessary section breaks can cause formatting nightmares as well as create extra steps when editing your documents. So we’re going to show you how to remove section breaks in Word in no time.
Removing a Section Break in Microsoft Word for Windows and Mac
If you’re a Windows or Mac OS user, deleting section breaks in MS Word is easy. You can use the same method on both operating systems, though the MS Word menu layout might be slightly different.
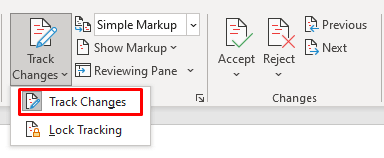
Note: You won’t be able to delete section breaks while the Tracking Changes option is turned on. To turn it off:
- Find the Review tab on the ribbon menu.
- In the tracking group click Track Changes.
- Select Track Changes from the drop-down menu to turn this option off.
Once the Track Changes option is off, follow these steps to delete individual section breaks:
- Open the document you’ll work on.
- On the menu ribbon at the top of the screen find Home. Make sure the Home tab is active.
- Find the Show / Hide Paragraph Mark button in the paragraph section and click it. The show/hide button will display all non-printing characters.
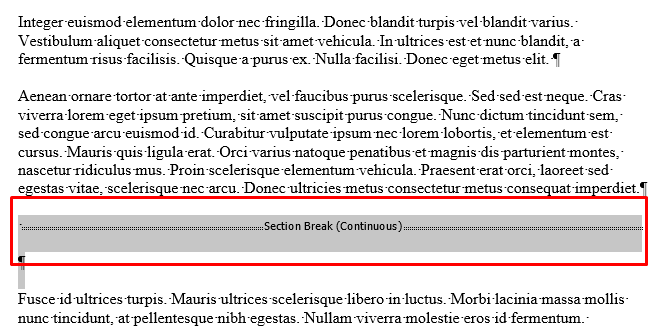
- Find the section break you want to remove from the document and select it. Place the cursor before the section break. Hold the left button and drag the mouse to select the section break. If you have an older version of Microsoft Word, you can double-click the section break to select it.
- Press Delete on your keyboard. Don’t use Backspace, but the Delete key. The section break will disappear.
Remove Multiple or All Section Breaks in MS Word
You can remove multiple or even all section breaks from an MS Word document by using the Find and Replace feature. Here’s how:
- Make sure you are in the Home tab in the ribbon.
- In the Editing group, click Replace. Alternatively, press CTRL + H for Windows and Command + H for Mac, on your keyboard.
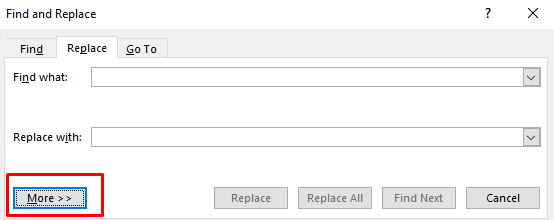
- The Find and Replace dialog box will appear. Click More to expand the dialog box. If you have the Less button instead of More, your dialog box is already expanded and you can skip this step.
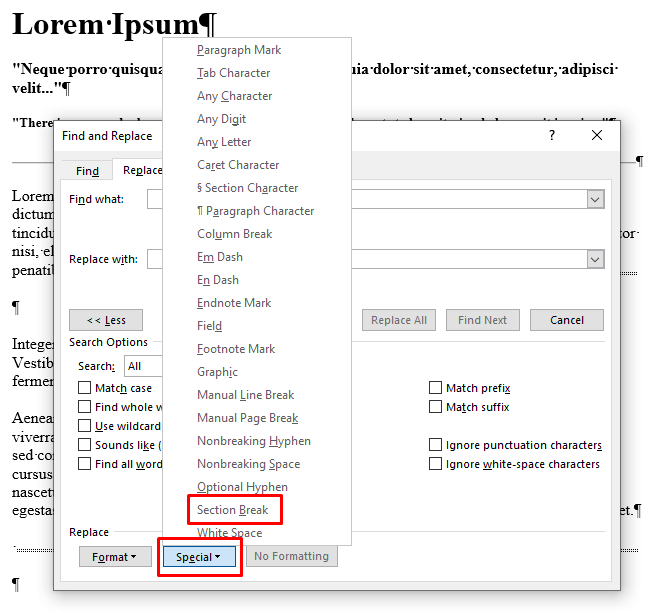
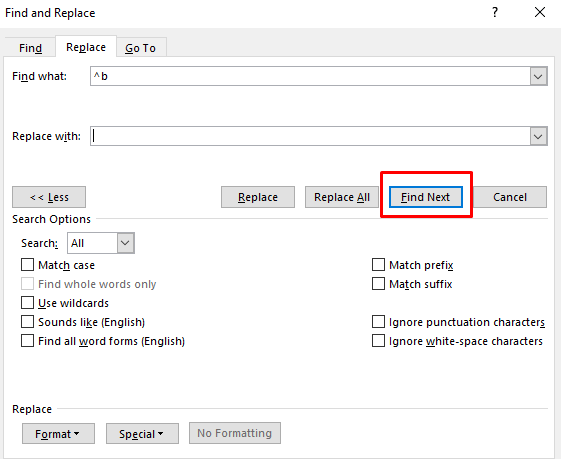
- Now place a cursor in the Find What section and choose Section Break from the Special menu you’ll find at the bottom of the dialog box. You’ll notice a ^b mark appeared in the Find What bar.
- Now place a cursor in Replace With section but leave it empty. Make sure there is nothing in this box, you can even press a Delete key a few times, even if you can’t see anything.
- Click Find Next.
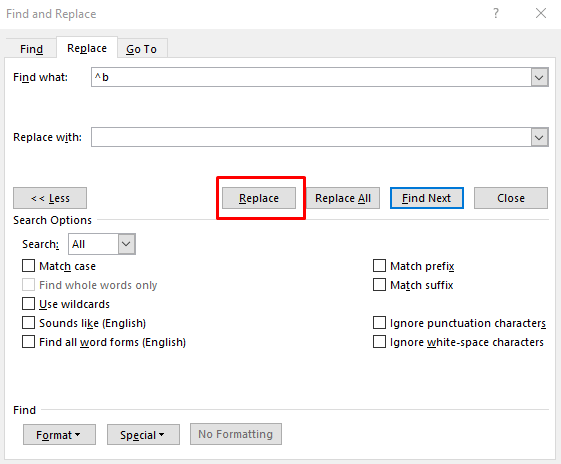
- Click Replace, then Find Next to go to the next section break. Repeat for each section break you want to delete.
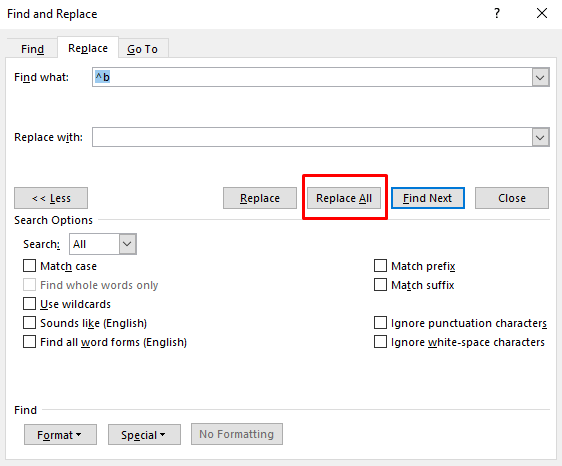
- If you want to delete all section breaks in the document, instead of Find Next, select Replace All next to it.
And that’s it. You successfully replaced multiple or all section breaks from your Word document. Once you’re done simply close the dialog box by clicking the X at its top right corner.
How to Add Section Breaks to a Microsoft Word Document
The focus of this article is on deleting the section breaks from MS Word documents, but if you’re formatting someone else’s work, and you mistakenly deleted the wrong section break, you need to know how to add one.
Follow these steps to add a section break to your Word document:
- Open the MS Word document you’ll work on.
- Place the cursor at the point of the document where you’ll add a section break.
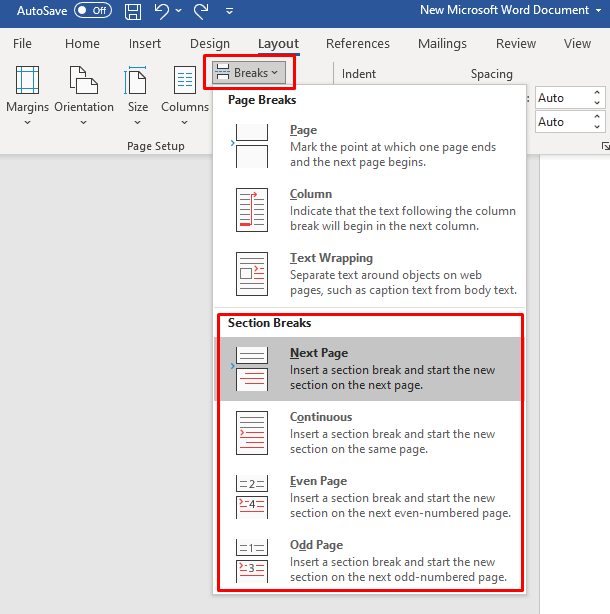
- Go to the Layout tab in the Ribbon.
- Select Breaks from the Page Setup group, and select the section break type of your choosing.
Make sure to also check out our detailed article on how to insert a section break and all the types of section breaks that Word offers.
Can You Delete a Section Break in Microsoft Word Online?
If you’re looking to delete section breaks while using Microsoft Word Online, the sad news is you can’t. Microsoft Word Online has a set of limitations, and this is one of them. Perhaps the developers will add this option in the future. You’ll have to use the Desktop Microsoft Word app and delete section breaks following the instructions from this article.


