Microsoft Teams is a popular collaboration tool that lets you chat, call, and share files with your colleagues. What happens when you’re not available to chat, however?
Rather than leave your colleagues without a response, you can change your status to cover periods when you’re away from your desk. For instance, you might want to do this if you pop out for an hour for lunch.
You can set Microsoft Teams to automatically reset your status after a certain time. To set your status timeout in Microsoft Teams, follow the steps below.
Why Set a Status Duration in Microsoft Teams?
Setting a status duration in Microsoft Teams can help you communicate your availability to your colleagues. For example, you can set your status to Do not disturb for an hour of concentrated work, or Be right back for a short break.
By setting a duration for your status, you don’t have to worry about changing it back manually. Teams will automatically reset your status based on your activity, calendar, and computer state.
How to Set a Status Duration in Microsoft Teams on PC or Mac
If you want to set a custom status timeout in Microsoft Teams, you can do so via the Teams client on your PC or Mac.
- To start, open the Microsoft Teams client and sign in.
- Click on your profile picture in the top-right corner of the app.
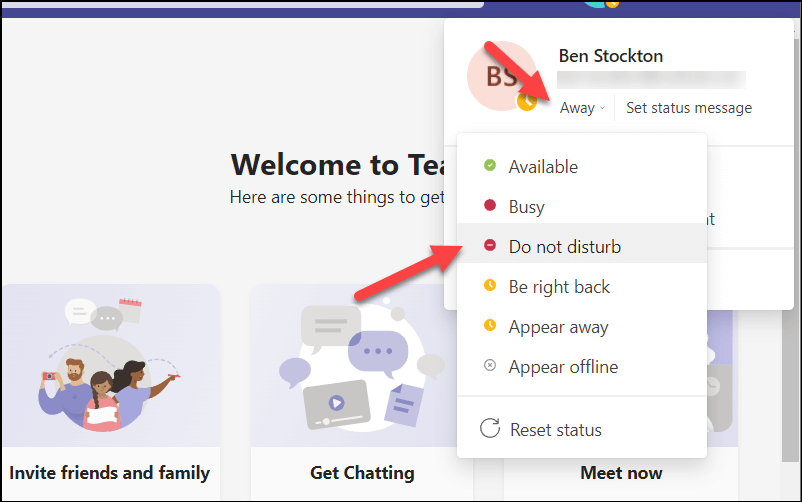
- Select your current status next, located under your name and email address.
- Choose which status you want to show going forward, such as Busy or Do not disturb.
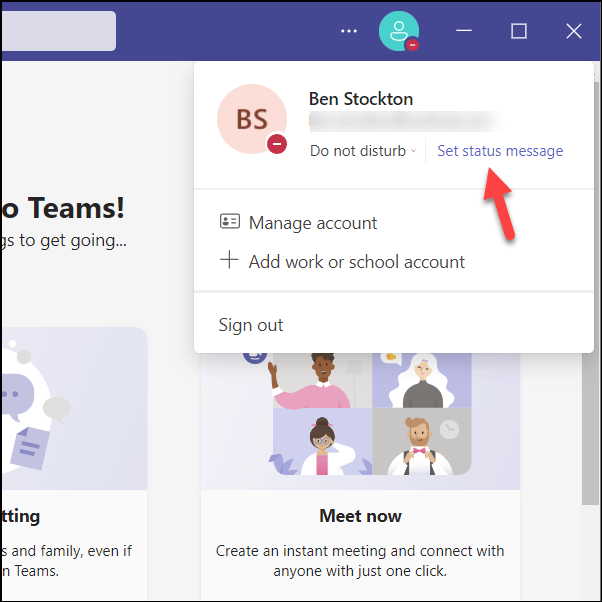
- Next, press the Set status message option.
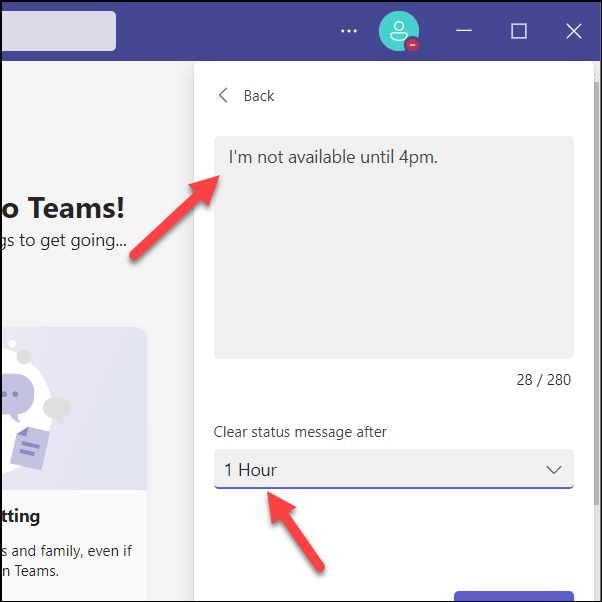
- Type a custom message to explain your availability (if you want to).
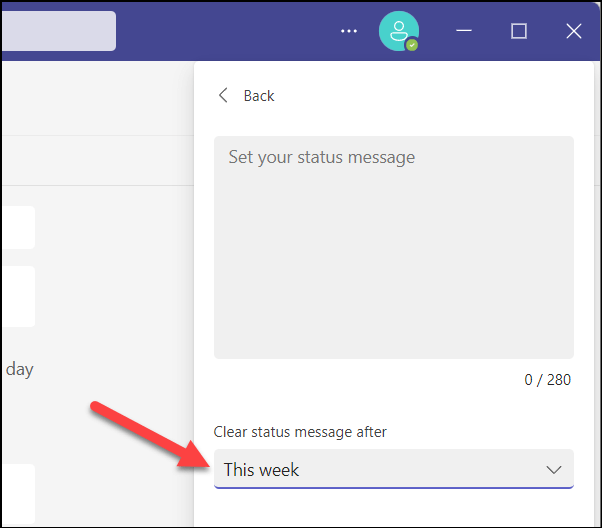
- Set a reset time by selecting one of the suggested options (such as 1 hour) in the Clear status message after drop-down menu.
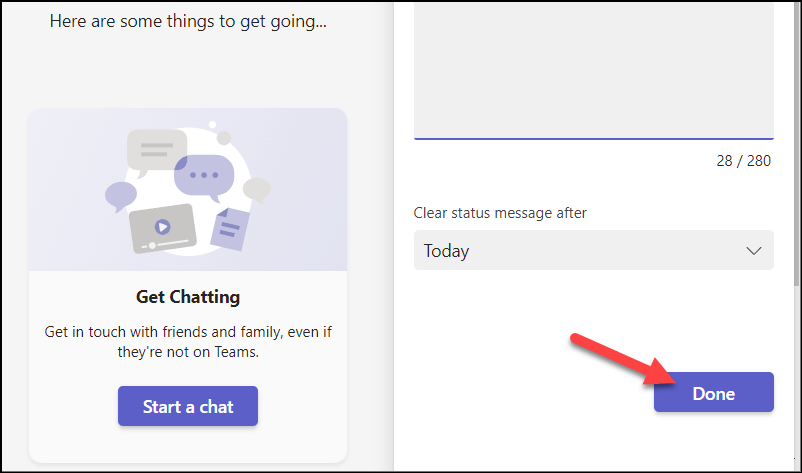
- Press Done to save and apply your custom message.
Your new status and status message will be visible to other Team members until the reset time expires. If you want to reset it manually at any point, simply click your current status and choose another—it’ll update automatically.
How to Set a Status Duration in Microsoft Teams on Android or iPhone
Unfortunately, the Microsoft Teams app on mobile devices doesn’t allow you to set a custom status timeout. If you prefer to use the Microsoft Teams app on your mobile device, you’ll need to manually update your status. Your status choice will be reflected across all of your devices and will remain in place until you change it.
Before you begin, you’ll need to make sure you install the Microsoft Teams app from the Google Play Store (on an Android device) or App Store (on an iPhone or iPad).
- Open the Microsoft Teams app on your mobile device and sign in (if you aren’t already).
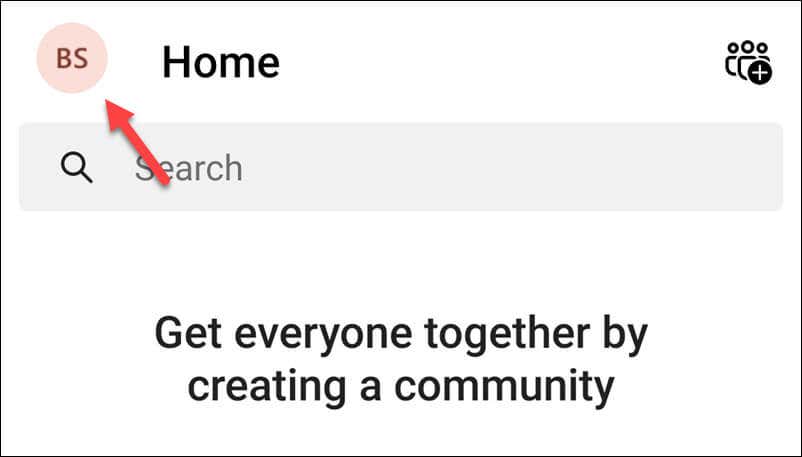
- Tap your profile icon in the top-left.
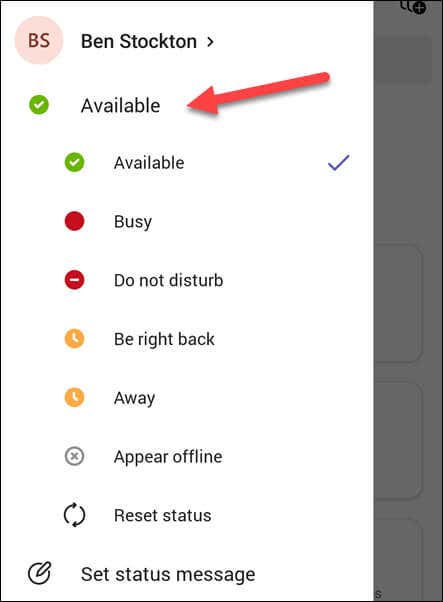
- Below your name, tap your current status (eg. Available).
- Choose a new status from the options provided.
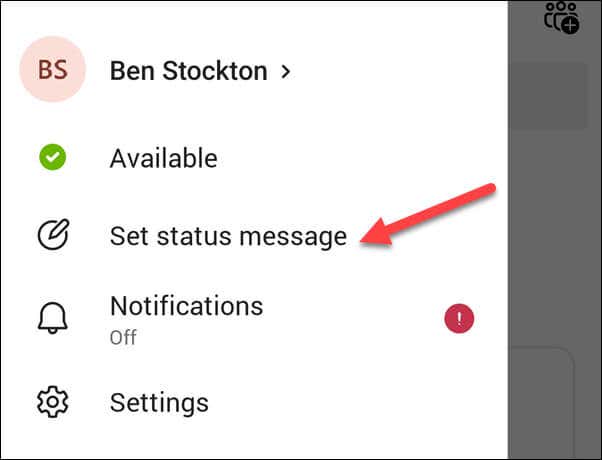
- If you want to set a custom message to alert your colleagues, choose Set status message.
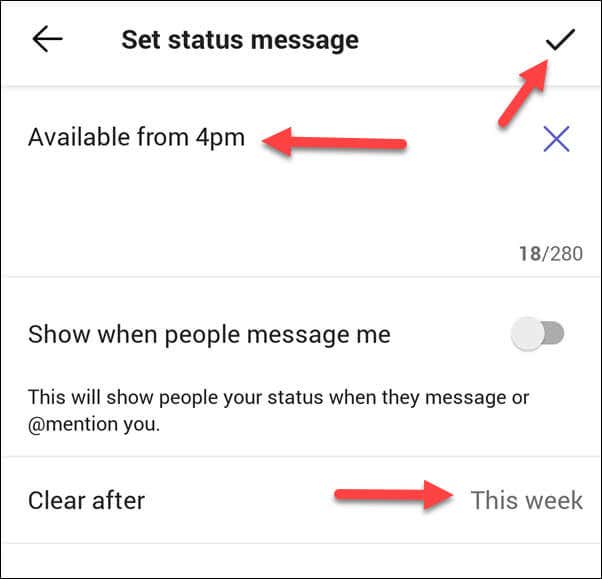
- In the Set status message menu, type a custom status message and choose a timeframe for your availability.
- To confirm your choice, tap the tick icon in the top-right.
Your status will update immediately. If you want to change it at any point, repeat the steps and choose a new status.
How to Keep Your Status Active on Microsoft Teams
If you don’t want your status to change at any point, there are some ways to keep it active on Microsoft Teams.
First, you could set a custom status time to a point in time that’s some time ahead in the future. This will keep your status level until that period is reached. To do this, choose this week as the duration period for your custom status—it’ll last at least seven days (depending on when you set the status originally).
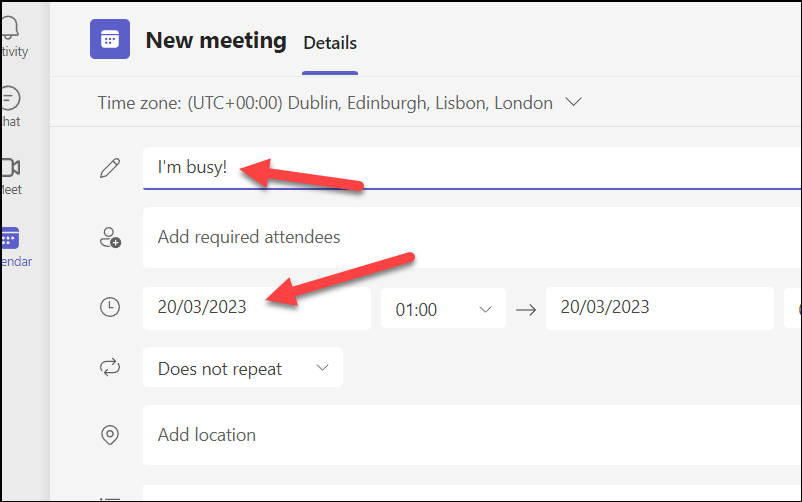
You could also use your Microsoft Teams calendar to block out certain periods. Your status will update based on availability. If you schedule back-to-back meetings, for instance, your status will update to Do not disturb to reflect that.
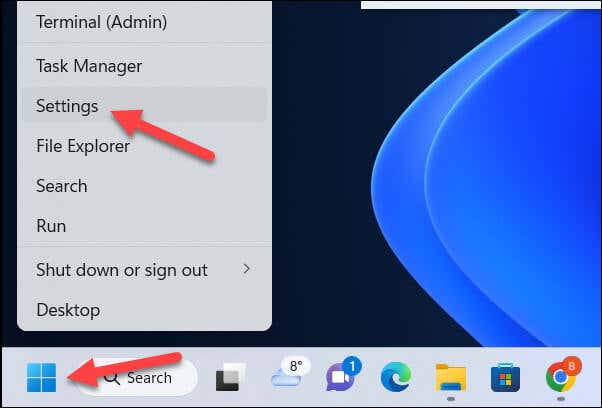
Another method is to change the settings of your system’s screen and sleep modes. On a PC, you can do this via the Settings menu. To do this on a Windows 11 PC:
- Right-click the Start menu and select Settings.
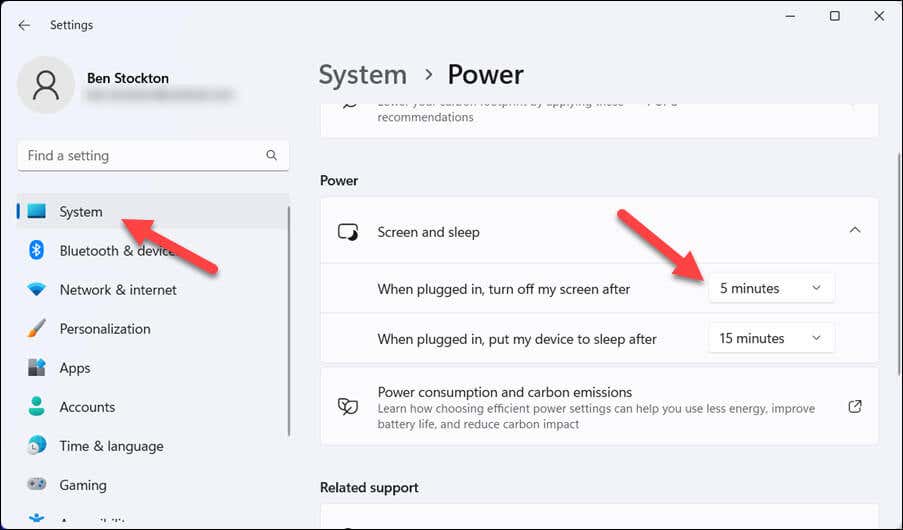
- In Settings, press System > Power > Screen and sleep.
- Adjust the screen turn-off and sleep durations according to your preference.
Finally, you could decide to use an app that simulates mouse movement or keyboard input like Auto Mouse Mover. This can trick Teams into thinking that you are still active on your computer and maintain your availability status.
However, be careful—these tools are likely to avoid the policies or rules of your organization, so use them at your own risk!
Managing Your Time with Microsoft Teams
Setting a status duration in Microsoft Teams can help you manage your availability and productivity better. If you’re busy, setting a custom status timeout in Microsoft Teams can help you limit distractions. Don’t forget to troubleshoot any issues if your Teams status doesn’t update properly.
Looking to share your work with your colleagues? You could try sharing your screen in a Teams meeting. You can also try some Teams keyboard shortcuts to help you improve your productivity.
