
Excel is a very powerful program. If you’re someone who uses spreadsheets often, learning how to operate Excel can make a huge difference. But even if you already know the basics, there are always a few more tricks that can improve your overall experience working in the app.
One of the handy tricks to learn is the different methods you can use to quickly switch between sheets in Excel. We’ll begin with the simple options like doing it manually and then gradually move on to other alternatives for more advanced users.
We also created a short video tutorial for our YouTube channel, which you can check out.
Keyboard Shortcuts To Switch Between Sheets In Excel
So you’ve got an Excel document in front of you with multiple worksheets. When you’ve got to switch between them, the obvious choice would be to do it by manually selecting a different sheet at the bottom of the workbook. However, that option might not be available.
In case you can’t use your mouse or touchpad or have a big workload and don’t waste time on that, you can switch between sheets in Excel using a keyboard shortcut.
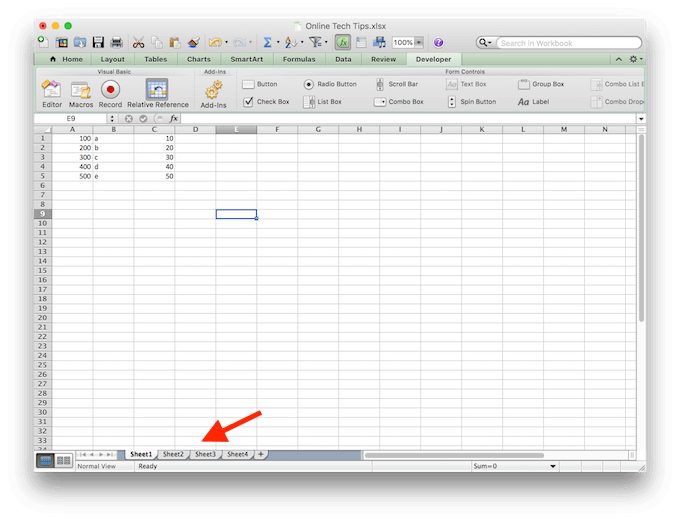
There are two shortcuts that you’ll need to learn here: Ctrl + PgDn (page down) for moving to the sheet on the right, and Ctrl + PgUp (page up) for moving to the sheet on the left. Or simply follow these steps to switch between sheets in the workbook:
- In order to move one sheet to the right, hold down Ctrl, then press the PgDn key.
- To keep moving to the right, press the PgDn key again.
- In order to move back or one sheet to the left, hold down Ctrl, then press the PgUp key.
- To keep moving to the left, press the PgUp key again.
That’s just one example of a useful keyboard shortcut for Excel. Learning a few more essential shortcuts can help improve your productivity. For example, it will save you time while navigating Excel, or doing such routine tasks like changing row height and column width in the program.
Use The Go To Command
Using the Go To command is another handy way of moving around your Excel worksheet. You will especially appreciate this method if you have to deal with overloaded Excel documents with lots of rows and columns on a daily basis.
In order to move to a different space of your workbook using the Go To command, follow these steps:
- Open your Excel worksheet.
- Choose Edit from the menu on top of the screen.
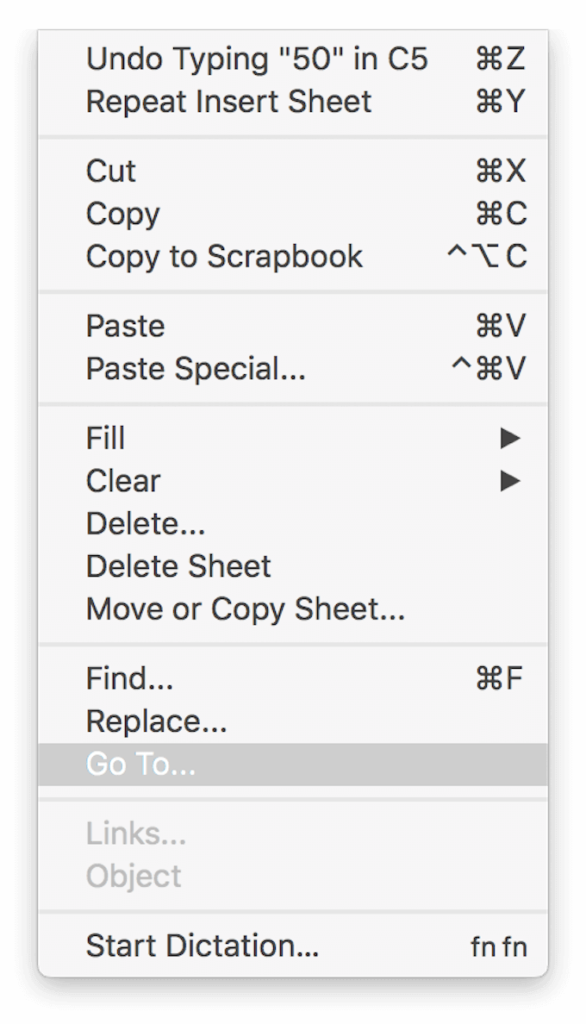
- Select Go To… option from the drop down menu. You will see the Go To window open. You can use that to jump from one place in your document to another.
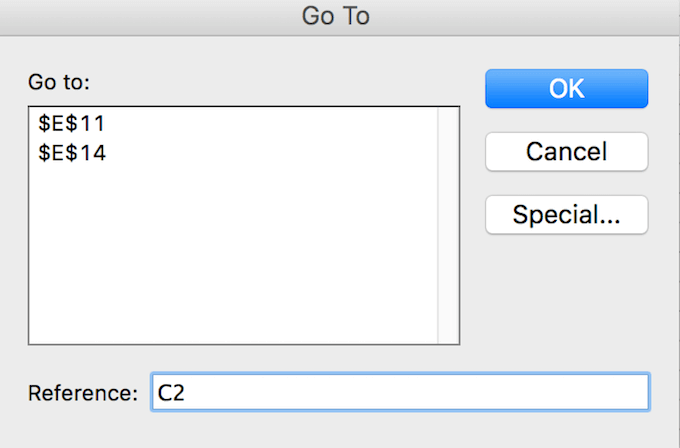
- In the dialog window, find the Reference line and type in your cell reference, like “C22” or “H134”. Then press OK.
This will take you to the place you’ve chosen by moving the active cell box onto that specific cell.
Enable Go To Command Using Keyboard Shortcuts
A quicker way to use the Go To command in Excel is by learning the right keyboard shortcuts for it. There are two different options here, you can either press the F5 key or use the Ctrl + G keyboard shortcut to bring the Go To window up.
Once you start using the Go To feature, you will see that it also stores all of your previous searches in that little window. So you can find a list of all your previous cell references in the top box above the Reference line. A useful feature if you find yourself jumping back and forth between specific areas of your Excel document.
However, remember that this information will disappear once you close your Excel workbook. So if you think you’ll need it for future reference, make sure you save it elsewhere before exiting the document.
Switch Between Sheets in Excel Using Go To
If you don’t want to jump to a specific cell in a different worksheet, but just want to open the whole thing, you can also use the Go To command to do it.
In order to switch between sheets in your Excel workbook, follow these steps:
- Open your Excel workbook.
- Bring up the Go To window using one of the shortcuts or manually.
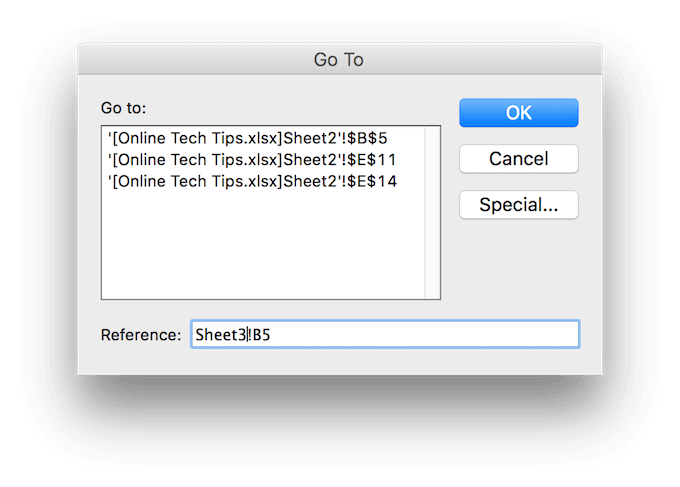
- In the Reference line, type in the desired sheet name along with the cell reference. For example, if you’re on Sheet 2 and want to move to Sheet 3, you’ll need to type in “Sheet3 + exclamation mark + the cell reference” in the Reference line, like Sheet3!B5.
The exclamation mark here serves as a separator between the sheet name and the cell number, as you can’t use spaces in cell references. - That command will take you to a different sheet and move the active cell box to the cell you’ve chosen. In order to move back to the previous sheet, repeat the whole process but change the sheet name that you type in the Go To window.
Use Hyperlink To Change Worksheets
You can navigate around your Excel workbook and jump from one sheet to another using hyperlinks as well. In Excel, there are different hyperlink types, and you can link to an existing file on your computer, a web page, or an e-mail address.
If you want to create a hyperlink and use it to move to a different worksheet, do the following:
- Select a place in your sheet (a cell) where you want to insert the hyperlink.
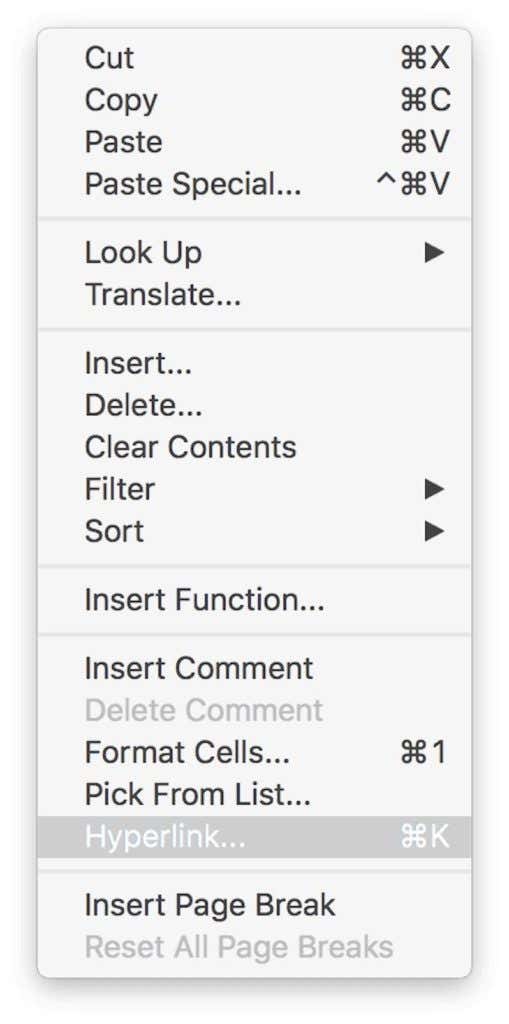
- Right-click on it and choose Hyperlink from the drop-down menu.
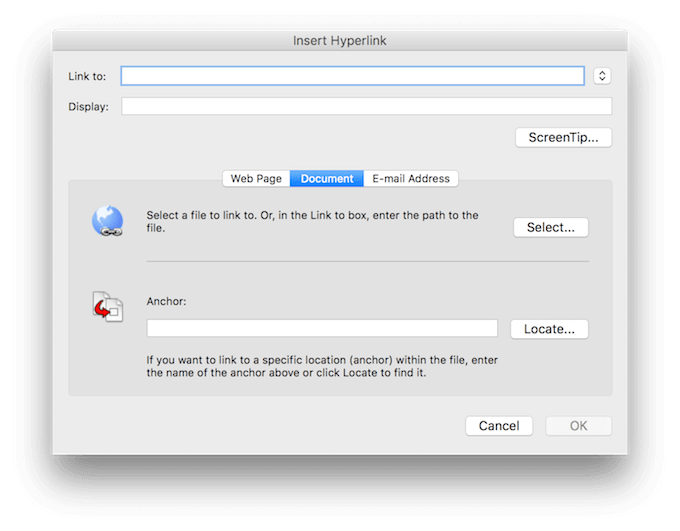
- From the options in the middle of the box, choose Document.
- Move on to the Anchor line below, find the Locate… button next to it and click it.
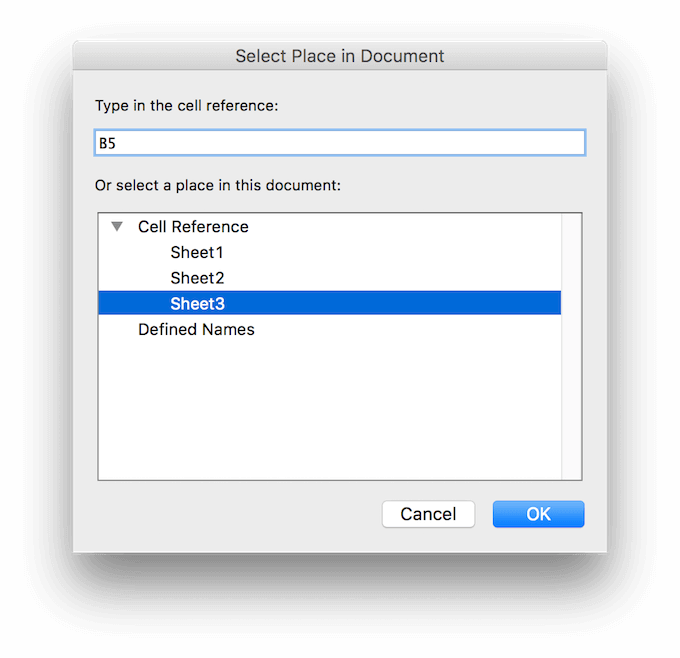
- In the pop-up window, choose the sheet you want to link to and type in the cell reference where you’d like the hyperlink to take you.
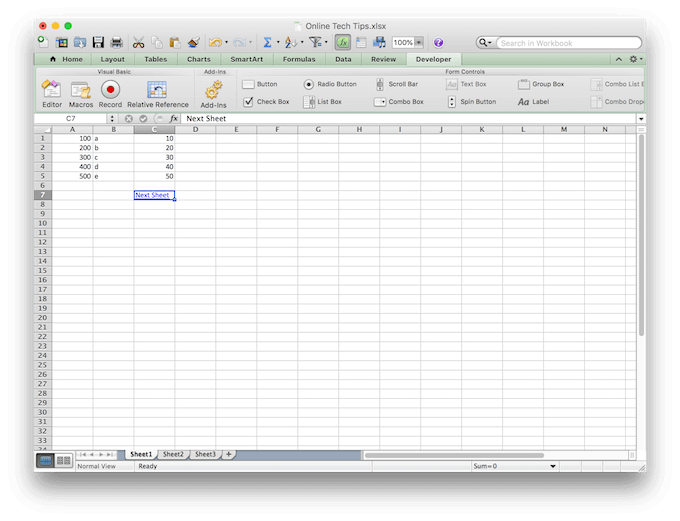
- After you press OK, you’ll be taken to the previous window where you can change the text of the hyperlink that you’ll see in the document. Type it in under Display.
You can later delete or edit this hyperlink to change its destination or appearance.
Use a VBA Script to Move Between Sheets
While all of the above options are great for switching between Excel sheets, you might find yourself in a situation when you need more. For example, if you’re working with an Excel document of many worksheets and constantly need to move back and forth between them. In that case you can create a VBA macro or script to automate that process for you.
Excel allows you to automate many different features and commands using Visual Basic for Applications (VBA) scripting. It’s the programming language that Excel uses to create macros.
If you already know a thing or two about it, then you can use macros like the following to move around your Excel workbook.
VBA Macro To Move To The Right
Sub Change_Sheets_Right()

Dim SheetNum, CurrentSheet As Integer
SheetNum = Sheets.Count
CurrentSheet = ActiveSheet.Index

If CurrentSheet < SheetNum Then
Sheets(CurrentSheet + 1).Activate
Else
Sheets(1).Select
End If

End Sub
VBA Macro To Move To The Left
Sub Change_Sheets_Left()

Dim SheetNum, CurrentSheet As Integer
SheetNum = Sheets.Count
CurrentSheet = ActiveSheet.Index

If CurrentSheet > 1 Then
Sheets(CurrentSheet - 1).Activate
Else
Sheets(SheetNum).Activate
End If

End Sub
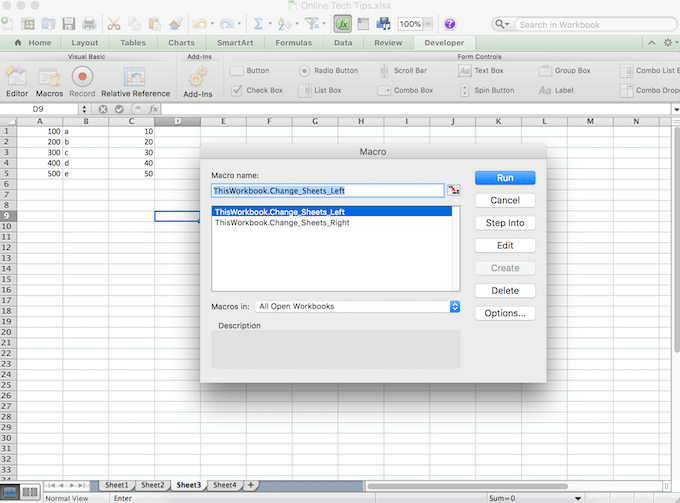
Install both codes in your workbook to be able to move in both directions, right and left one sheet at a time.
Become a Pro Excel User
You’re now one step closer to mastering Excel and saving yourself a bunch of time and effort at work at the same time. Of course, there will always be new tips and tricks that you can learn about this software.
However, automating your everyday workflow is the first and probably the most important step you can take diving into the world of Excel.
What Excel automation tips do you know and use? Share them with us in the comments section below!