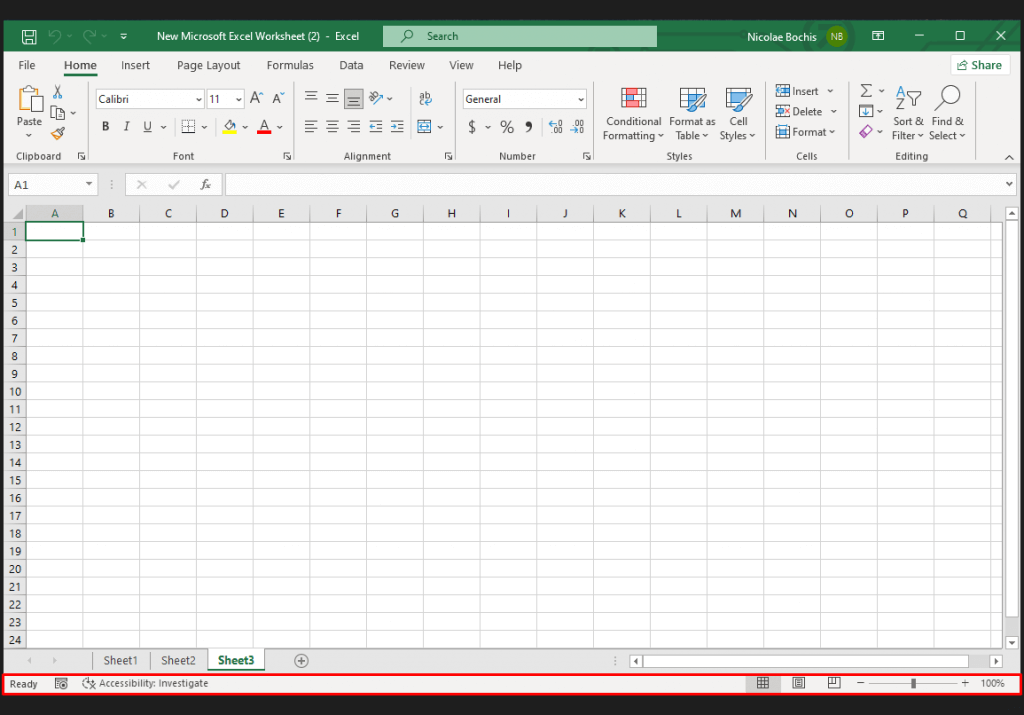
Excel’s status bar is one of the hidden gems (and an unsung hero) that makes it the default spreadsheet software you turn to. It quietly resides at the bottom of the Excel window, often overlooked but brimming with valuable information and customization options. In this article, we will look at it and show you how to take advantage of it.
Excel Status Bar Default Options
Even before you customize the Excel status bar, it’ll display some helpful information and give you access to some useful functionalities. The common Excel options you can find as default on the status bar are:
- Cell Mode
- Macro Recording Tool
- Accessibility Check
- Page Number
- Statistics/Mathematical Options
- Worksheet Views
- Zoom Options
Let’s see what each of them does and how you can use them.
Cell Mode
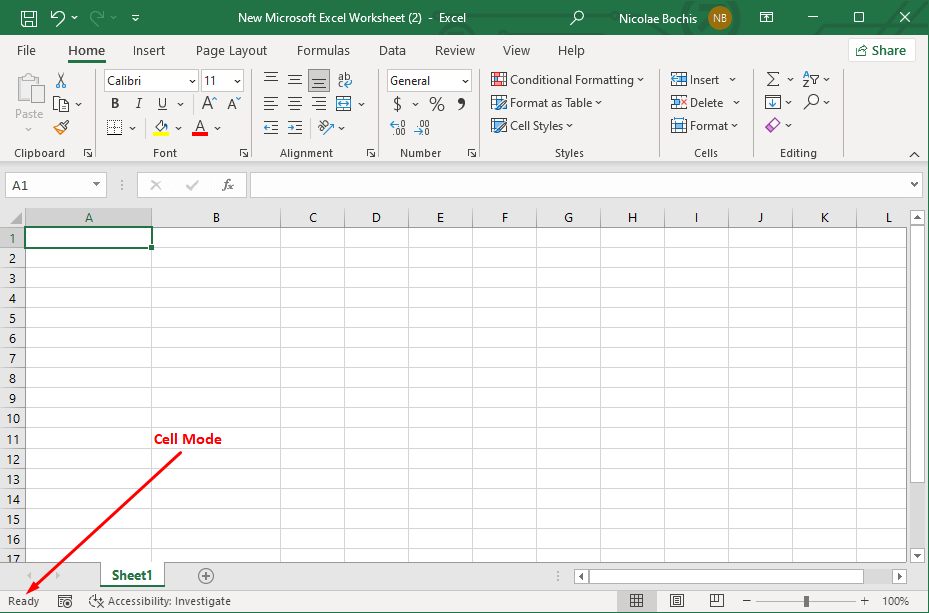
At the leftmost side of the Excel status bar, you’ll find the cell mode indicator. It’ll inform you about the status of the currently selected cell. There are four different status modes:
- Ready. It means the selected cell is ready to receive input or an action. That doesn’t necessarily mean the cell is empty. You can either start typing new data or editing the already existing data in the selected cell.
- Enter. This mode means you are currently entering data in the cell. The Enter mode is activated when you start typing in the selected cell or press F2 twice in a row.
- Edit. Press the F2 key on your keyboard or double-click the cell, and the mode will change to the in-cell edit. While in the Edit mode, you can make changes to the cell.
- Point. It’ll display when you start typing a formula or a function and select the cell you’ll use as a reference.
Macro Recording Tool
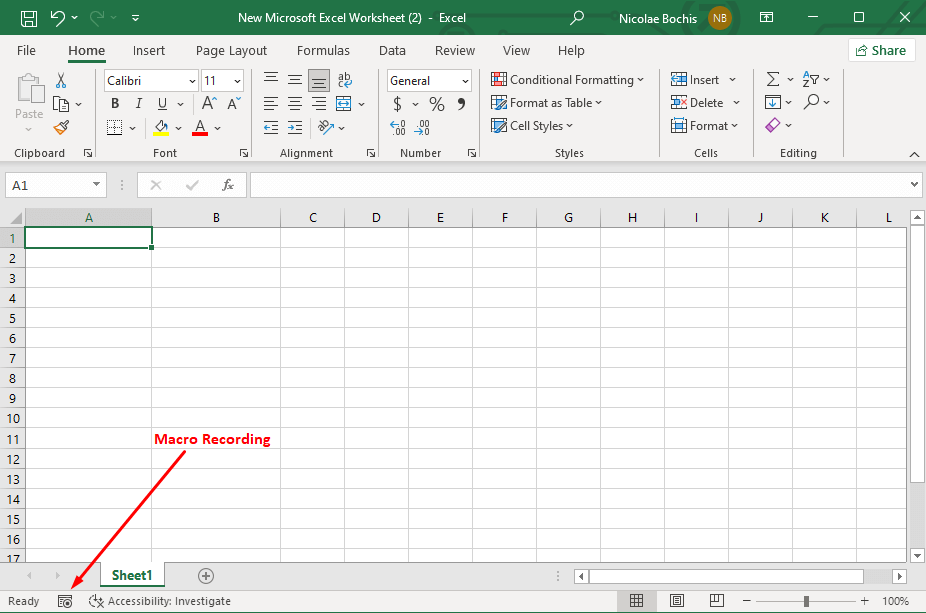
To the left of the Cell Mode is the Macro Recording icon. You can use it to record a series of actions as macros or keyboard shortcuts and use them to tackle repetitive work in Microsoft Excel. To initiate the recording process, click this icon and perform the action within the Excel spreadsheet as usual. To stop recording, click the icon again. Note: the icon will change into a transparent square while recording.
Accessibility Check
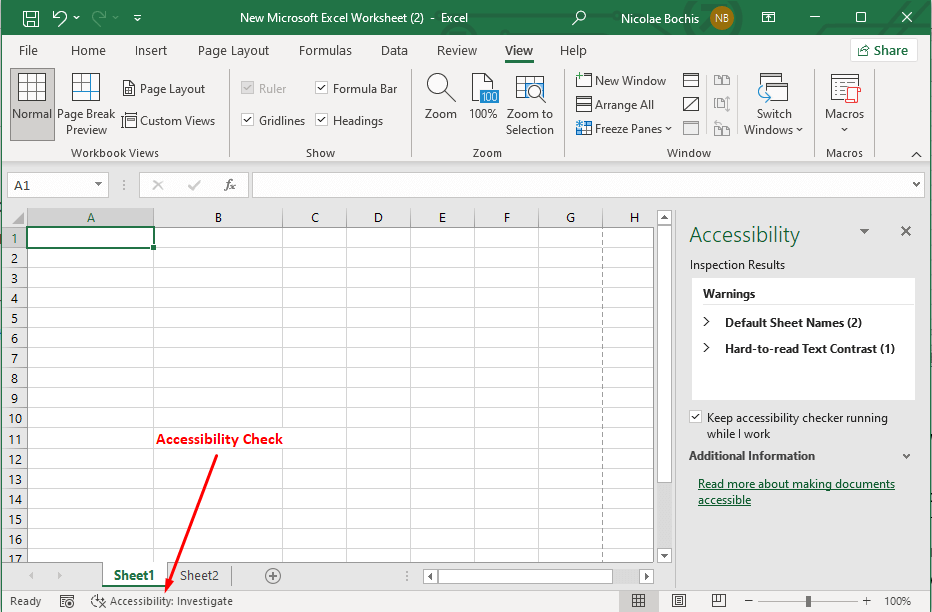
Next to the Macro Recording icon on the left side of the status bar is the Accessibility Check feature. When you enable it, Excel will examine your spreadsheet and determine the cell formatting, document structure, and readability. It’ll then highlight potential problems that might prevent people with different kinds of disabilities or accessibility needs from reading your Excel document.
The status bar will display Accessibility: Investigate if there are potential problems in your document. Clicking this text will open a separate panel to the right where you’ll find suggestions on making it accessible to everyone.
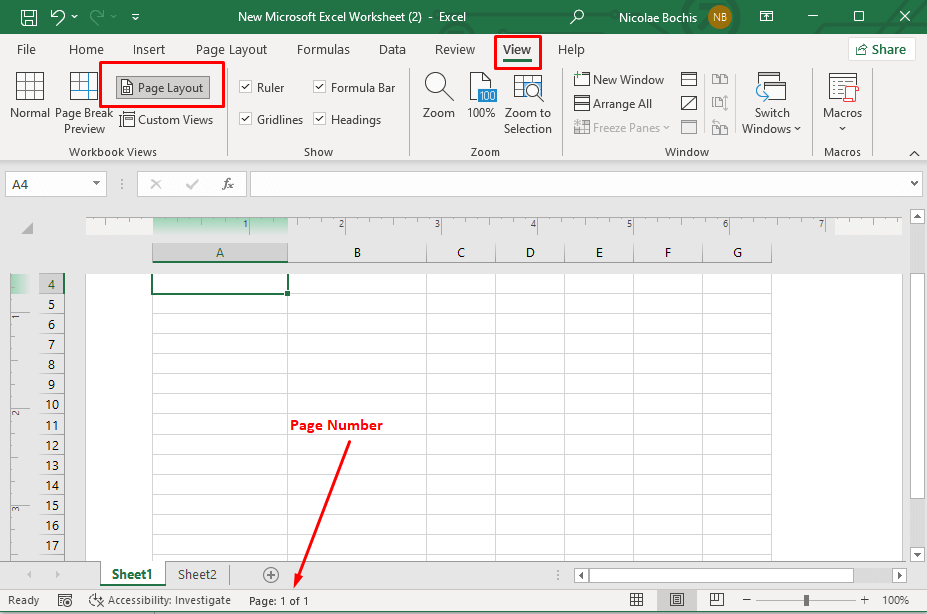
Page Number
The Page Number option on the Excel status bar shows you how many printable pages your worksheet has and the current page. But you’ll have to switch to the Page Layout view mode if you want to see the number of pages.
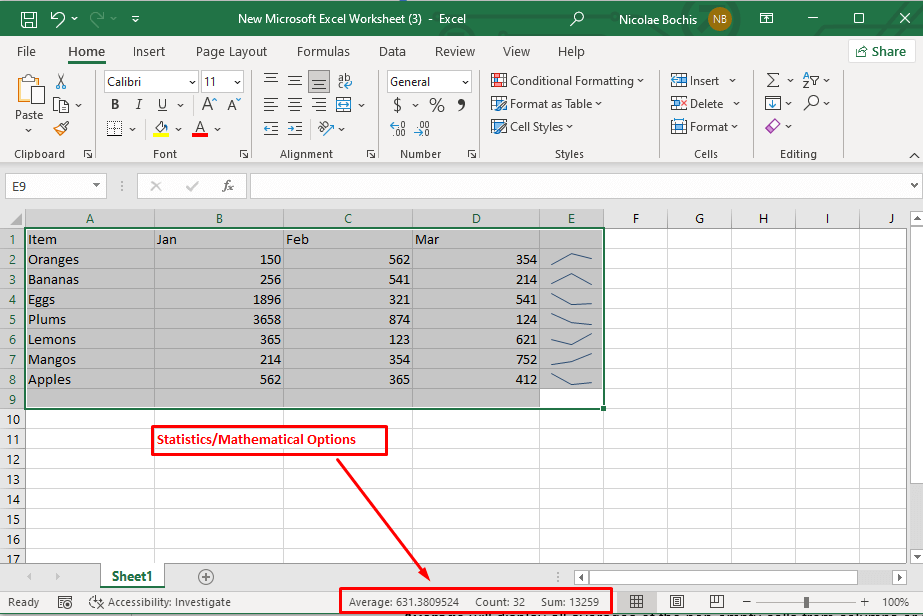
Statistics/Mathematical Options
The middle of the status bar will display some statistical and mathematical options instead of the page number when in Normal view mode. Select the cells containing data, and these options will show up. You’ll be able to see the following:
- Count displays the number of non-empty cells from columns and rows. It’ll work even if your data is not numeric.
- Average will display all averages of the non-empty cells from columns or rows.
- Sum will sum up all the numeric values in the selected range of cells.
- Numerical Count lets you capture several numeric entities in columns. However, this option is not turned on by default, and you’ll have to customize your status bar to display it.
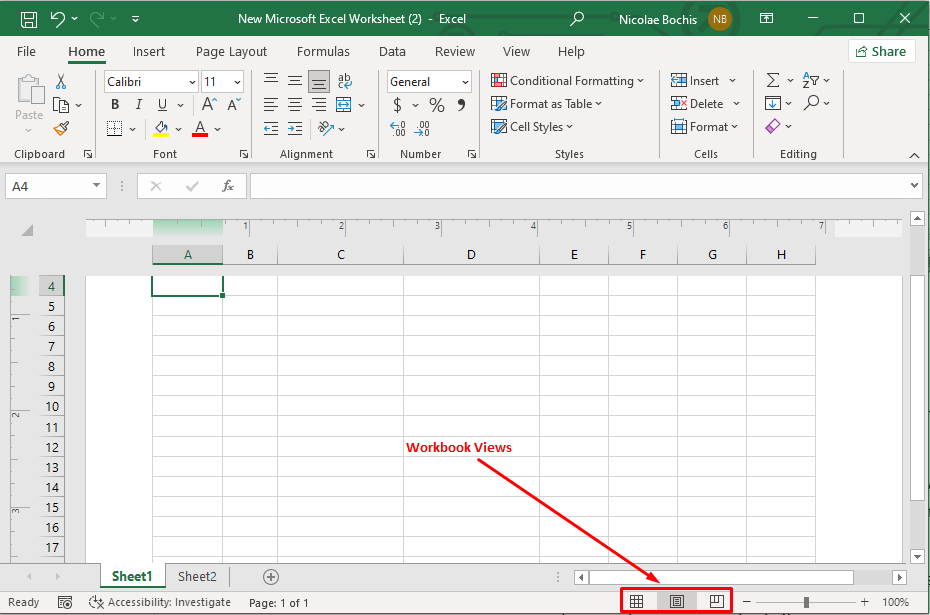
Workbook Views
You’ll notice the three Workbook view options to the right of the page number. They allow you quick access to the viewing modes and keep the focus on your work. You can find these workbook views in the View tab on the ribbon, too.
Normal View is the default worksheet view. It displays the standard gridlines, headers, and footers.
- Page Layout View is a simulation of how the printed pages of the current worksheet would look like. Use it to design and adjust the layout of the Excel workbook before you print it or convert it to a PDF file.
- Page Break Preview displays all the visible page breaks. This is useful to see how much content you can split across multiple pages.
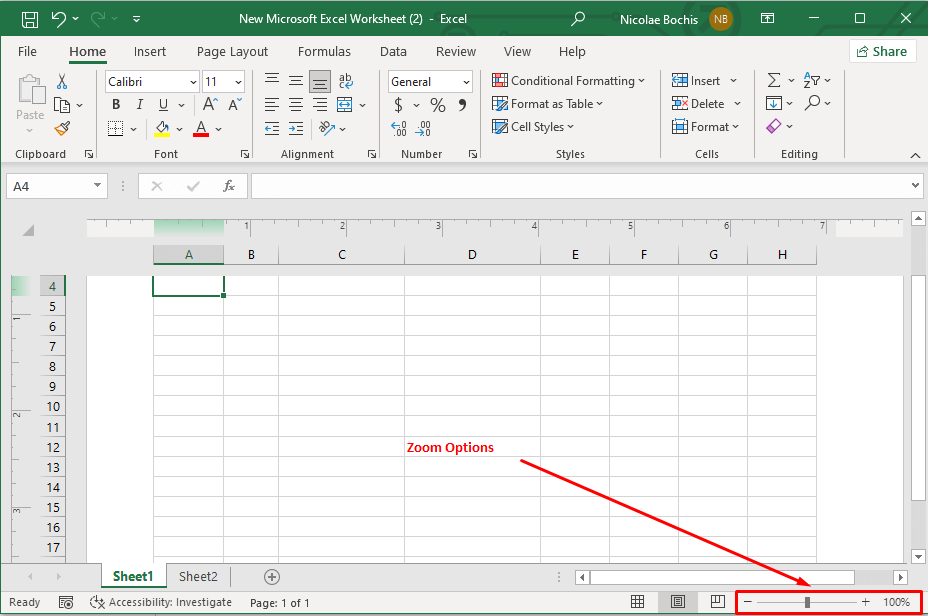
Zoom Options
The rightmost option is the Zoom tool. You can use it to modify the level of the workbook’s magnification. Use the zoom slider bar to zoom in or out, or opt for the plus (+) to zoom in and minus (-) to zoom out.
The zoom percentage displayed in the screen’s right corner lets you know your workbook’s current zoom level. If you click on the number, a zoom dialog box will open where you can set the magnification percentage for your worksheet.
How to Customize Status Bar in Excel
Excel lets you customize the status bar and add certain functions and options to suit your needs. To do that, simply right-click anywhere on the Status Bar to get the full list of options. Let’s look at some additional status bar options available to you.
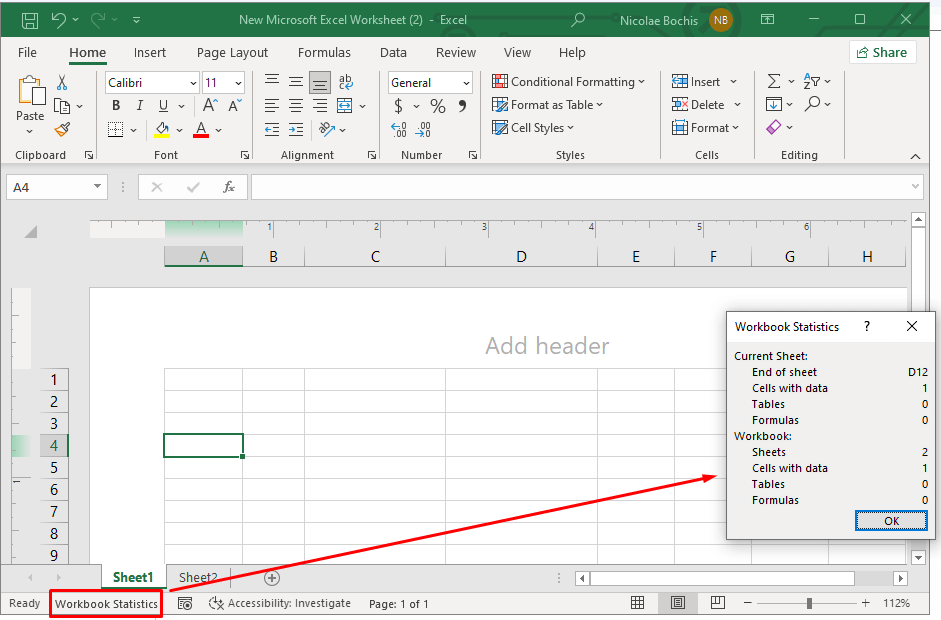
Workbook Statistics
You can right-click the status bar and select the Workbook Statistics option to see key information about your workbook. When you click on the Workbook statistics on the status bar, it’ll open a separate dialog box containing details about the current Excel sheet and the entire workbook. You can learn how many sheets are in a workbook, how many cells have data if there are any tables, pivot tables, and formulas.
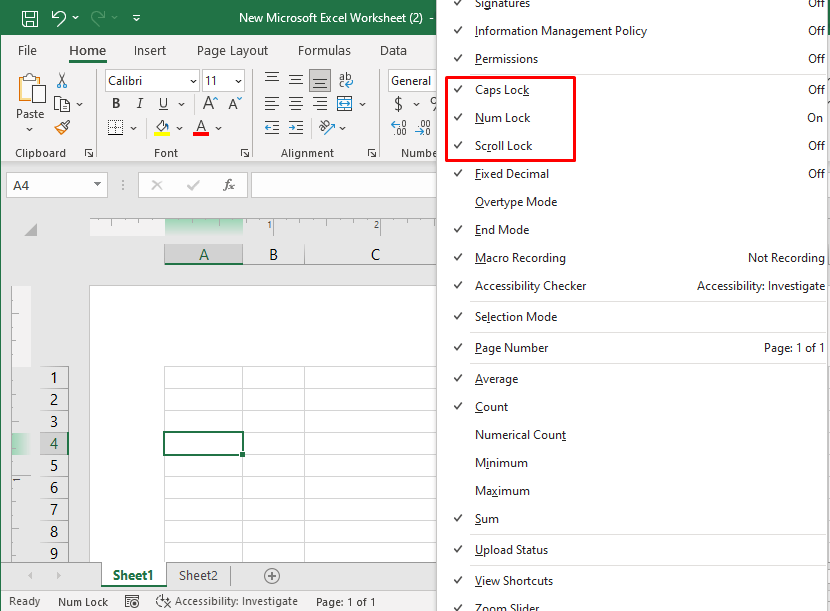
Caps Lock, Num Lock, and Scroll Lock
Enable Caps, Num, and Scroll Lock so the status bar indicator visually reminds you if these keyboard keys are currently off or on. That will help you to avoid making mistakes while typing.
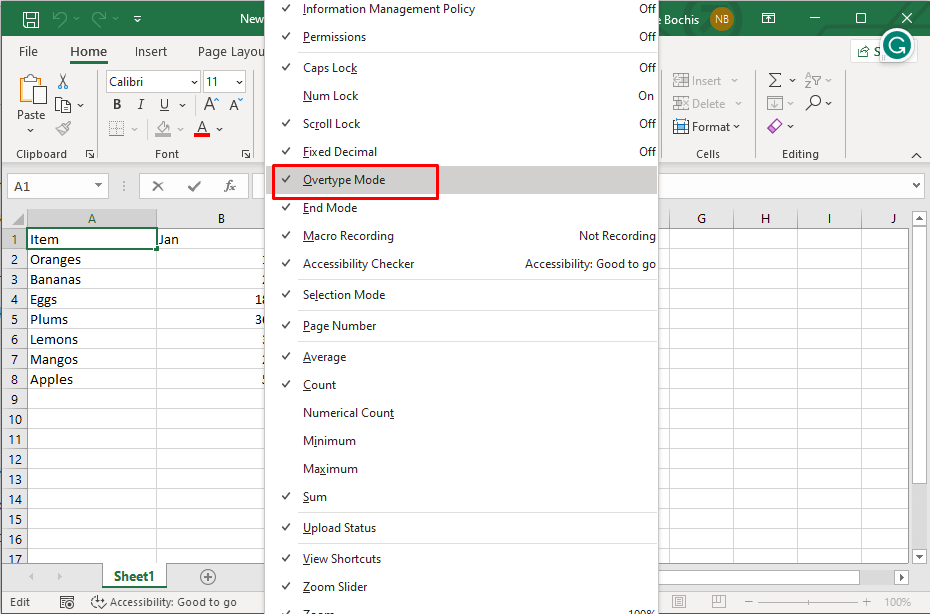
Overtype Mode
Overtype mode is handy when you need to replace the existing content of the cell with new content. This mode will allow you to overwrite the existing data as you type the new data.
You can toggle the overtype mode on and off by pressing the Insert key on your keyboard. When the Overtype mode is enabled, the status bar will display Overtype as an indicator. This indicator won’t show up when the mode is disabled.
To wrap it up, the status bar in Microsoft Excel is like a trusty sidekick, quietly offering you valuable insights and customization options as you navigate your spreadsheets. Understanding how to use and customize the status bar can significantly enhance your productivity, providing valuable insights into your data and allowing you to tailor Excel to your unique needs, so keep experimenting with it.

