When you must give a presentation at work, Microsoft PowerPoint is the standard tool most people use. However, without some creativity, PowerPoint presentations can end up dull. Learning how to autoplay PowerPoint slides can add some spice to your presentations.
In this article, you’ll learn how to autoplay content in PowerPoint slides. You can automatically play an embedded video when a slide appears or autoplay animations. Finally, you can create a self-running presentation that moves through the next slide using specific timing that you’ve set up and even loop the presentation for continuous play.
Note: The following tips will work on PowerPoint, whether running on a Windows or a Mac computer.
How to Create a Self-Running PowerPoint Presentation
Why create a self-running PowerPoint presentation? You may not want to get distracted by clicking to move your presentation to the next slide. Or you’d like to set up your presentation on a kiosk at a convention. Some presentations that can run themselves may not even need a speaker.
Set Up the Slide Show
By default, PowerPoint presentations are configured to run as “Presented by a speaker”, where you have to click through each slide to trigger transitions throughout the presentation.
To set up Autoplay, first configure the presentation to autoplay how you would like.
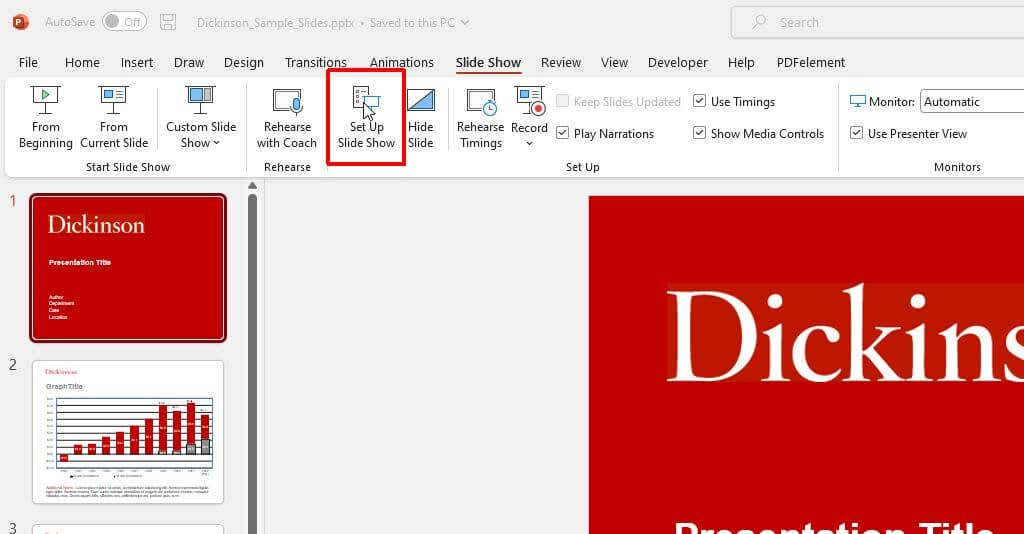
- Select Slide Show tab from the menu, then select Set Up Slide Show from the ribbon.
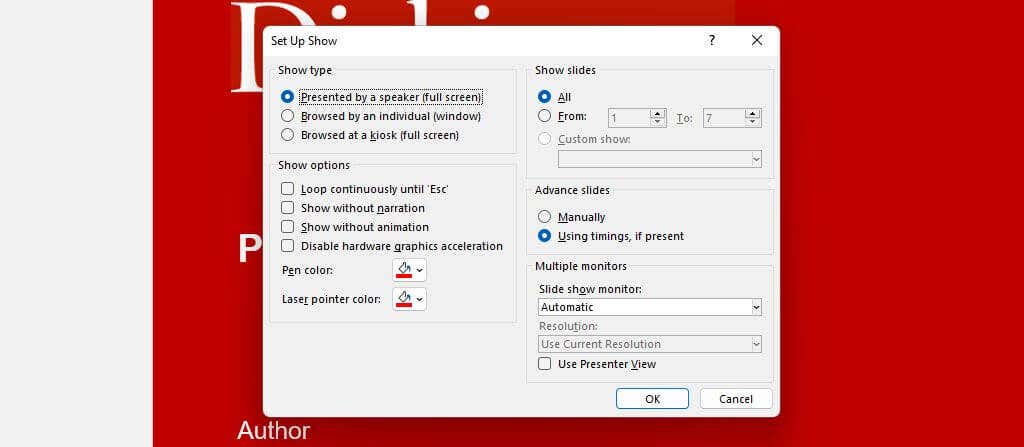
- Use the options on the pop-up window to configure how your presentation will behave during autoplay.
Here’s how each option works:
- Presented by a speaker: The speaker must click through each slide using the mouse click. However, automatic slide timing is still an option if you select it on the right.
- Browsed by an individual: The viewer will need to press Play to start the presentation, but after that, it’ll play on its own.
- Browsed at a kiosk: This option will continue to loop through the presentation until you press the Esc key on the keyboard. This will automatically enable the Loop Continuously option at the bottom of the window.
Rehearse and Set Slide Times
The next step is to set up the slide timing and rehearse your presentation to ensure the time spent automatically on each slide is appropriate.
Using this rehearsal option is also a great way to practice your presentation and ensure that the overall runtime is within your limitations.
To do this:
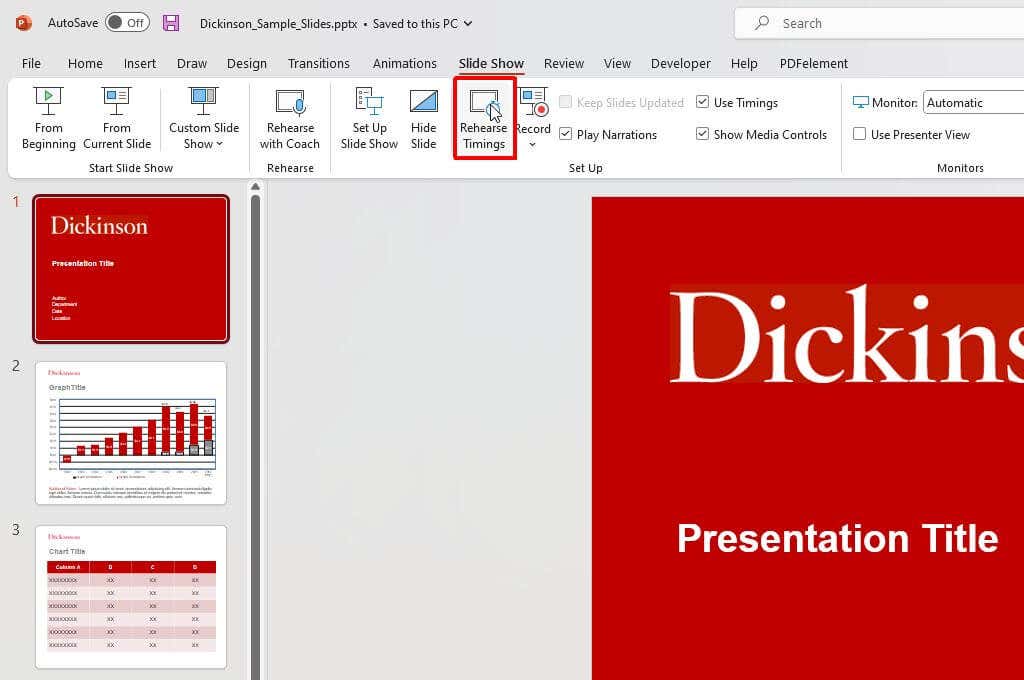
- Select Slide Show from the menu and choose Rehearse Timings from the ribbon.
- This will start the “Recording” session. In this mode, you’ll need to speak normally using the script you will use during your presentation. When done speaking on a specific slide, select the “Next” arrow to continue to the next slide.
Note: Use the “Pause” button to pause the time for the current slide if you need to collect your thoughts or take a break for any reason. This small window will also show you the overall time for your entire presentation.
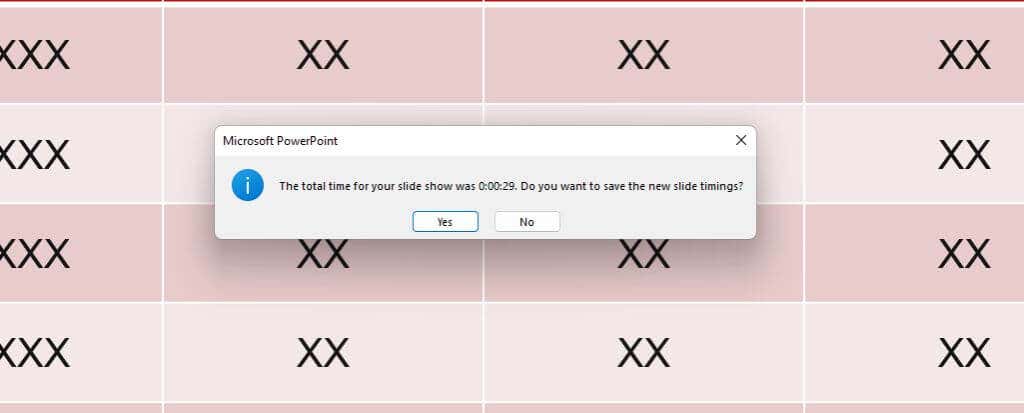
- Continue to do this through all of the slides. Finally, press the “x” at the upper right corner to finish recording on the last slide. You’ll see a pop-up message asking if you’d like to save your new slide timings.
Once you’ve saved these changes, your PowerPoint presentation is ready to use. If you’ve kept the default Presented by a speaker setting and enabled the Using timings, if present select under “Advance Slides,” you can start your presentation manually and then let slides advance automatically as you speak.
Record Slide Show (Fully Automated)
If you want to create a fully self-running presentation for a kiosk or send people to run themselves, select the correct option in the “Set Up Show” window described above.
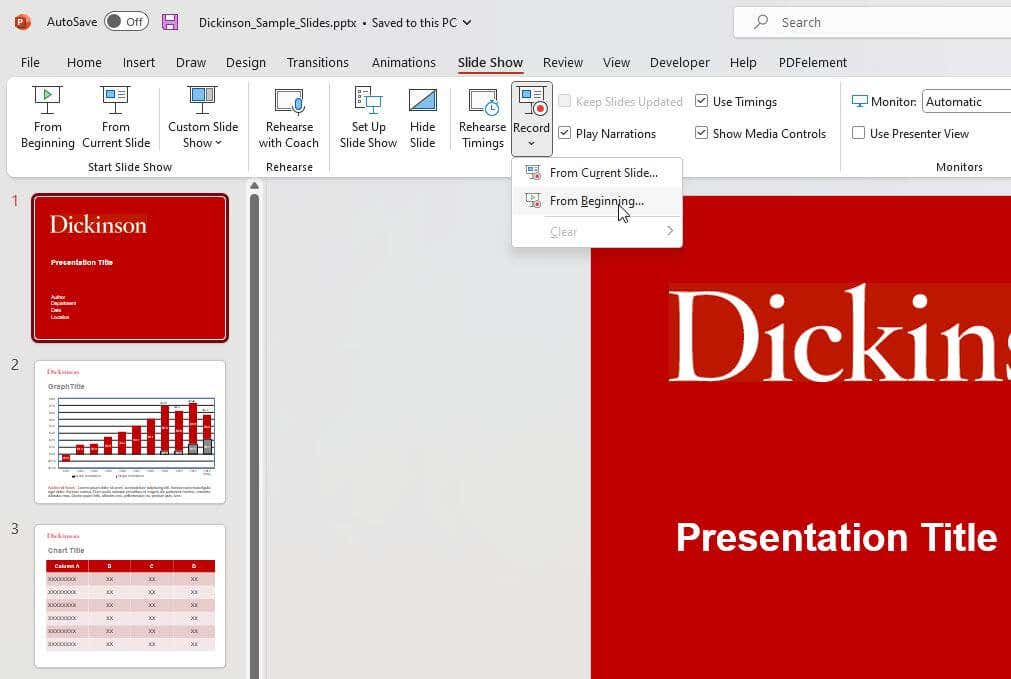
Then, record your presentation by selecting Slide Show from the menu and selecting Record in the ribbon. Next, select From Beginning in the drop-down menu to start recording your presentation in full screen from the first slide.
You can skip this step if you don’t want to record your voice narrating the slideshow. Just make sure you’ve enabled the Show without narration check box in the Set Up Show window.
How to Embed and Autoplay a Video
Another thing you can automate in your PowerPoint presentations is triggering an embedded video file when you click on the slide where you’ve placed it.
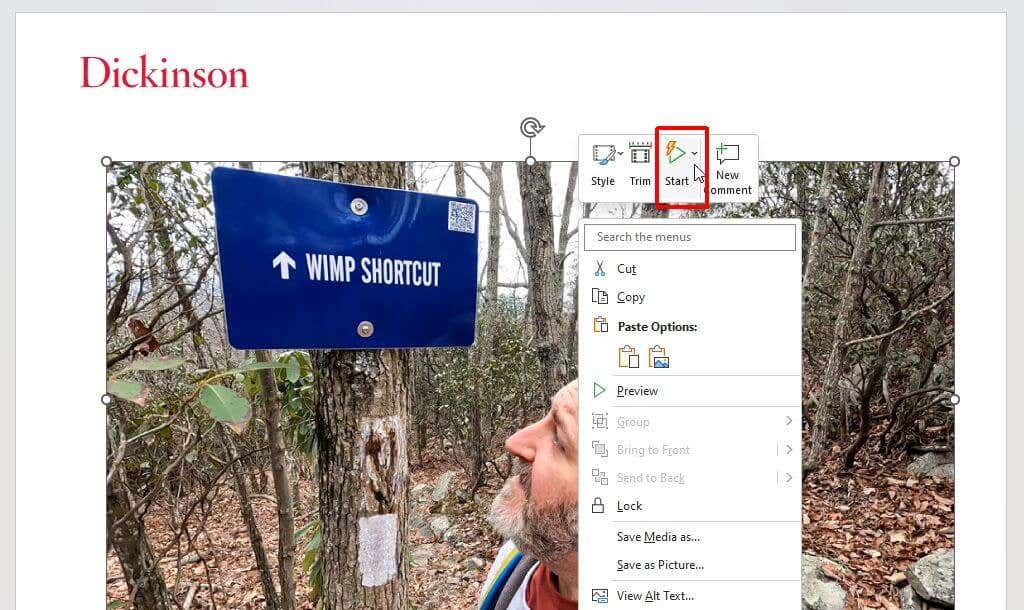
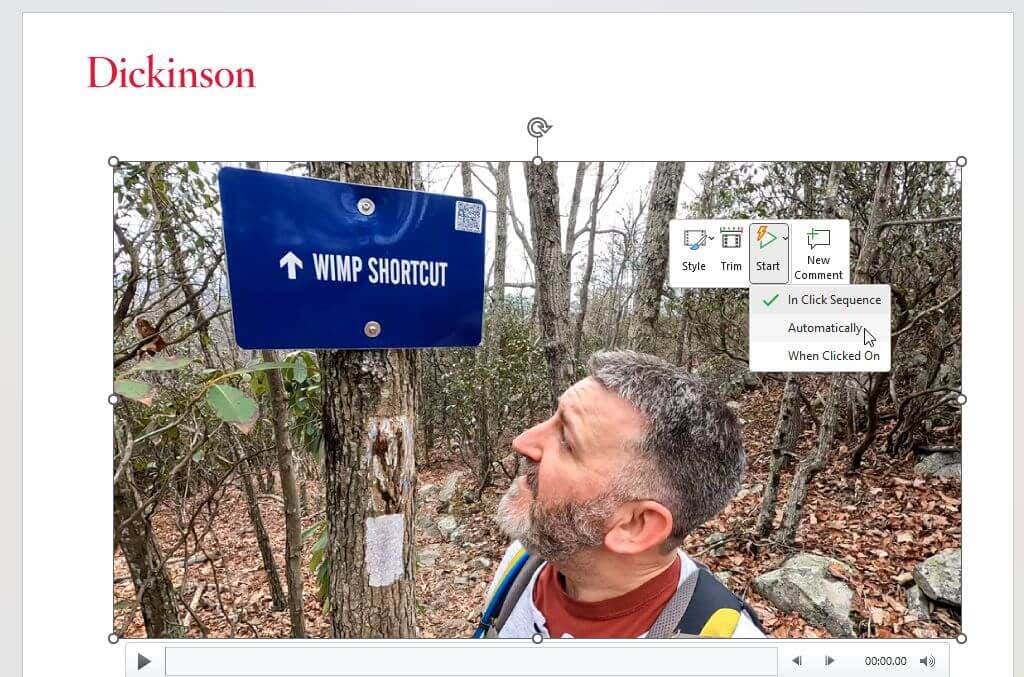
In the editing view, right click the video you want to automate and select the down arrow to the right of the Start button.
Select Automatically from the dropdown menu.
Save the PowerPoint presentation. Now, it’ll start playing automatically when you advance to the slide with your embedded video while in presenter view.
Should You Use a Self-Running PowerPoint Presentation?
The option to have your PowerPoint slide show advance automatically can be handy. However, it isn’t always the right approach. For example, a complete, recorded presentation is great if you’re emailing your presentation or offering a download. But a self-running presentation could backfire if you’re drawn into a side conversation or have other things you want to say on the fly. As a result, you may find yourself fumbling to pause your presentation.
If you want more control over your presentation flow, sticking with a manually run presentation might be best for your situation.
