Microsoft Word includes a built-in screen capture tool for when you need to grab a quick. With Microsoft Word’s Screenshot tool, you can easily capture the shot you need without a third-party application.
In addition to using the Screenshot feature on your desktop, you can take advantage of it in the Word mobile app on Android and iOS. Getting that perfect shot for your document couldn’t be simpler.
Take a Screenshot of an Active Application
One of the best features of the Microsoft Word Screenshot tool is that you can just click to capture a shot of an active application. The feature works the same on both Windows and macOS.
- Be sure that the application you want to capture is in an active window. If you have it open but minimized to the Taskbar or Dock, you will not see it in the tool.
- Place your cursor in the Word document where you want to insert the screenshot.
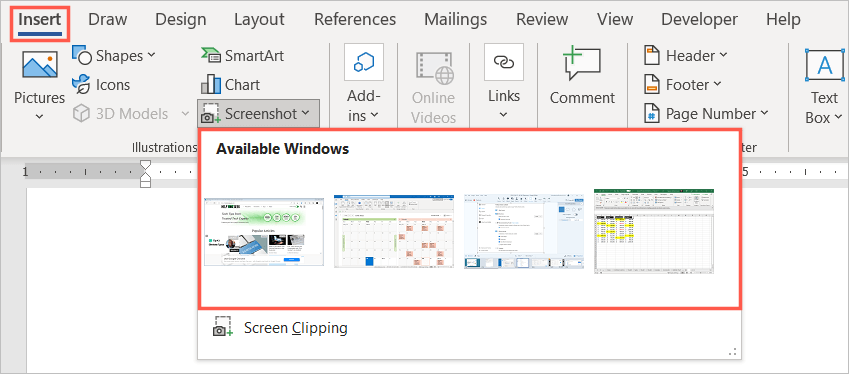
- On the Insert tab, select the Screenshot drop-down arrow in the Illustrations section of the Ribbon.
- At the top of the drop-down box, you’ll see thumbnails for the available active windows. Choose one, and it’ll pop a screenshot right into your document at the insertion point.
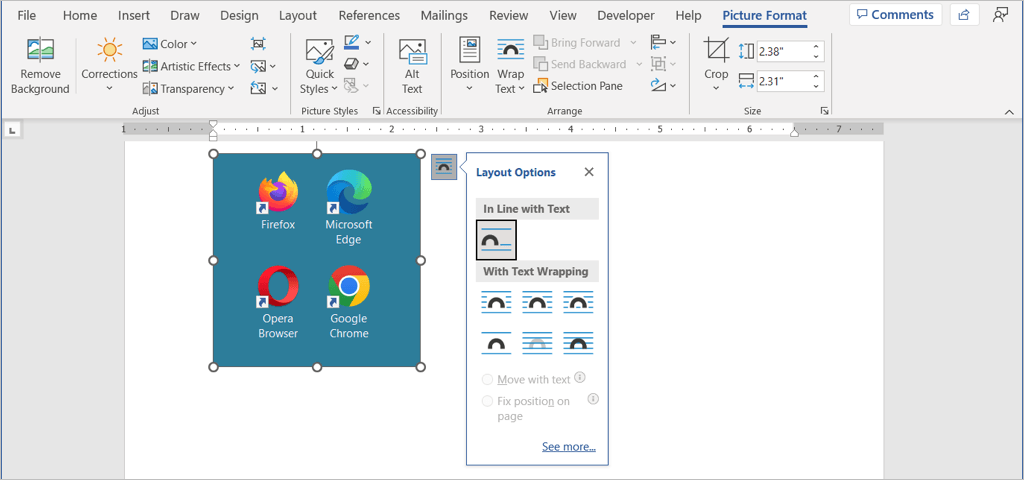
You can select the image and use the Picture Format tab or Layout Options (Windows) to edit or align the image with your text. You can also resize the screenshot like any other image in Word.
Take a Screenshot of Your Desktop
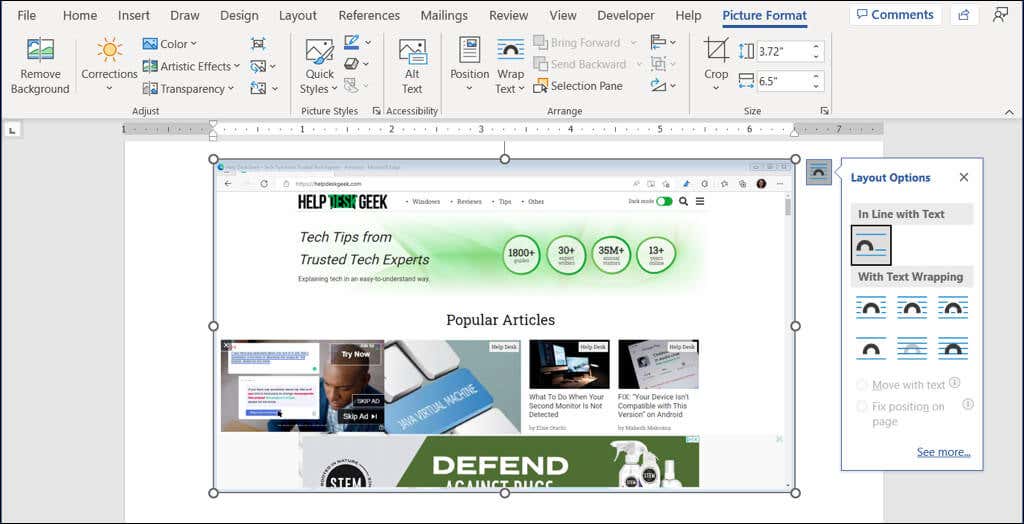
Maybe the screenshot you need isn’t an active application but something else on your desktop. Using the Screenshot tool’s Screen Clipping option, you can capture the area you need—or even the entire screen.
- Place your cursor in the document where you want the screenshot.
- Go to the Insert tab.
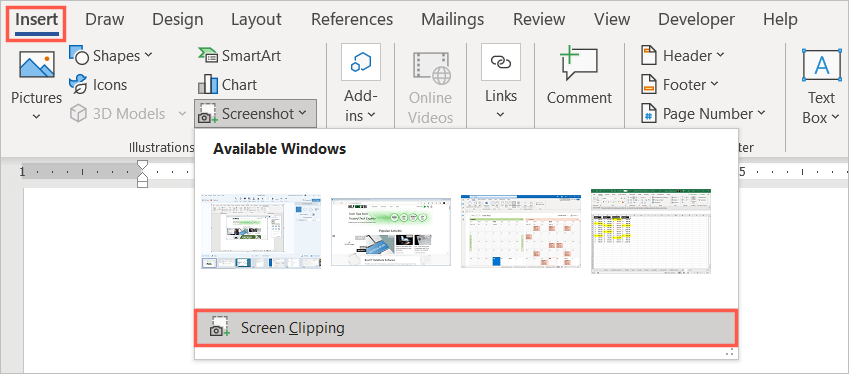
- Select the Screenshot drop-down arrow and pick Screen Clipping.
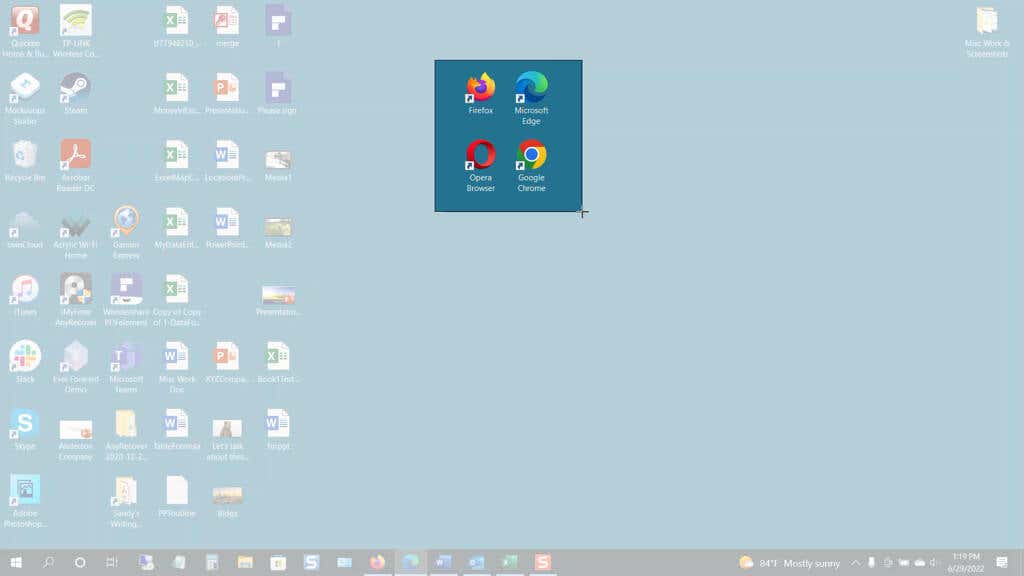
- You’ll see your pointer transform into a crosshair symbol. Move to the location on your computer where you want to capture the screenshot.
- Drag your cursor to capture the specific area, section, or location you need. As you drag, you’ll see the portion of the screenshot highlighted, and the background dimmed.
- When you have the selection you need, release your mouse button or trackpad. This automatically captures the shot and places it in your Word document.
Like a screenshot of an active application, you can use the Picture Format editing tools, view Layout Options (Windows), or resize the image.
Take a Screenshot in the Word Mobile App
If you take advantage of the Word mobile app on Android or iPhone, you can use a similar tool with your device camera.
- Launch Word on your mobile device and open the document if you haven’t already. Be sure you’re in editing mode by tapping the pencil icon at the top.
- Place your cursor in the document where you want the image.
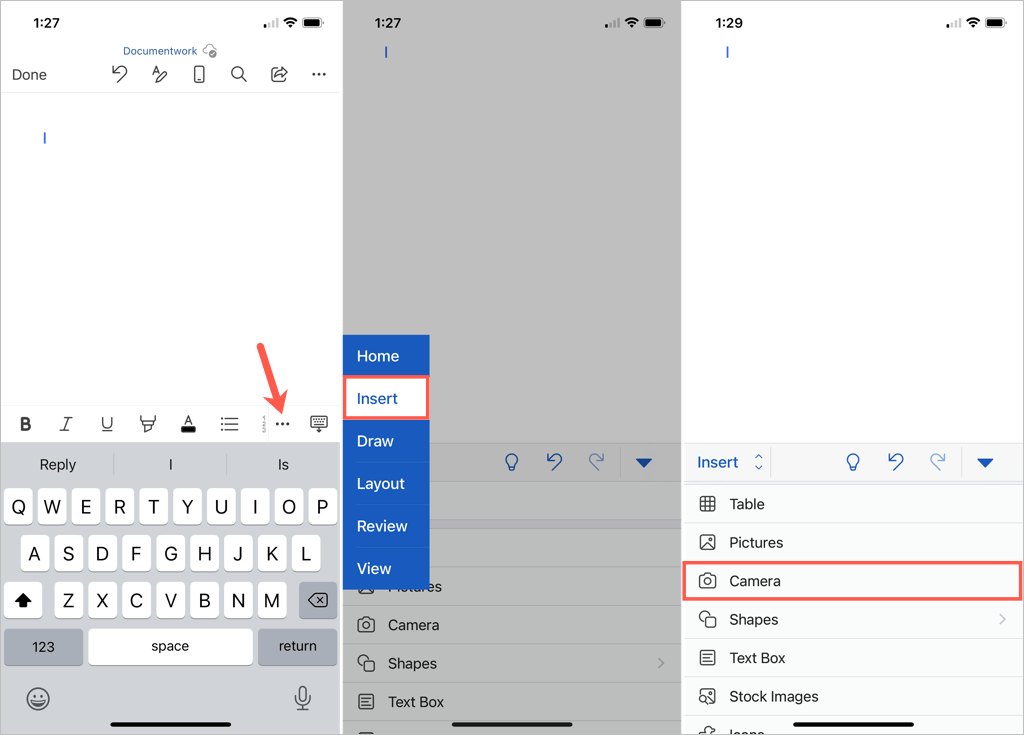
- On the right side of the toolbar, above the keyboard, tap the arrow (Android) or three dots (iPhone).
- Select the drop-down box on the left that displays the Home tab and pick Insert.
- On Android, choose Pictures > Camera, or on iPhone, select Camera. To insert an image from your device instead, pick Photos or Pictures and locate the image.
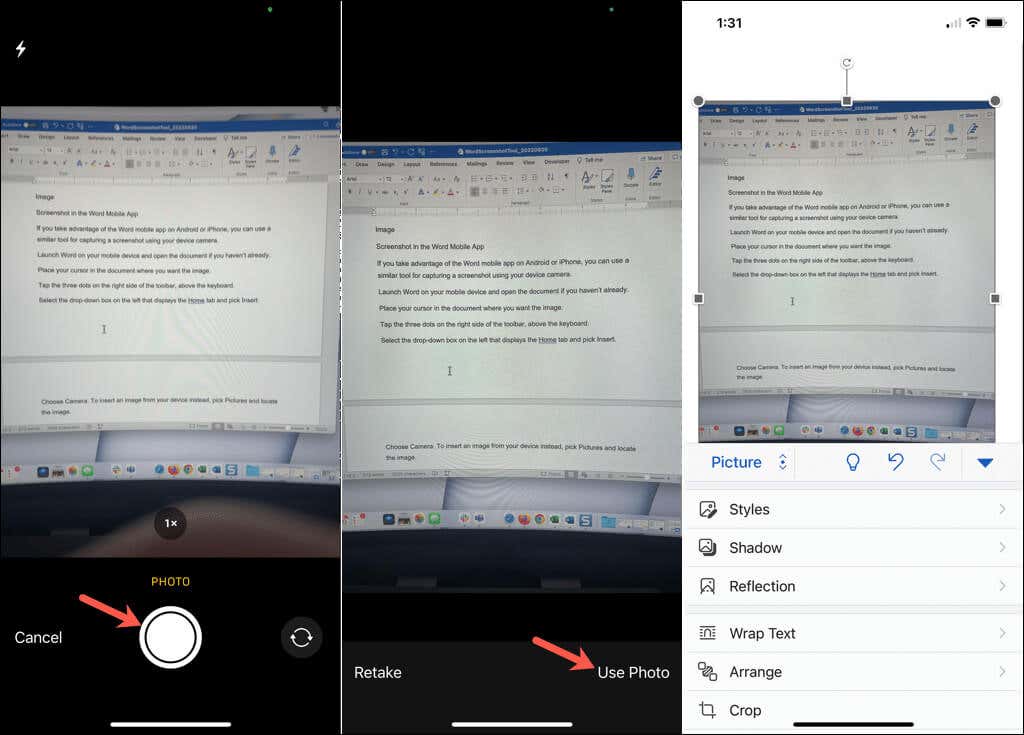
- When your device camera opens, use the capture button to snap the shot.
- Select Done on Android or Use Photo on iPhone to insert the captured image. To redo the shot, pick Delete or Retake.
You’ll then see the image appear in your Word document. From there, you can move the picture, drag a corner or edge to resize it or use the editing tools on the Picture tab to format the image.
The built-in Screenshot tool makes inserting an image in your Word document easy. Plus, you can use this tool in other Microsoft Office applications like Excel and PowerPoint.
Now that you know how to take a screenshot in Word, check out a couple of related tutorials. Learn how to extract images from your document or how to convert an image in Word.
