Are you trying to install Microsoft Teams on your Windows 11 or Windows 10 PC, but the installation keeps failing? Luckily, there are a few ways to deal with the problem and install the app without errors on your machine.
Some reasons Teams doesn’t install are that your PC doesn’t meet the app’s minimum requirements, your antivirus is interfering with installation, Teams leftover files are causing a problem, your user account doesn’t have permissions to install apps, and more.
Ensure Your PC Meets Teams’ Minimum System Requirements
When you have trouble installing Teams, ensure your computer meets the app’s minimum system requirements. If your PC doesn’t meet these needs, you can’t install or use the app on your computer.
The required minimum specifications are:
- Processor: minimum 1.1 GHz or faster, two-core
- RAM: 4 GB
- Disk space: 3 GB
- Display: 1024 x 768 pixels resolution
- Operating system: Windows 11, Windows 10, Windows 8.1
- .NET version: .NET 4.5 CLR or later
If your PC meets these requirements, but you still can’t install the app, use the following troubleshooting tips.
Turn Off Your Antivirus and Firewall While Installing Teams
One reason you can’t install Teams is that your antivirus and firewall are interfering with the installation process. This sometimes happens even when your apps are clean of any malicious content.
In this case, temporarily turn off your machine’s antivirus and firewall to fix your issue. How you do this depends on the program you’re using. For Microsoft Defender Antivirus, you’ll follow the following steps:
- Open the Start menu, find Windows Security, and launch the app.
- Select Virus & threat protection in the app.
- Choose Manage settings in the Virus & threat protection settings section.
- Turn off the Real-time protection toggle.
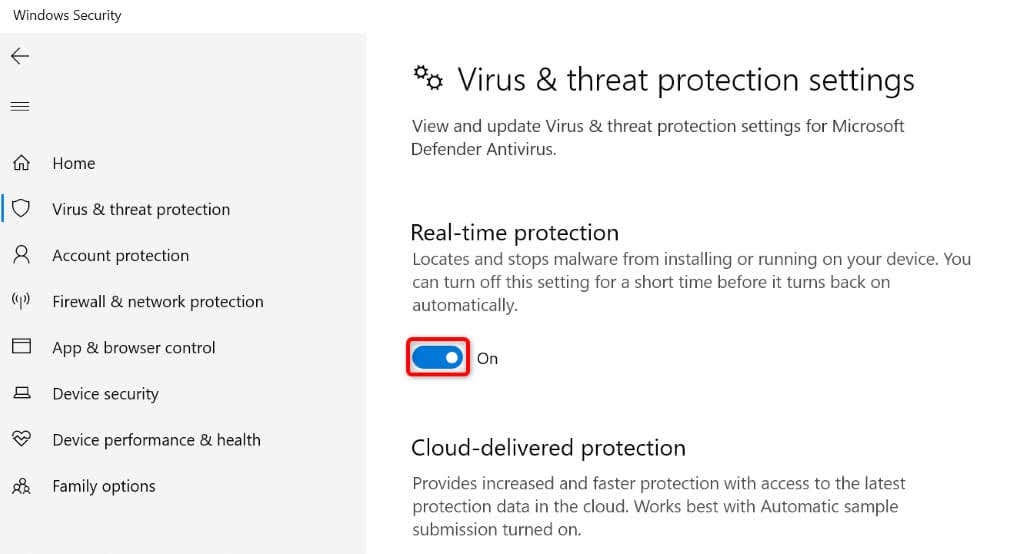
- Select Yes in the User Account Control prompt.
- Choose Firewall & network protection in the left sidebar.
- Select the network that says (active).
- Turn off the Microsoft Defender Firewall option.
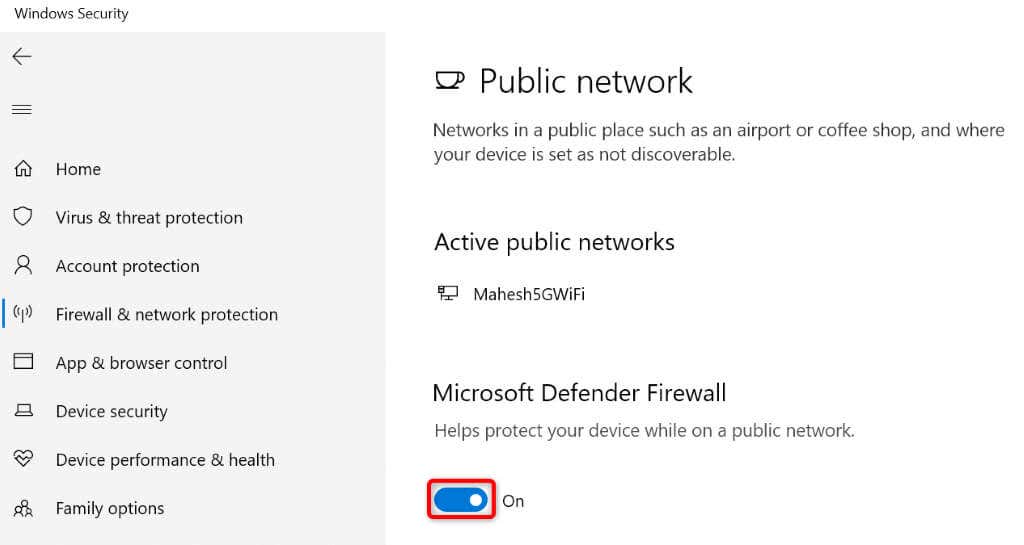
- Choose Yes in the User Account Control prompt.
- Run the Teams’ installer file.
Use Microsoft’s Install and Uninstall Troubleshooter
If you still can’t install Teams, Microsoft has a Program Install and Uninstall troubleshooter that you can use to find and fix your app’s installation issues. This free tool automatically detects your app install problems and helps resolve the faulty items.
- Launch a web browser on your PC, access the Program Install and Uninstall troubleshooter site, and download the tool by selecting Download troubleshooter.
- Run the downloaded file.
- Select Next on the tool’s first screen.
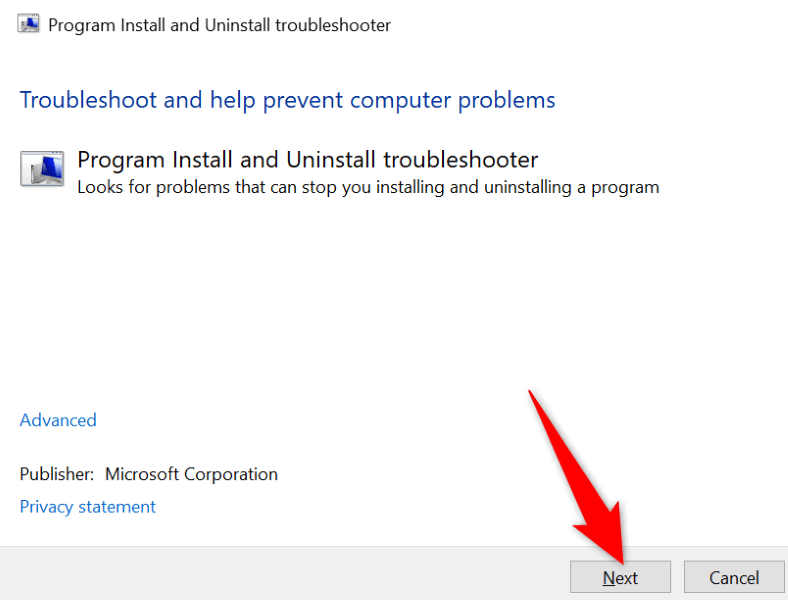
- Allow the app to find issues with your app installs.
- Follow the on-screen instructions in the app to resolve your app install problem.
Perform a Clean Microsoft Teams Installation
If you have Teams installed on your PC or had the app installed before, get rid of all the app’s leftover files and perform a clean app installation. Here are the steps to do that.
Step 1: Force Close the Teams App
- Right-click the Windows taskbar and select Task Manager.
- Access the Processes tab in the tool.
- Find and right-click Microsoft Teams on the list and choose End task.
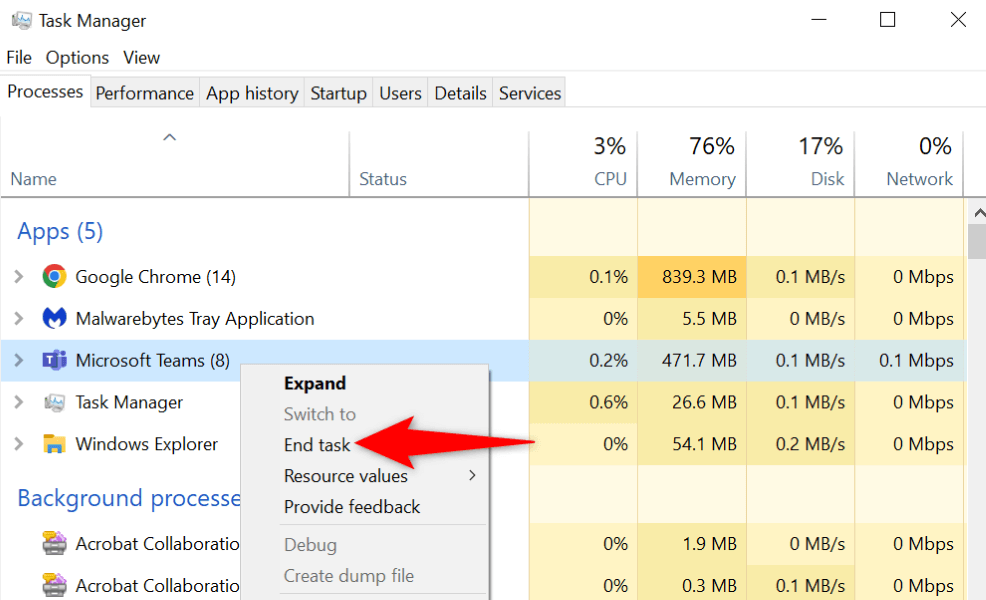
Step 2: Remove Teams-Related Credentials From Your PC
- Open the Start menu, find Control Panel, and launch the tool.
- Select User Accounts.
- Choose Credential Manager.
- Select Windows Credentials.
- Expand the Generic Credentials section, find any credentials related to Teams, select those credentials, and choose Remove.
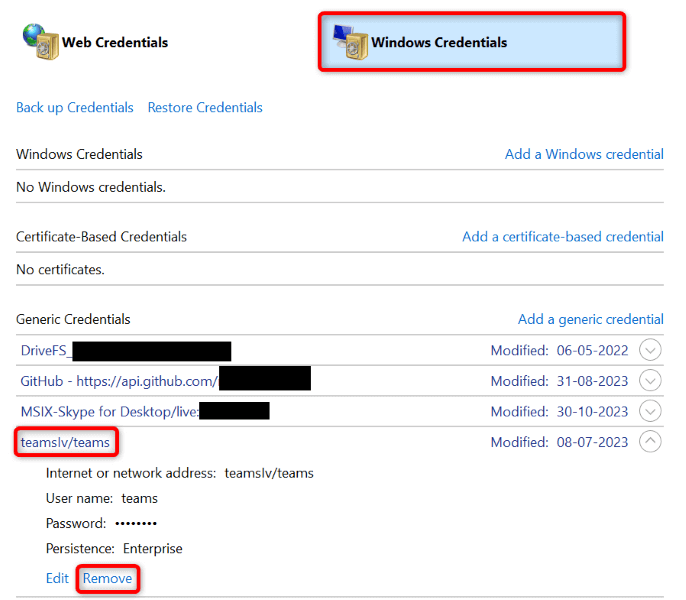
- Select Yes in the prompt.
Step 3: Delete the Teams App
- Open Control Panel and select Uninstall a program.
- Select Microsoft Teams on the list and choose Uninstall at the top.
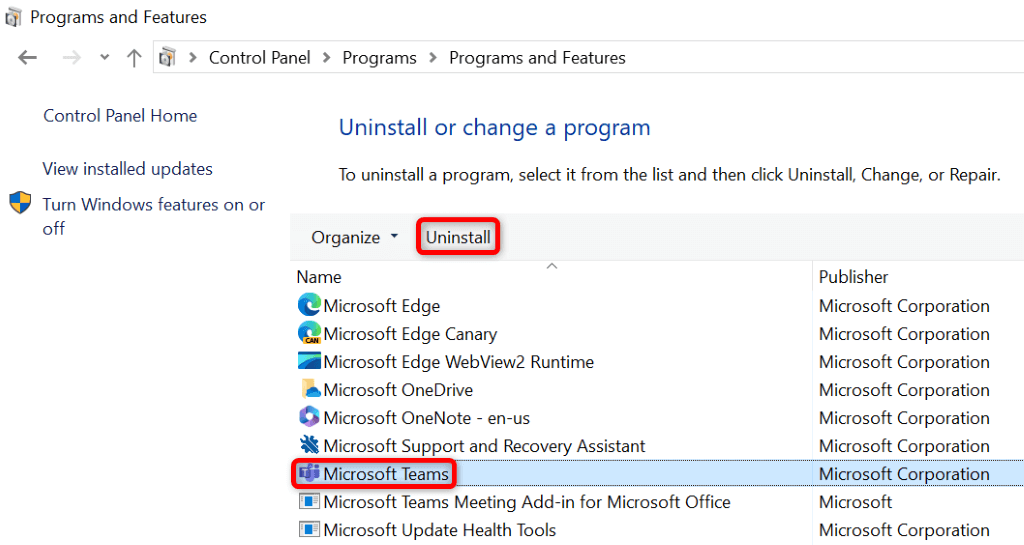
- Select Yes in the prompt.
- Wait for the app to be uninstalled.
Step 4: Remove Teams’ Leftover Files and Install Teams
- Open the Run dialog box by pressing Windows + R.
- Type the following in the box and press Enter:
%appdata%\Microsoft\ - Find the Teams folder, right-click the folder, and choose Delete.
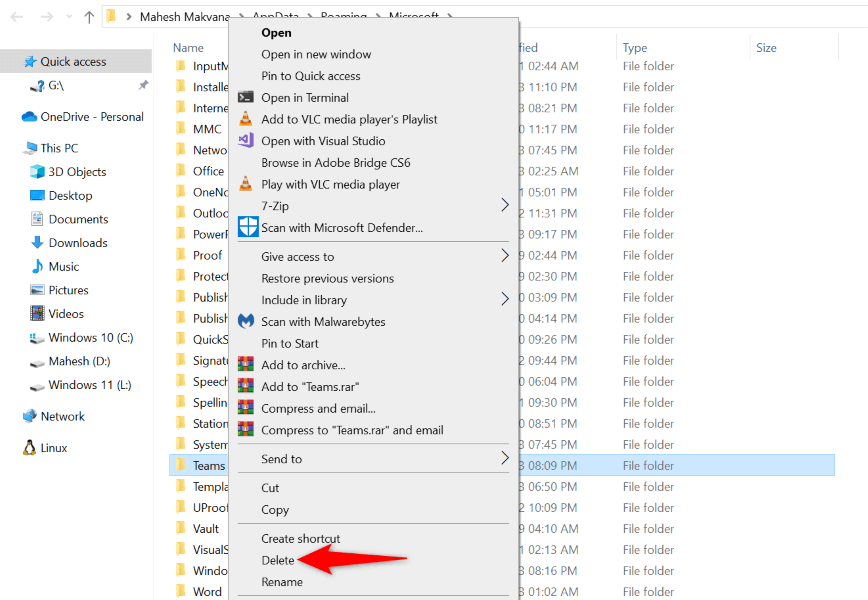
- Empty the Recycle Bin so the Teams’ files are gone for good.
- Restart your PC.
- Turn off your antivirus temporarily.
- Re-download the Teams installer, right-click the installer, and choose Run as administrator.
- Select Yes in the prompt and continue to install the app.
Install Teams From Windows’ Built-In Administrator Account
If you still have issues installing Teams on your PC, your current user account might not have the required permissions to install specific apps. In this case, activate your PC’s built-in administrator account and then install the app.
- Open the Start menu, find Command Prompt, and select Run as administrator.
- Choose Yes in the User Account Control prompt.
- Type the following command on the CMD window and press Enter:
net user administrator /active:yes
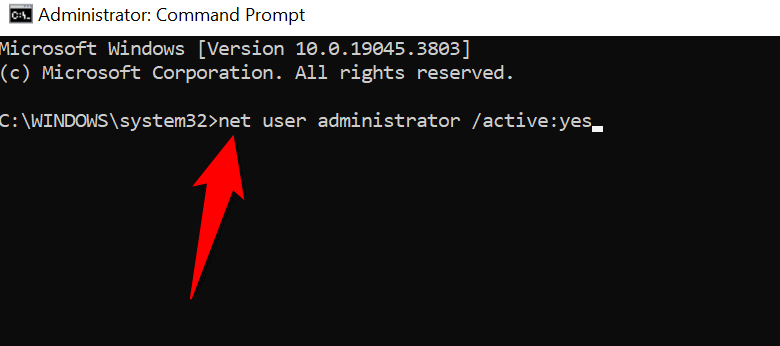
- Close Command Prompt.
- Sign out of your current account by opening the Start menu, selecting the account icon, and choosing Sign out.
- Log in to the newly enabled admin account, download the Teams installer, and run the installer to install the app.
Resolve Teams’ Installation Issues and Install the App Successfully on Your Windows PC
Microsoft Teams is an essential tool for many organizations. If you can’t install the app on your computer and fear missing out on your work tasks, the methods above will help you fix the items preventing the app from installing. You can then install the app without any errors, sign in to your account, and access all your organizational conversations. Enjoy!
Related Posts
Mahesh has been obsessed with technology since he got his first gadget a decade or so ago. Over the last few years, he’s written a number of tech articles on various online publications including but not limited to MakeTechEasier and Android AppStorm. Read Mahesh’s Full Bio

