Microsoft Teams’ screen sharing feature allows you to share your device’s screen with your meeting participants. If you have trouble presenting your screen or see a black screen in the meeting while trying to present, your device or app may have an issue. Here are the possible solutions to your problem.
Some reasons you can’t share your screen are that not everyone is allowed to share the screen in your current meeting, Teams doesn’t have screen-sharing permission on your Mac, your internet connection isn’t fast enough, or Teams’ cache is corrupt.
1. Let Everyone Present Their Screen in Your Teams Meeting
Teams allows the meeting admin to choose who can present their screen in a meeting. If your meeting admin has disabled screen sharing for everyone, that may be why you can’t share your screen with others.
You can ask the admin to fix that by following the following steps:
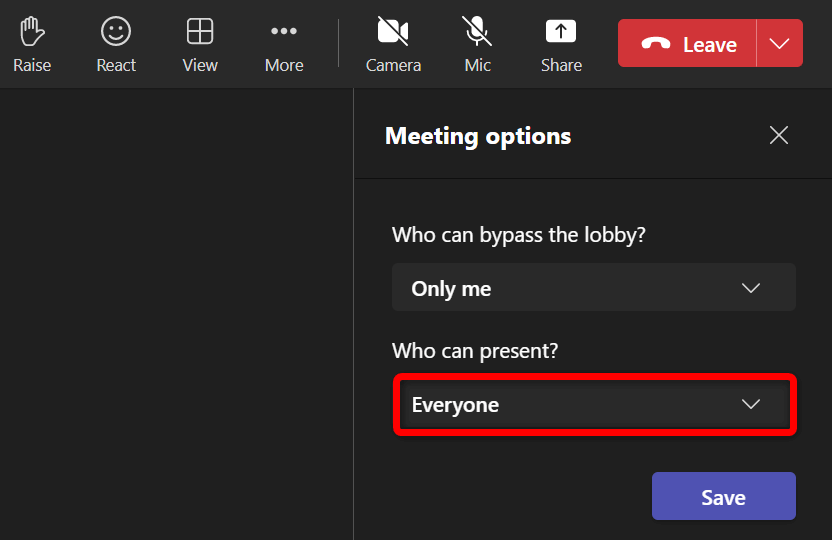
- Select More at the top of a Teams meeting screen.
- Choose Settings > Meeting options in the menu.
- Select Who can present? and choose Everyone. Then, select Save.
2. Allow Teams to Share Your Mac Screen
If you’re using Teams on a Mac, you’ll have to allow the app to share your screen from your macOS settings. Once you’ve done that, Teams will be granted full access to your screen.
- Select the Apple menu in the top-left corner and choose System Preferences.
- Select Security & Privacy on the following panel.
- Choose the Privacy tab and select the Screen Recording option.
- Turn on the checkbox for Microsoft Teams on the right.
3. Make Sure Your Internet Connection Is Fast Enough
Screen sharing requires higher internet bandwidth than normal internet usage. Your internet speed should be fast enough to allow you to present your screen in your online meetings.
You can check the speed of your connection by heading to a site like Fast.com. The site will tell you your internet speed, letting you decide if you should upgrade your current plan to get higher speeds.
4. Close the Activities Using Your Internet Data
One possible reason you can’t smoothly share your screen in your Teams meetings is that your computer’s other apps and activities are using up your internet bandwidth. This leaves Teams with little bandwidth to work, leading to various issues.
You can fix this issue by closing all your apps that utilize your internet connection. You can find a list of all your open apps and even force them to close on your Windows 10/11 and Mac machines.
On Windows
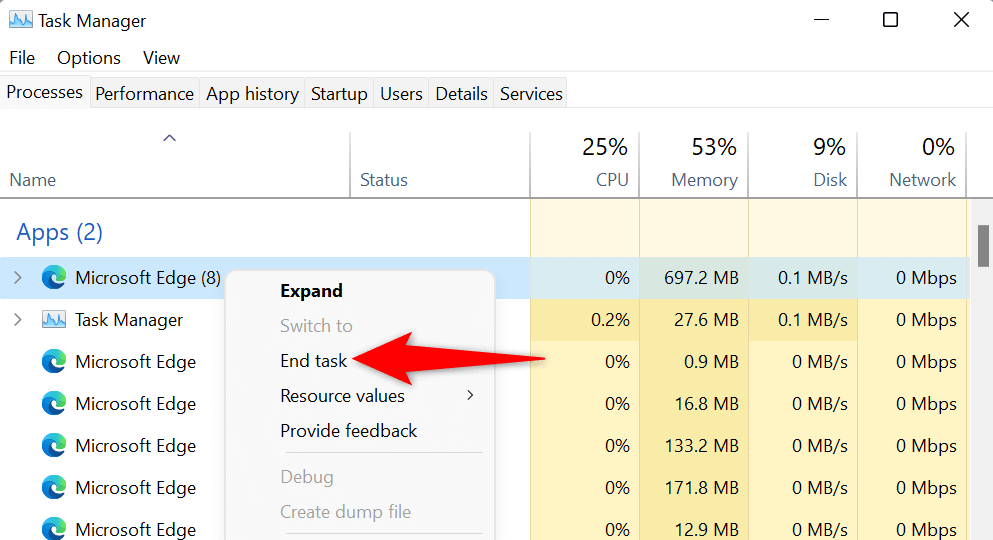
- Right-click the Start menu icon and choose Task Manager.
- Select the Processes tab, find the app to close, right-click the app, and choose End task.
On Mac
- Press Option + Command + Esc on your keyboard.
- Select the app to close on the list and choose Force Quit.
5. Use Microsoft Teams in Google Chrome or Microsoft Edge
If you’re trying to share your screen in the web version of Microsoft Teams and not in the desktop app, make sure to use a stable web browser like Google Chrome or Microsoft Edge. These browsers tend to work well with Teams, allowing you to present your screen and use various other app functions.
You can easily switch from your current web browser (like Firefox) to Chrome or Edge, and then start presenting your screen to everyone.
6. Delete Microsoft Teams’ App Cache
Like all other apps, the Teams application stores cache files on your computer to improve your app usage. These files can go corrupt, rendering the app unstable.
Your screen sharing not working issue may have resulted from a bad Teams cache. In this case, you can clear the app’s cache files and resolve your issue. The good news is deleting the cache doesn’t delete any of your files in the app.
On Windows
- Close Teams if you’re already running the app on your PC.
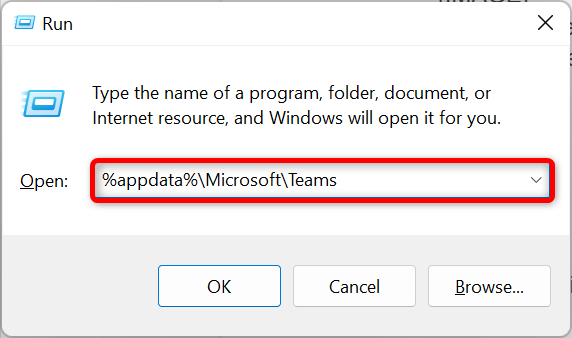
- Launch the Run dialog box by pressing Windows + R.
- Type the following in the box and press Enter: %appdata%MicrosoftTeams
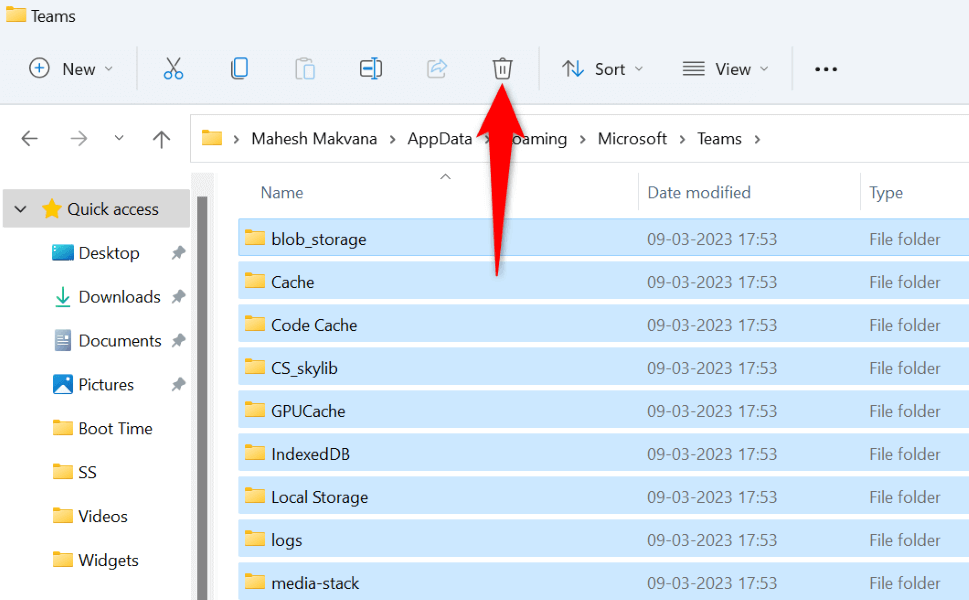
- Select all the files displayed on your File Explorer window by pressing Ctrl + A.
- Delete the selected files by selecting the trash can icon at the top.
- Reboot your PC and launch the Teams app.
On Mac
- Quit Teams if the app is already running on your Mac machine.
- Select Go > Go to Folder in a Finder window, enter the following path, and press Enter:
~/Library/Application Support/Microsoft/Teams - Delete all the contents of the folder by dragging and dropping all the items onto the trash can.
- Launch Keychain Access, find all Microsoft Teams entries, and delete all those entries.
7. Lower Your Windows or Mac Screen Resolution
Consider lowering your screen resolution when you have trouble sharing your screen with others in your Teams meeting. This makes Teams use fewer resources, increasing the chances of successfully presenting your screen in your meeting.
Later, you can go back to the original screen resolution.
On Windows
- Open Settings by pressing Windows + I.
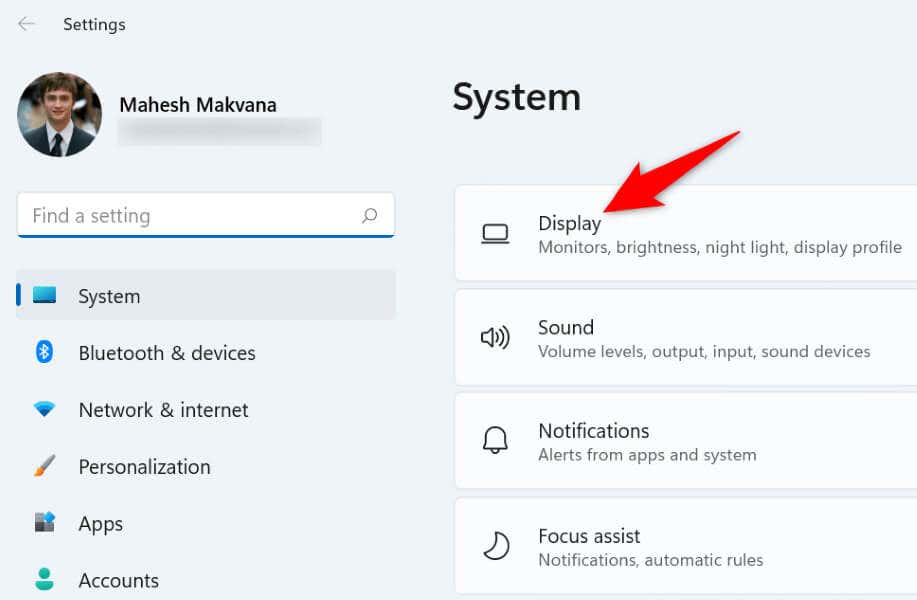
- Select System in the left sidebar.
- Choose Display on the right pane.
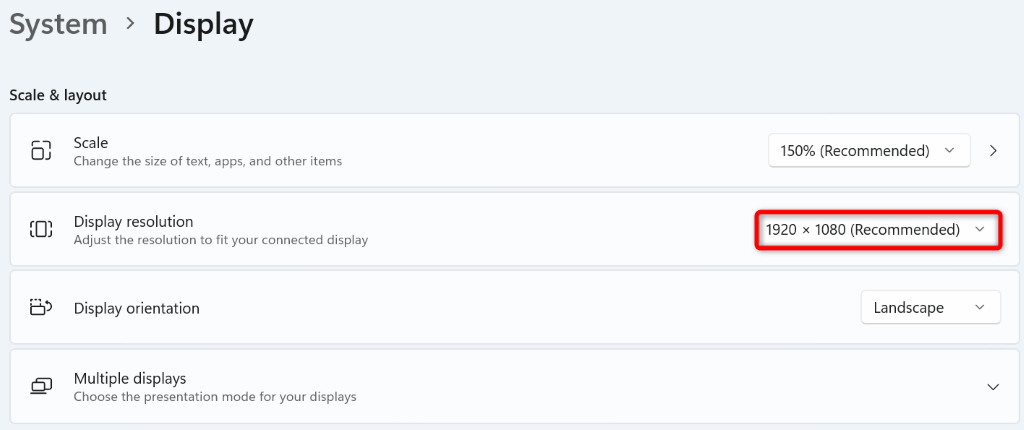
- Select the Display resolution drop-down menu and choose a lower resolution.
- Attend your Teams meeting and try to present your screen.
On Mac
- Go to System Preferences on your Mac.
- Select Display on the following page.
- Choose the Scaled option in the Resolution menu.
- Select a resolution that’s lower than the current one.
8. Update Your Display Drivers
Your display drivers define how your screen content is rendered. If these drivers are corrupt or outdated, that may be why you can’t present your screen in Teams. You can fix this by updating your faulty drivers to the latest version.
- Open Device Manager by right-clicking the Start menu icon and choosing Device Manager.
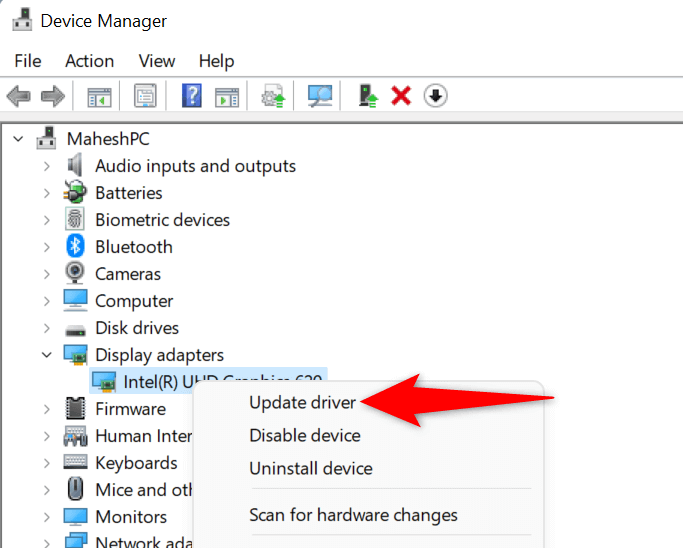
- Expand Display adapters, right-click your adapter, and choose Update driver.
- Select Search automatically for drivers and install the available drivers.
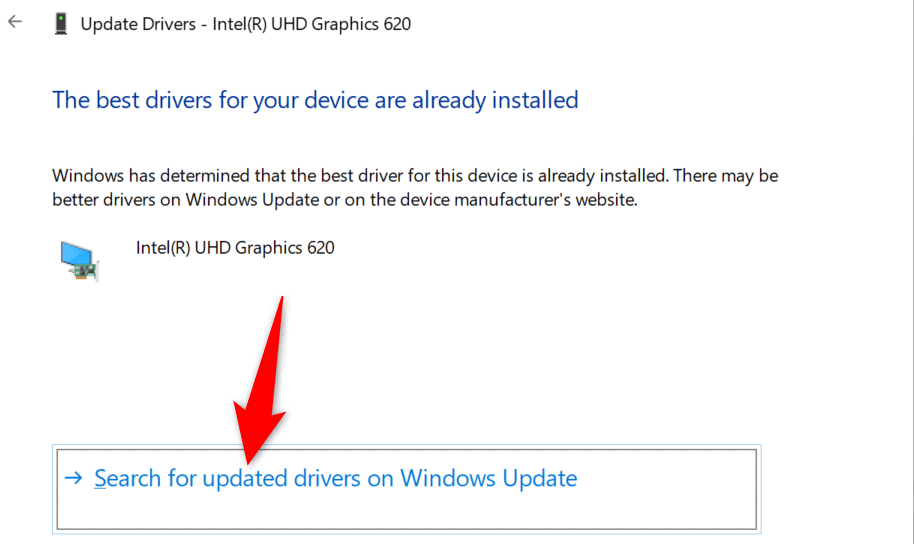
- If Device Manager can’t find new drivers, select Search for updated drivers on Windows Update. This option will use Windows Update to find newer drivers for your graphics adapter.
9. Update Microsoft Teams
Last but not least, you should be running the latest version of Microsoft Teams on your Windows or Mac computer. This is because older app versions have issues that are patched in newer versions.
You can update the app to fix your issue and possibly get new features.
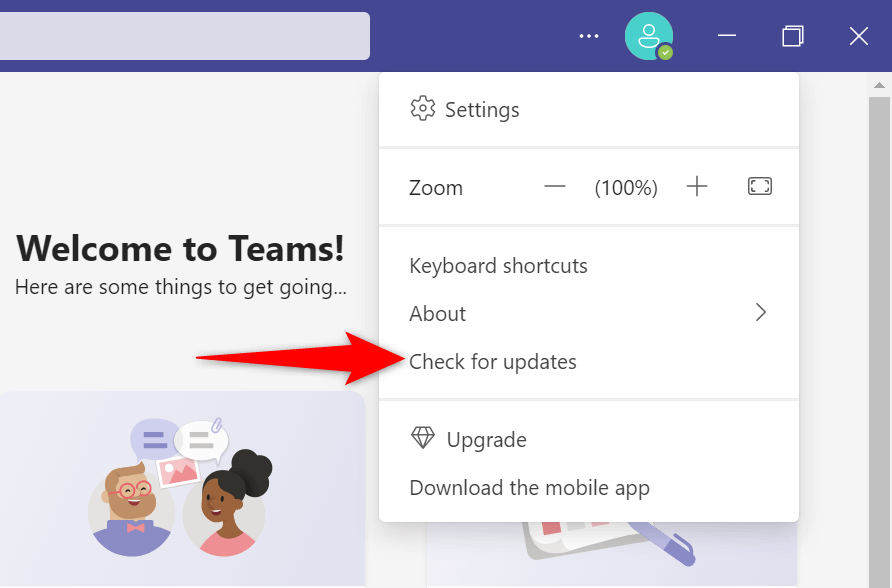
- Open Microsoft Teams on your Windows or Mac machine.
- Select the three dots at the top of the page.
- Choose Check for updates in the menu.
- Allow the app to download and install the available updates.
Present Screen Without Issues in Microsoft Teams on Windows and Mac
Screen sharing is essential in many kinds of meetings. If you’re experiencing issues doing that in MS Teams, your problem may be related to your app or your computer. The guide above lists some possible solutions to help you resolve your issue.
Once you’ve fixed the item causing the issue, you can start displaying your screen in all your Teams meetings. Enjoy!
