Google Assistant wasn’t officially integrated into the Chromebook until the release of Chrome OS 77 in 2019. Before that, many Chromebook users relied on an experimental version of the virtual assistant from the Chrome Flags menu.
When setting up your Chromebook, you should get a prompt to configure Google Assistant. If you missed the prompt, or you chose to set up the virtual assistant later, we’ll show you how to easily get Google Assistant up and running on your Chromebook in no time.
Set Up Google Assistant on Chromebook
When configuring Google Assistant on any device, you want to make sure it’s done correctly. Otherwise, you may miss out on some personalized features that the virtual assistant offers.
Follow the steps below to learn all there is to know about setting up Google Assistant on Chromebook.
1. Head to the Chrome OS settings menu. Press Alt + Shift + S and tap the gear icon in the Status area.
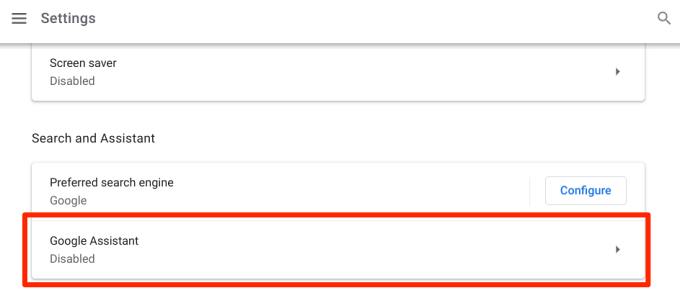
2. Scroll to the Search and Assistant section and click Google Assistant to enter the virtual assistant’s settings menu.
3. Toggle on the Google Assistant option if it’s set to Off.
That’ll instantly enable Google Assistant and a bunch of other Assistant-related settings. We explain what these settings do in the next section.
Google Assistant Settings on Chromebook
Although these configurations are optional, enabling them can improve and personalize the Google Assistant experience on your Chromebook.
Related Info
When you toggle on this option, Google Assistant will occasionally display information relating to the content on your Chromebook’s screen. This could be info about a movie, people, places, your contacts, etc.
You can also manually trigger Google Assistant to provide information on your Chromebook’s display by saying “Hey Google. What’s on my screen?”
OK Google
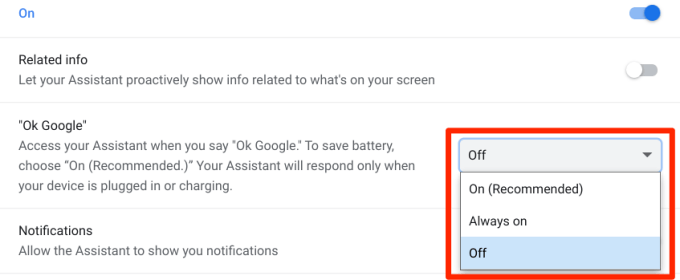
You should consider enabling the “OK Google” voice prompt when you set up Google Assistant. This allows you to conveniently summon the virtual assistant on your Chromebook using your voice. You can choose to configure the Assistant’s voice prompt to either “Always on” or “On (Recommended)”
The “Always on” option will have Google Assistant actively lurking in the background, waiting to be summoned by voice. That’ll provide the ultimate virtual assistant experience, but the round-the-clock availability may take a toll on your Chromebook’s battery life.
The “On (Recommended)” option means the Assistant will respond to voice prompts only when your Chromebook is plugged in, not on battery power.
The best part of setting up the Assistant voice prompt is that Google syncs your “Voice model” from other devices to your Chromebook.
So, if you use Assistant on your Android smartphone or Google Home Mini, the Assistant “Voice Model” from those devices is automatically linked to your Chromebook.
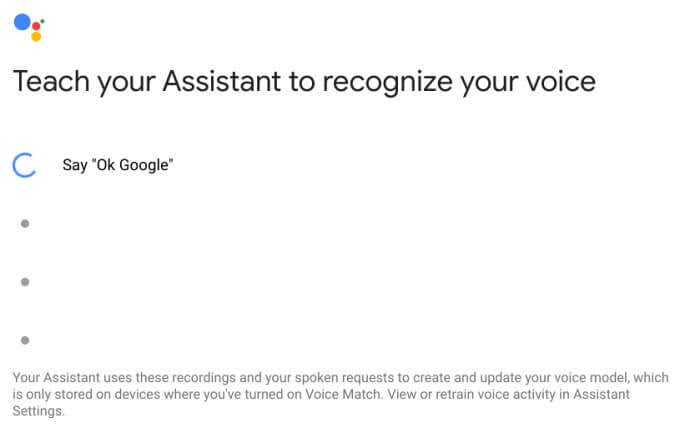
If you’ve never used Google Assistant on any of your devices, you’ll need to set up Voice Match so that the virtual assistant can recognize your voice. Click I agree to proceed.
Follow the prompts on the screen to create a voice model. This only takes a couple of seconds and it’ll help the Assistant perform better.
You can click the Retrain button to re-register your voice from scratch. Google Assistant is smart enough to recognize your voice, even if you haven’t used it for years. So, you really don’t have to redo the voice match. It’s nice to have the option, though.
Setting up Voice Match helps Google Assistant recognize and respond to your voice only. Not configuring Voice Match gives anyone access to summon and use the Google Assistant on your Chromebook.
Notifications
Toggling on this option allows Google Assistant to send notifications to your Chromebook’s Status Area.
Preferred Input
There are two ways to summon Google Assistant on Chromebooks: using the “OK Google” hotword or a keyboard shortcut (Search + A). Enable this option to set voice commands as the preferred input method for Google Assistant.
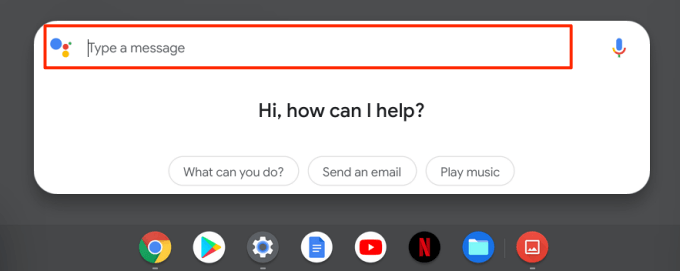
If disabled, your Chromebook will launch Google Assistant in text-only mode when you use the Search + A shortcut.
This means you’ll have to type your command in the dialog box and press Enter when you’re done. This is useful if your Chromebook’s microphone is faulty or not working correctly. Or, if your device isn’t responding to the “OK Google” command. You can click the microphone icon to switch to voice input.
Google Assistant Settings
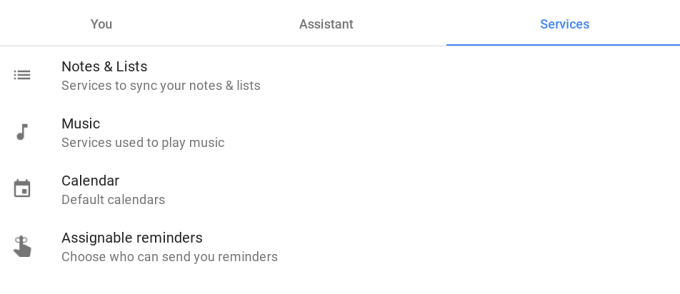
Clicking this option will open a new window where you can further personalize your Chromebook’s Google Assistant. In the Services section, for example, you can choose a default music player and customize how Google Assistant interacts with your calendar, notes, and other applications.
If you wish to change Google Assistant’s input language and email updates settings, navigate to the Assistant tab.
Finally, go to the You tab to add your home and work address, or places you visit frequently. It could be your favorite restaurant, your Grandma’s house, school address, etc. This information will help Google Assistant provide accurate and personalized suggestions about your daily commute (via Google Maps & other Google services).
To further customize your commute experience, click Transportation and add information about your shuttle to work and other places. Data provided in this section will help the Assistant suggest the best routes before your trips or while driving.
Click on Weather to modify the temperature unit you want Assistant to use when giving weather reports. The available temperature units are Celsius and Fahrenheit.
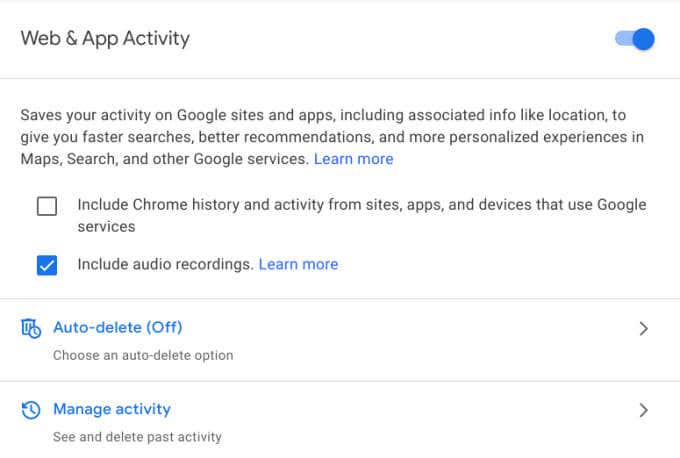
The “My Activity” and “Activity Controls” options let you manage the information that Google Assistant (and other Google services) saves to your account. Clicking these options will open a new browser window where you’ll find websites you visited, previous Google searches, places you’ve been, YouTube videos you watched, audio recordings, etc.
You can always opt-out if you aren’t comfortable with Google having access to your personal information. However, you should note that data saved in your account helps Google provide personalized experiences.
How to Use Google Assistant on Chromebook
Now that you’ve configured Google Assistant to your preference, how do you use the assistant to execute tasks?
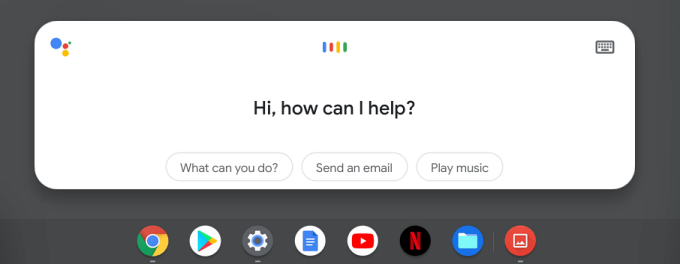
Uttering “OK Google,” “Hey Google” or pressing “Search + A” will launch the Google Assistant card at the bottom of your Chromebook’s display. When the launcher comes up on the screen, follow up with a task you want the assistant to perform.
You could ask Google Assistant to increase screen brightness, turn on Night Mode, read you the news, enable Wi-Fi, launch an app, take a screenshot, or create an appointment. Check out this guide for more worthwhile Google Assistant Tips that’ll make your life easier.
Experience the Assistant Goodness
Google Assistant is one of the many Chrome OS tools that can help you save time, multitask better, and get things done faster. Explore the Assistant, customize the settings to your preference, and enjoy the experience. While at it, check out these advanced Chromebook tips to become a power user.
Related Posts
Sodiq has written thousands of tutorials, guides, and explainers over the past 4 years to help people solve problems with Android, iOS, Mac, and Windows devices. He also enjoys reviewing consumer tech products (smartphones, smart home devices, accessories, etc.) and binge-watching comedy series in his spare time. Read Sodiq’s Full Bio
