

A Windows update broke something. The removal method depends on your Windows version and what type of update it was. Monthly quality patches and version upgrades follow different paths.
Find the Right Update First
Fix #1: Check Update History to identify the KB number
You need the KB number before you can target the right update. If you already know it, skip to Fix #2.
- Press
Windows + Ito open Settings. - Click Windows Update (Windows 11) or Update & Security > Windows Update (Windows 10).
- Click Update history.
- Look through the Quality updates section and match install dates to when the problem started.
- Note the KB number of the suspect update, which follows the format KB5055523.

Uninstalling Quality Updates (Monthly Patches)
Quality updates are the cumulative monthly patches, including security fixes, bug fixes, and driver updates bundled into one install.
Fix #2: Uninstall a quality update via Settings (Windows 11)
You must be signed in as an administrator. This path works on Windows 11 22H2 and later.
- Press
Windows + Ito open Settings. - Click Windows Update.
- Click Update history.
- Scroll down and click Uninstall updates.
- Find the update by its KB number.
- Click Uninstall next to it.
- Confirm when prompted, then restart your PC.
If an update has no Uninstall button, Windows has locked it. Servicing stack updates fall into this category and can’t be removed through the UI. A System Restore point is your next option in that case.
Fix #3: Uninstall a quality update via Control Panel (Windows 11 and 10)
Control Panel’s installed updates view works on both Windows 10 and Windows 11.
- Press
Windows + R, typecontrol, and press Enter. - Go to Programs > Programs and Features.
- Click View installed updates in the left panel.
- Find the update by its KB number.
- Select it and click Uninstall in the toolbar.
- Confirm, then restart when prompted.
Fix #4: Uninstall a quality update via Settings (Windows 10)
Windows 10’s Settings path sends you to the same Control Panel uninstall screen.
- Press
Windows + Ito open Settings. - Go to Update & Security > Windows Update.
- Click View update history.
- Click Uninstall updates at the top of the page.
- Select the KB you want to remove and click Uninstall.
- Confirm and restart.
Rolling Back a Feature Update (Version Upgrades)
Feature updates are version upgrades, moving from Windows 11 23H2 to 24H2, or from Windows 10 to Windows 11. They don’t appear in the “Uninstall updates” list. Windows handles them separately under Recovery.
Fix #5: Use “Go back” to revert a feature update (Windows 10 and 11)
- Press
Windows + Ito open Settings. - In Windows 11, go to System > Recovery. In Windows 10, go to Update & Security > Recovery.
- Look for Go back under Recovery options.
- Click Go back and follow the on-screen steps. Your PC restarts and returns to the previous version.
The 10-day window: “Go back” is only available for roughly 10 days after a feature update installs. After that, Windows deletes the previous version’s backup files to reclaim disk space and the option disappears. If it’s greyed out or missing, jump to When None of This Works below.
When Windows Won’t Boot After an Update
Fix #6: Remove the latest update from Windows Recovery Environment (WinRE)
If Windows can’t start normally after an update, WinRE lets you strip out the most recent update without booting into the OS.
- Trigger WinRE by forcing three consecutive interrupted startups. Hold the power button until the PC shuts off, power it back on, and repeat three times. Alternatively, boot from a Windows installation USB.
- From the WinRE screen, select Troubleshoot.
- Select Advanced options.
- Choose Uninstall updates.
- Select Uninstall latest quality update or Uninstall latest feature update depending on which type caused the problem.
- Follow the prompts. Your PC restarts and removes that update.
This removes only the single most recent update of the type you choose. If the problem started several updates back, try System Restore from the same Advanced options menu instead.
Advanced Methods
Fix #7: Uninstall by KB number from Command Prompt
wusa.exe lets you target a specific update by KB number without touching the Settings UI.
- Press
Windows + S, search for Command Prompt, right-click it, and select Run as administrator. - Run the following command, replacing
5055523with the actual KB number you want to remove:
wusa /uninstall /kb:5055523 /quiet /norestart- Wait for completion, then restart manually when you’re ready.
/quiet skips the confirmation prompt. /norestart holds the reboot so you can time it. If the specified KB isn’t installed, wusa reports that and exits cleanly.
Fix #8: Reset the SoftwareDistribution cache (for broken Windows Update, not for uninstalling)
Deleting C:\Windows\SoftwareDistribution does not remove any installed update. The folder stores cached update downloads and the local update history database. Delete it and your Update history screen goes blank, but every update already installed stays installed. The history was just a log.
Use this only when Windows Update itself is broken: downloads stuck at 0%, persistent scan errors, or error codes the built-in Windows Update troubleshooter hasn’t cleared.
- Press
Windows + S, search for Command Prompt, right-click it, and select Run as administrator. - Stop the Windows Update and BITS services:
net stop wuauserv
net stop bits- Rename the folder so Windows creates a fresh one:
ren C:\Windows\SoftwareDistribution SoftwareDistribution.old- Restart both services:
net start wuauserv
net start bits- Open Settings > Windows Update and click Check for updates. Windows rebuilds the folder and database from scratch. The initial scan can take several minutes.
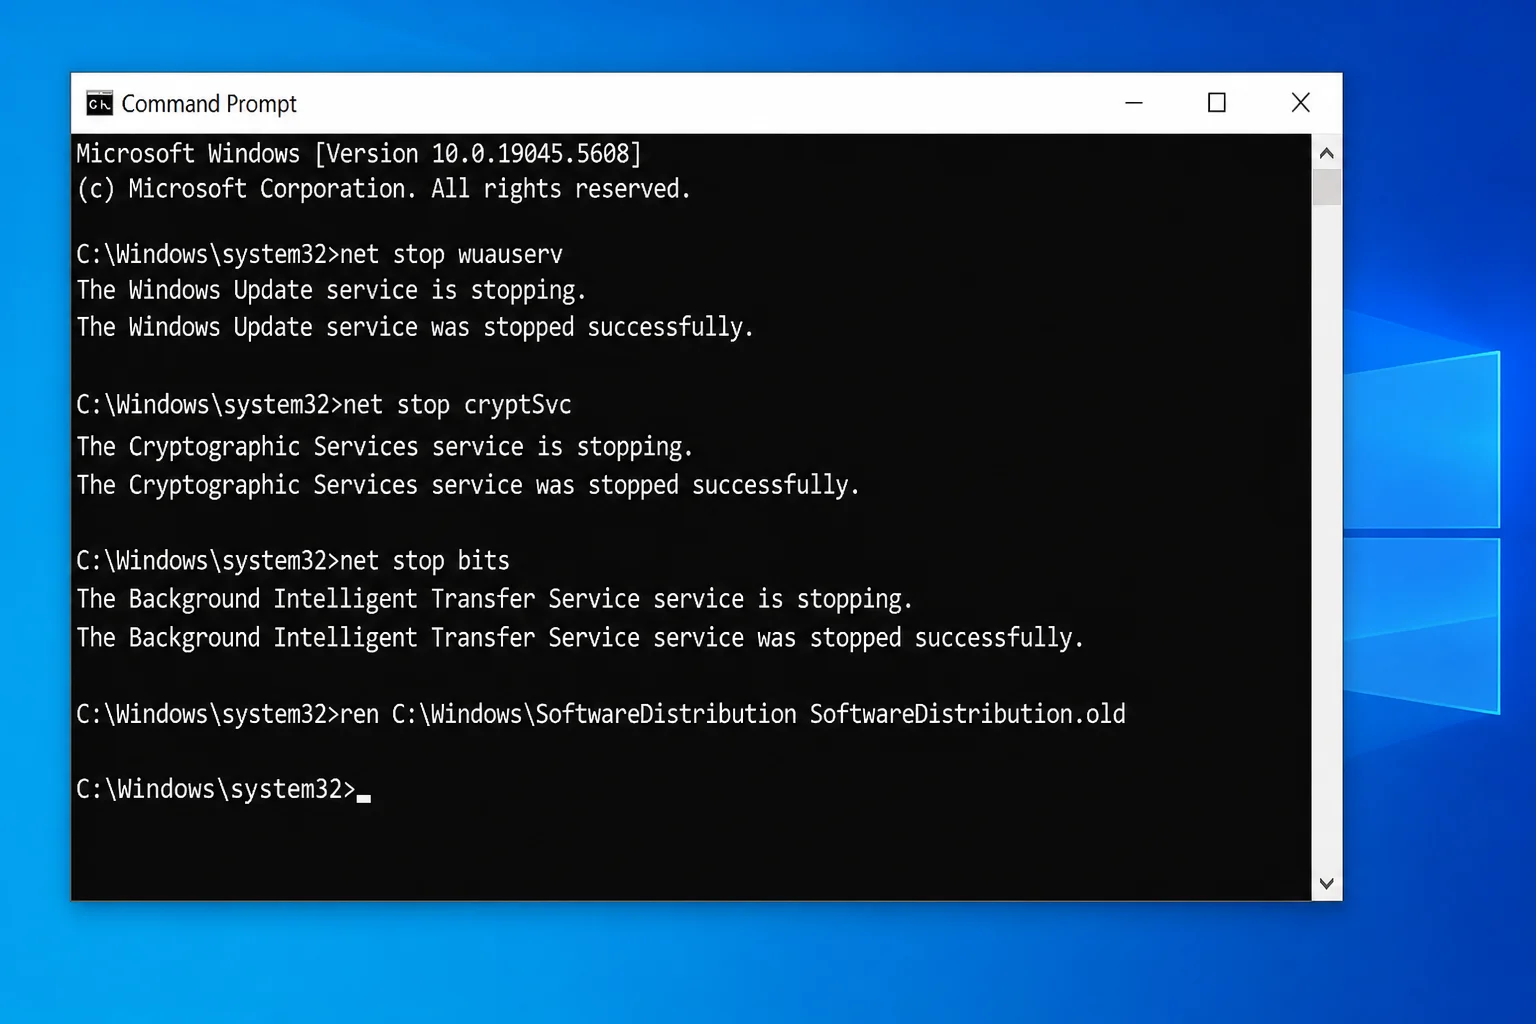
Windows regenerates the SoftwareDistribution folder automatically. Update history shows blank until the scan finishes, but your installed updates are untouched.
When None of This Works
If the problem update can’t be removed and “Go back” is no longer available, you have a few options left:
- System Restore. If a restore point exists from before the update installed, it rolls back system files and registry changes. Go to Settings > System > Recovery > Advanced startup, then choose Troubleshoot > Advanced options > System Restore.
- Reset this PC. Go to Settings > System > Recovery > Reset this PC. The “Keep my files” option reinstalls Windows without erasing your personal data.
- Contact your IT admin. On work or school devices, update policies may block removal entirely. An administrator can handle it through management tools.
Conclusion
Fix #2 handles this for most Windows 11 users. Settings > Windows Update > Update history > Uninstall updates gets you there in four clicks. On Windows 10, Fix #3 or Fix #4 reaches the same endpoint. One thing worth keeping in mind: cumulative updates bundle previous security patches, so uninstalling one leaves you temporarily more exposed. Treat it as a short-term workaround and check back after Microsoft pushes a corrected patch. For more information, you can visit the official Windows Update FAQ or learn how to uninstall a Windows update. Additionally, you can check out Windows 10 or 11 PC Freezes: A Step-by-Step Diagnostic Guide for troubleshooting tips.