If you have a bunch of files to rename, manually renaming them would be too time-consuming. One way to save time is to batch rename your files on your Windows 10 PC. There are both built-in features as well as third-party tools to bulk rename files on a Windows computer.
Each method offers a unique way to rename your files. For example, File Explorer helps you quickly rename files but with limited features. The Command Prompt provides a few more features but is not as easy to use.

Use File Explorer To Batch Rename Files In Windows 10
If you’re only looking to basic rename files on your machine, you don’t need to install any apps. The built-in rename feature helps bulk rename files as well and you can use it from the context menu.
- Put all the files that you want to give a new name in a single folder.
- Open the folder containing your files using File Explorer.
- Select all the files that you want to batch rename. To select multiple files in an order, click the first file in the list, hold Shift, and click the last file. All the files between the first and the last file will get selected. To select multiple files in no order, select one file and then hold Ctrl and click the files that you want to select.
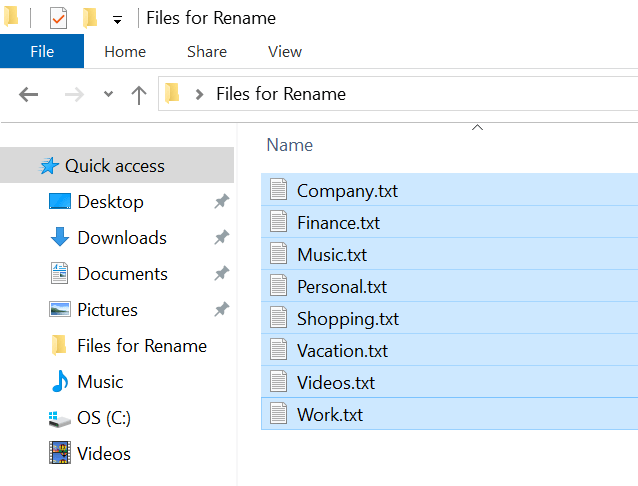
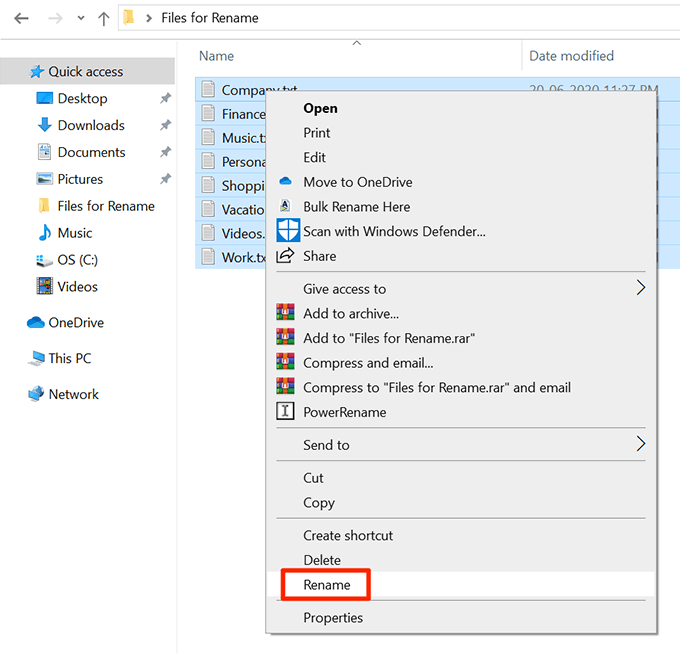
- Right-click any one file and select Rename from the context menu on your screen.
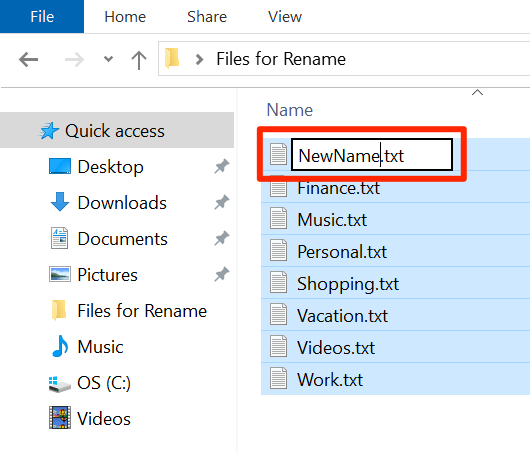
- The name of one of the selected files will become editable. Type the new name you want for all your chosen files and press Enter.
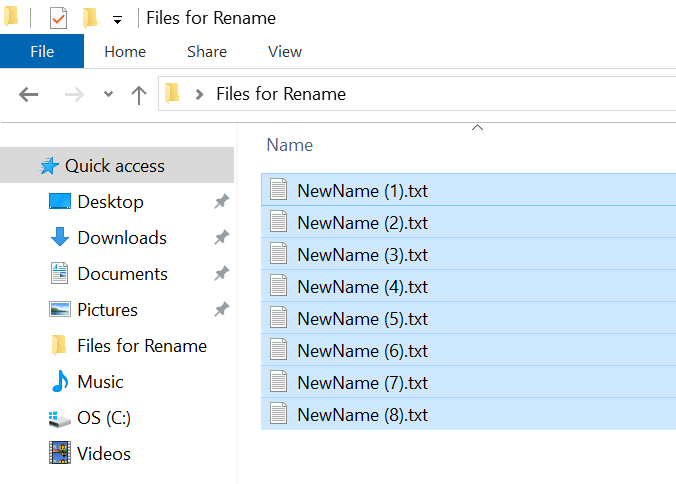
- All your chosen files will now have your new name. There will be a number next to each file name to differentiate from one another.
- If you made a mistake renaming files, press Ctrl + Z and the file name change will revert back.
Batch Rename Files Using Command Prompt In Windows 10
If you want more options to batch rename files on your PC, you can use the Command Prompt. It allows you to use characters like ? and * to select and rename your files. This gives you many ways to for file renaming like:
- Rename files with a certain extension.
- No need to click and select each file in the folder.
- Bulk change extensions for your files.
- You can write a script to automatically rename your files.
The ren or rename command makes batch renaming files possible on Windows.
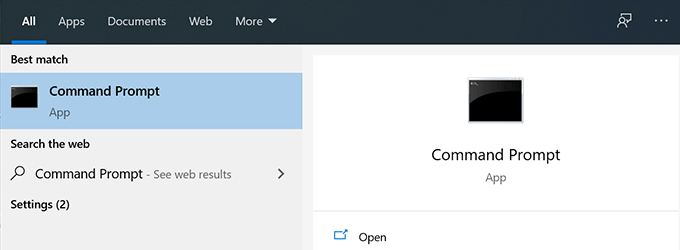
- Search for Command Prompt using Cortana search and launch it.
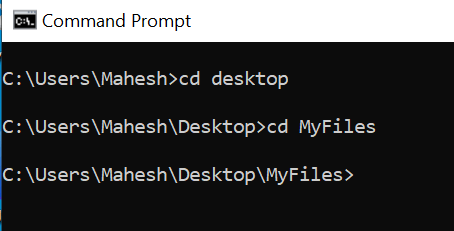
- Type the following to change the current working directory to where your files are.
cd <folder-path>
- To rename all your files and add a suffix to their names, say Mahesh, you can use the following command.
rename *.* ??????????????????????-Mahesh.*
Here’s what each parameter in the command means:
rename – this is the command that lets you rename files from Command Prompt.
*.* – this selects all files in the current folder.
??????????????????????-Mahesh.* – the question marks denote the original names of the files, Mahesh is the new word you want to add, and the * at the end keeps the file extension the same as before.

- To change extensions of your files, say from JPG to PNG, you can use the following command.
rename *.jpg *.png

The possibilities to batch rename files with this command are endless.
Rename Multiple Files At Once Using PowerShell In Windows 10
If you prefer PowerShell to run commands, there’s a command to rename single or multiple files at once on your Windows 10 computer. This command is a bit more complex than the Command Prompt one but has more features.
The following demonstrates how you replace the word John with Mike in all your file names.
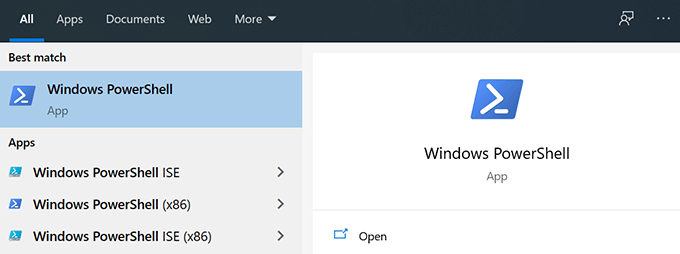
- Use the Cortana search to search for Windows PowerShell and open it.
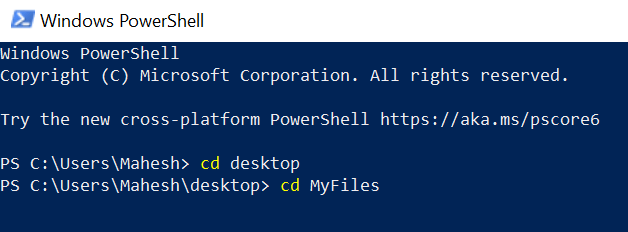
- Run the following command in PowerShell to get to the directory where your files are located.
cd <path>
- Type the following command into PowerShell and press Enter. This’ll replace John with Mike in all files in your chosen folder.
dir | rename-item -NewName {$_.name -replace “John”,”Mike”}

- You might get an error but all your file names should be changed.
- There are numerous naming varieties you can use with this command to give various types of names to your files.
Use PowerToys To Batch Rename Files In Windows 10
Microsoft has a suite of tools called PowerToys and one of these tools is PowerRename. This tool lets you batch rename files with many advanced options on your PC.
It gets added to the context menu when you install it so you can quickly and easily rename your files.
- Head over to the PowerToys page on GitHub and download the latest release to your computer.
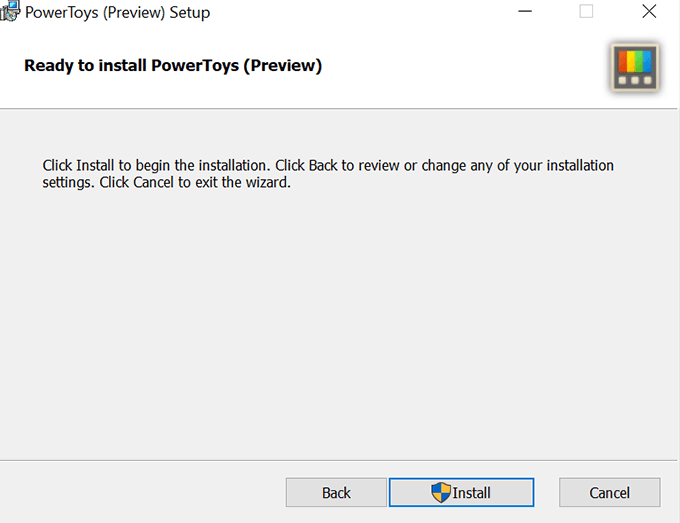
- Install PowerToys on your computer.
- Use File Explorer to open the folder where your files are located.
- Select the files you want to rename.
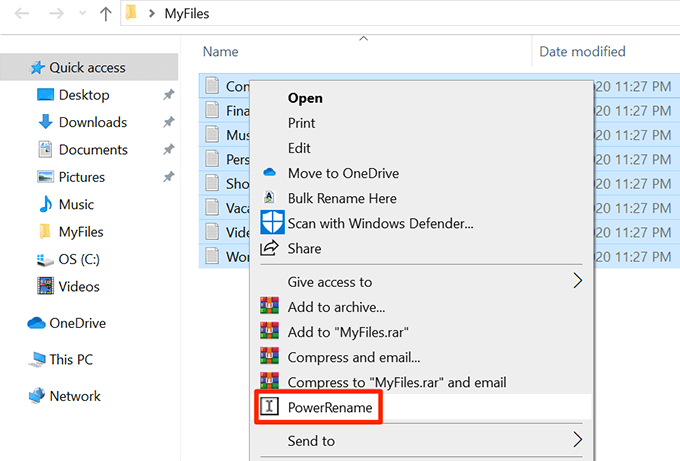
- Right-click any one file and choose PowerRename.
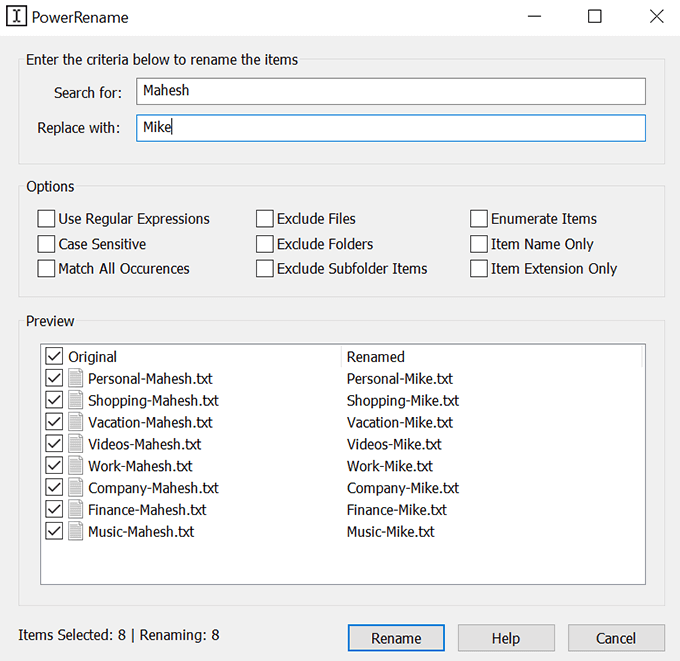
- You’ll see many options to rename your files.
Batch Rename Files With Bulk Rename Utility In Windows 10
Bulk Rename Utility is a free tool to rename multiple files using various options on your computer. It has a single-interface approach to renaming files and includes most options you need for your task.
- Download and install Bulk Rename Utility on your PC.
- Launch Bulk Rename Utility on your computer.
- Use the options on the left-hand side section to choose the folder where your files are located.

- Select all the files you want to rename on the right-hand side section.

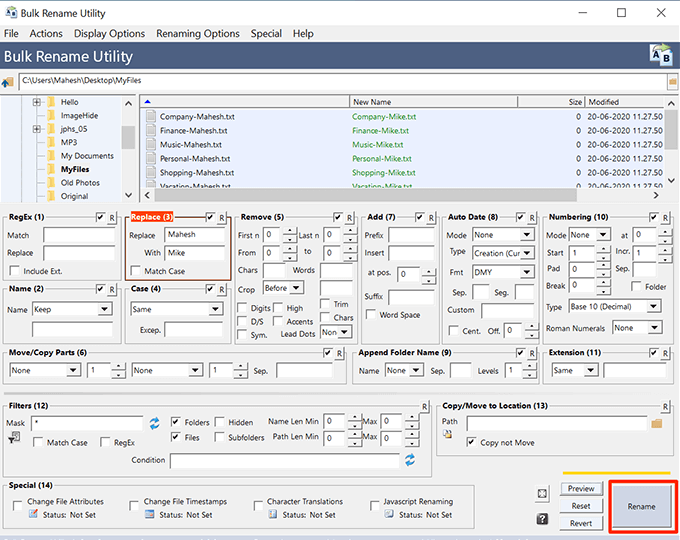
- Use various options depending on how you want to rename your files on the interface.
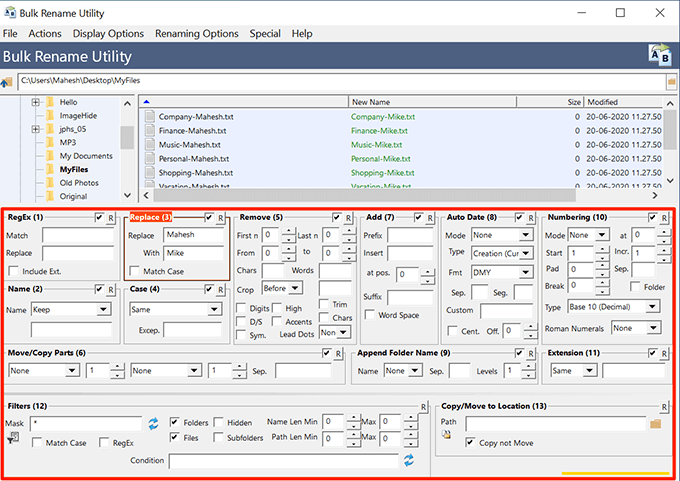
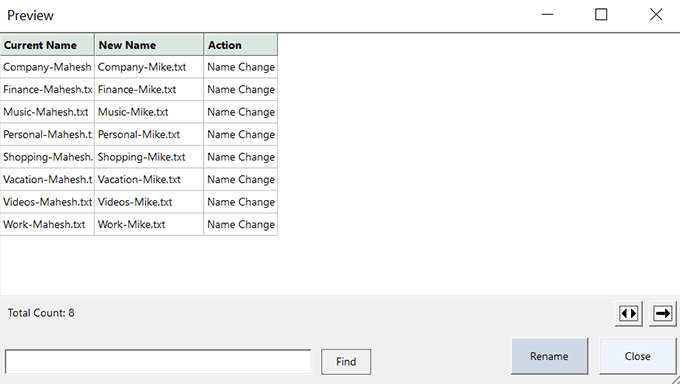
- Click Preview at the bottom-right corner to see how your newly chosen name will look like on your files.
- Click Rename to actually rename your files.
Use Rename Master To Bulk Rename Files In Windows 10
Rename Master is another free tool to batch rename files on a PC.
- Download and install Rename Master on your machine.
- Open the tool.
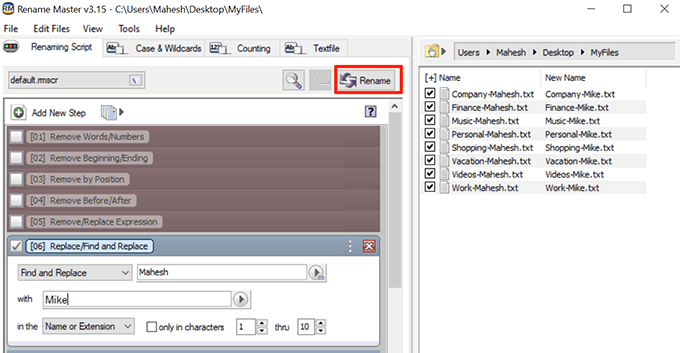
- Select your files and folders from the right-hand side pane.

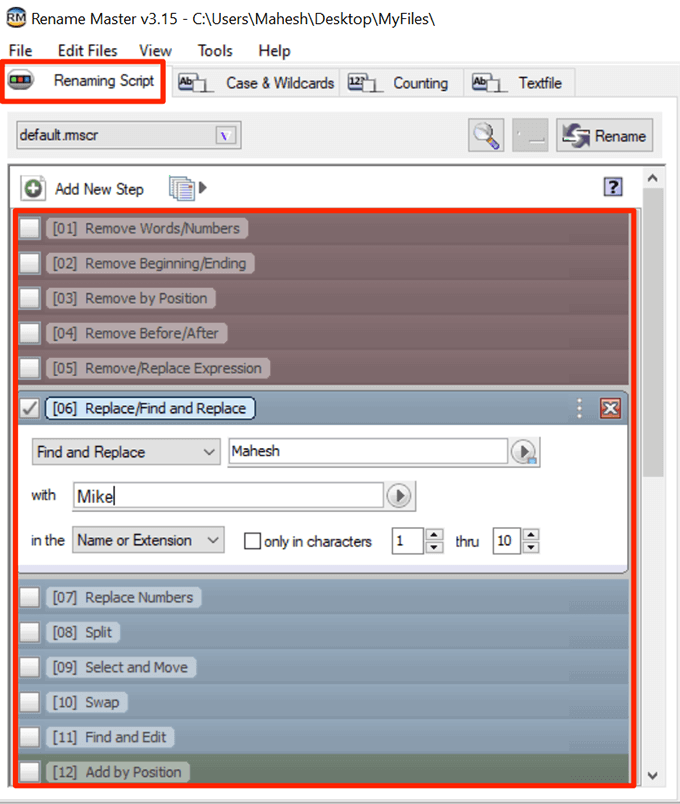
- Click the Renaming Script tab and choose one or more options to rename your files.
- Click Rename to start renaming your files.
You can also use a custom script to bulk rename files on your Windows 10 PC.
What’s your favorite method to rename multiple files at once on your Windows 10 computer? Is it File Explorer or one of the other methods? Let us know in the comments below.
Related Posts
- Preparing for Windows 10 End of Support: Upgrading to Windows 11
- How to Fix a “This file does not have an app associated with it” Error on Windows
- How to Fix an Update Error 0x800705b4 on Windows
- How to Resolve “A JavaScript error occured in the main process” Error on Windows
- How to Fix the Network Discovery Is Turned Off Error on Windows
Mahesh has been obsessed with technology since he got his first gadget a decade or so ago. Over the last few years, he’s written a number of tech articles on various online publications including but not limited to MakeTechEasier and Android AppStorm. Read Mahesh’s Full Bio
