Windows 10, unlike previous versions of Windows, receives regular feature updates that improve the user experience. Alongside typical bug fixes, Microsoft has continually improved and added to the initial Windows 10 experience since it was first released in 2015.
Before Microsoft releases any new features and software to the general public, it rigorously tests them to make sure they’re fit for purpose. A large number of Windows users play their part in this process, thanks to Windows Insider, a special beta-testing program that any Windows user can sign up for.
Before You Sign Up For Windows Insider
As long as you’re running Windows 10, you can sign up for the Windows Insider program. However, before you do, you should be aware of some of the pros and cons.
As we’ve mentioned, Windows Insider lets you test out some of the newest changes, features, and software that Microsoft intends to introduce in future Windows updates. The Windows Sandbox is a recent example, having been tested in Windows Insider builds before its general release in version 1903.
It’s important to recognize that signing up for the Windows Insider program carries risks. Windows Insider builds aren’t always stable. The purpose of the Windows Insider program is to test these Windows 10 updates, identify any bugs or issues, and to make sure they’re ready for wider release.
If you’re worried about the instability, avoid Windows Insider builds completely.
You’re also required to send a lot of device data to Windows as part of the terms and conditions. This is to help Microsoft narrow down any issues. If you’re worried about your privacy, this isn’t the program for you.
Make sure you back up your critical files before you upgrade Windows 10 to a Windows Insider build.
Installing Windows Insider Builds
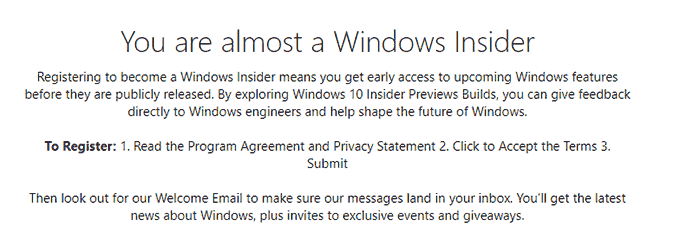
If you want to proceed, you’ll need to sign up as a Windows Insider first. It’s probably best to use the Microsoft account you use to sign into Windows, but this isn’t a necessity.
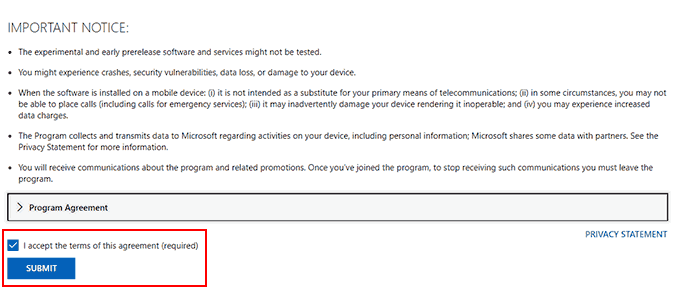
- At the Windows Insider sign-up page, accept the terms and conditions by scrolling to the bottom of the page and clicking the checkbox. Click Submit once you’re ready.
Once you accept the terms, you’ll be accepted into the Windows Insider program. You’ll then be ready to install the latest Windows Insider build of Windows 10.
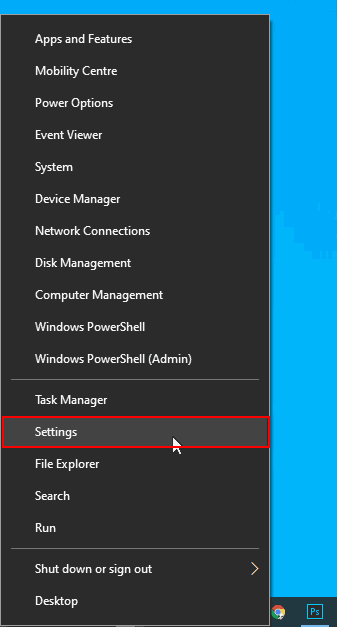
- To begin, you’ll need to head to your Windows 10 Settings menu. Start by right-clicking the Windows Start menu button in your taskbar and clicking Settings.
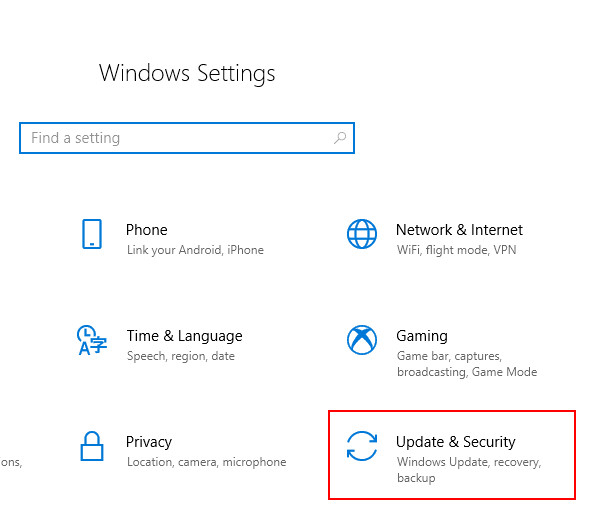
- In the Windows Settings menu, click Update & Security.
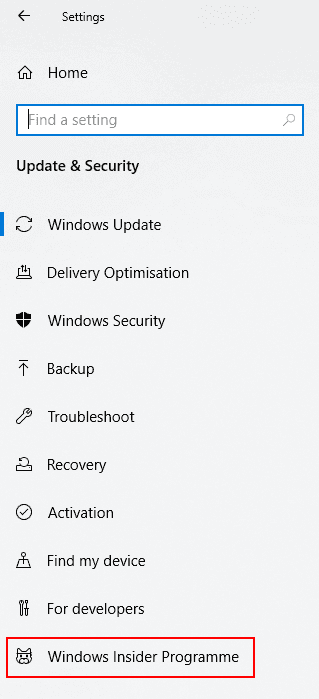
- In the Update & Security menu, click Windows Insider Program in the left-hand menu (or Windows Insider Programme if your language is set to UK English).
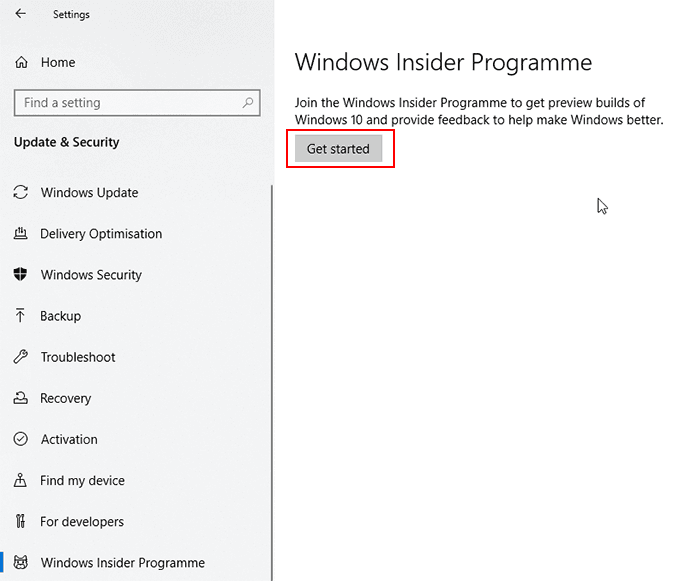
- Once you’re in the Windows Insider Program menu, click Get Started to begin the installation process.
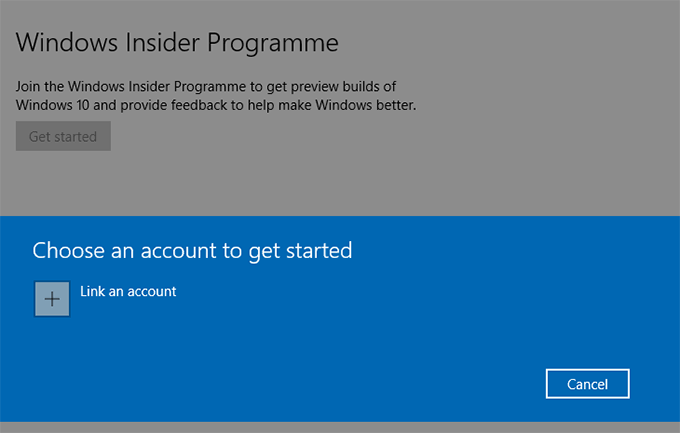
- You’ll be asked to link your Windows Insider account. Click the Link an account button and sign in with your Microsoft account in the Microsoft sign-in window that appears.
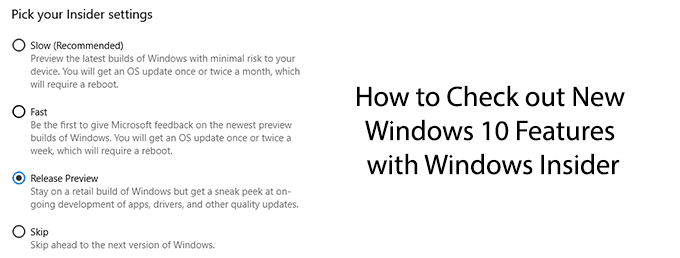
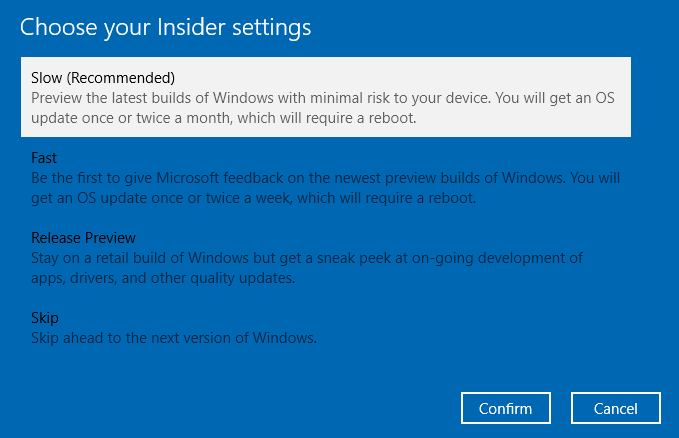
You’ll be asked what “pace” of Windows Insider updates do you want to receive. You can find out about the different Windows Insider build options at the Windows Insider website.
- Select Slow for the most stable “preview” build, Fast for the most recent build with the latest features (with a greater risk of instability), Release Preview to gain some new feature updates (but to stay on the same Windows 10 installation build as most users), or Skip to skip ahead to testing the next major Windows release.
- Click Confirm to go to the next menu.
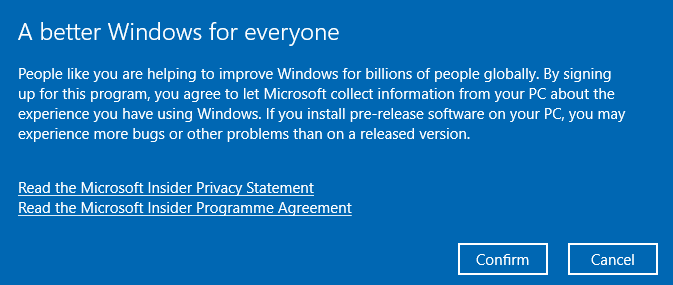
- Windows will ask you to confirm the Windows Insider terms and conditions. Click Confirm to proceed.
- At the final stage, you’ll be asked to restart. Click Restart Now.

- Once you restart, head back to your Settings > Update & Security > Windows Update menu and click Check for updates. Windows will begin downloading the latest Windows Insider build, ready for you to download and use.
Rolling Back To Stable Windows 10 Installations
If you’re not happy with the performance of your Windows Insider build and you’d like to return to the stable release of Windows 10, you can within the first ten days of installing your first Windows Insider build.
After the ten days are up, you’ll have to reinstall Windows 10 to return it to the stable release, as Windows won’t allow you to downgrade after the initial ten day period.
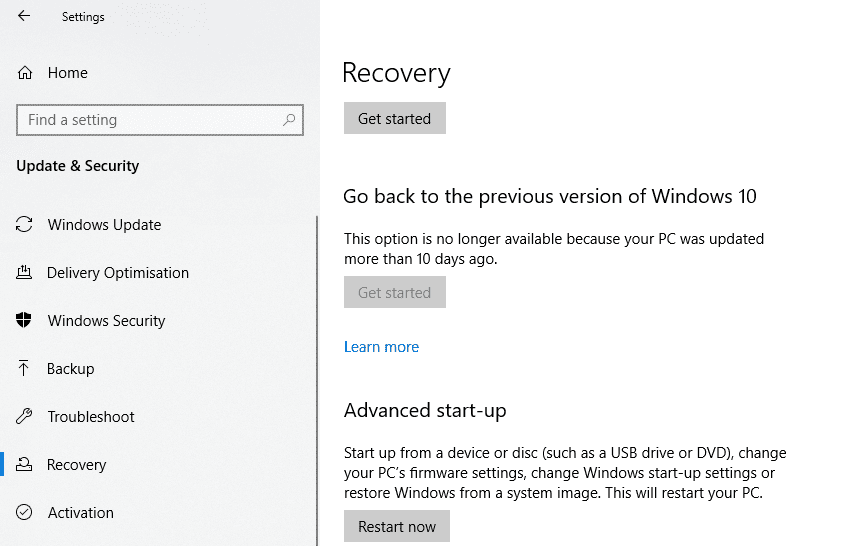
- If you’re within the first ten days of your first Windows Insider build installation, head to the Settings > Recovery menu.
- Click Get started under the Go back to the previous version of Windows 10 section.
- Follow the instructions and allow Windows to restore your stable Windows 10 installation.
- Once you’ve downgraded, return to Settings > Update & Security > Windows Insider Program to opt-out of the Windows Insider program. Click on the Stop getting preview builds slider to switch it from Off to On.
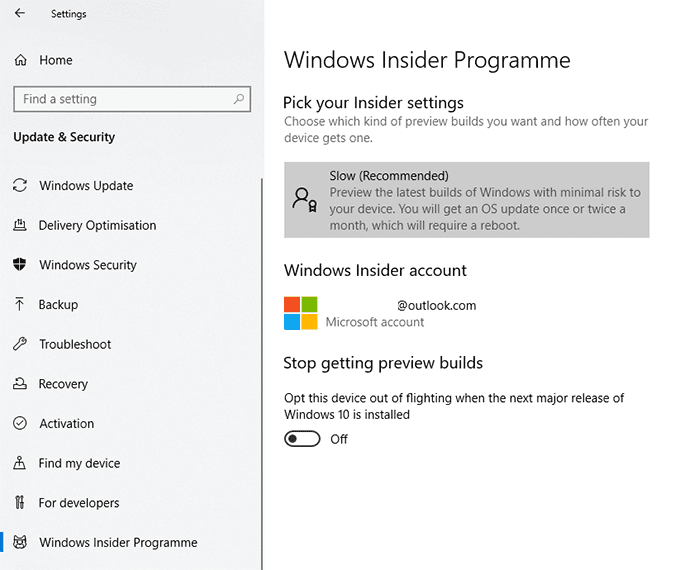
You can also change your Windows Insider settings from this menu, including altering the frequency of your updates.
At any point, if you want to return to using Windows Installer builds, change the Stop getting preview builds slider back to Off. Return to Settings > Update & Security > Windows update and check for updates to begin downloading your latest Windows Insider build.
Related Posts
- Preparing for Windows 10 End of Support: Upgrading to Windows 11
- How to Fix a “This file does not have an app associated with it” Error on Windows
- How to Fix an Update Error 0x800705b4 on Windows
- How to Resolve “A JavaScript error occured in the main process” Error on Windows
- How to Fix the Network Discovery Is Turned Off Error on Windows
Ben Stockton is a freelance technology writer based in the United Kingdom. In a past life, Ben was a college lecturer in the UK, training teens and adults. Since leaving the classroom, Ben has taken his teaching experience and applied it to writing tech how-to guides and tutorials, specialising in Linux, Windows, and Android. He has a degree in History and a postgraduate qualification in Computing. Read Ben’s Full Bio
