A screensaver is supposed to appear after a predefined time has passed. If you still don’t see the Windows 10 screensaver even after waiting for that period of time, there may be an issue with your screensaver settings and you’ll need to fix it for it to work.
Unless you already know why the screensaver is not working in Windows 10, you’ll want to try a few methods before your issue is resolved. You don’t really need to download anything or use any third-party apps to fix the issue, as most likely changing an option here and there in your system configuration will fix the problem for you.

Update Your System To Fix The Windows 10 Screensaver Not Working Issue
One of the possible reasons why the screensaver isn’t working on your Windows 10 PC is because you have an old version of Windows running on your computer. Older versions are known to have issues and bugs in them, and updating your machine to a newer version of the operating system will likely fix the issue for you.
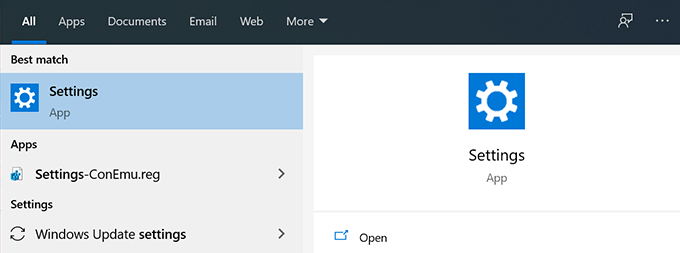
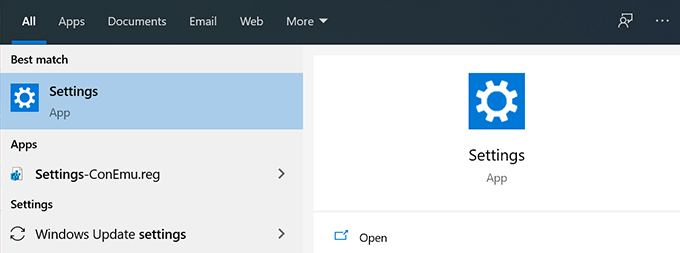
- Search for Settings from the Cortana search box and click on it when you see it.
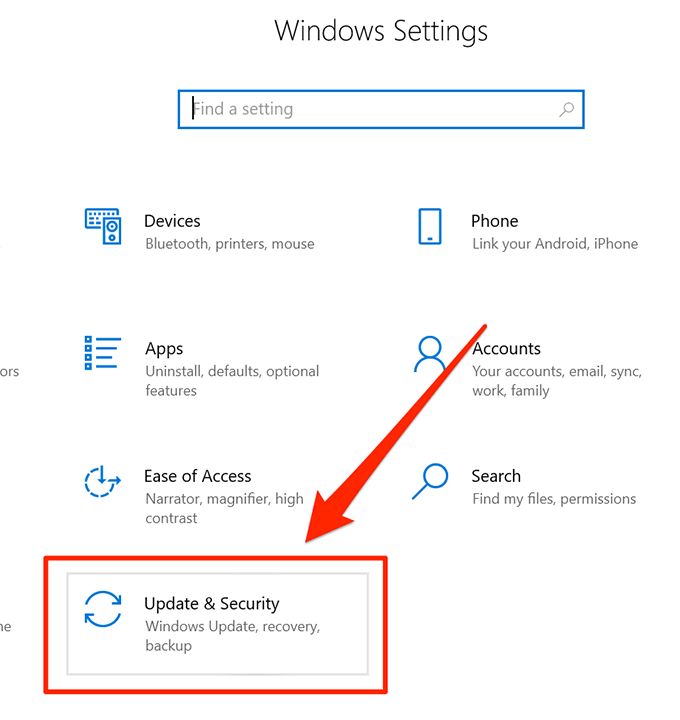
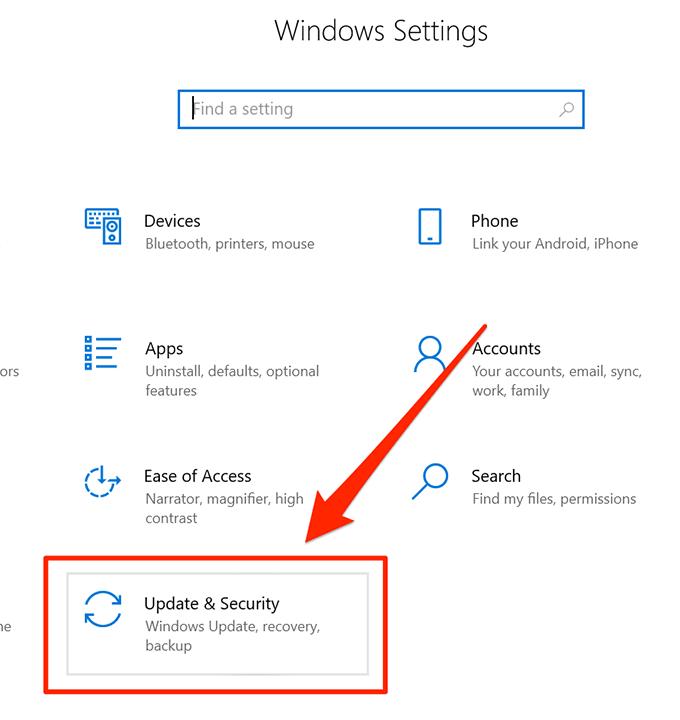
- Select the Update & Security option on the following screen to access the Windows update option.
- There’ll be several options in the left sidebar on your screen. Find the one that says Windows Update and click on it to open it.

- On the right-hand side pane, you’ll find a button saying Check for updates. Click on it to check for updates for your PC.

- If an update is available, go ahead and get it installed on your computer.
Verify The Windows 10 Screensaver Settings
While it goes without saying that you should have a screensaver selected in the Windows 10 screensaver settings menu, some users forget to do it and that’s why they don’t see anything come up even after their computer sitting idle for a while.
The issue can be resolved by going into the settings menu and selecting one of the available screensavers for your machine. Once that’s configured, your screensaver will appear as it should.
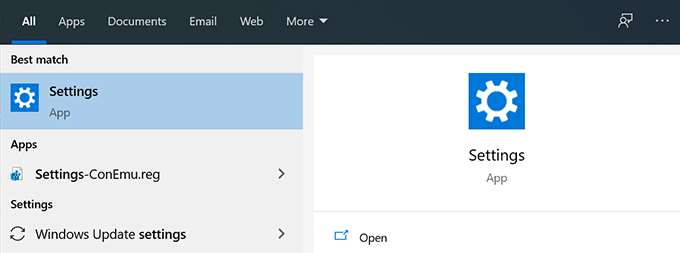
- Use the Cortana search box to search for and open the Settings app.
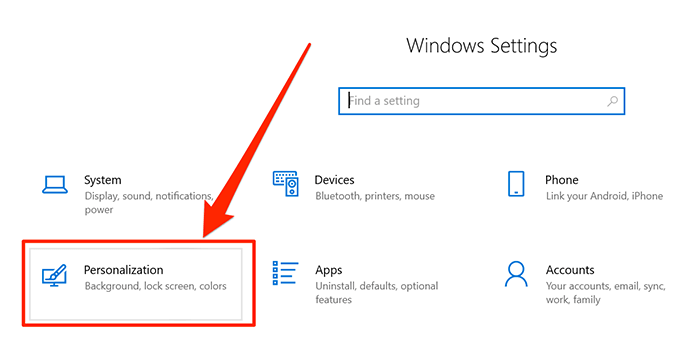
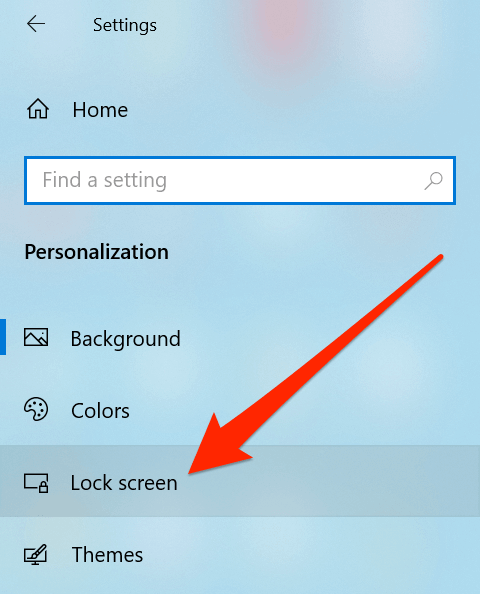
- Click on the option that says Personalization to access the Windows 10 screensaver locations where you can view your screensavers.
- Select Lock screen from the options available in the left sidebar.
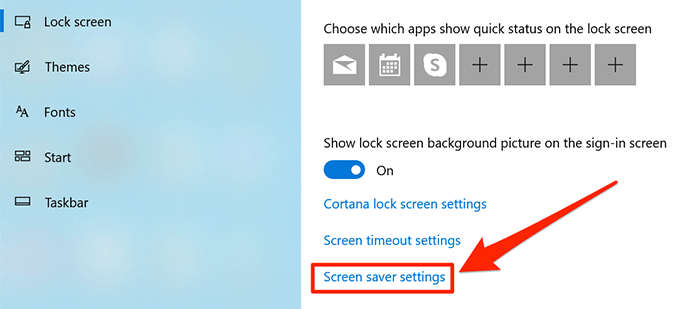
- Scroll down on the right-hand side pane and click on the option that says Screen saver settings.
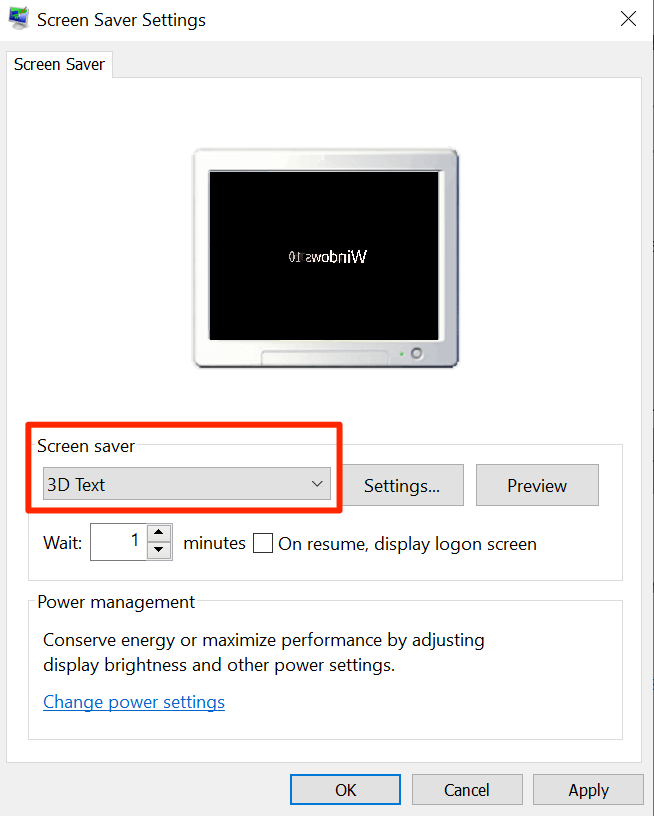
- The following screen lets you choose one of the many screensavers available on your system. Click on the Screen saver dropdown menu, select the option of your choice, specify the wait time in the Wait box, and then click on Apply followed by OK.
Unplug The Devices You Don’t Use From Your PC
One of the great things about Windows computers is that you can plug-in pretty much anything into them. These pluggable items usually include USB flash drives, wireless keyboards and mouse, and even game controllers.
For as long as these devices are connected to your computer, they use certain utilities, either inbuilt or third-party, to function. Sometimes, these utilities come in the way of screensaver settings and prevent it from working. Your computer thinks since you’ve plugged-in these devices, you’re using them or planning to use them and so it keeps your computer awake.
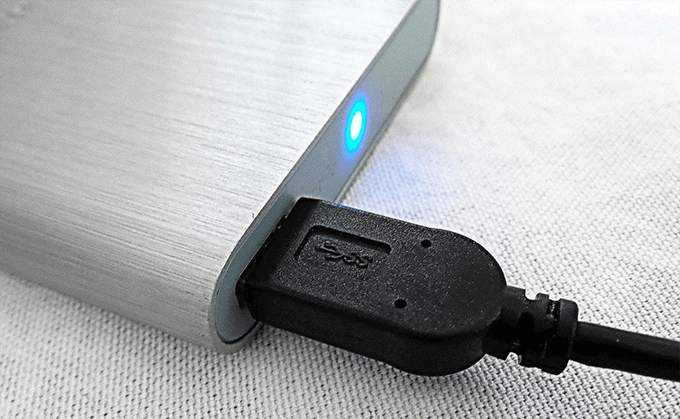
This behavior prevents the screensaver from launching on your computer. However, there’s an extremely easy way to fix it: unplug all the unwanted devices from your machine. Once that’s done, your screensavers will continue to work in Windows 10 as they did before.
Keep Your Mouse Clean & Away From Any Movements
You probably already know why and when your computer activates the screensaver mode. For those of you who don’t, the screensaver is activated after a predefined time in the settings has passed and that there should have been no activity on your computer.
Keeping your keyboard away from any activities is easy but that is not the case with a mouse. Especially if your mouse has collected any dust or is placed in an area where it detects any movements, it’s going to keep your machine awake. It’ll prevent the screensaver from being launched and the issue will continue until and unless you can keep your mouse idle.
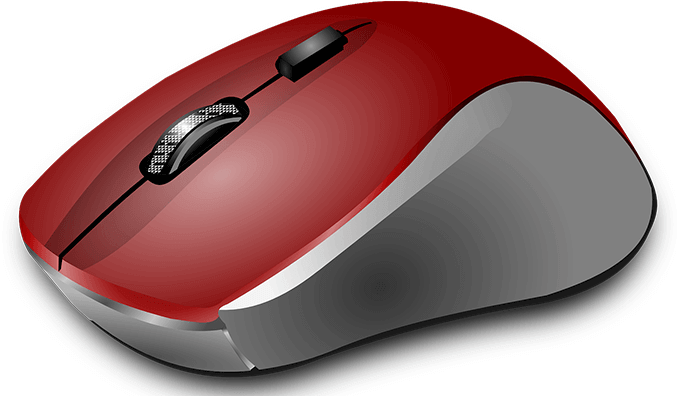
A good way to fix this is to clean your mouse of any dust and try and place it on a flat surface without any disturbances. This should fix your issue if it was caused by your peripherals.
Reset Power Settings On Your Windows 10 PC
A screensaver is actually the result of a power plan that your computer uses. If these settings aren’t properly configured, it’ll lead to the screensaver not working in Windows 10.
Resetting the power settings should fix it for you.
- Click on the Cortana search box, search for, and open Control Panel.

- Ensure you’re viewing it in Large icons mode. Click on the Power Options link.

- Click on Change plan settings next to your plan.
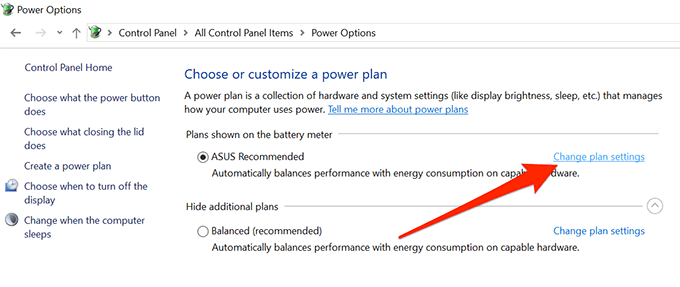
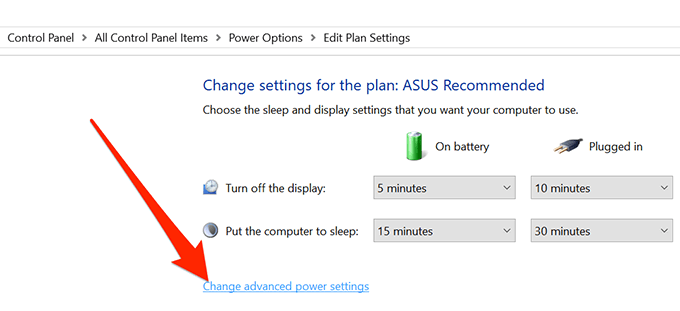
- Click on Change advanced power settings.
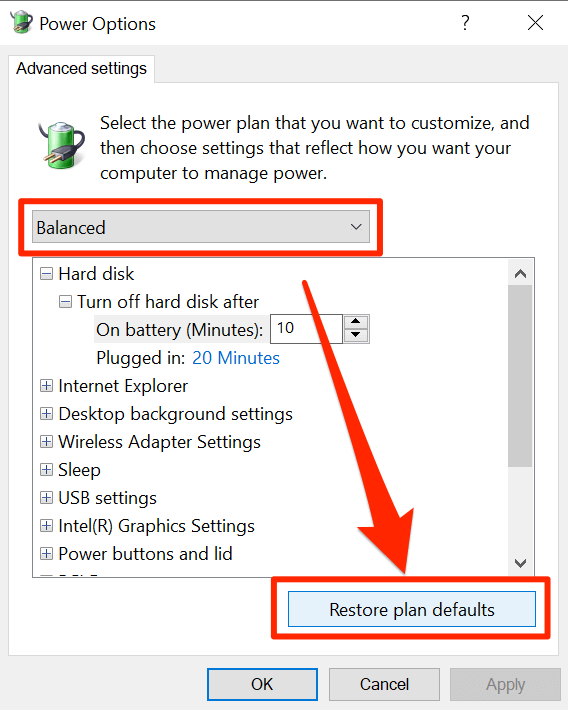
- Select your power plan and click on Restore plan defaults at the bottom. Then hit Apply followed by OK.
Resolve Windows 10 Screensaver Issues With Power Troubleshooter
If none of the above methods worked for you, you might want to let your system detect the issue for itself and offer you suggestions on how to fix it. Your PC actually has a troubleshooter to help you deal with power issues on your computer.
- Launch the Settings app on your PC.
- Click on the Update & Security option.
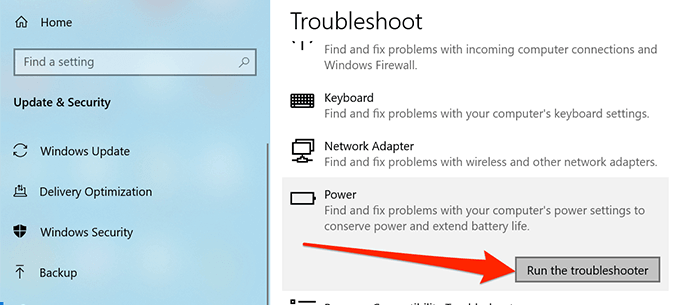
- Select Troubleshoot from the left sidebar.

- Click on Power on the right-hand side pane and select Run the troubleshooter.
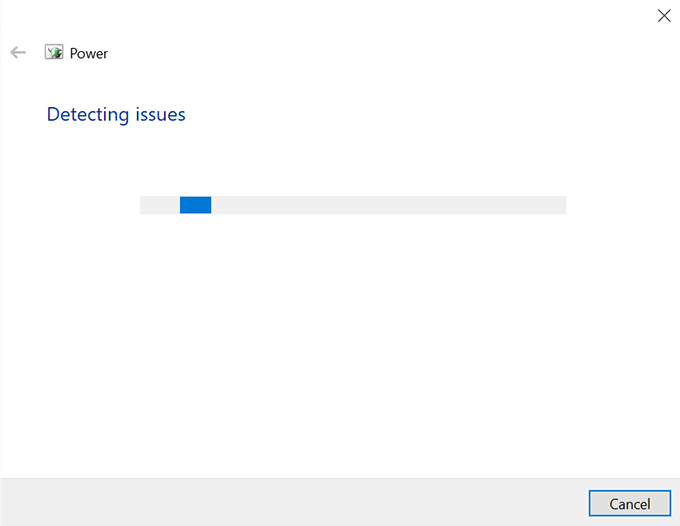
- Wait for it to detect issues and offer you possible ways to fix those issues.
We hope the guide helped you fix the screensaver issue on your Windows 10 machine. And if it did, please let us know what method worked for you in the comments below.
Related Posts
- Preparing for Windows 10 End of Support: Upgrading to Windows 11
- How to Fix a “This file does not have an app associated with it” Error on Windows
- How to Fix an Update Error 0x800705b4 on Windows
- How to Resolve “A JavaScript error occured in the main process” Error on Windows
- How to Fix the Network Discovery Is Turned Off Error on Windows
Mahesh has been obsessed with technology since he got his first gadget a decade or so ago. Over the last few years, he’s written a number of tech articles on various online publications including but not limited to MakeTechEasier and Android AppStorm. Read Mahesh’s Full Bio
