A PC is only as good as the sum of its parts, and that includes the software used to control its many components. This software is called drivers—they allow Windows to communicate and control different parts of your PC, converting instructions into suitable code that the hardware can itself understand.
These drivers are subject to occasional bug fixes and feature upgrades that can improve the overall stability of your Windows PC. Unfortunately, like any man-made code, driver updates can be as problematic as the drivers they replace. You’ll need to know how to roll back a driver in Windows 10 if an update causes you issues.
Why Should You Roll Back a Driver in Windows 10?
New driver updates are quite common, especially for devices like graphics cards. These often come with new features and fixes which can improve the overall stability of your PC and improve the usability of the devices they control.
Unfortunately, this doesn’t mean all drivers you install are stable. For instance, if you were a gamer with an NVIDIA graphics card, you might start by updating your NVIDIA graphics drivers to an untested driver in beta testing, providing support for a recently released, next-generation game.
This driver may bring support for that game, but it may come with additional problems that can only be resolved with further, wider testing. That doesn’t mean stable drivers are any better, though—they can also come with issues or bugs that the developer wasn’t able to locate or fix before the driver was released.
If this happens, and your PC is still stable enough to boot up, you can roll back a driver to the previously installed (and hopefully more stable) driver release.
How to Back Up Windows 10 Drivers
You should ensure that you have a system in place to back up your drivers. This will help you should you need to roll back a device driver to an earlier version, as you’ll have a copy of your older device drivers available.
Windows won’t typically delete old drivers, even when you roll back to an older version. Backing up your Windows 10 drivers can help you quickly restore these drivers should you be forced to wipe and reinstall Windows at a later date, however.
If that happens, you’ll need these older drivers to hand if you intend to revert to using an older driver, rather than a problematic newer driver release. Thankfully, you can create a quick backup of your installed device drivers using the Deployment Image Servicing and Management (DISM) tool.
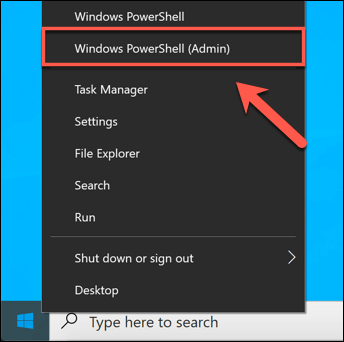
- To use the DISM tool to back up your drivers, you’ll need to open a Windows PowerShell window with administrative privileges. To do this, right-click the Windows Start menu and press the Windows PowerShell (Admin) option.
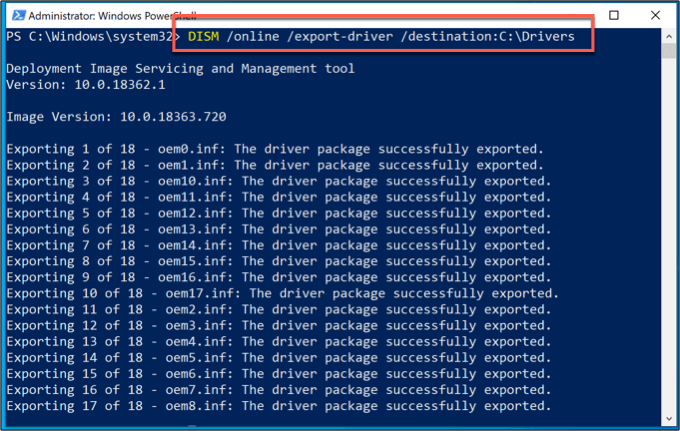
- In the PowerShell window, type DISM /online /export-driver /destination:C:Drivers, replacing the C:Drivers folder with another suitable location for your driver backups. This will copy all available third-party drivers to this folder, allowing you to restore them later.
- If you want to back up the full set of available Windows drivers, however, you’ll need to do this manually. Windows 10 stores drivers in the C:WindowsSystem32DriverStore folder. To back up this folder, open Windows File Explorer and visit the C:WindowsSystem32 folder.
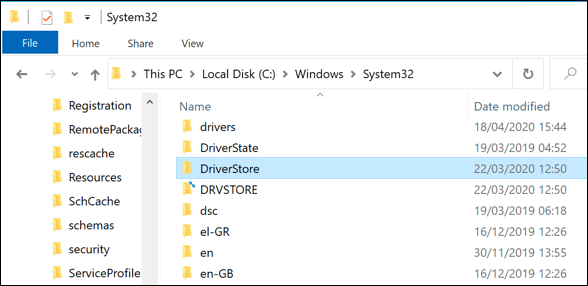
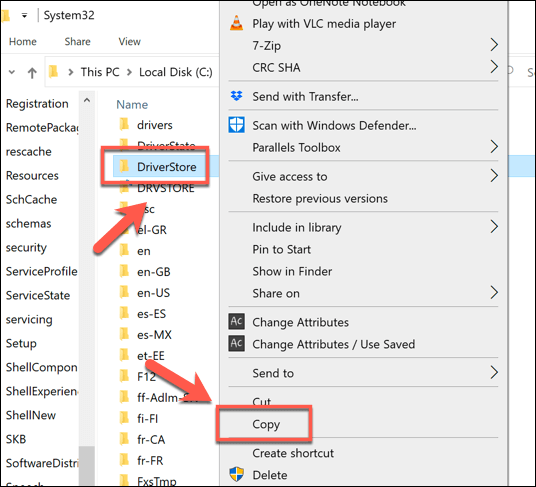
- Right-click the DriverStore folder and hit the Copy option, or select it and press Ctrl + C on your keyboard.
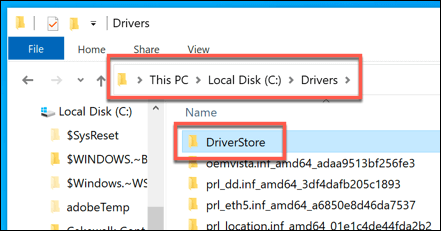
- With the DriverStore folder copied, paste the contents into your suitable backup folder (for instance, C:Drivers). This will allow you to restore them manually afterward.
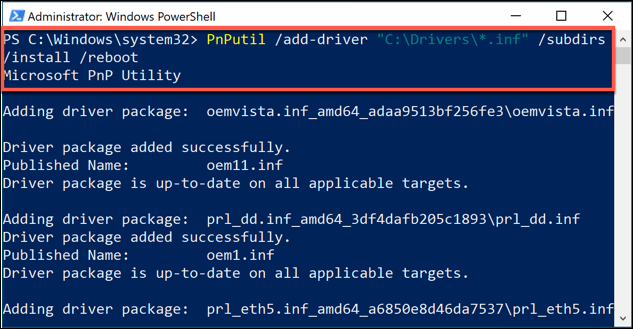
- If you need to reinstall these drivers in the future, you can install them all at once using the PnPUtil tool. In a PowerShell window with administrative privileges, type PnPutil /add-driver “C:Drivers*.inf” /subdirs /install /reboot. This will install all of the drivers in this folder, rebooting your PC to complete the process.
How to Roll Back a Driver in Windows 10
If you need to roll back a driver in Windows 10, you can do this using the Windows Device Manager. The Device Manager lists all detected devices and attached hardware, allowing you to install, upgrade or roll back drivers for each device.
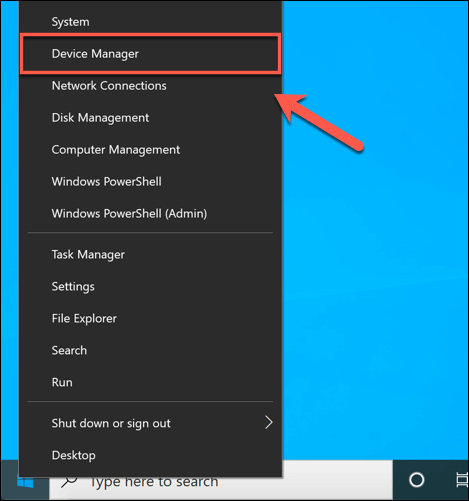
- To access the Device Manager, right-click the Windows Start menu and press the Device Manager option.
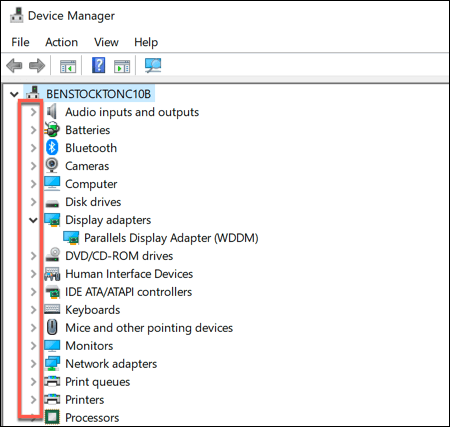
- The Device Manager menu separates all attached hardware into categories. Press the arrow next to any of these categories to view a full list of hardware.
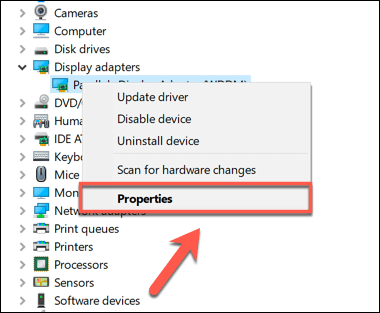
- To roll back a driver, right-click any of the listed devices and press the Properties option.
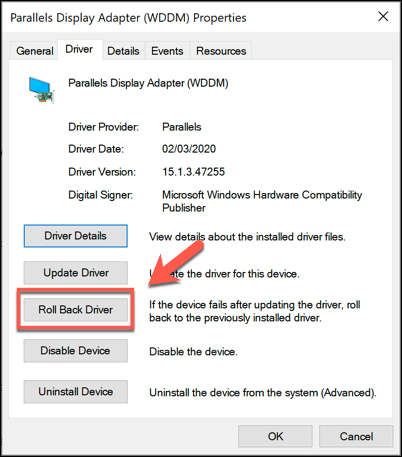
- In the Driver tab of the Properties window, press the Roll Back Driver option. This will allow you to begin rolling back your installed driver to a previous version.
- Windows will ask you to confirm why you’re rolling back your driver. Select a reason from one of the selected options—feel free to add an additional comment in the Tell us more box. When you’re ready, press the Yes button.
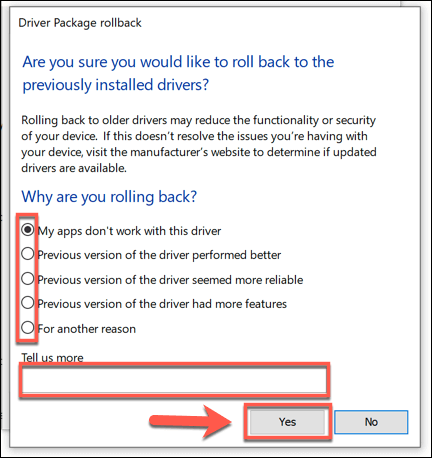
Once you confirm why you’re rolling back the driver, Windows will automatically begin the process. You may need to restart your PC once this process has completed to fully reload the old driver and ensure your PC is working correctly.
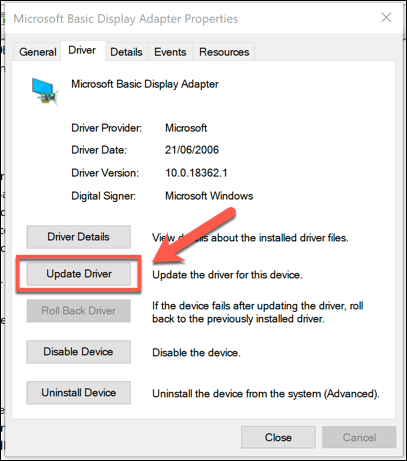
- Should you wish to return to the newer driver at a later date, return to the Device Manager window, right-click a driver and press Properties. In the Driver tab of the Properties window, press the Update Driver button.
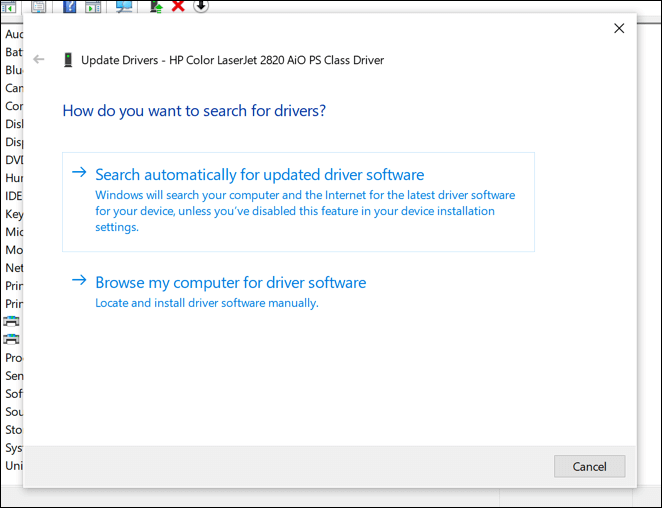
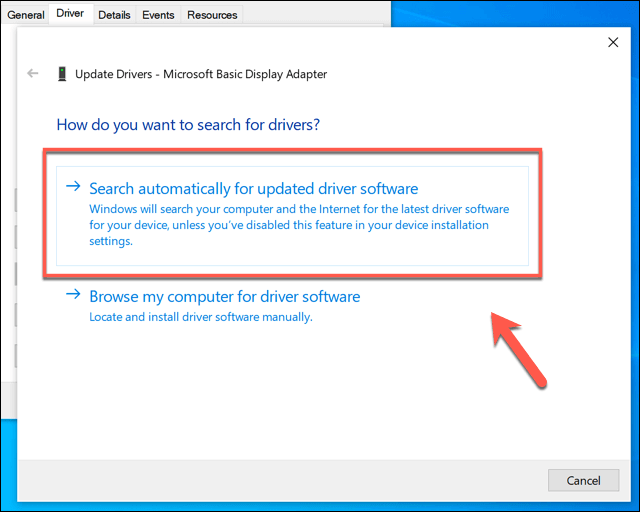
- In the Update Drivers window, press the Search automatically for updated driver software. This will search your PC and Windows Update for the newer driver. If your rolled-back driver is older than the most recently released driver, this should update your driver to the newer version.
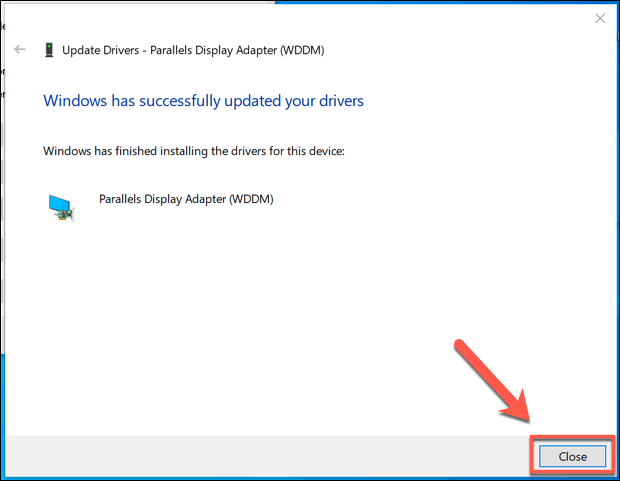
- Windows will confirm when the new driver has been installed—press Close to confirm and close the Update Drivers window.
Effective System Maintenance in Windows 10
Knowing how to roll back a driver in Windows 10 is just one necessary step in ensuring you know how to stay on top of the system maintenance of a Windows 10 PC. You could take things further by setting up automatic Windows backups, giving you the option to restore your PC if something goes wrong in the future.
While you may need to roll back drivers from time to time, don’t be afraid to check for regular driver updates and update them to the latest versions, too. Driver problems should be uncommon, and new drivers should come with improved stability for your PC overall. After all, if things go wrong, you can always roll back your driver.
Related Posts
- Preparing for Windows 10 End of Support: Upgrading to Windows 11
- How to Fix a “This file does not have an app associated with it” Error on Windows
- How to Fix an Update Error 0x800705b4 on Windows
- How to Resolve “A JavaScript error occured in the main process” Error on Windows
- How to Fix the Network Discovery Is Turned Off Error on Windows