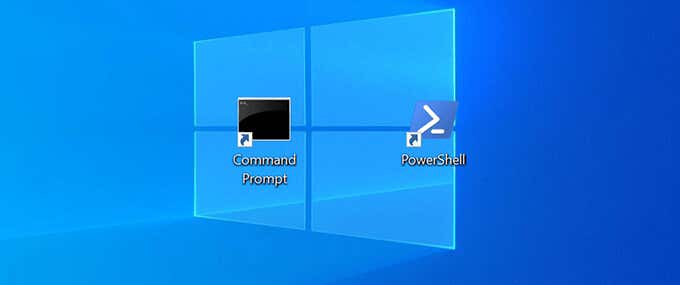
Command Prompt and PowerShell are two essential tools for a command-line user on Windows PCs. If you access these tools frequently, you can add the Command Prompt and PowerShell shortcuts to your desktop to quickly access them.
You can even assign a keyboard shortcut to these apps.
Create a Command Prompt Desktop Shortcut on Windows 10
You can add a Command Prompt shortcut to your desktop the same way you add any other shortcut. Once the shortcut is added, you can change its name and icon to your liking.
To start:
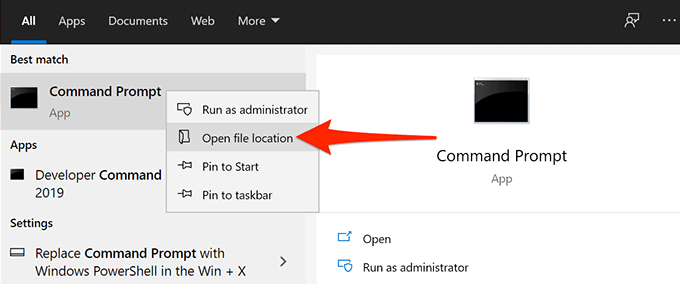
- Open the Start menu and search for Command Prompt.
- Right-click Command Prompt in the search results and select Open file location.
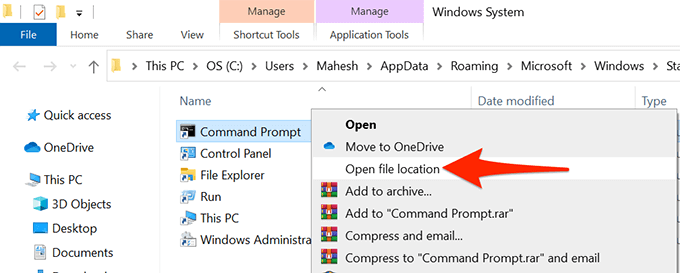
- A File Explorer window opens with a Command Prompt shortcut. Here, right-click the Command Prompt shortcut again and select Open file location.
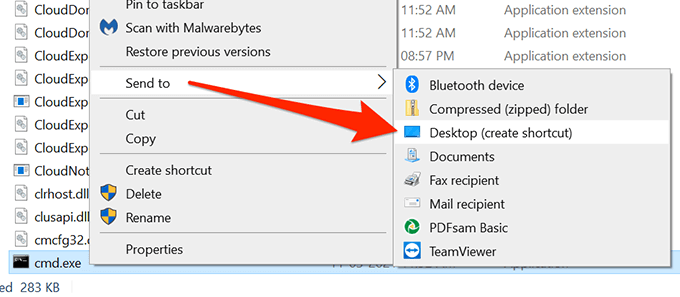
- You should now see a file called cmd.exe, which is the Command Prompt executable file. Right-click the cmd.exe file and select Send to > Desktop (create shortcut).
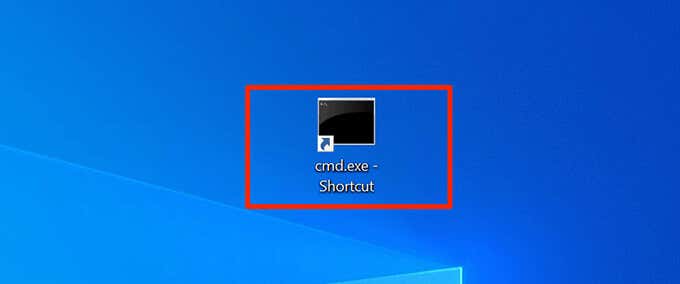
- Access your desktop, and you should find a new shortcut called cmd.exe – Shortcut there. Double-click this shortcut to open Command Prompt.
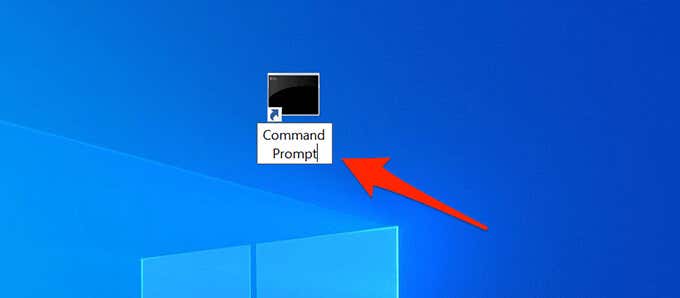
- To rename the shortcut, right-click the shortcut, select Rename, enter a new name, and press Enter.
Run the Command Prompt Shortcut With Admin Rights
To run certain commands, you’d need admin privileges in Command Prompt. You can configure your desktop Command Prompt shortcut so that it always opens the tool with admin privileges.
To do this:
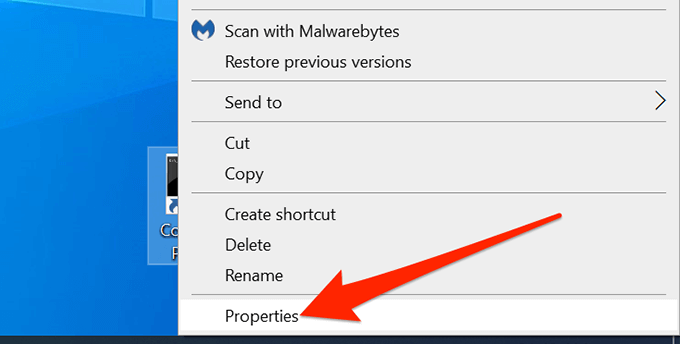
- Right-click the Command Prompt shortcut on your desktop and select Properties.
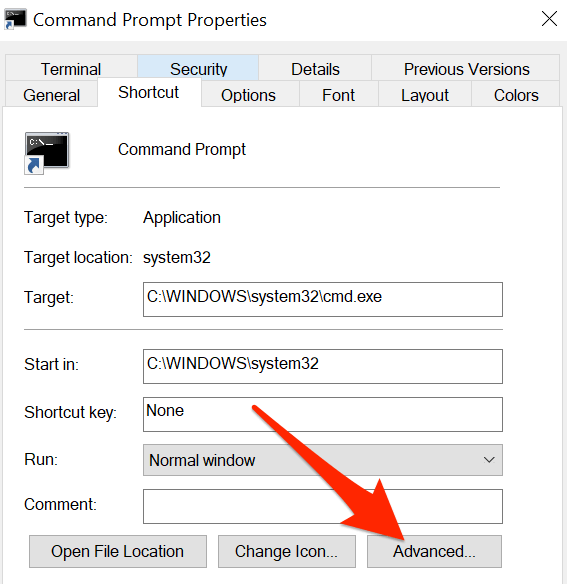
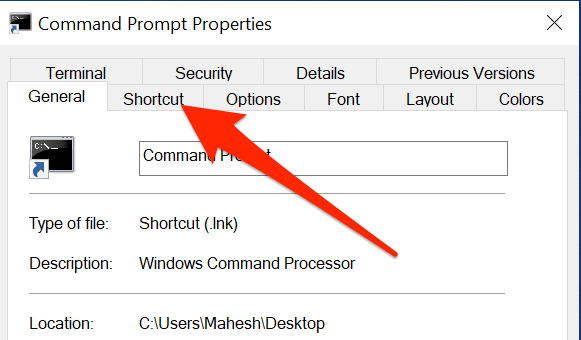
- On the Properties window, select the Shortcut tab at the top.
- In the Shortcut tab, select the button that says Advanced.
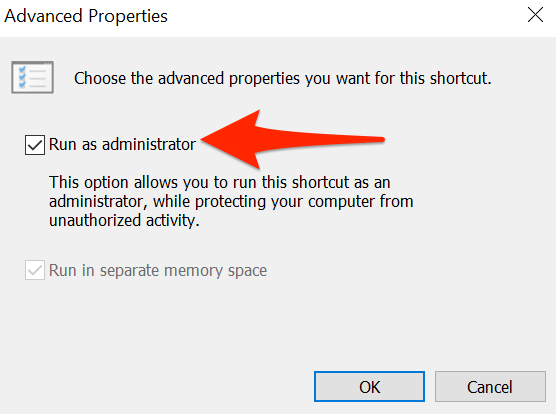
- A new window opens on your screen. Here, enable the Run as administrator checkbox and select OK at the bottom.
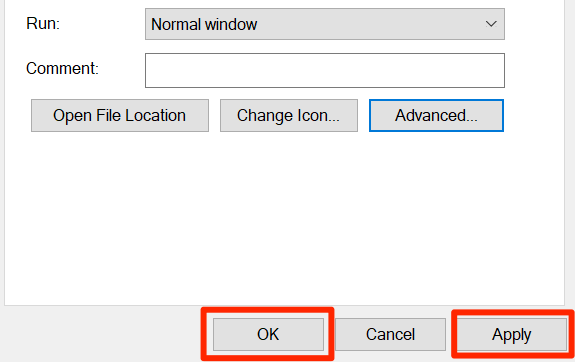
- Go back to the Properties window, select Apply and then select OK at the bottom.
- Double-click the Command Prompt shortcut, and it should now open with admin privileges.
Create a Keyboard Shortcut to Launch Command Prompt
You can make opening Command Prompt even easier by assigning a keyboard shortcut to the tool’s desktop shortcut. Windows allows you to choose a custom combination of keys for the shortcut.
To assign a shortcut:
- Right-click the Command Prompt shortcut on your desktop and select Properties.
- Select the Shortcut tab at the top of the Properties window.
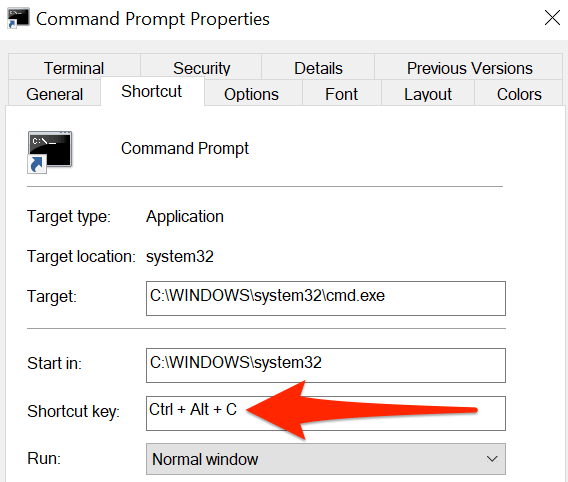
- In the Shortcut tab, select the Shortcut key field. Know that whatever keyboard shortcut you assign here, Windows will prefix it with Ctrl + Alt.
- Press the key that you want to assign to the Command Prompt shortcut. For example, press C. The Shortcut key field should display Ctrl + Alt + C.
- Then, select Apply followed by OK at the bottom to save your changes.
Add the Command Prompt Shortcut to the Windows Taskbar
You may want to pin Command Prompt to your taskbar to open the tool with a single click:
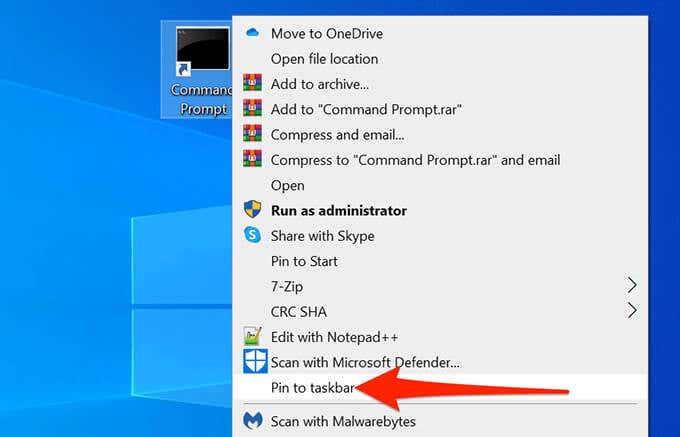
- Right-click the Command Prompt shortcut on your desktop and select Pin to taskbar.
- The tool is now on your taskbar.
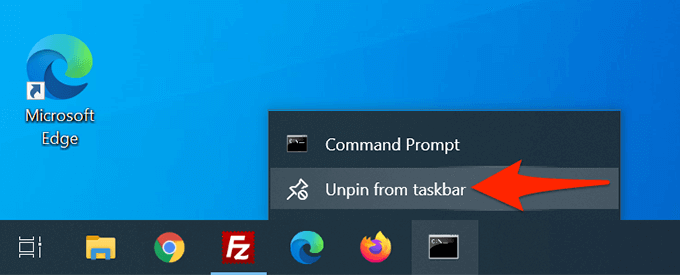
- To remove this taskbar shortcut, right-click the shortcut and select Unpin from taskbar.
Create a PowerShell Desktop Shortcut on Windows 10
If you use PowerShell, adding PowerShell’s shortcut to your desktop is as easy as adding any other app’s shortcut.
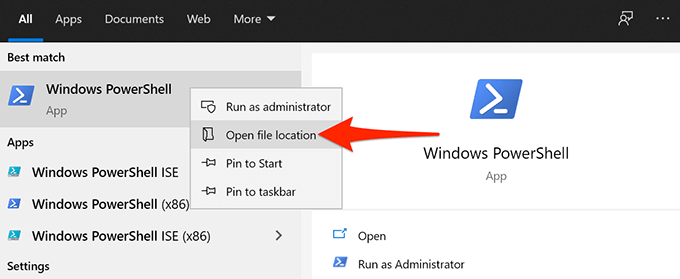
- Launch the Start menu and search for Windows PowerShell.
- Right-click Windows PowerShell in the search results and select Open file location.
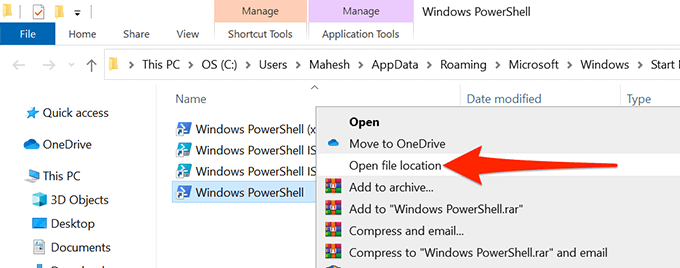
- On the following screen, right-click Windows PowerShell and select Open file location.
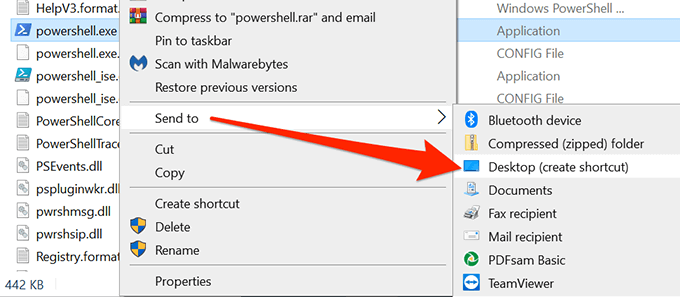
- You should now see powershell.exe. Right-click this file and select Send to > Desktop (create shortcut).
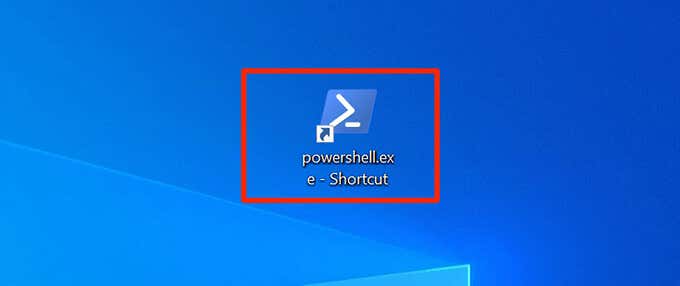
- You now have a PowerShell shortcut on your Windows desktop.
Run the PowerShell Shortcut With Admin Rights
If you run commands that require admin privileges, configure the PowerShell shortcut to always open the tool with admin rights.
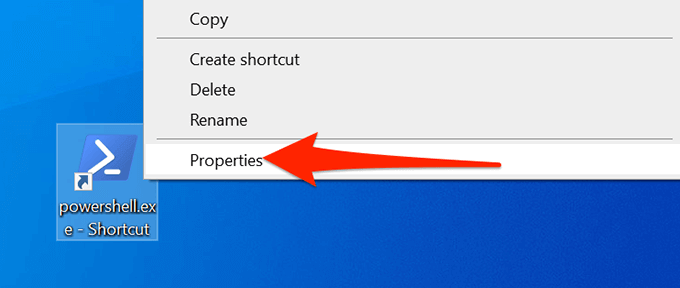
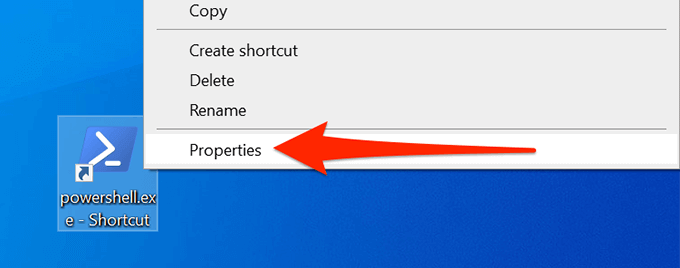
- Right-click the PowerShell shortcut on your desktop and select Properties.
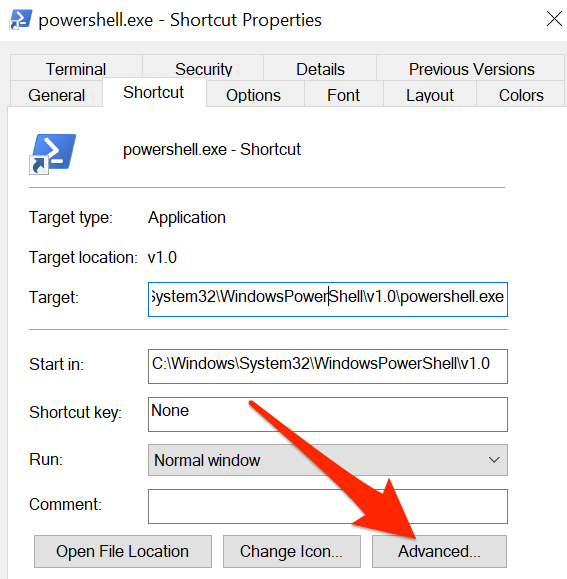
- Select the Shortcut tab in Properties.
- Select the Advanced button in the Shortcut tab.
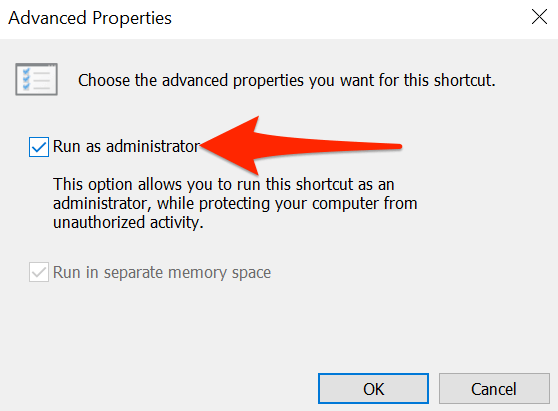
- In the Advanced Properties window that opens, activate the Run as administrator box and then select OK at the bottom.
- Select Apply and then select OK at the bottom of the window.
- Your PowerShell shortcut will now always open with admin rights.
Create a Keyboard Shortcut to Launch PowerShell
You can assign a shortcut to the PowerShell desktop so that the tool opens with a keystroke.
- Right-click the PowerShell shortcut on your desktop and select Properties.
- Select the Shortcut tab in Properties.
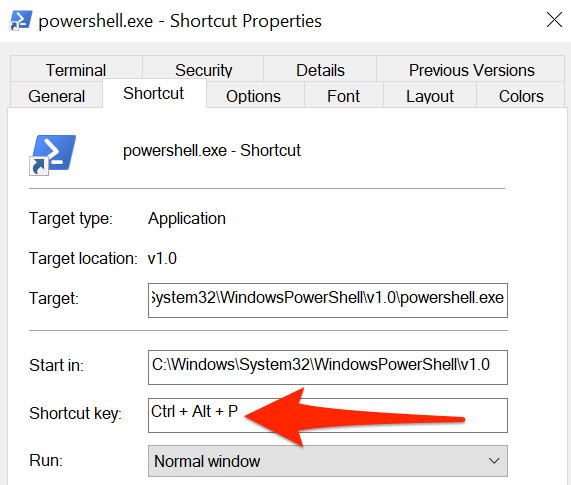
- Select the Shortcut key field and type the keyboard shortcut you want to use. Keep in mind that your shortcut will be prefixed with Ctrl + Alt.
- For example, if you assign P, Windows will treat it as Ctrl + Alt + P.
- Select Apply and then select OK at the bottom to save your shortcut.
Add the PowerShell Shortcut to the Windows Taskbar
For quick access, you can add the PowerShell shortcut to your taskbar.
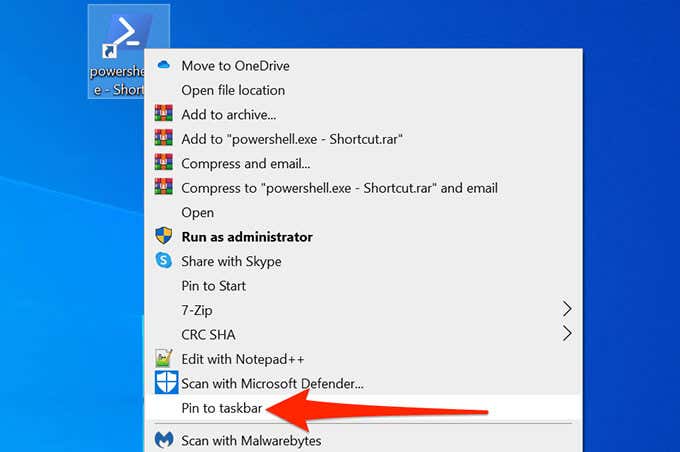
- Right-click the PowerShell shortcut on your desktop and select Pin to taskbar.
- A PowerShell icon is now added to your taskbar.
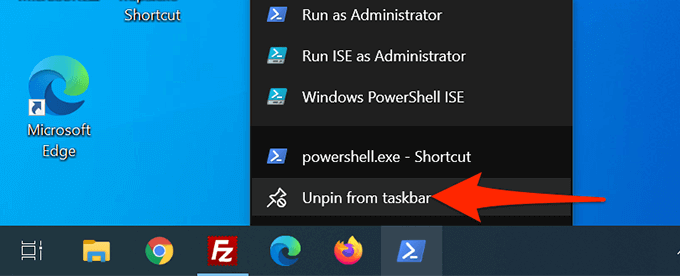
- To remove this shortcut, right-click the shortcut on the taskbar and choose Unpin from taskbar.
Bonus Tip: Open Command Prompt or PowerShell’s Taskbar Shortcut With a Keyboard Shortcut
By default, Windows 10 assigns a keyboard shortcut to each app on the taskbar. These shortcuts use a numeric system. Here, the app on the farthest left side of the taskbar is numbered one, and then two, three, and so on.
To use this shortcut, you’d press the Windows key and then the number of your app on the taskbar. For example, if Command Prompt is the fifth numbered shortcut on the taskbar, you’d use Windows + 5 to open the utility.
You can drag the icons on the taskbar in any direction (left or right), and their shortcuts will change accordingly.
Related Posts
- Preparing for Windows 10 End of Support: Upgrading to Windows 11
- How to Fix a “This file does not have an app associated with it” Error on Windows
- How to Fix an Update Error 0x800705b4 on Windows
- How to Resolve “A JavaScript error occured in the main process” Error on Windows
- How to Fix the Network Discovery Is Turned Off Error on Windows
Mahesh has been obsessed with technology since he got his first gadget a decade or so ago. Over the last few years, he’s written a number of tech articles on various online publications including but not limited to MakeTechEasier and Android AppStorm. Read Mahesh’s Full Bio
