Constant exposure to blue light from electronic devices can cause visual problems and ruin your sleep pattern. On Windows 10, the Night Light feature prevents digital eye strain and improves sleep quality by reducing blue light emission from your computer’s display.
Despite its benefits, there are times when the feature malfunctions. If you’re on this page because Windows 10 Night Light is not working on your Windows 10 computer, try the potential solutions listed below.
1. Check Night Light Schedule
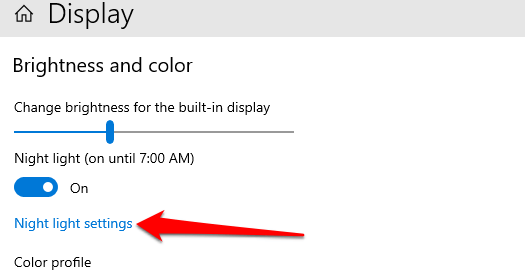
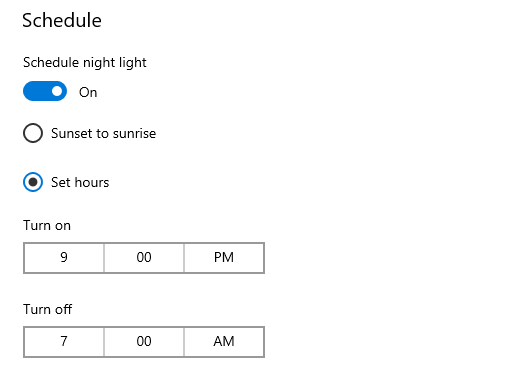
If you configured Windows to activate Night Light automatically but it doesn’t, check your Night Light schedule settings and confirm the hours. Go to Settings > System > Display and click Night light settings.
Choosing Windows’ preset “Sunset to sunrise” schedule means Night Light will come on by 7:30 PM every day and go off 6:30 AM in the morning. If you choose to set your own custom hours, make sure you enter the accurate time in the provided boxes.
2. Adjust Night Light Strength
Does your screen look the same after enabling Windows 10 Night Light? Does Windows fail to display a warm color when you toggle on Night Light?
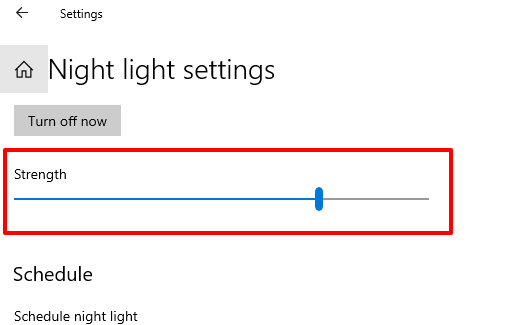
That could be because you’ve reduced the Night Light strength to the minimum. Go to Settings > System > Display > Night light settings and move the Strength slider to the right to increase the intensity of the warm color.
3. Turn on Location Services
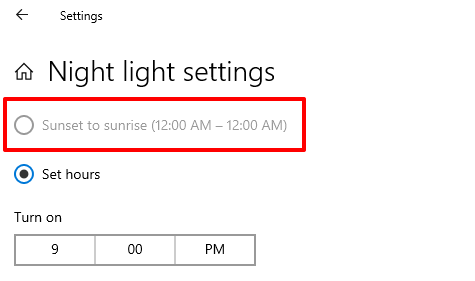
Night Light is one of the many Windows features that require location access to work optimally. If the preset “Sunset to sunrise” schedule option is greyed out, that’s most likely because location access is disabled on your PC.
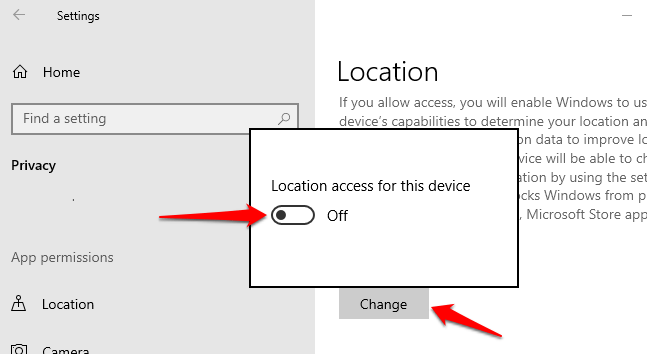
Go to Settings > Privacy > Location to check your device’s location settings. Click the Change button and toggle on Location access for this device.
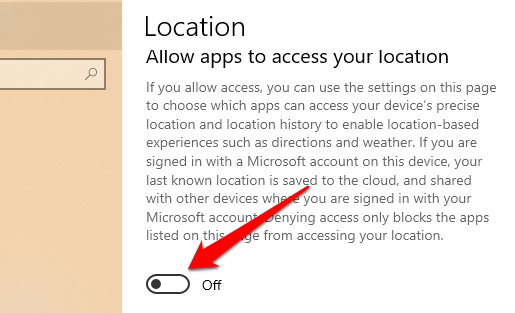
Scroll to the “Allow apps to access your location” section and toggle on the option.
Return to the Night Light settings menu and check if you can use the “Sunrise to sunset” schedule.
4. Check Date and Time Settings
A lot can go wrong on your computer if the date, time, or timezone settings are inaccurate. Your browser may fail to load certain webpages, Microsoft Store won’t download apps, and so on. Other Windows apps and features (Night Light, for example) may also malfunction if your PC’s date & time settings are incorrect.
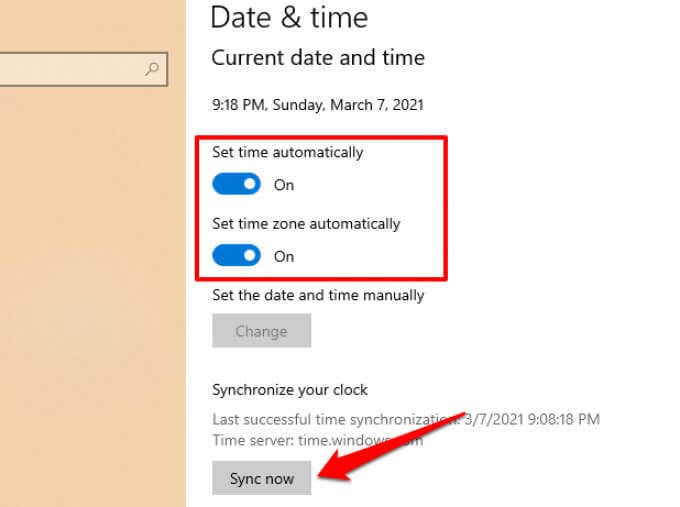
To prevent these from happening, head to Settings > Time & Language > Date & time and toggle on these two options: Set time automatically and Set time zone automatically.
Afterward, click the Sync now button in the “Synchronize your clock” section. That’ll trigger your computer to obtain accurate date & time information from the Windows Time Server.
5. Restart Your Computer
If the problem is due to a temporary glitch with your operating system, rebooting your computer might help restore Night Light to normalcy. Before you restart your device, try signing out of your profile/account and signing back in—press the Windows button, click on your profile icon, and select Sign out. Reboot your computer if Windows 10 Night Light still doesn’t work when you sign back in.
6. Update or Reinstall Display Driver
You may encounter difficulties using Night Light if your computer’s graphic/display driver is outdated, broken, or buggy. If the problem persists after trying the recommendations above, update or reinstall your graphics/display drive.
Note: Windows 10 Night Light does not work on devices using a DisplayLink graphic driver or Microsoft’s Basic Display driver. If you use either of these drivers, visit your PC manufacturer’s website to download a different graphics driver.
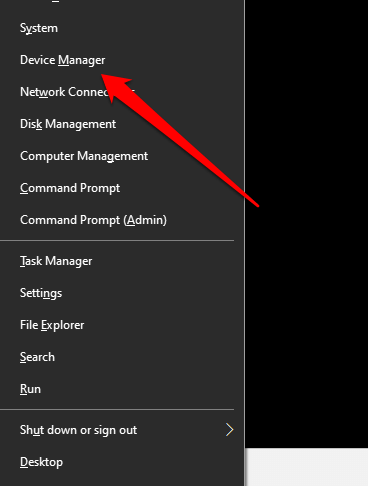
Right-click the Start Menu icon (or press Windows key + X) and select Device Manager on the Quick Access menu.
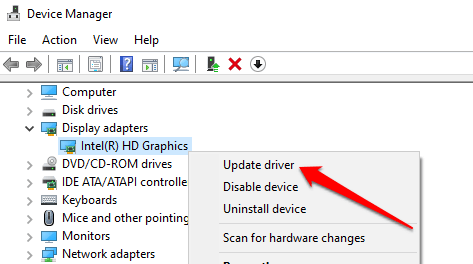
Expand the Display adapters section, right-click the graphics driver, and select Update driver.
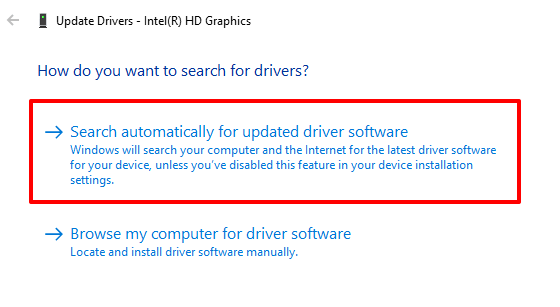
Click Search automatically for updated driver software.
Windows will scan your computer and the internet for an updated version of your graphics driver. If Windows doesn’t find any available update, return to the Device Manager and uninstall the graphics driver.
Don’t worry, you won’t break anything on your computer; Windows will automatically reinstall a clean, error-free copy of the driver when you reboot your PC.
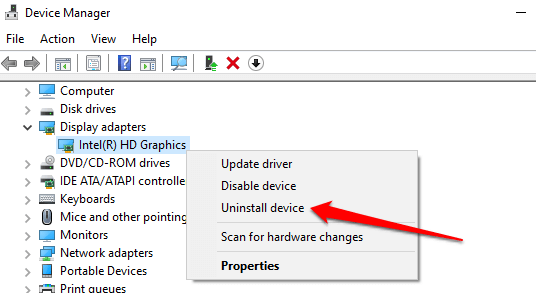
Right-click on the driver and select Uninstall device.
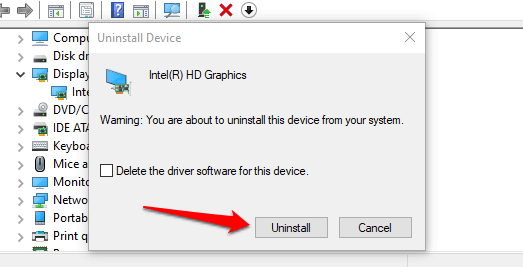
Leave the “Delete the driver software for this device” option unchecked and click Uninstall.
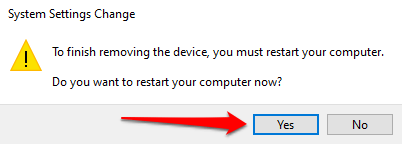
Restart your computer when prompted to. Before you click Yes, make sure you close all active programs so you don’t lose unsaved data.
7. Reset the Windows 10 Night Light Settings
Is the Night Light option grayed out in the Action Center and Windows Settings? Have you tried all possible fixes but to no avail? Head to the Windows Registry and reset the Night Light functionality.
Note: The Windows Registry is a database of sensitive files and settings. Damaging any registry file may corrupt the Windows OS and cause your computer to malfunction. Therefore, it’s important to make a backup of the registry before you attempt to make changes to the registry. Refer to this guide on backing up and restoring the Windows Registry.
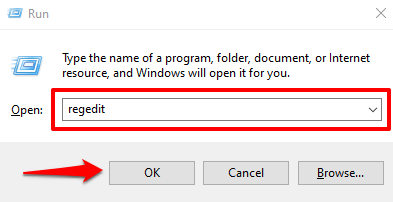
Launch the Windows Run box (Windows key + R), type regedit in the dialog box, and click OK.
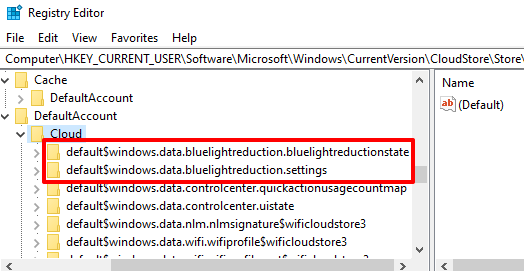
Paste this path below in the Registry Editor’s address bar and press Enter.
HKEY_CURRENT_USER\Software\Microsoft\Windows\CurrentVersion\CloudStore\Store\DefaultAccount\Cloud
On the left sidebar, locate and delete these two subfolders: $$windows.data.bluelightreduction.bluelightreductionstate and $$windows.data.bluelightreduction.settings.
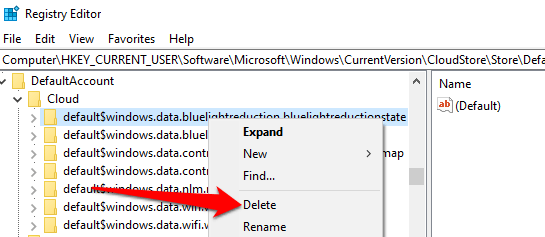
Simply right-click on the folder(s) and select Delete.
Close the Registry Editor and restart your computer.
8. Update Windows
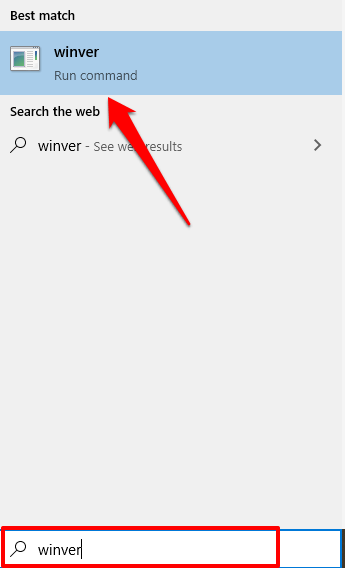
Apparently, there’s a known bug in version 1903 of Windows 10 that causes the Night Light to malfunction. Type winver in the Windows Search bar and press Enter to check the Windows version installed on your device.
If you’re running version 1903 (or older), go to Settings > Update & security > Windows Update to update your computer.
Even if you aren’t running version 1903, you should still install any official update available in the settings menu. Keeping your computer updated at all times can improve performance and fix other hidden issues.
Keep Your Eyes Protected
If Windows 10 Night Light won’t turn off, fails to warm your display when activated, or randomly comes on when it’s not supposed to, these troubleshooting techniques would get the feature working correctly again.
Related Posts
- Preparing for Windows 10 End of Support: Upgrading to Windows 11
- How to Fix a “This file does not have an app associated with it” Error on Windows
- How to Fix an Update Error 0x800705b4 on Windows
- How to Resolve “A JavaScript error occured in the main process” Error on Windows
- How to Fix the Network Discovery Is Turned Off Error on Windows
Sodiq has written thousands of tutorials, guides, and explainers over the past 4 years to help people solve problems with Android, iOS, Mac, and Windows devices. He also enjoys reviewing consumer tech products (smartphones, smart home devices, accessories, etc.) and binge-watching comedy series in his spare time. Read Sodiq’s Full Bio

