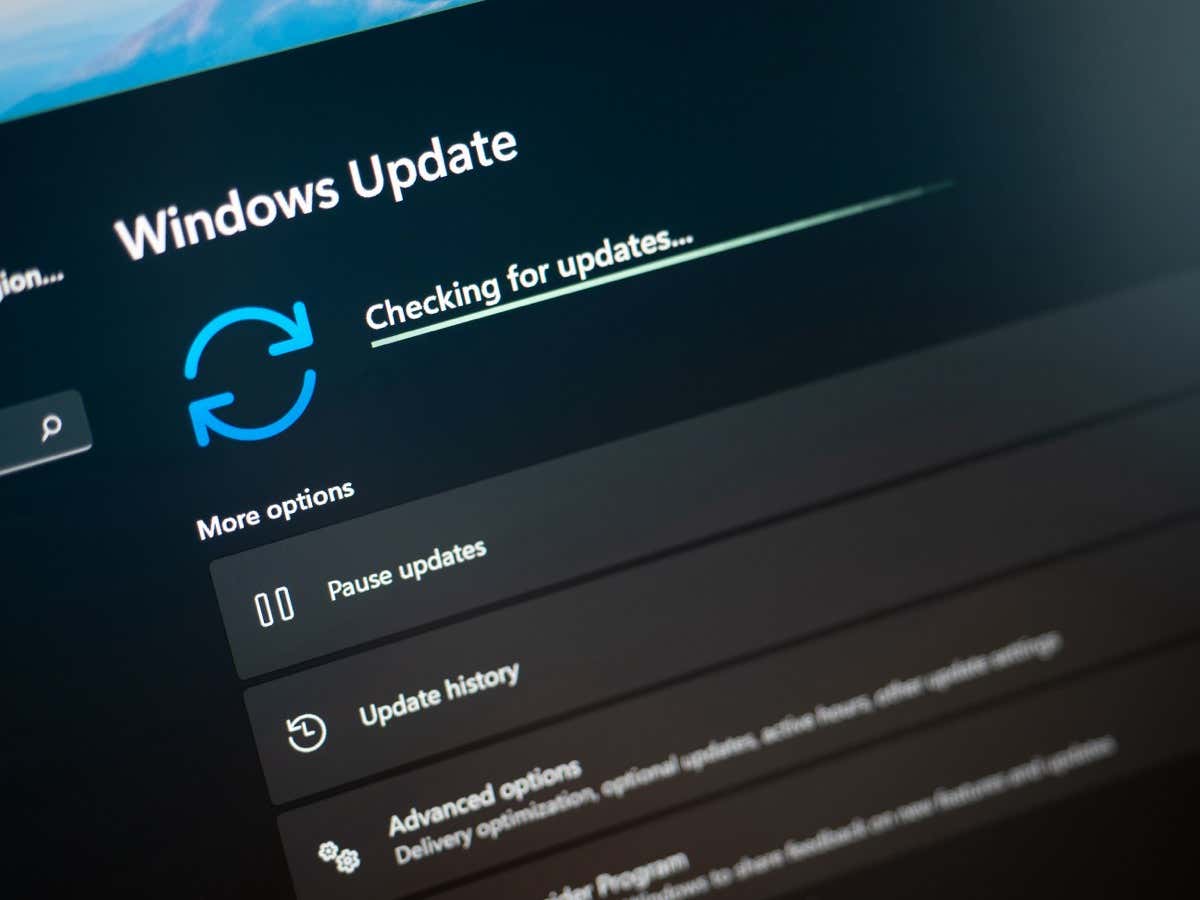
Encountering a 0x80073701 error usually indicates your PC’s Windows Update components aren’t working correctly. There are other reasons this error occurs and prevents you from updating your system. We’ll show you various ways to get around this problem and bring your operating system up to date.
Some other reasons the above error occurs are that the Windows Update cache is corrupted, Windows system files are damaged, a third-party app is interfering with your updates, and more.
1. Restart Your PC
When an update fails to download or install, give your PC a reboot and see if that resolves your problem. This is because your PC may have a minor glitch, which you can try to fix by restarting your system.
Make sure to save your unsaved work before powering off your computer.
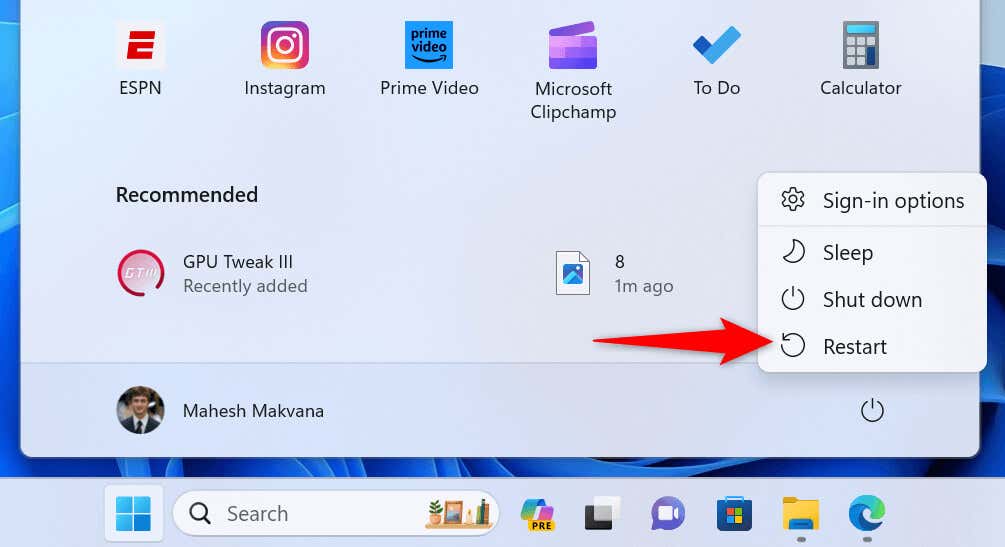
- Press the Windows key or select the Start menu icon to open the Start menu.
- Select the Power icon in the menu.
- Choose Restart to reboot your PC.
- Launch Windows Update when your PC boots up.
2. Use Windows Update Troubleshooter
Windows 11 and 10 include many troubleshooters to help you fix various issues on your machine. You can use the Windows Update troubleshooter when you have problems updating your operating system. This tool automatically finds issues with your updates and helps you resolve those problems.
On Windows 11
- Open Settings by pressing Windows + I.
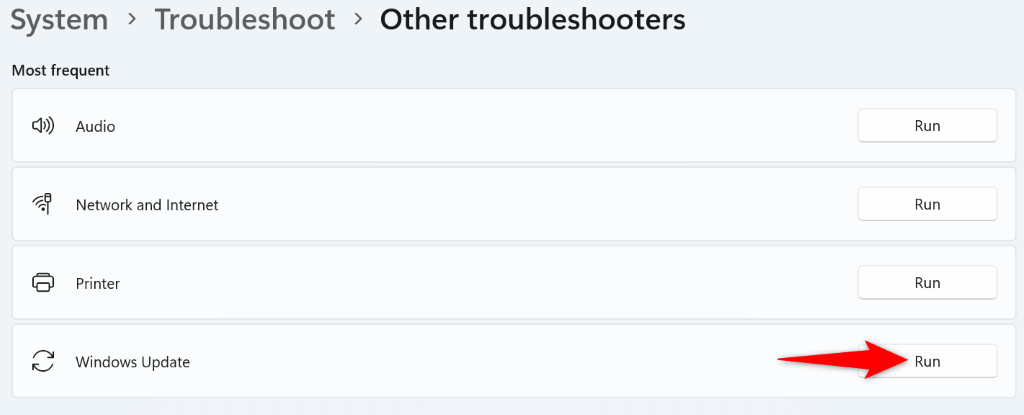
- Select System in the left sidebar and Troubleshoot on the right pane.
- Choose Other troubleshooters to view all troubleshooting tools.
- Select Run next to Windows Update to launch the troubleshooter.
- Allow the tool to detect and resolve your update problems.
On Windows 10
- Launch Settings using Windows + I.
- Select Update & Security in Settings.
- Choose Troubleshoot in the left sidebar.
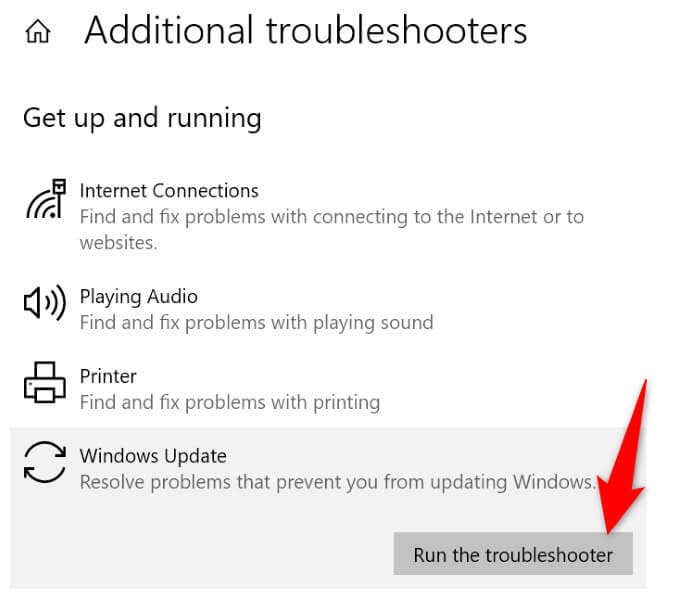
- Select Additional troubleshooters on the right pane.
- Select Windows Update and choose Run the troubleshooter.
- Allow the troubleshooter to find and fix your PC’s update problems.
3. Clear the Windows Update Download Cache
One fix to use when your updates fail to download or install is to delete your Windows Update cache. This is because certain downloaded update files might be corrupted, causing your issue.
Windows will re-download the required files after you’ve cleared the cache. Note that you’ll use the same steps on both Windows 11 and Windows 10 to remove the update cache.
- Open the Run dialog box by pressing Windows + R.
- Type the following in the box and press Enter: services.msc
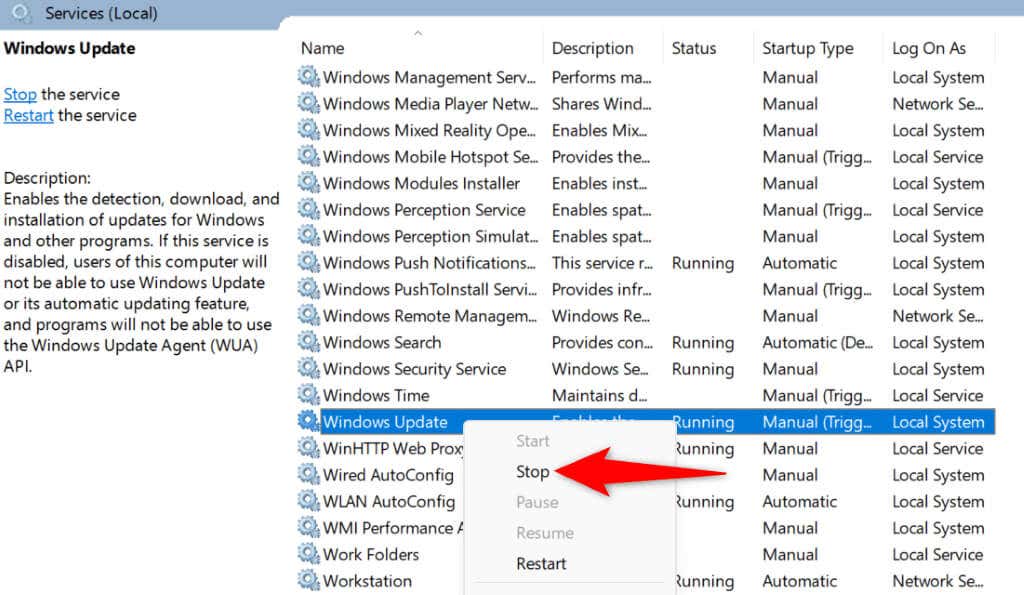
- Find the Windows Update service on the list, right-click the service, and choose Stop. Keep the Services window open as you’ll return here to start the service again.
- Open the Run dialog box again, type the following, and press Enter: C:\Windows\SoftwareDistribution\
- Select all files in the folder by pressing Ctrl + A.
- Right-click a selected file and choose Delete.
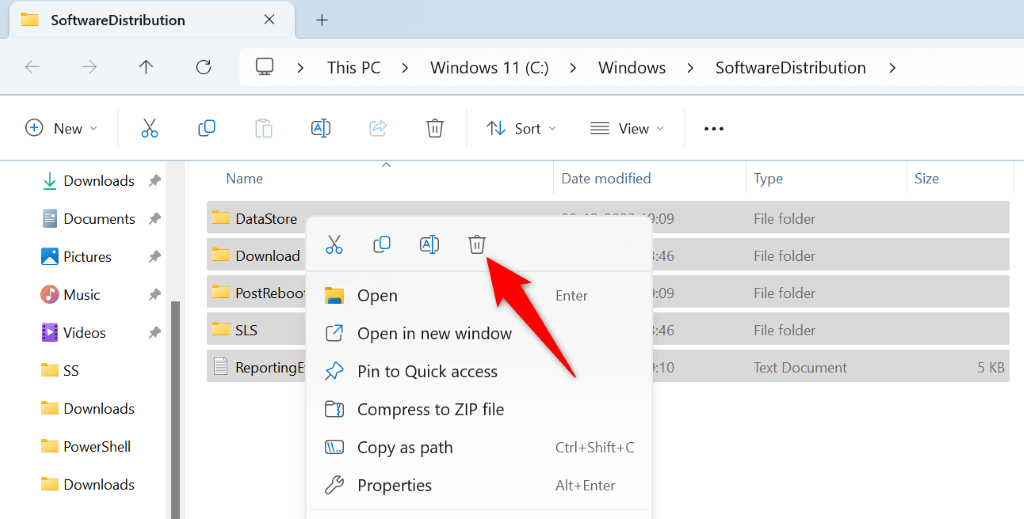
- Empty your Recycle Bin so your Windows Update cache is gone for good.
- Return to the Services window, right-click Windows Update, and choose Start.
- Run Windows Update and update your PC.
4. Reset Windows Update on Your PC
If you continue to get a 0x80073701 error while updating Windows, reset your PC’s update components to fix your problem. Your update components might be facing issues, and resetting those items should resolve your issue.
You’ll use a batch file to reset the Windows Update components on your Windows 11 or 10 PC.
- Download the reset batch file for Windows 11 or Windows 10.
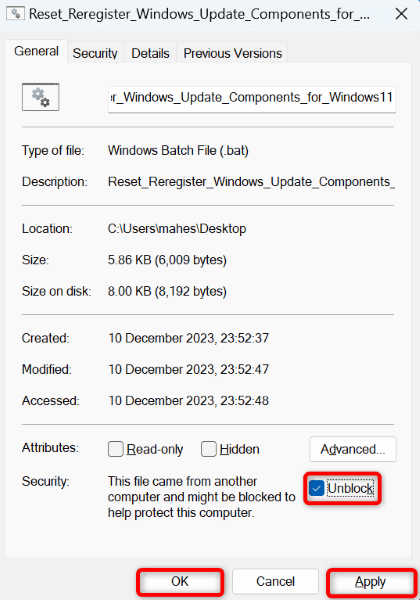
- Right-click the downloaded file and select Properties.
- Select the Unblock option and choose Apply followed by OK. Then, close the Properties window.
- Double-click the batch file.
- Select Yes in the prompt.
- Wait for your computer to restart, then try to update your system.
5. Repair Windows’ Damaged System Files
If Windows’ core files are damaged, that might be why you can’t update your system. Such core-level corruption happens for various reasons, including other apps’ interference and virus or malware infection.
In this case, use your PC’s built-in SFC (System File Checker) tool to find and replace the broken system files with working files. This tool automatically detects the damaged files; only little interaction is required from your end.
- Open the Start menu, find Command Prompt, and select Run as administrator.
- Choose Yes in the User Account Control prompt.
- Type the following command in CMD and press Enter. This command will download the files required to fix your system’s damaged files.
DISM.exe /Online /Cleanup-image /Restorehealth
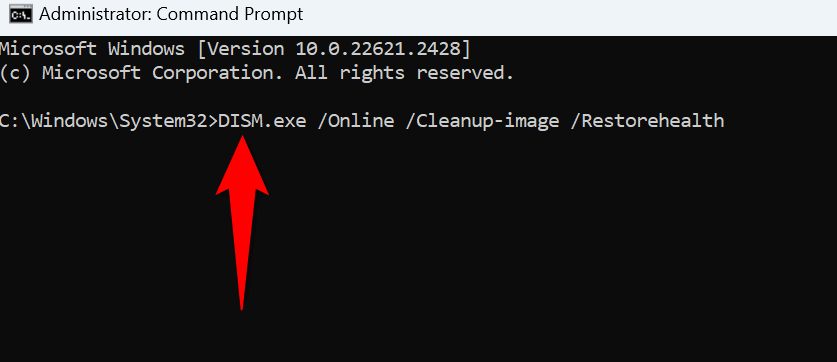
- Next up, run the following command to fix your system’s corrupted files: sfc /scannow
- Restart your PC.
6. Clean Boot Your Windows PC
If your Windows update still fails to download or install, a third-party app might be causing interference. One way to verify that is to clean boot your PC, where your system only loads the essential files to boot up your computer.
- Open the Start menu, find System Configuration, and select the item with that name in the search results.
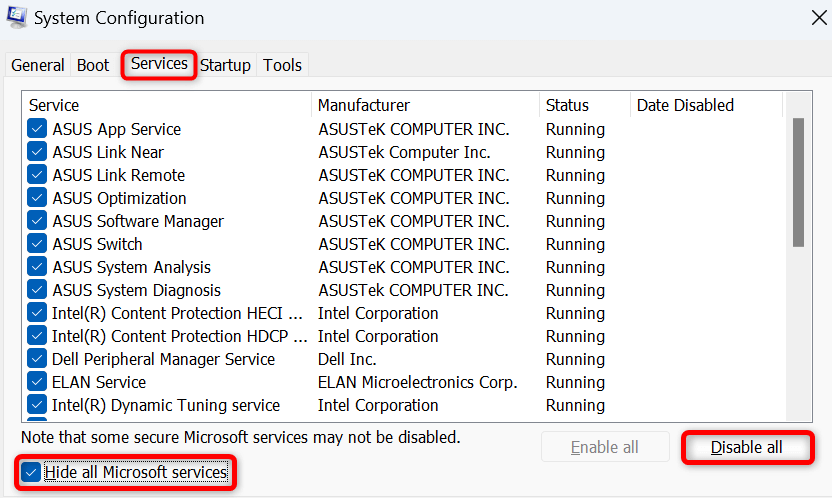
- Access the Services tab in the System Configuration window.
- Enable the Hide all Microsoft services option and choose Disable all.
- Access the Startup tab and select Open Task Manager.
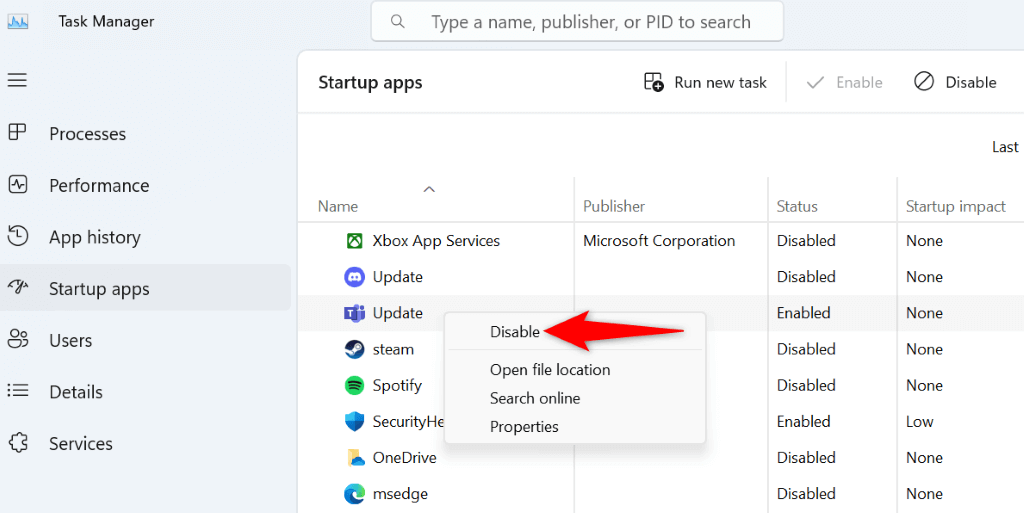
- Right-click each item that has Enabled in its Status column and choose Disable. This ensures no startup apps run when you clean boot your system. Then, close Task Manager.
- Select OK in System Configuration’s Startup tab.
- Reboot your computer.
- Try to update your Windows system as usual. If the system updates, your third-party apps are likely the culprit. In this case, remove those apps from your PC’s Settings app.
Get Around a 0x80073701 Error to Update Windows Successfully
It’s important to keep your Windows system up to date, but errors like 0x80073701 prevent you from installing the latest updates. Using the above methods, you can fix that particular issue and get Windows to download and install the available updates without any hiccups. We hope the guide helps you.
Related Posts
Mahesh has been obsessed with technology since he got his first gadget a decade or so ago. Over the last few years, he’s written a number of tech articles on various online publications including but not limited to MakeTechEasier and Android AppStorm. Read Mahesh’s Full Bio
