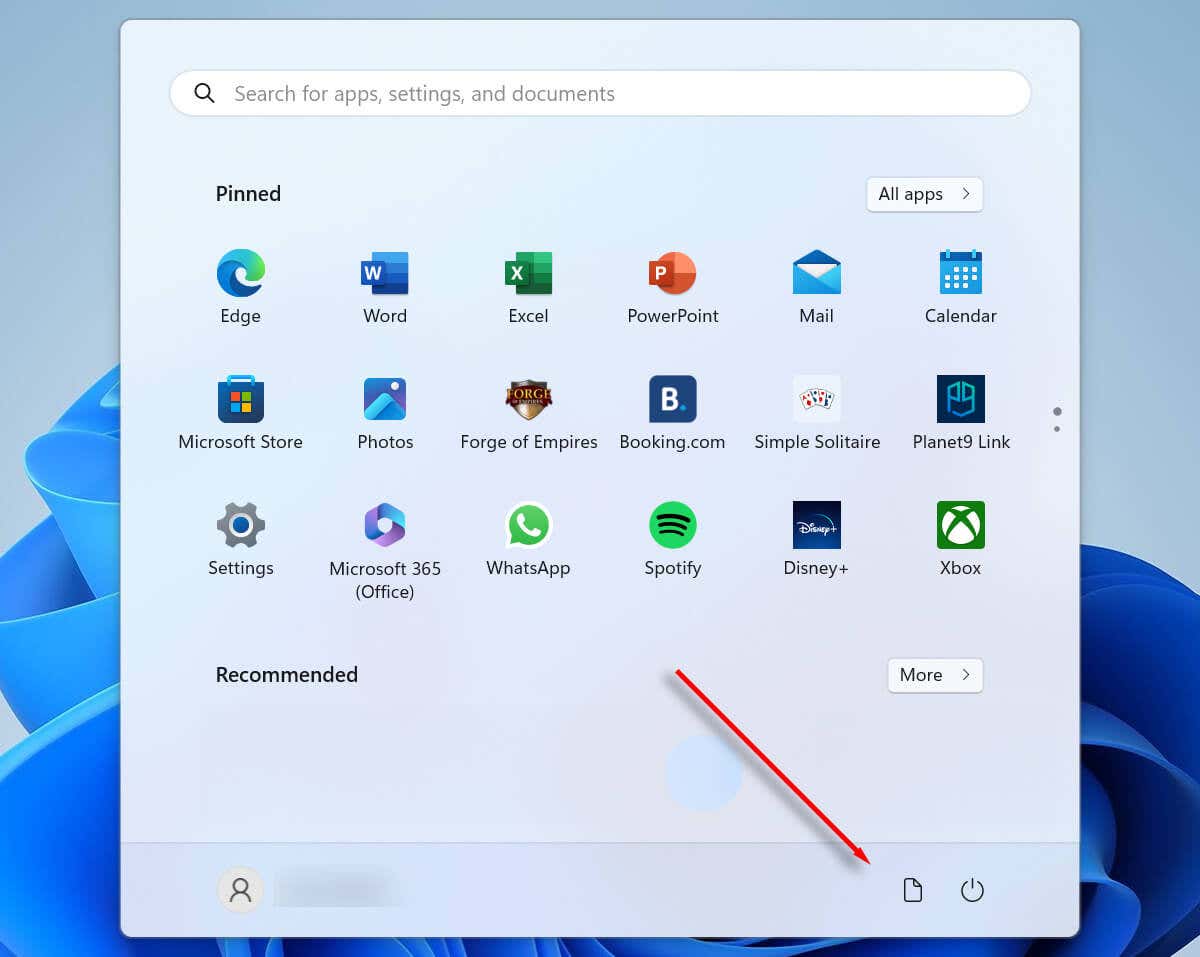
If you’re tired of the default layout of the Windows 11 Start Menu, there are plenty of customization options. One of these options is the ability to add system folders to the bottom of the Start Menu beside the power button.
Below, we’ll explain how to add system folders to the bottom of the Windows 11 Start Menu.
How to Add System Folders to the Windows 11 Start Menu
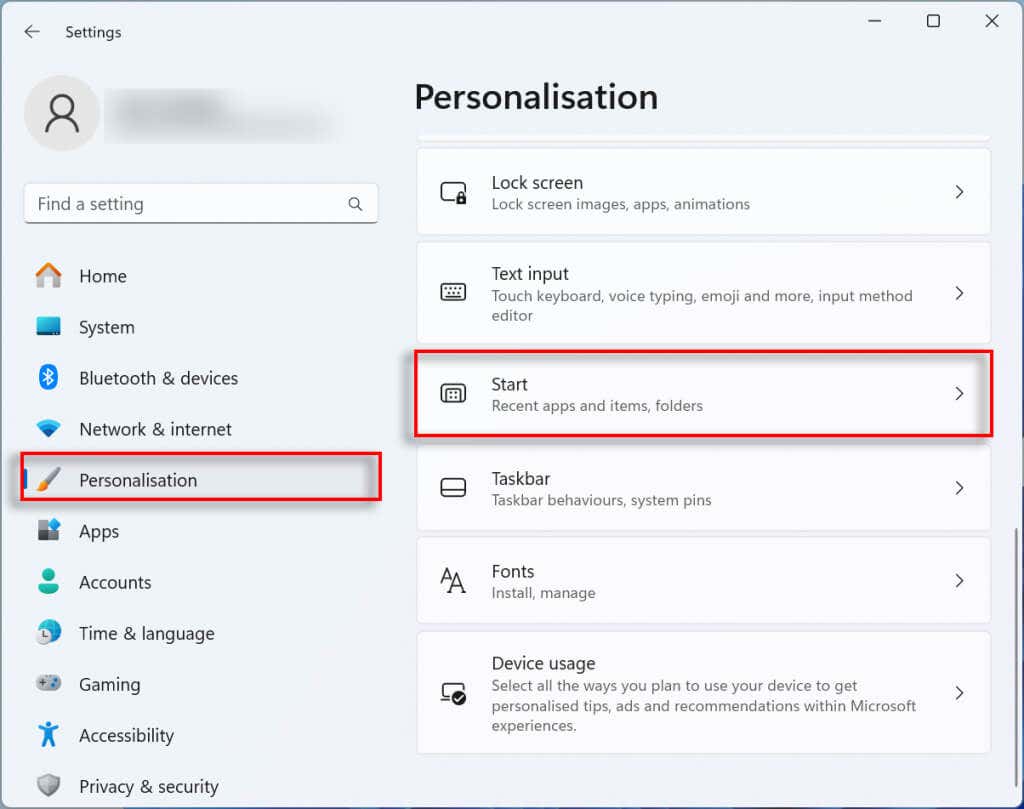
To add folders to the Start Menu, you need to access the personalization options in system settings. Here’s how:
- Press the Windows key + I to open Settings.
- Select Personalization from the left-hand menu.
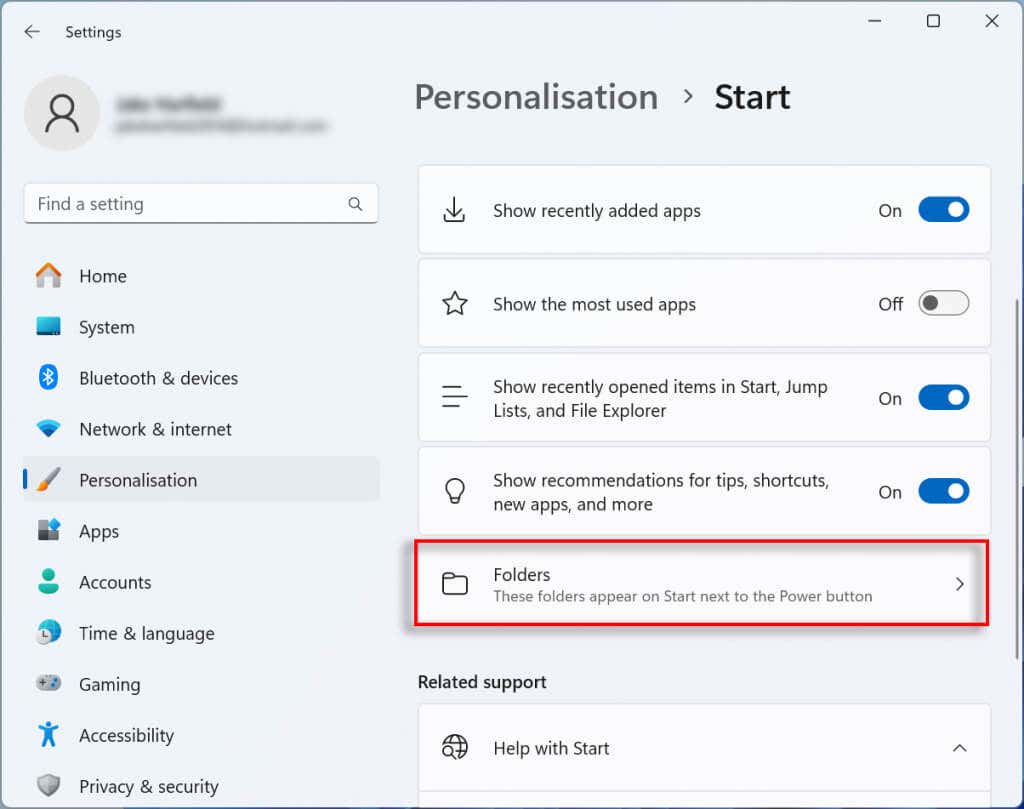
- Choose Start.
- Select the Folders option.
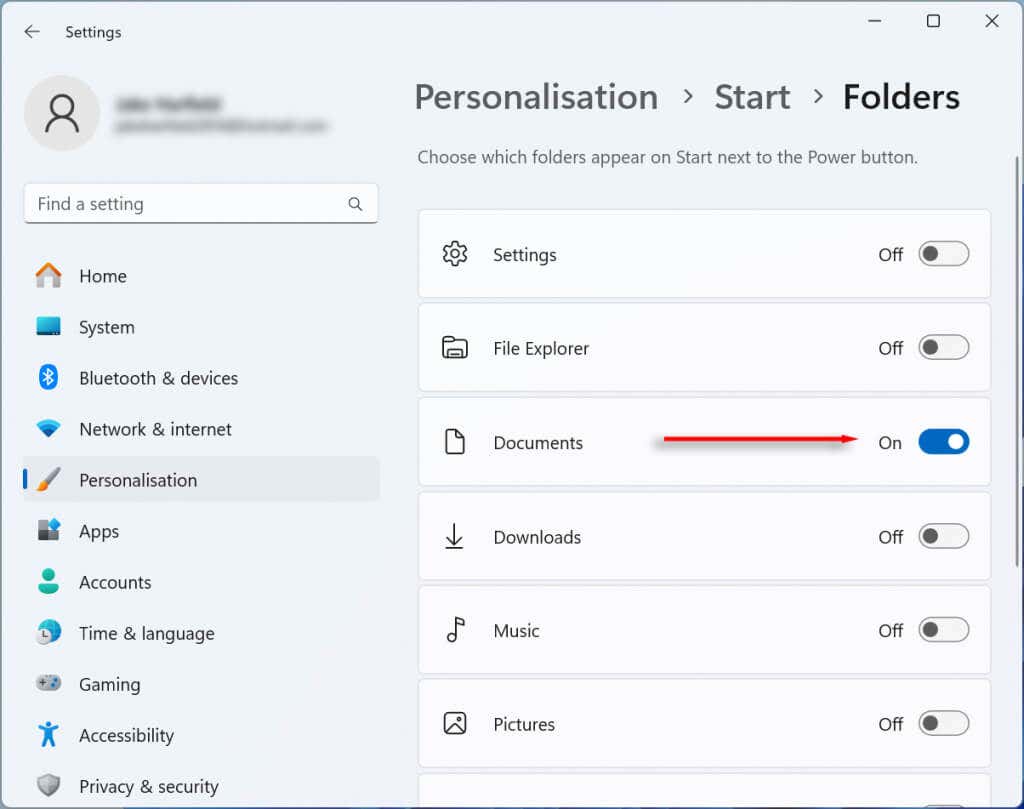
- Toggle on which system folders you want to appear next to the power button in the Start Menu. These include Settings, File Explorer, Documents, Downloads, Music, Pictures, Videos, Network, or your Personal folder.
Note: You’re also able to remove the Recommended section from the Start Menu. This section, while useful for some users, can be a privacy issue if multiple people use the same PC.
Customize Away
Hopefully, this article has helped you add system folders to your Start Menu. If you’d like to customize the menu further, don’t forget that you can add shortcuts to the Start Menu, too.


