Hyper-V is a useful virtualization tool that lets Windows 11 users run virtual machines on their PCs. The problem is that it can cause problems with other apps and emulators, preventing you from using some programs or playing games.
In this tutorial, we’ll explain how to disable Hyper-V so that you can get back to gaming in peace.
What Is Hyper-V?
Hyper-V is a virtualization platform developed that lets users create and run virtual machines (VMs) on Windows 10 and Windows 11 Pro, Education, and Enterprise. This makes it possible to run multiple operating systems on a single PC, reducing hardware costs and making it easier to test new software during development.
However, Hyper-V can cause conflicts with third-party apps like VMWare Workstation, VirtualBox, and some game emulators. Because of this, many users like to disable Hyper-V — especially since it has no use for most PC owners.
Note: Hyper-V is not available on Windows 11 Home Edition.
How to Check if Hyper-V Is Running on Your PC
To see if the Hyper-V Hypervisor is running on your Windows 11 PC, you can check the System Information tool. To do so:
- Press the Windows key + R to open the Run dialog box.
- Type msinfo32.exe and press Enter.
- In the System Summary tab, scroll down to the bottom and check for the following entry:
A hypervisor has been detected. Features required for Hyper-V will not be displayed.
- If this entry is present, it means Hyper-V is active and you’ll need to disable it if you want to use other virtualization tools. Likewise, if you see any entries including Hyper-V that are enabled, it means that the application is running.
How to Disable Hyper-V
Below, we’ll explain how to remove Hyper-V using Windows Features, BCDEdit, command line, and PowerShell. Keep in mind that once removed, you’ll be unable to access Hyper-V Manager or change any VM settings until you reinstall it.
1. How to Disable Hyper-V Using Windows Optional Features
The easiest way to disable Hyper-V is by using the Windows Features app. To do so:
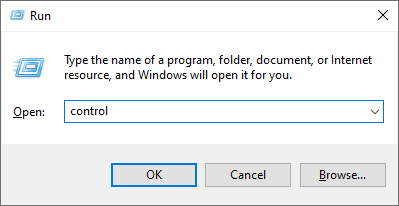
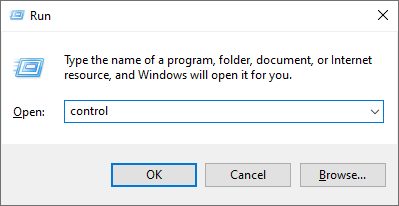
- Press Win + R to open Run.
- Type control and press Enter to open the Control Panel.
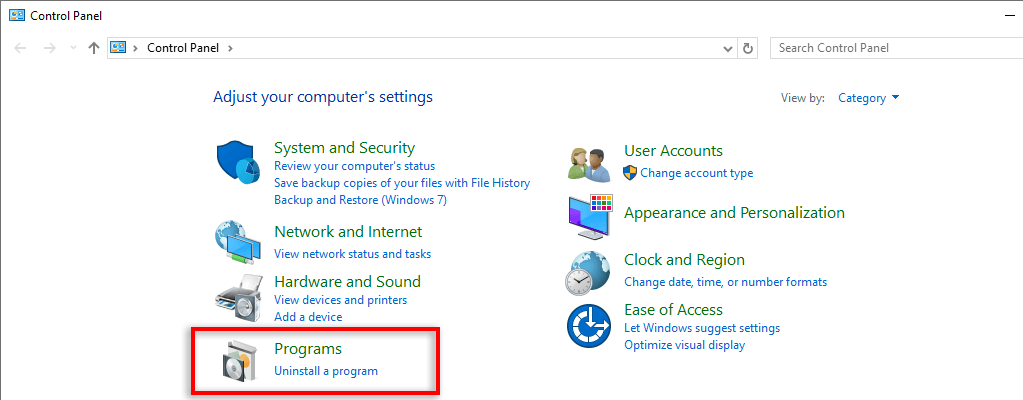
- Select Programs.
- Choose Programs and Features.
- Select Turn Windows features on or off in the left-hand menu.
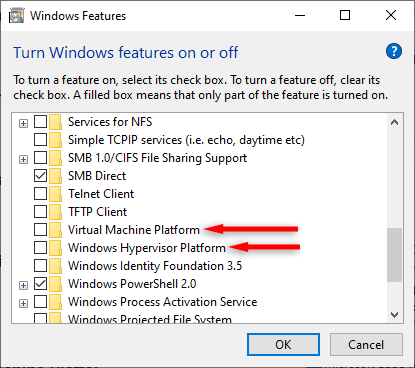
- Scroll down and uncheck the checkbox next to Hyper-V, Windows Hypervisor Platform, and Virtual Machine Platform.
- Reboot your PC.
Note: This method will completely uninstall Hyper-V, meaning that if you want to use it in the future, you’ll have to reinstall it. We’ll explain how to do so below.
2. How to Disable Hyper-V Using BCDEDIT
The BCDEDIT tool lets you disable Hyper-V in your PC’s boot configuration rather than uninstalling it entirely. This is useful if you want to avoid having to install Hyper-V again in the future.
To disable Hyper-V using BCDEDIT:
- Open the Start Menu and search for “cmd.”
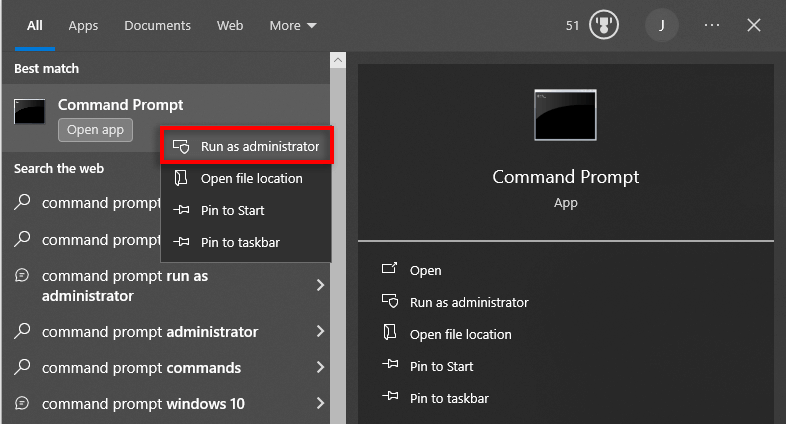
- Right-click Command Prompt and press Run as Administrator.
- In the Command Prompt window, enter the following command:
bcdedit /set hypervisorlaunchtype off
- You should receive a message saying that the command was successful. When you do, restart your PC to ensure that Hyper-V is disabled.
If you ever need to re-enable Hyper-V, type the following command into Command Prompt as above:
bcdedit /set hypervisorlaunchtype auto
Then restart your PC to confirm the changes.
3. How to Disable Hyper-V Using Command Prompt
If you’re unable to use the Windows Features tool to disable Hyper-V, you can uninstall it using Command Prompt. To do so:
- Open the Start Menu and search for “cmd.”
- Right-click Command Prompt and press Run as Administrator.
- Type the following command and press Enter:
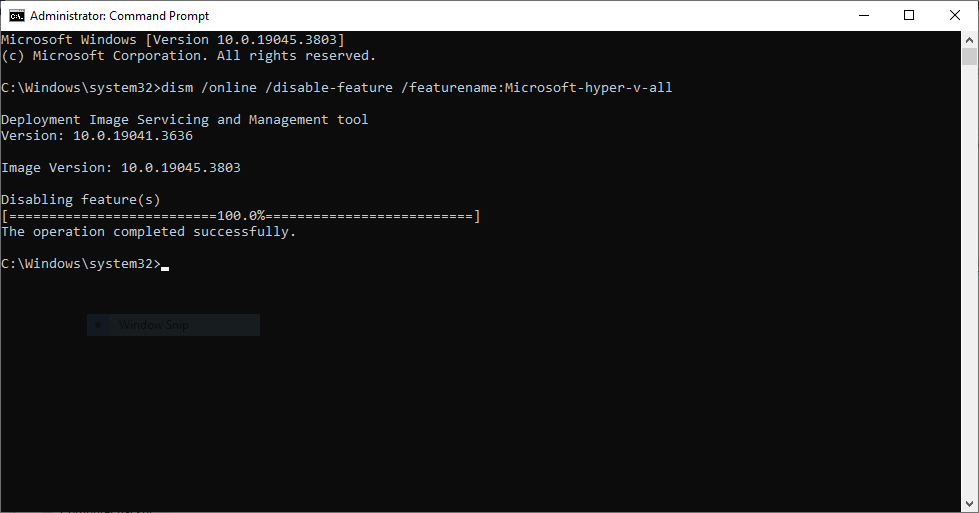
dism /online /disable-feature /featurename:Microsoft-hyper-v-all
- You should receive a completion message stating that the DISM tool has disabled Hyper-V.
- Restart your PC.
4. How to Disable Hyper-V Using Windows PowerShell
One final method to disable Hyper-V is by using PowerShell in admin mode. To do so:
- Open the Start Menu and type “PowerShell.”
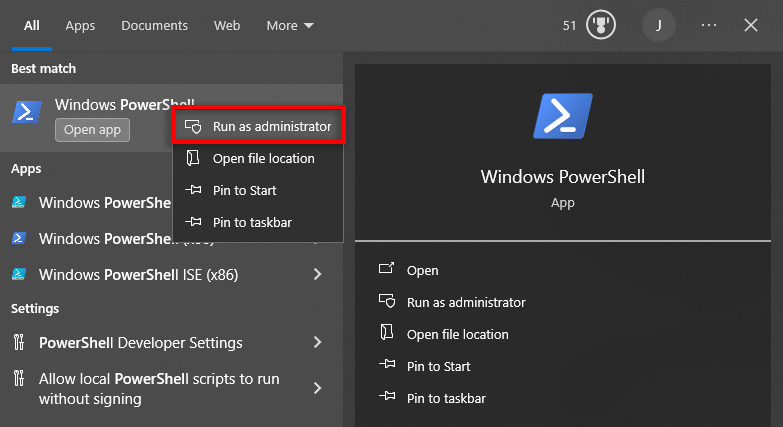
- Right-click PowerShell and select Run as administrator.
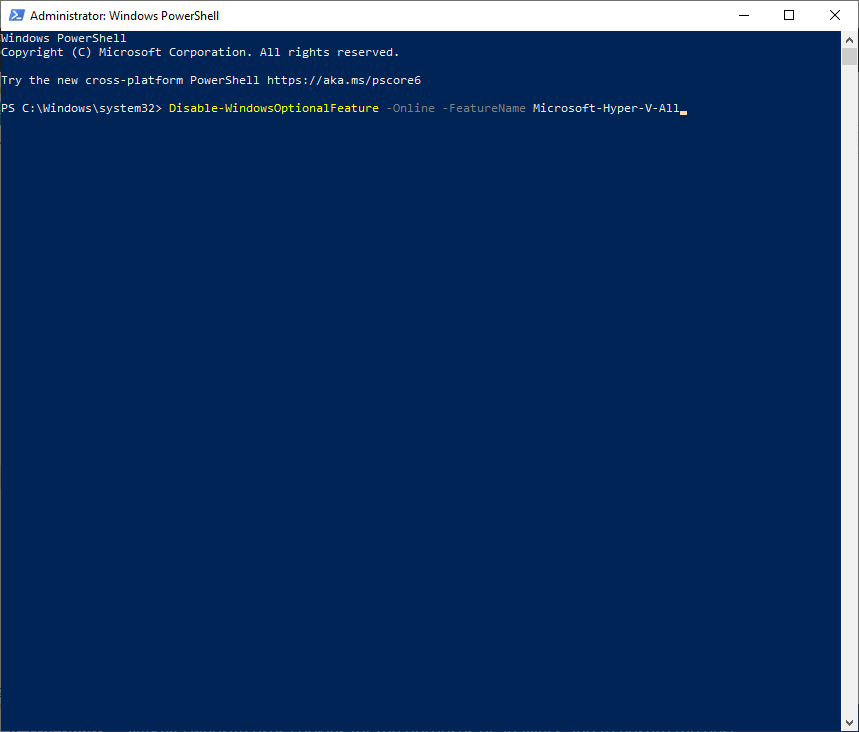
- Enter the following command and press Enter:
Disable-WindowsOptionalFeature -Online -FeatureName Microsoft-Hyper-V-All
- Wait for a success message, then restart your PC to confirm the changes.
How to Fix “We Couldn’t Complete the Updates” Error
While uninstalling Hyper-V, many users encounter an error message that states, “We couldn’t complete the updates, undoing changes.” This error prevents you from uninstalling Hyper-V and means that the original error is still going to occur.
To fix this, you need to remove the Hyper-V Virtual Network Adapter:
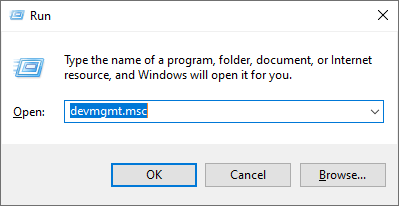
- Open the Run dialog box.
- Type devmgmt.msc and press Enter.
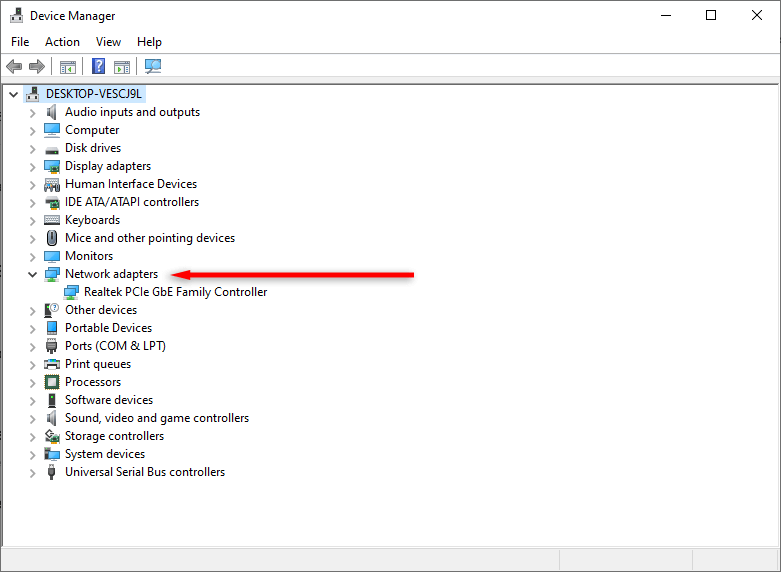
- In the Device Manager, double-click Network Adapters to expand the section.
- Locate Hyper-V network adapters. Select the View menu option at the top of the window, and select Show hidden devices.
- Right-click Hyper-V Virtual Ethernet Adapter and select Uninstall Device.
- Repeat this for every network adapter in the list. Then, reboot your PC and check if it worked on startup.
Still Having Problems With Hyper-V? Try These Fixes
Unfortunately, you may still have issues with games and other virtualization software after removing Hyper-V. This is due to a few similar Windows features that cause conflicts with third-party virtualization tools.
Here are two things to try:
1. Turn Off Memory Integrity
The memory integrity feature, found in Windows Security, helps prevent malware from infecting the most important system processes. However, it also stops certain third-party tools from being able to access key resources they need to function.
To turn off memory integrity:
- Press the Windows key + I to open Settings.
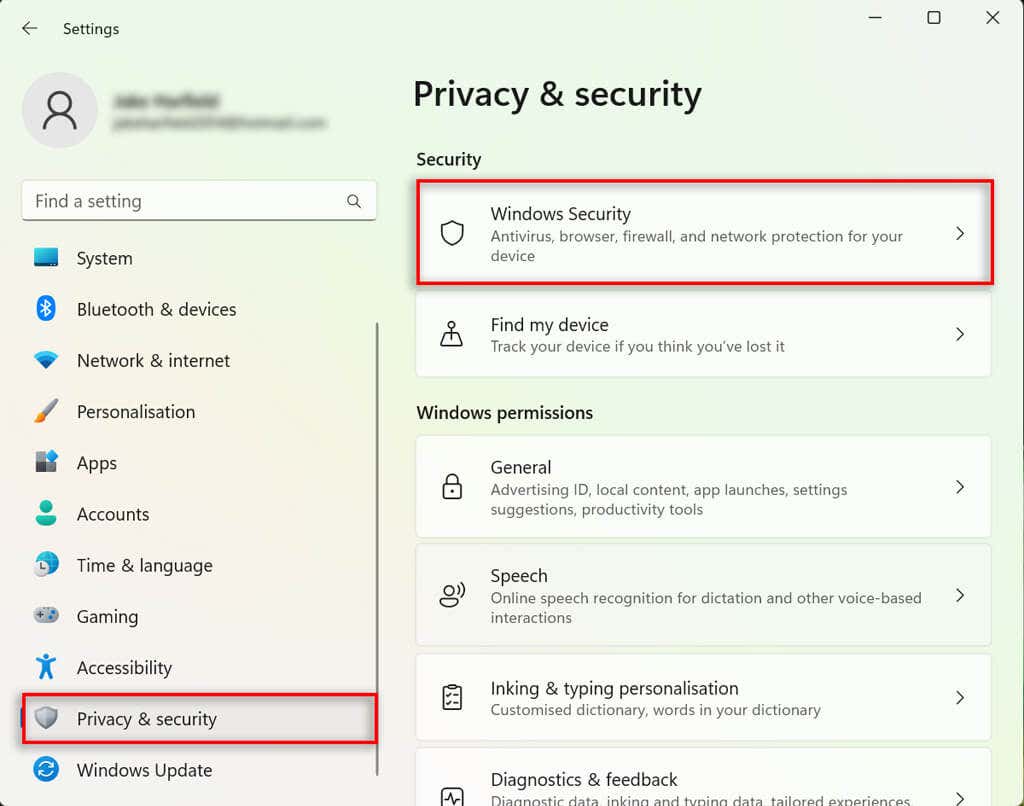
- Select Privacy & security.
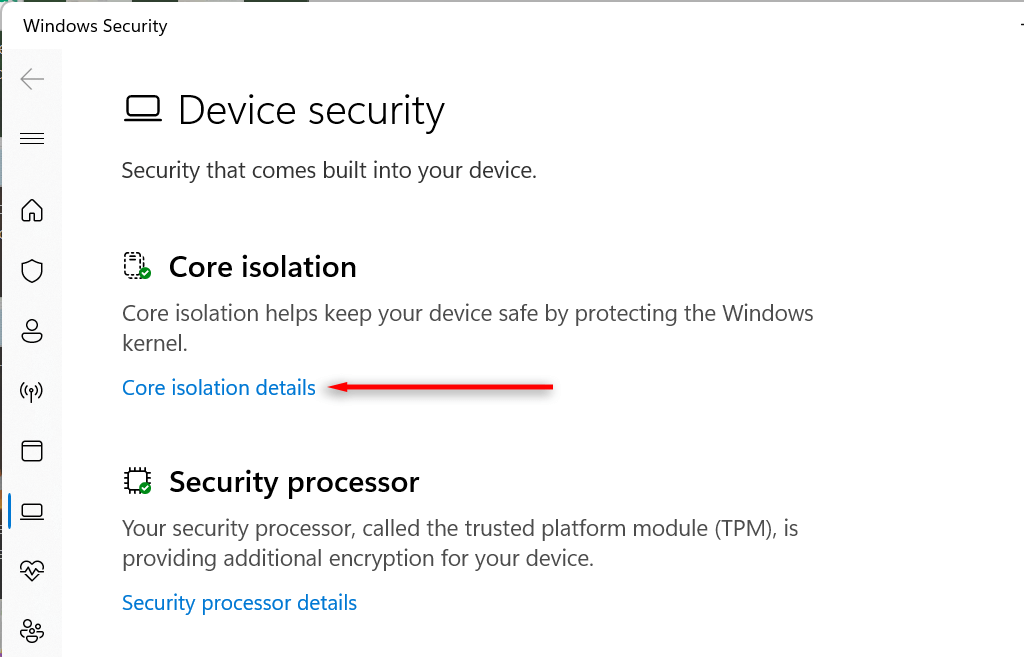
- Choose Windows Security and select Device security.
- Select Core isolation details.
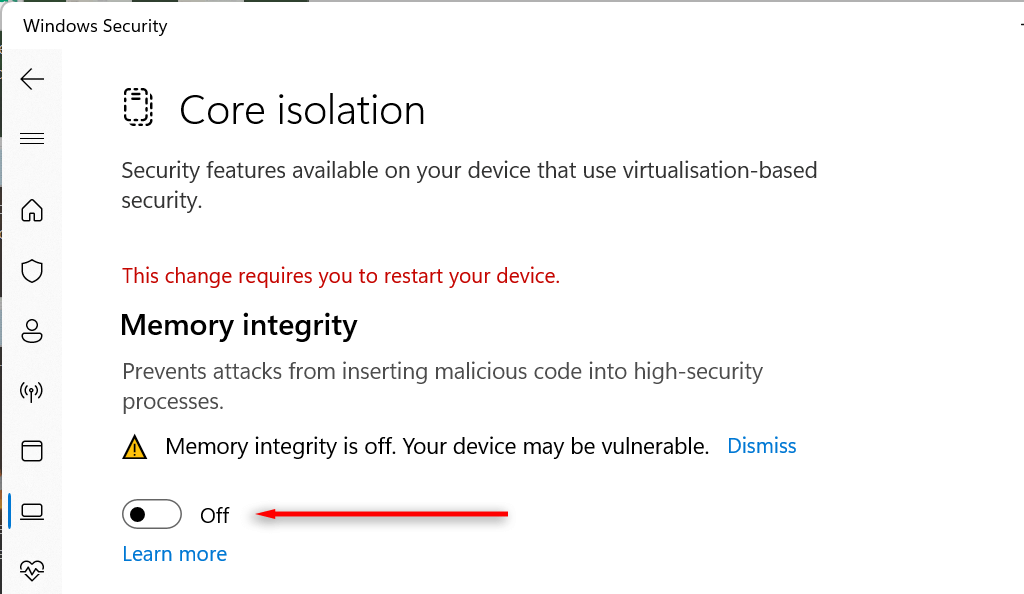
- Toggle off Memory integrity and restart your computer.
2. Disable Device Guard and Credential Guard
Device Guard and Credential Guard are two Windows features that require Hyper-V to function. Due to this, there may be a group policy function or BIOS/UEFI settings that automatically enable Hyper-V whenever you boot up your PC.
To fix this, you need to alter the Windows registry. Modifying the registry can be risky, so we recommend creating a system restore point before performing the next steps.
Here’s how to disable Device Guard and Credential Guard:
- Press Win + R to open Run.
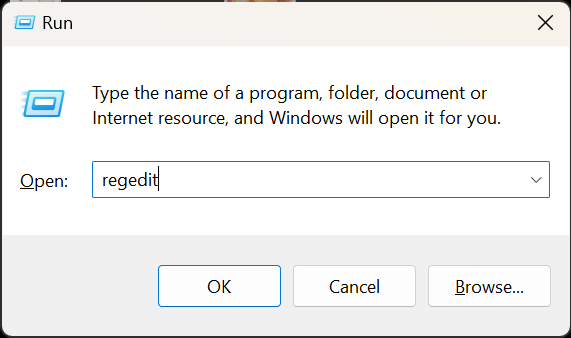
- Type Regedit and press Enter.
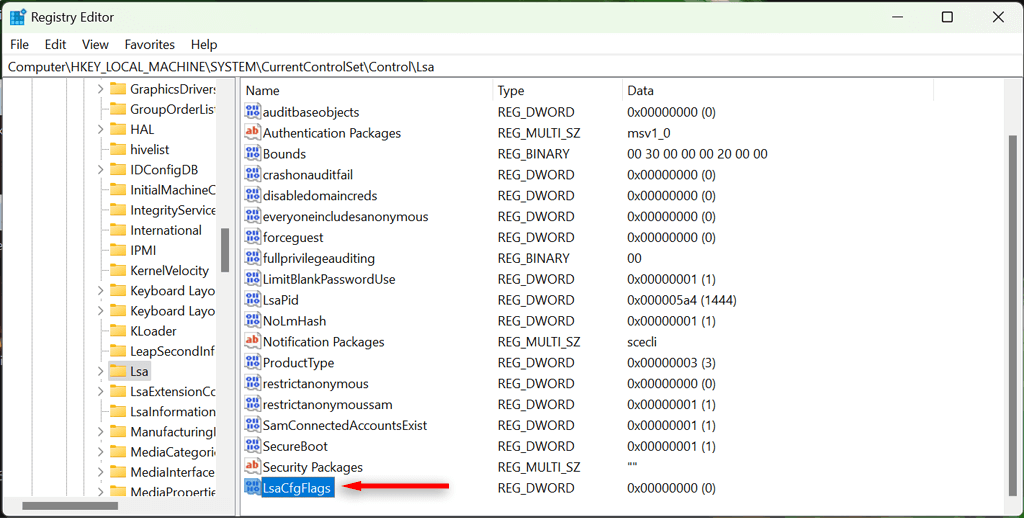
- Navigate to Computer\HKEY_LOCAL_MACHINE\SYSTEM\CurrentControlSet\Control\Lsa. You can simply copy and paste that location into the address bar at the top of the Registry Editor window.
- Select the Lsa folder.
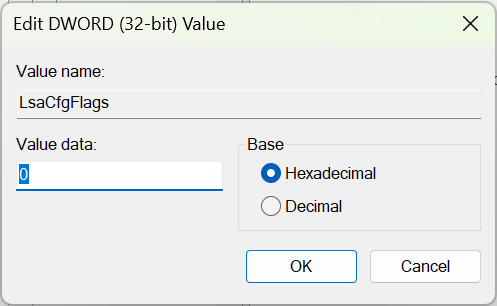
- In the right-hand window pane, locate LsaCfgFlags. If it doesn’t exist, right-click in the window, select New > DWORD (32-bit) Value, and name it “LsaC gFlags.”
- Double-click the LsaCfgFlags DWORD and change the Value data field to 0.
- Select OK.
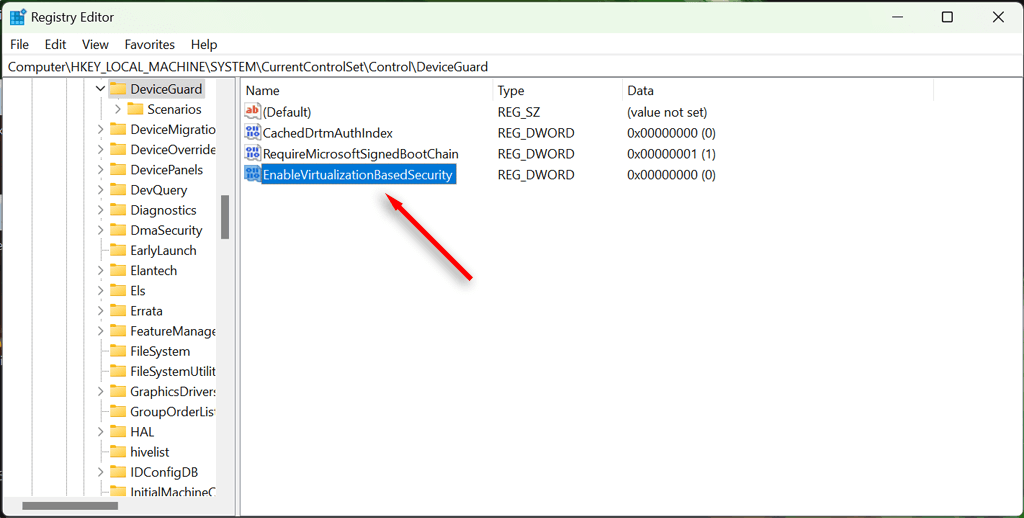
- Now, navigate to Computer\HKEY_LOCAL_MACHINE\SYSTEM\CurrentControlSet\Control\DeviceGuard.
- Locate the EnableVirtualizationBasedSecurity DWORD value. If it doesn’t exist, create it as above.
- Double-click the DWORD and set its value to 0.
- Select OK, then restart your computer to make sure the changes are applied.
Note: If you ever need to re-enable Device Guard or Credential Guard, repeat the steps above but set the value to 1.
No More Virtualization Issues
The Hyper-V feature is a great virtualization tool, but it can cause frustrating issues. Now that you’ve successfully disabled Hyper-V and its related features, you should be able to use third-party virtualization software with no problems.
