Bing is one of the most popular search engines, and Microsoft is doing a great job of adding new features to this AI-powered search engine. However, you might prefer an alternative search engine because Bing uses RAM and processing power constantly, which might slow down the Windows 11 search experience or even interfere with how other apps work. Another annoying thing about Bing is that Microsoft is pushing it to every Windows 11 feature. It doesn’t matter if you use Windows Search or the Start Menu; Bing will appear.
Removing Bing will allow you to personalize your search experience with the preferred search engine. Perhaps you want an alternative one that has more robust privacy policies? Whatever the reason, this article will show you several ways to disable or remove Bing from your PC.
Remove Bing Search With Registry Editor
Modifying the Windows registry might sound intimidating for non-tech-savvy Windows 11 users, but this simple tutorial will show you how easy it is. To remove the Bing search engine with Registry Editor, take the following steps:
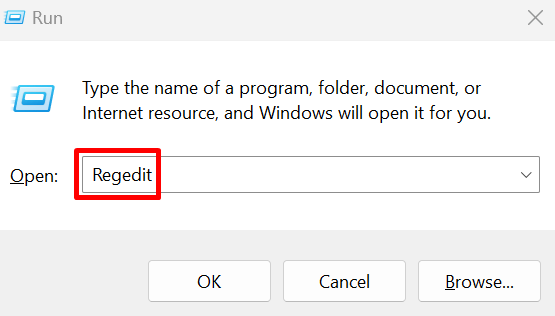
- Press the Windows key + R on your keyboard to open the Run dialog.
- Type Regedit in the search bar, then hit Enter, or click OK.
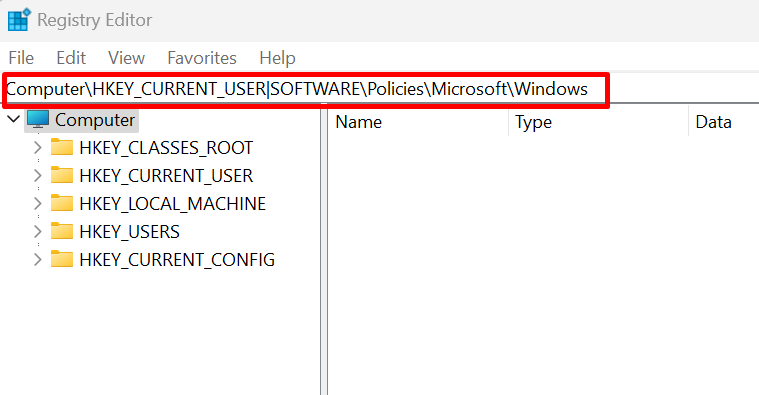
- You’ll need to navigate to
Computer\HKEY_CURRENT_USER\SOFTWARE\Policies\Microsoft\Windows
You can simply copy this string and paste it into the address bar of the Registry and press Enter.
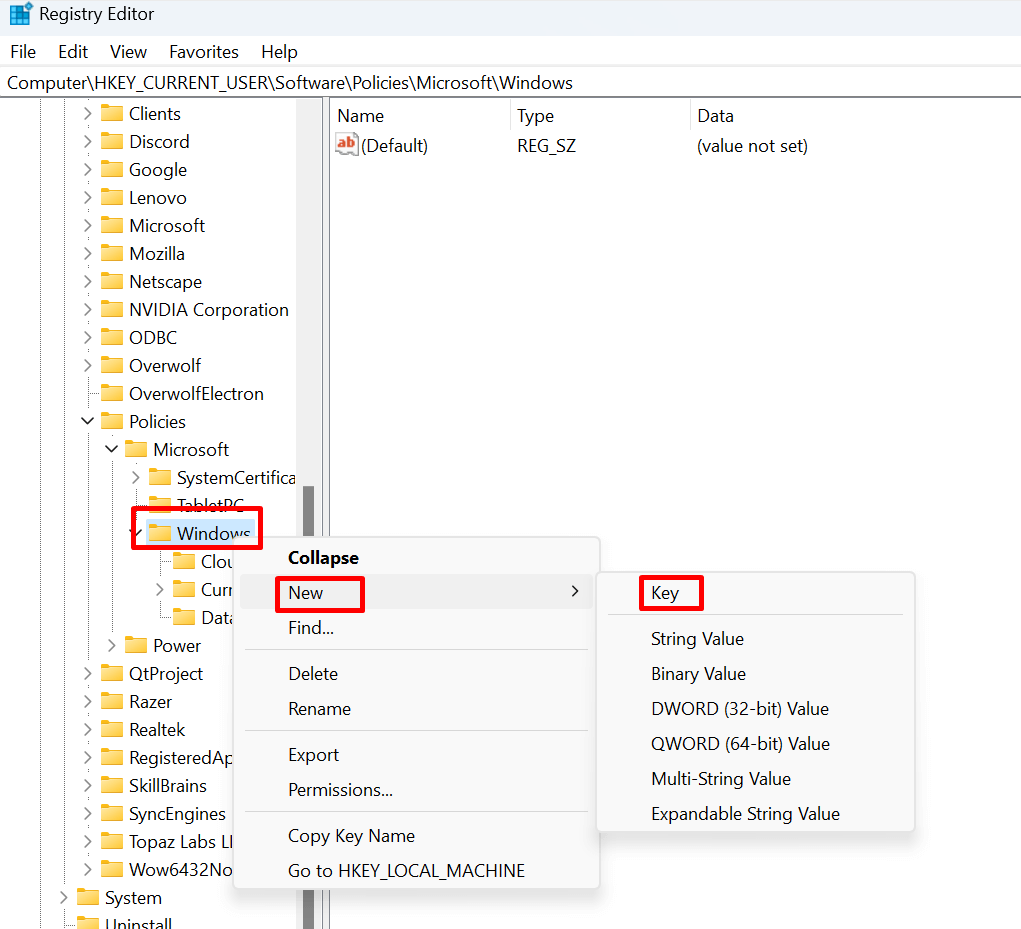
- Find Windows and right-click it, then select New, and select Key from the side menu.
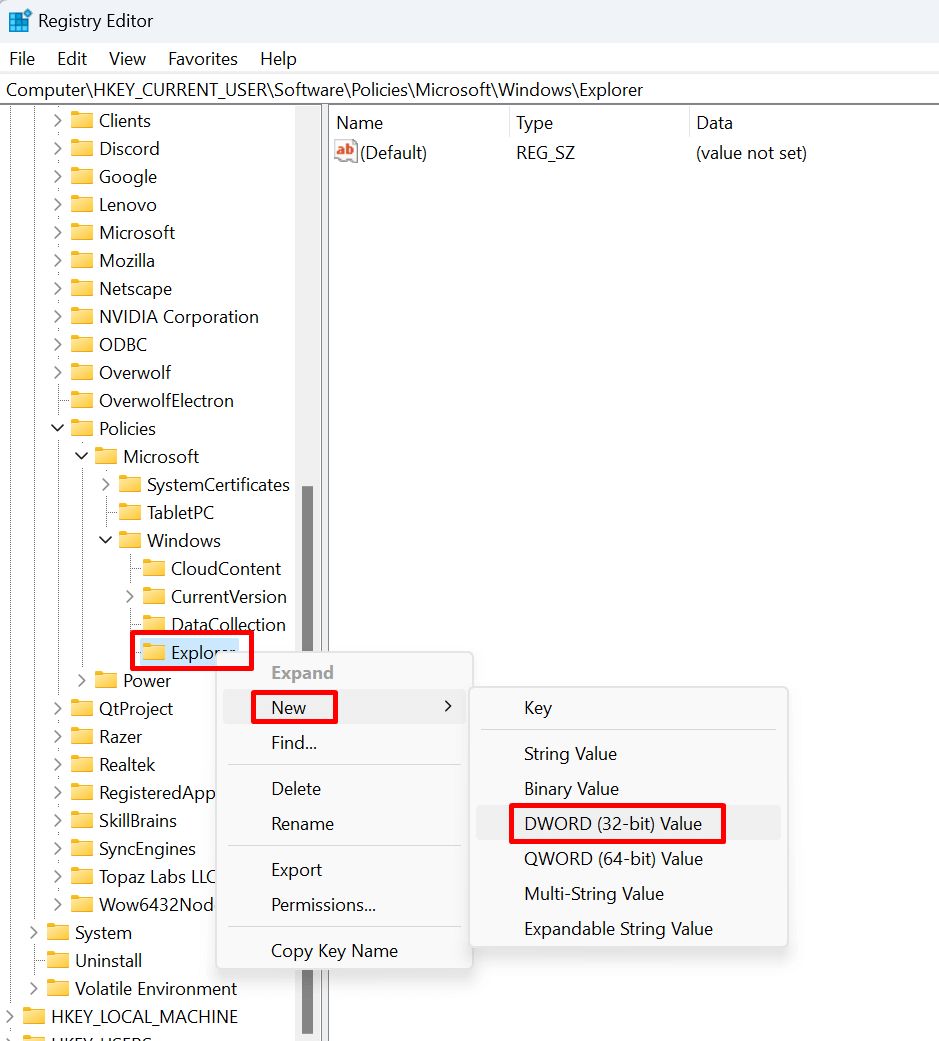
- Name this new key Explorer. Note that if the Explorer key already exists under the Windows key, you won’t need to create a new one. You can skip this step and proceed to create a DWORD.
- Right-click Explorer, select New, and then DWORD from the side menu.
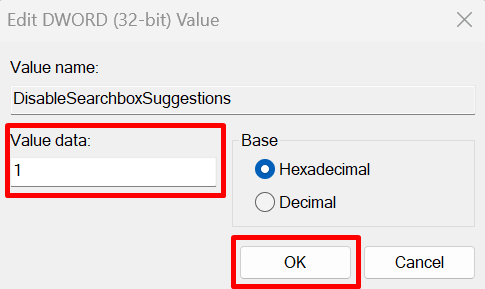
- Rename the DWORD to DisableSearchBoxSuggestions.
- Now, double-click on DisableSearchBoxSuggestions, and a dialog box will open. In it, you’ll have to change the Value data to 1 and select the OK button.
- Restart your PC.
And that’s it. These simple steps will disable Bing from your Windows 11, and you should no longer see its search suggestions once the Windows 11 OS is restarted.
Remove Bing Search by Using Group Policy Editor
Another way to remove Bing is with the Group Policy Editor. For some users, this might be the simpler way of getting rid of Bing. Here’s what you need to do:
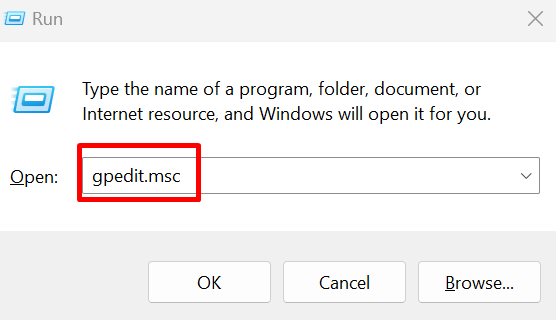
- Press the Windows key + R keys on your keyboard to open the Run dialog.
- Type gpedit.msc and press Enter.
- Navigate to:
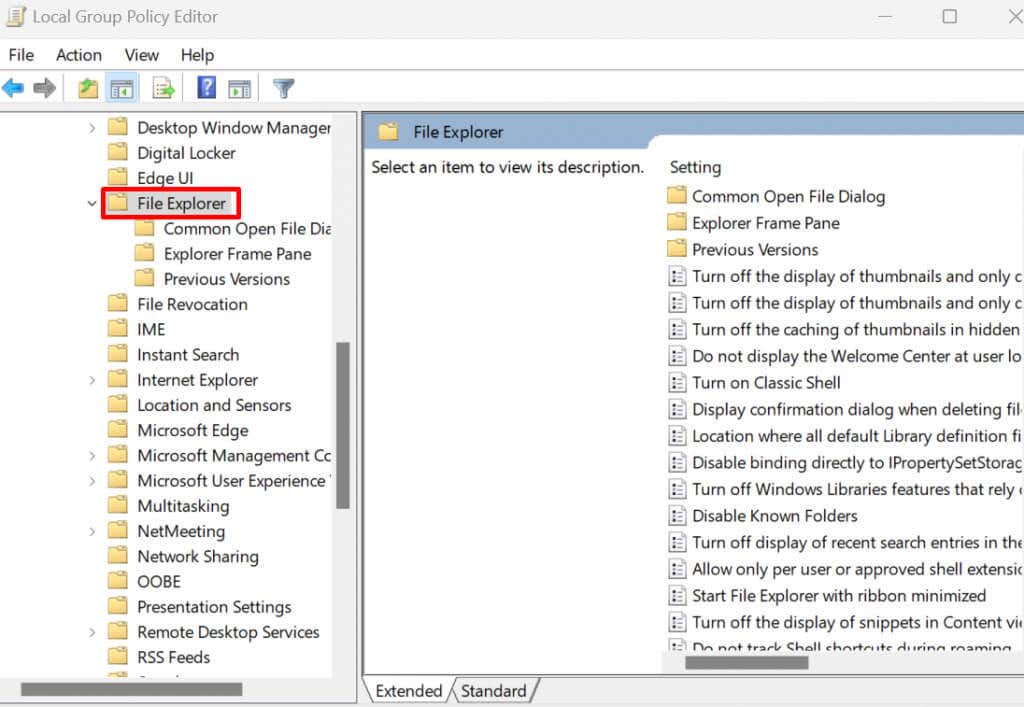
User Configuration\Administrative Templates\Windows Components\File Explorer
- Find File Explorer in the left pane and click on it.
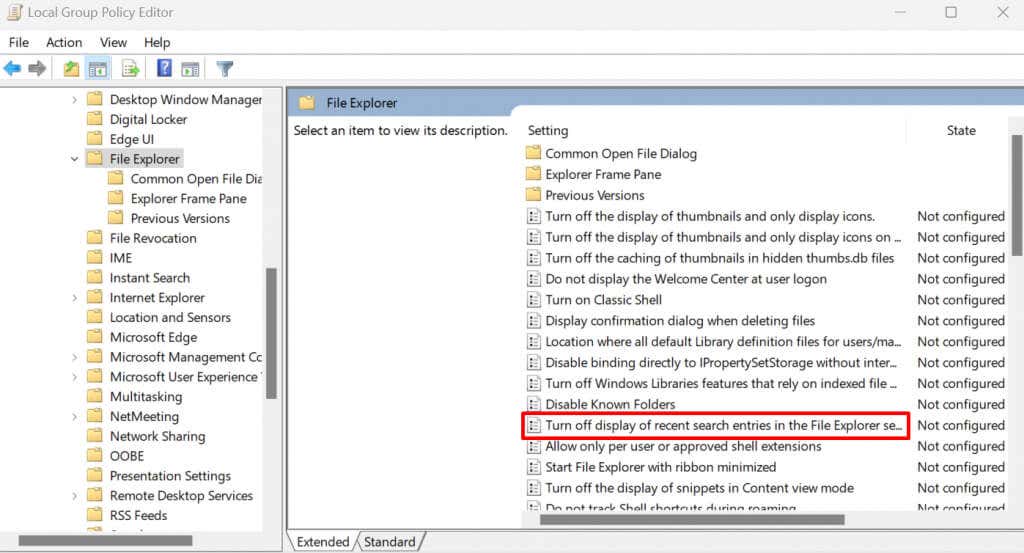
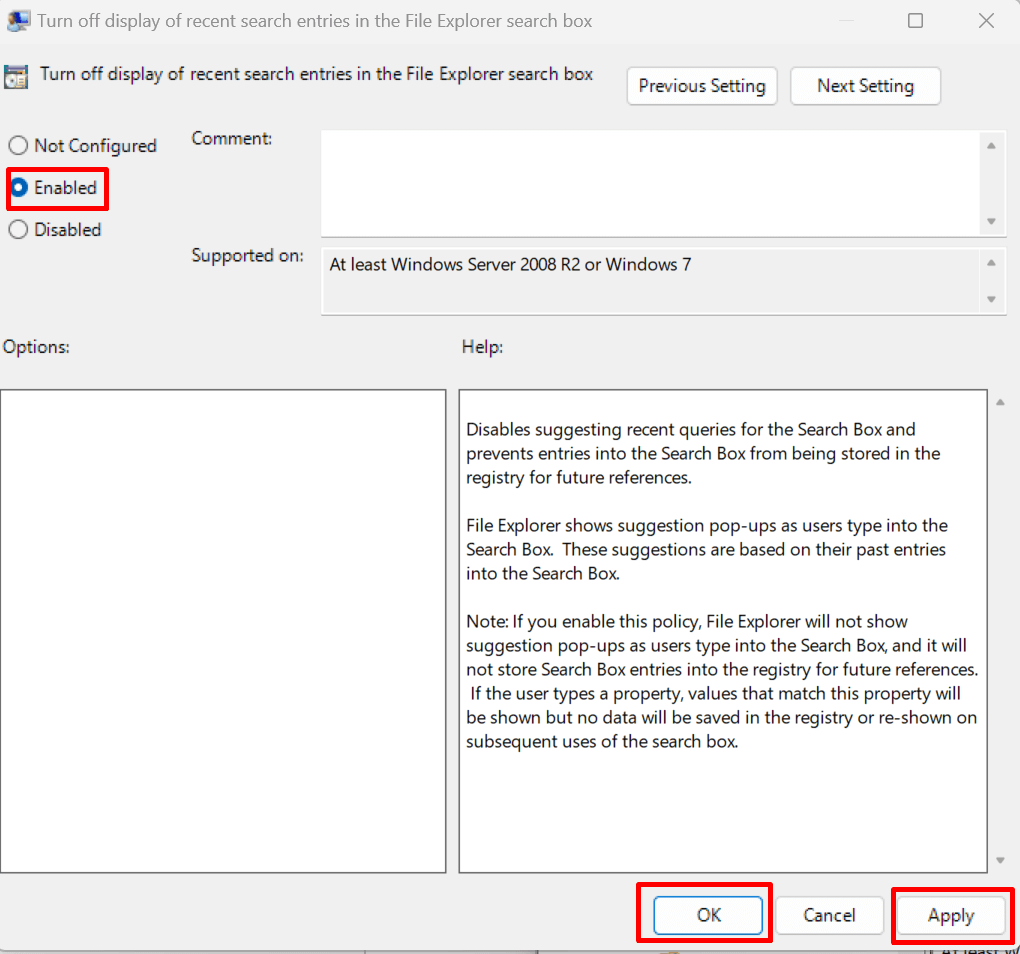
- In the right pane, find the Turn off display of recent search entries in the File Explorer search box and double-click it.
- When a new window appears, select Embed, click the Apply button, and then OK.
- Restart your computer, and Bing will be removed from Windows 11.
Remove Bing Search by Using Command Prompt
Did you know you can remove Bing in Command Prompt? This might be the simplest way to do it, as it has fewer steps. Here’s how:
- Open the Run dialog by pressing the Windows key + R on your keyboard.
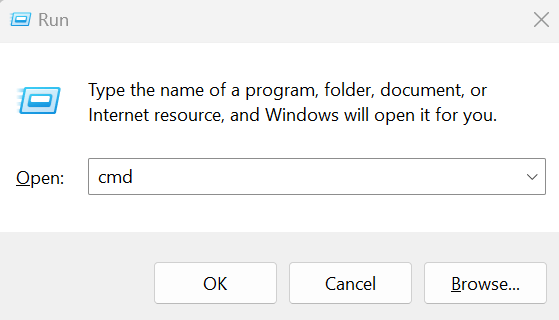
- Type cmd and hit Ctrl + Shift + Enter to open an elevated Command Prompt.
- Type the command below and hit the Enter key on your keyboard
Reg add “HKCU\Software\Microsoft\Windows\CurrentVersion\Search” /v BingSearchEnabled /t REG_DWORD /d 0 /f
This script adds a registry entry to disable Bing on the Windows 11 operating system. You can copy it from here and paste it into the Command Prompt.
- Restart your PC, and the changes will be put into effect.
And there you have it, Bing is no more! Whether you’re after a different search engine or just a bit more control over your digital realm, knowing how to disable or remove Bing from Windows 11 is key. Remember, tech is supposed to serve you, so don’t hesitate to tinker, tweak, and test until Windows 11 works exactly as you want.
Related Posts
Nicolae is a Jack of all trades technology writer with a focus on hardware, programming languages, and AI image-processing software. Over the last five years, he has ghostwritten numerous tech how-to guides and books on a variety of topics ranging from Linux to C# programming and game development. Nicolae loves everything that has to do with technology and his goal is to share his knowledge and experience with others. Read Nicolae’s Full Bio

