The Windows 11 lock screen features beautiful photos from around the world and transitions into the sign-in screen with the press of a button. But while it’s visually appealing, it adds an extra step to the login process many users wish to avoid.
In this tutorial, we’ll cover different ways to disable the lock screen in Windows 11 so that your PC opens on the login screen.
Why Disable Your Lock Screen?
The main reason to disable the lock screen is to speed up the sign-in process.
The Windows lock screen displays a background image, the date and time, and app notifications. While this is useful for many users, it doesn’t appeal to everyone. After removing the lock screen, Windows will take you straight to the login screen, where you can use any sign-in option to enter your computer.
How to Disable Lock Screen in Windows 11
Unfortunately, disabling the lock screen isn’t as straightforward as other customization processes when using Windows 11 Home, but it is still possible. Here’s what you need to do:
Disable the Lock Screen Using the Registry Editor
You can disable the lock screen using the registry settings. However, before editing your registry settings, you should export a copy of your registry. This will help you revert to your previous registry settings in case of an error or file corruption.
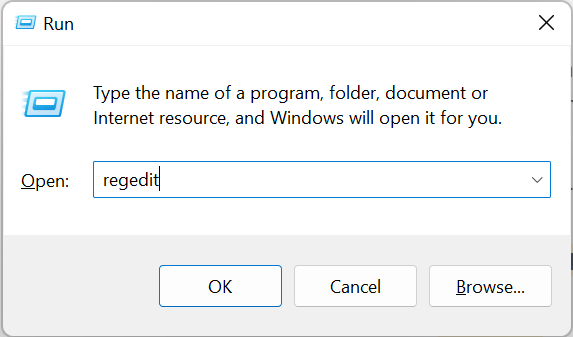
- Press the Windows key + R to launch the Run command box.
- Type regedit in the text input box and press Enter to launch Registry Editor.
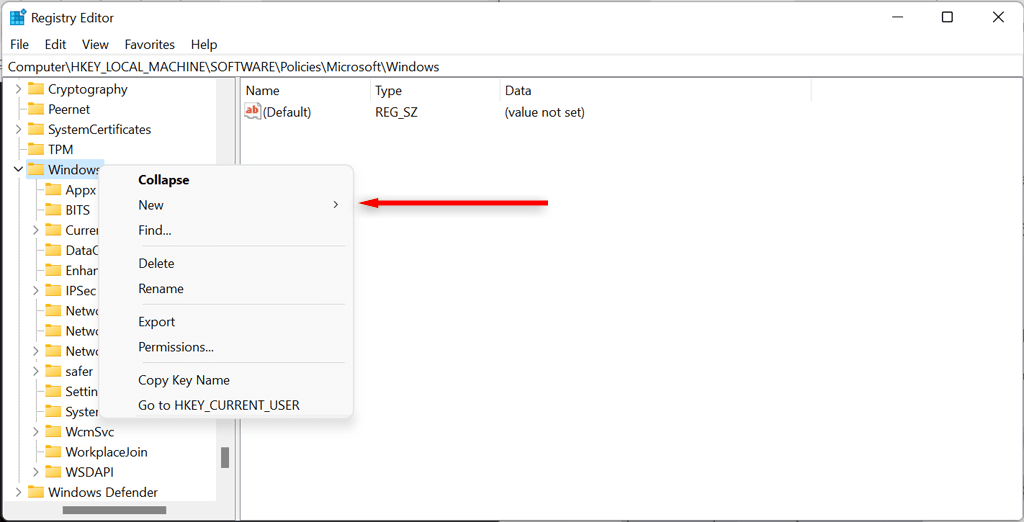
- In the navigation box up top, paste the following path and press enter: Computer\HKEY_LOCAL_MACHINE\SOFTWARE\Policies\Microsoft\Windows
- In the left-hand panel and right-click the Windows folder. Select New > Key and name it Personalization.
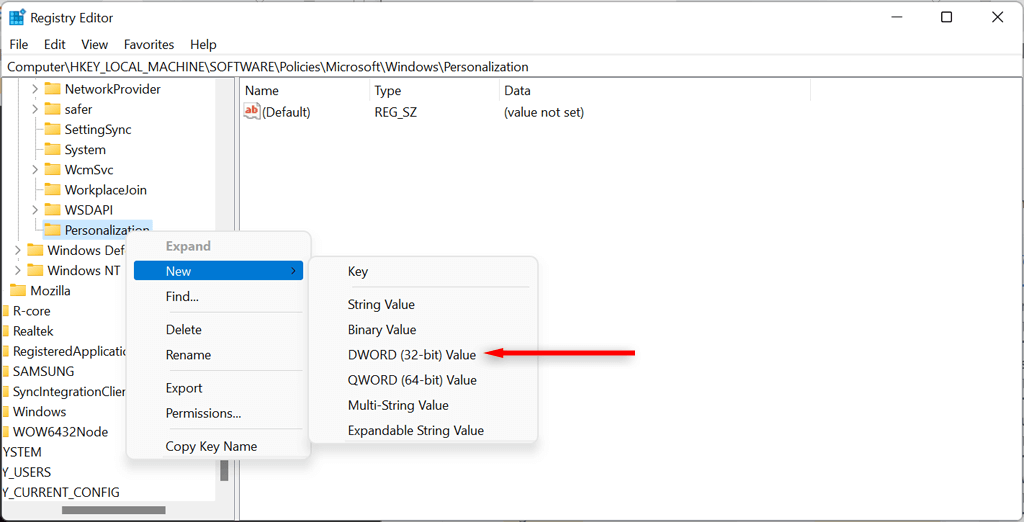
- Right-click the Personalization Key and select New > DWORD (32-bit) Value. Name it as NoLockScreen.
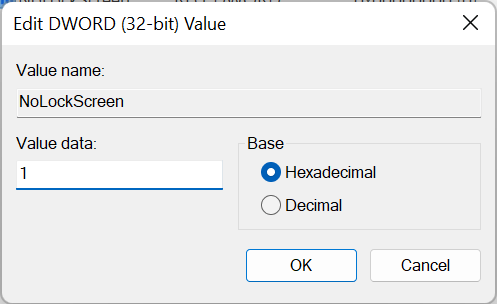
- Double-click on the NoLockScreen value in the right pane and set the Value Data to 1. Keep the base hexadecimal.
- Click on OK to apply changes and Restart your system. You won’t see the lock screen when your computer boots up.
- To bring back the lock screen, launch the Registry Editor again and paste the following into the address bar up top. Computer\HKEY_LOCAL_MACHINE\SOFTWARE\Policies\Microsoft\Windows\Personalization. Set the NoLockScreen key value to 0.
Disable the Lock Screen Using the Local Group Policy Editor
If you have Windows 11 Pro, you can use the Local Group Policy Editor to disable the lock screen.
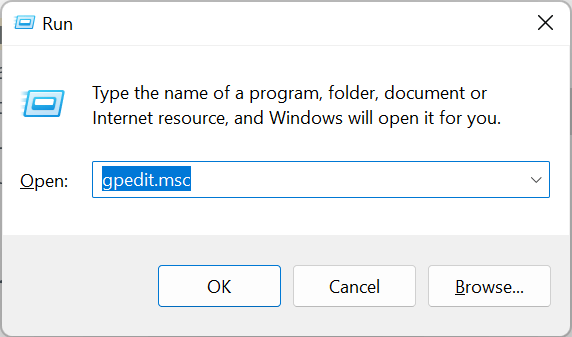
- Use the keyboard shortcut Windows + R to launch the Run command box on your system.
- Type gpedit.msc and press Enter key to open the Group Policy Editor.
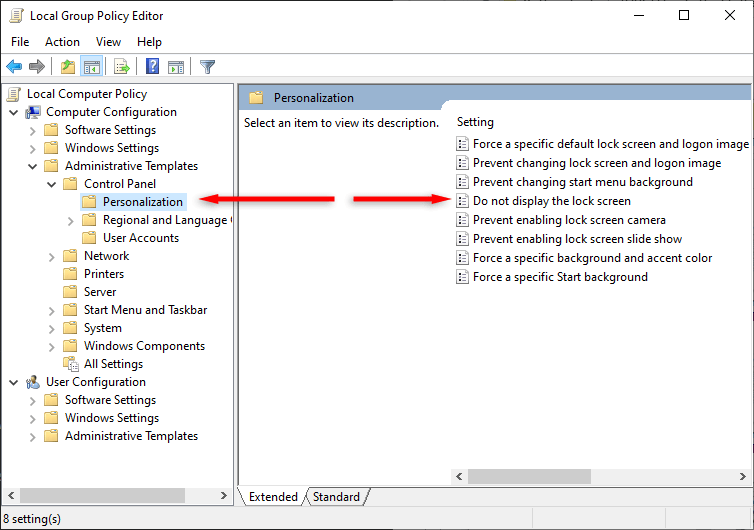
- Navigate to Computer Configuration on the left-hand side. Then go to Administrative Templates > Control Panel > Personalization. Under personalization options, Double-click the Do not display the lock screen option.
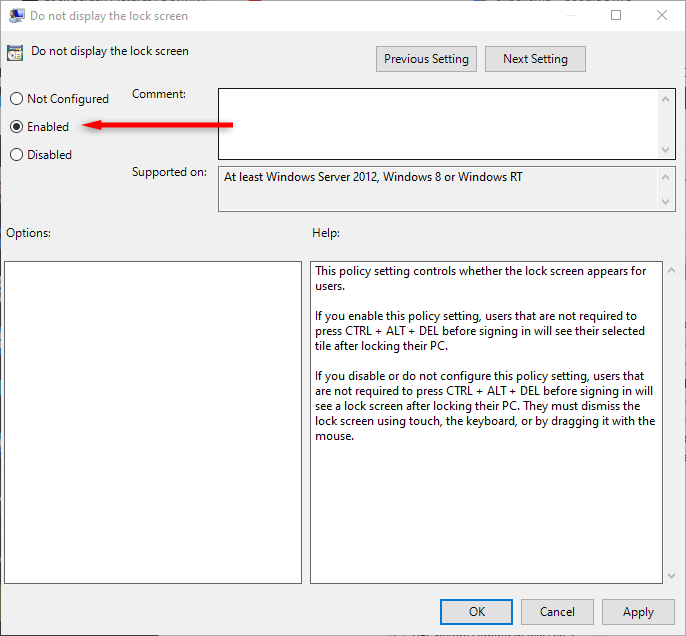
- In the new window, change the lock screen policy by clicking from the enabled option to the disabled option. Click on the Apply button and then the OK button to finalize the changes.
- Restart your system to initiate the changes. When your computer reboots, the lock screen should not appear.
Disable the Lock Screen Using Winaero Tweaker
Winaero Tweaker is a free app that allows you to customize Windows further than the Windows settings permit. However, we recommend using any registry editors with extreme care, as it’s easy to break your Windows operating system by implementing the wrong changes.
You can use it to disable the Windows lock screen as follows:
- Go to the Winaero website. Download and install the app.
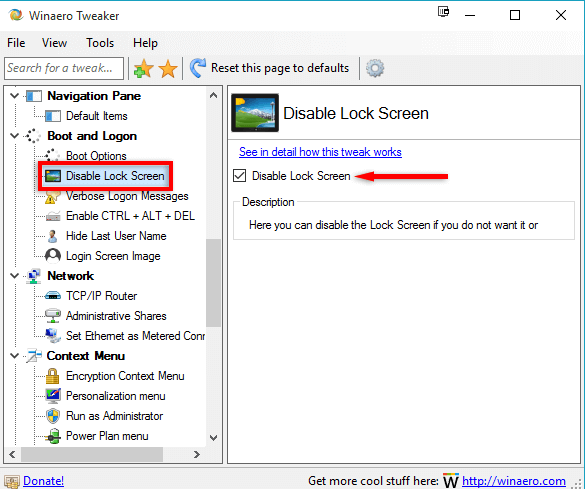
- In the menu on the left-hand side, go to the Boot and Logon option.
- Under the Boot and Logon section, find the Disable Lock Screen option. Click on the Disable Lock Screen checkbox.
- Restart your system to apply the changes. You will notice that the lock screen doesn’t appear anymore.
Use Ultimate Windows Tweaker
Ultimate Windows Tweaker is an alternative to Winaero Tweaker. It makes it easy to disable the lock screen; however, it is wise to create a system restore point before you do to avoid causing the operating system to malfunction.
- Visit the Ultimate Windows Tweaker website. Download the app.
- Extract the Ultimate Windows Tweaker archive to a new folder.
- Right-click the UltimateWindowsTweaker.exe file, and select Run as administrator.
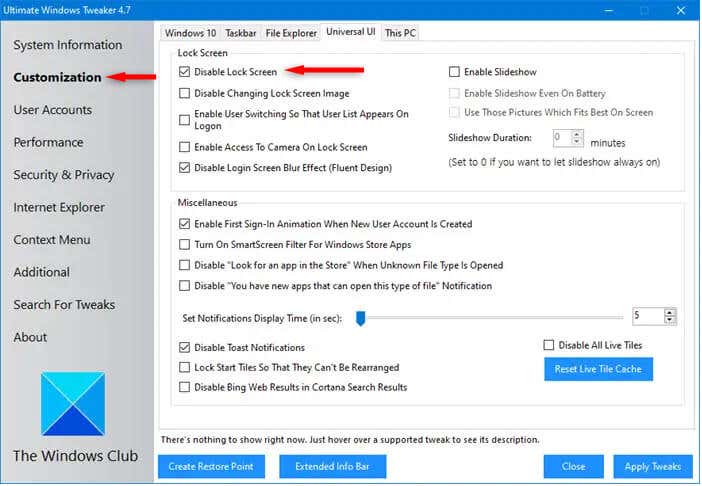
- Select Customization and check Disable Lock Screen checkbox. Then, select the Apply Tweaks button and close the program.
- Log out or restart your computer. The lock screen should not appear.
Lock Screen Begone
Using one of the above methods, you should be able to disable your lock screen and navigate straight to the login screen when you start your computer. If the registry editor or local group policy editor is too cumbersome, apps such as Winaero Tweaker and Ultimate Windows Tweaker make it easy to disable the lock screen.
