File Explorer is the easiest way to browse and organize files on Windows operating systems. It also has a useful File Grouping feature which lets you arrange files and folders by name, date, and more. However, this feature doesn’t always work well, and some users prefer to disable it.
In this tutorial, we’ll explain how to turn off Grouping in Windows Explorer.
How to Disable File Grouping in Windows 10
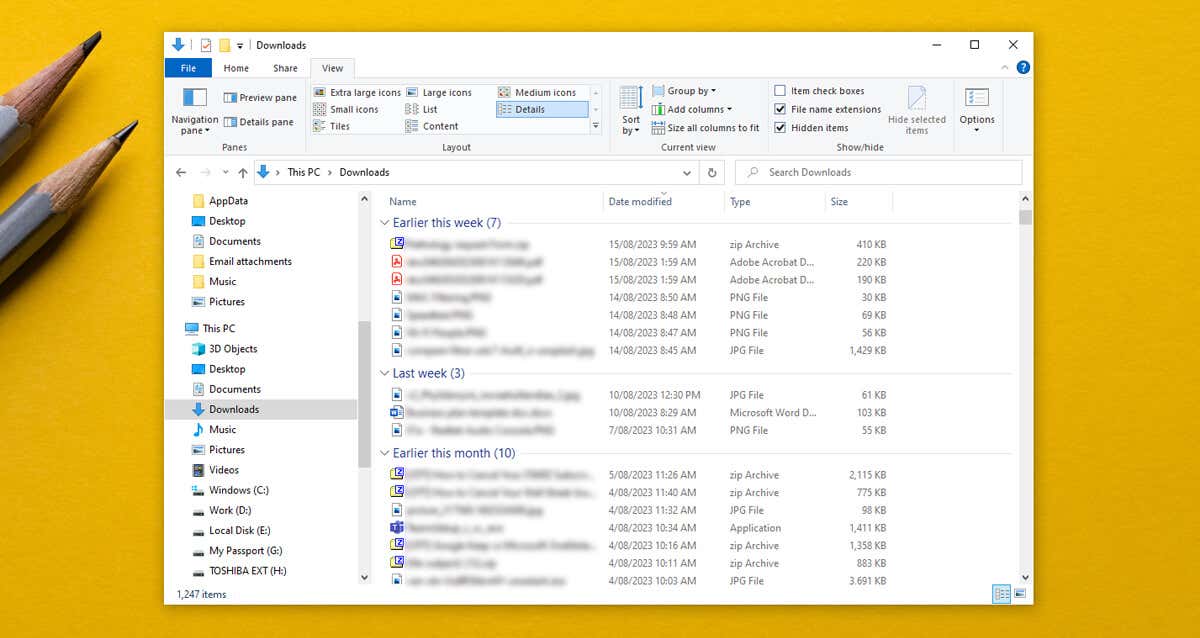
If you disable File Grouping, you’ll prevent the Explorer file manager from grouping your files according to their name, date, or file size. Typically, the only folder where this setting is automatically applied is the Downloads folder in which files are grouped by date modified. To do so:
- Open File Explorer by pressing the Windows key + E or via the Start Menu.
- Navigate to the folder you want to disable File Grouping in.
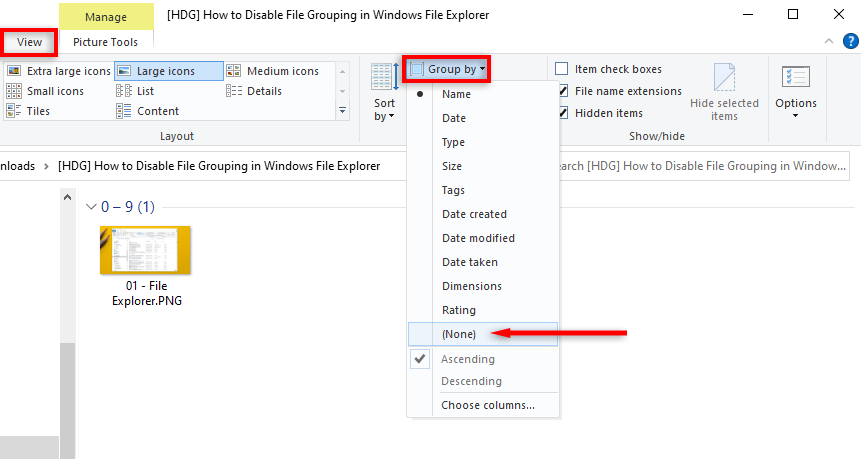
- Select the View Tab at the top of the window.
- Select Group By.
- In the drop-down menu, choose None.
How to Disable File Grouping in Windows 11
To turn off File Grouping in Windows 11:
- Open File Explorer and navigate to the folder you want to edit.
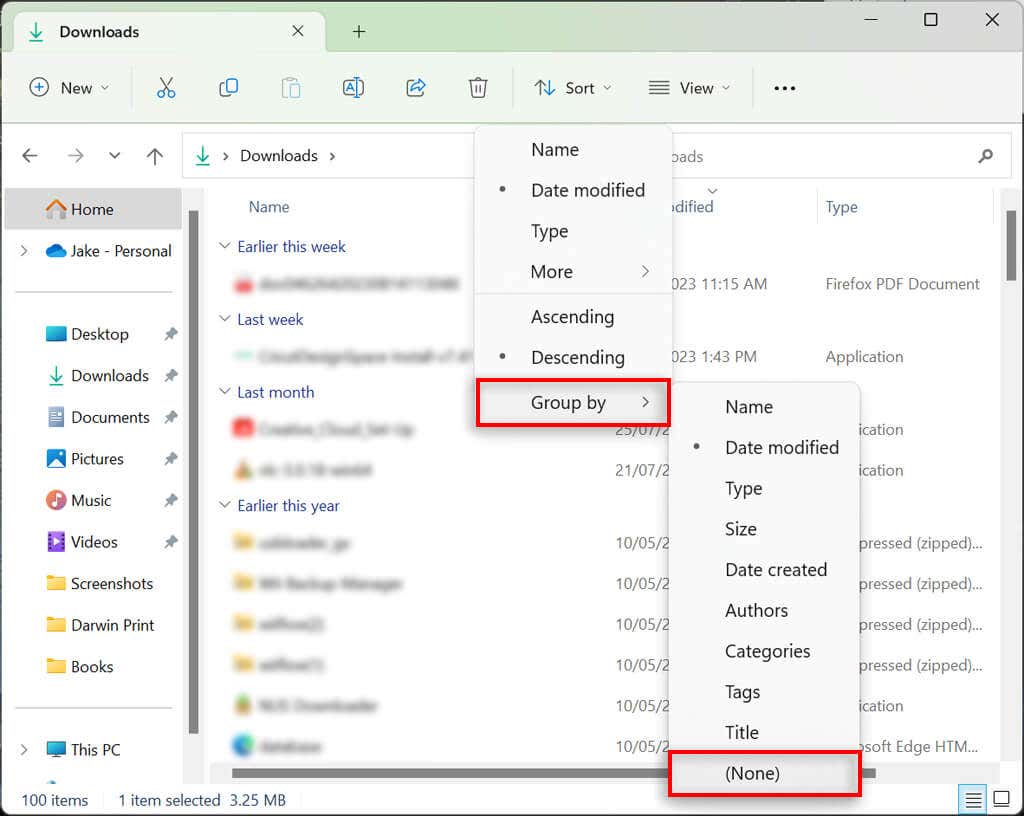
- Select Sort in the command bar at the top of the window.
- Hover over Group by and select (None) from the drop-down menu.
Note: You can also right-click anywhere in the folder and select Group by > (None).
How to Turn Off File Grouping in ALL Folders
It’s possible to disable groups universally. First, disable File Grouping in a single folder as shown above. Then, follow the steps below for either Windows 10 or Windows 11 to apply the setting to all folders on your PC.
On Windows 10
- Open a File Explorer window and navigate to the folder where you’ve already disabled File Grouping.
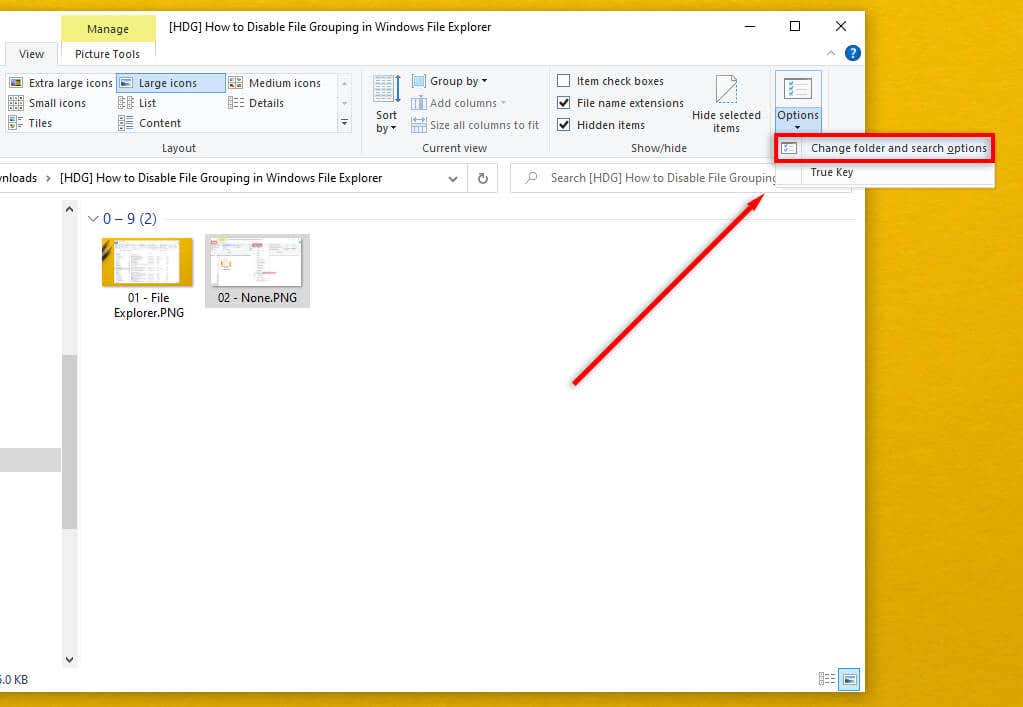
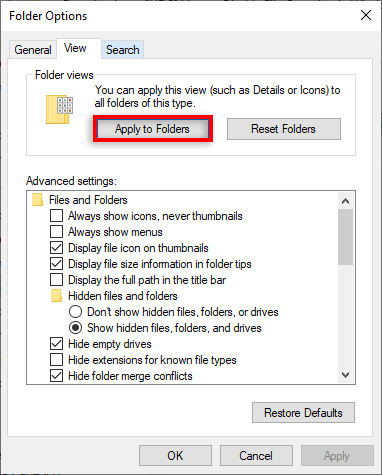
- Select the View tab and select Options then Change folder and search options.
- In the Folder Options dialog box, select View.
- Choose the Apply to Folders button to make the new setting universal.
- Select OK.
On Windows 11
- Open the Windows 11 File Explorer and navigate to the folder where you’ve already disabled File Grouping.
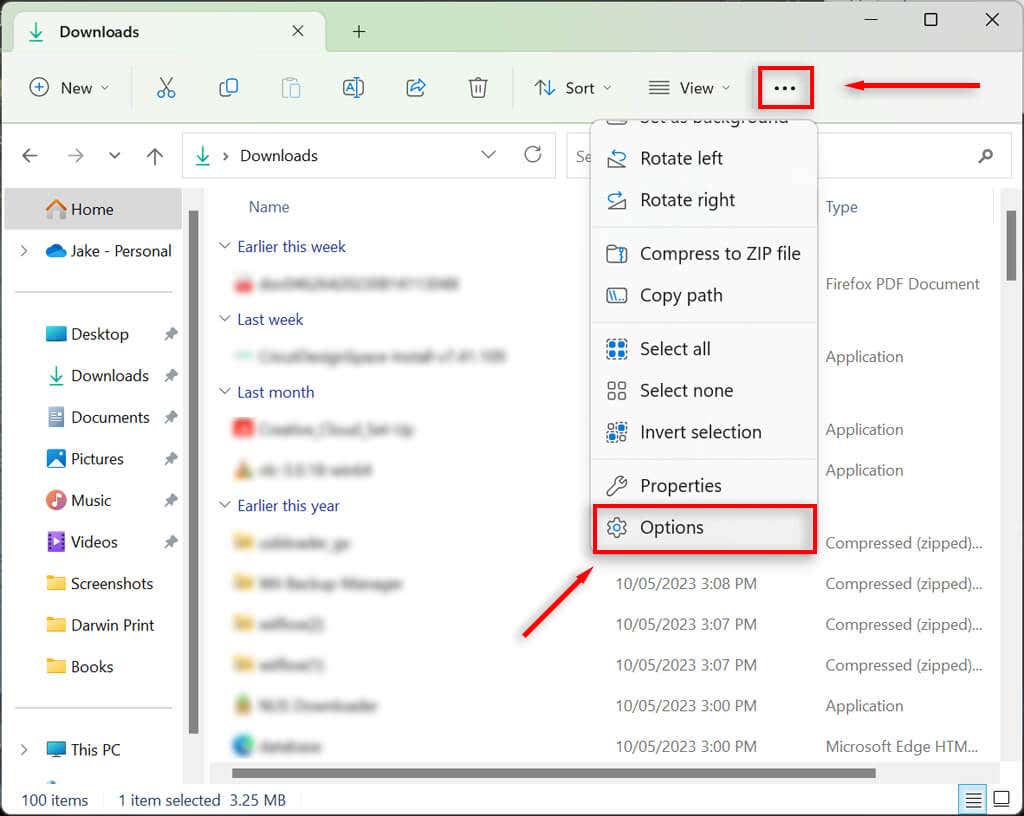
- Select the three dots at the top-right corner, then select Options.
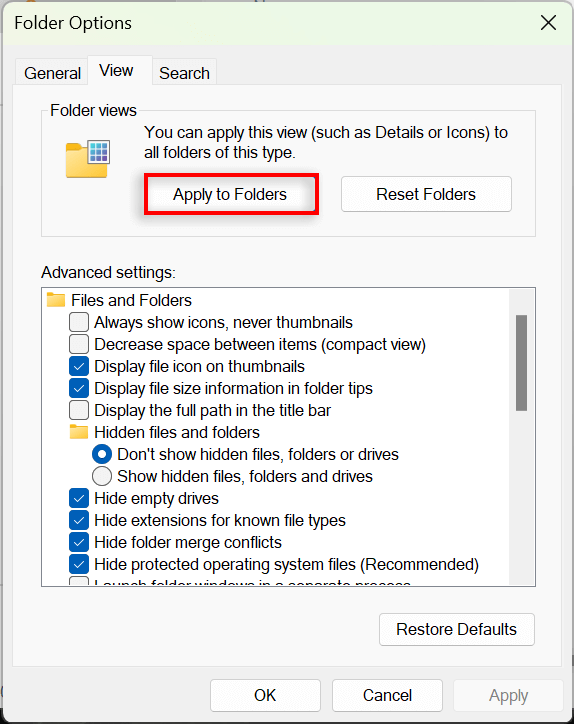
- Choose Apply to Folders, then select Yes.
- Press OK to save the setting.
How to Enable File Grouping on Windows 10/11
To enable File Grouping, you simply need to repeat the steps above and select a different Grouping option.
On Windows 10 or 11, open File Explorer and right-click an empty location. Select Group by, then choose the type of grouping you want to apply. You can choose between Date modified, Type, Size, and Name. You can also select whether you want the files to group in an ascending or descending order.
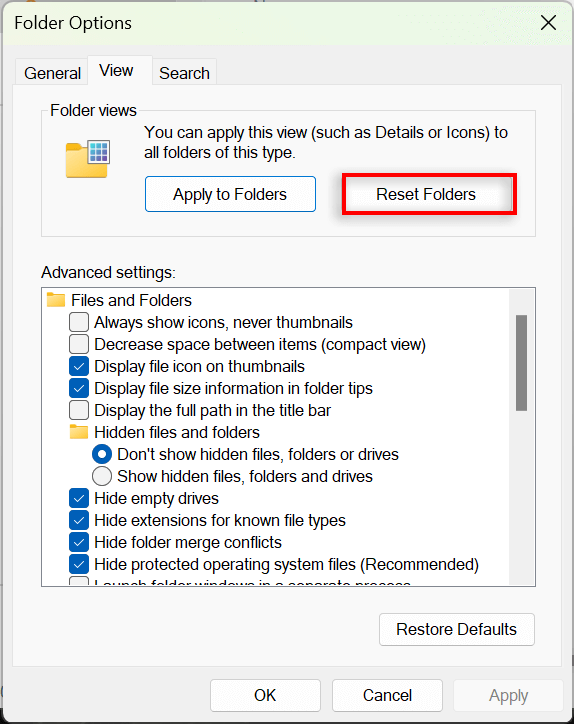
To enable File Grouping in all folders, navigate to File Explorer > Folder Options and select Reset Folders.
Better Organization, Less Stress
Many users find the File Grouping feature frustrating and choose to turn it off. Luckily, Microsoft makes it easy to customize your folder view options and organize your files and subfolders exactly how you would like to. The problem is, occasional Windows updates (like the notorious Win 10 1903 version) can mess with your grouping settings and revert them to default.
But hopefully, by following the steps above, you can ungroup your folders for good.
