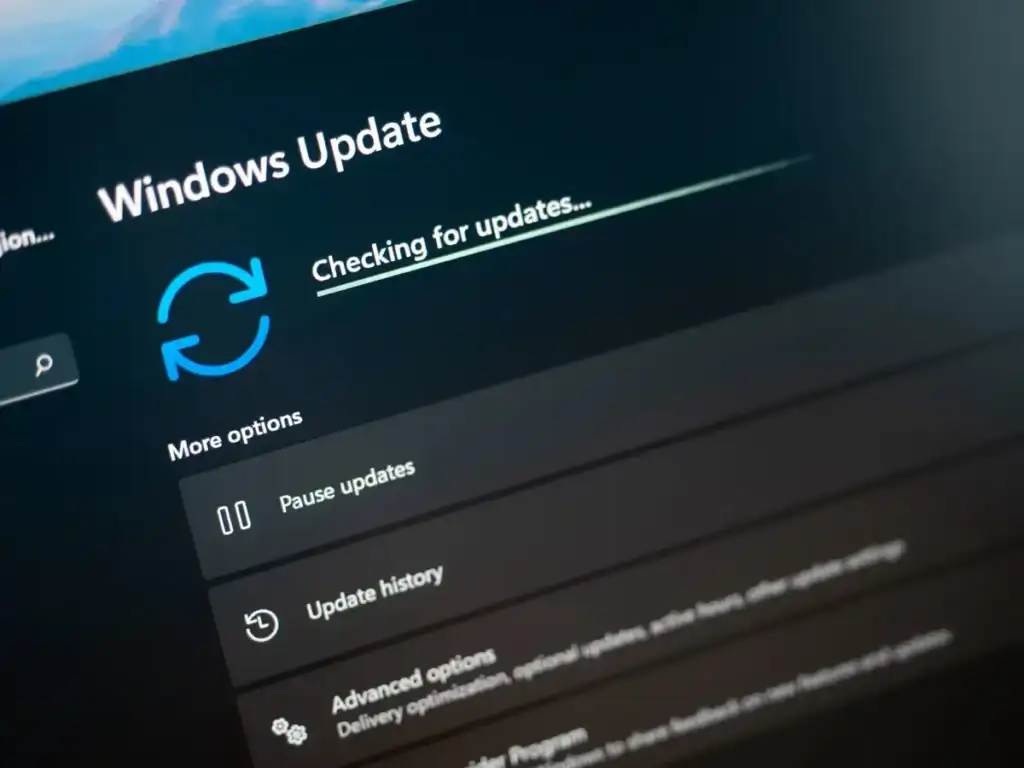
If you’ve encountered Windows update error 0xc1900223 in Windows 11 or 10, one or more of your system updates have failed to install. Troubleshoot steps include clearing the cache, resetting components, and repairing system files.
Many items can cause your updates to fail to install, including Windows Update being faulty, the update cache being corrupted, and more. We’ll show you a few ways to fix this problem so you can update your machine without problems.
Turn Off Your VPN
If you use a VPN on your Windows PC, turn the VPN service off before installing updates. This is because Microsoft may have trouble verifying update files with the company’s servers as your VPN transmits the internet data via a third-party server. Disabling the VPN helps fix that problem.
How you turn off your VPN depends on the app you’re using. You’ll open the app and disable the main toggle in most apps. Once you’ve done that, re-try installing updates on your PC.
Use Windows Update Troubleshooter
When an issue occurs with Windows updates, use your PC’s built-in Windows Update troubleshooter. This tool aims to help you find and resolve any update-related problems on your computer. The tool only requires little interaction from your end.
On Windows 11
- Launch Settings by pressing Windows + I.
- Select System > Troubleshoot > Other troubleshooters in Settings.
- Choose Run next to Windows Update.
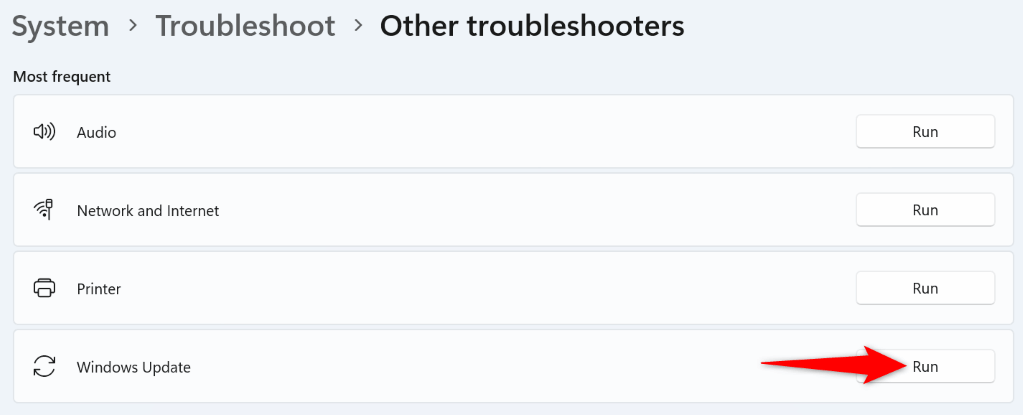
- Follow the on-screen instructions.
On Windows 10
- Open Settings using Windows + I.
- Select Update & Security > Troubleshoot > Additional troubleshooters in Settings.
- Select Windows Update and choose Run the troubleshooter.
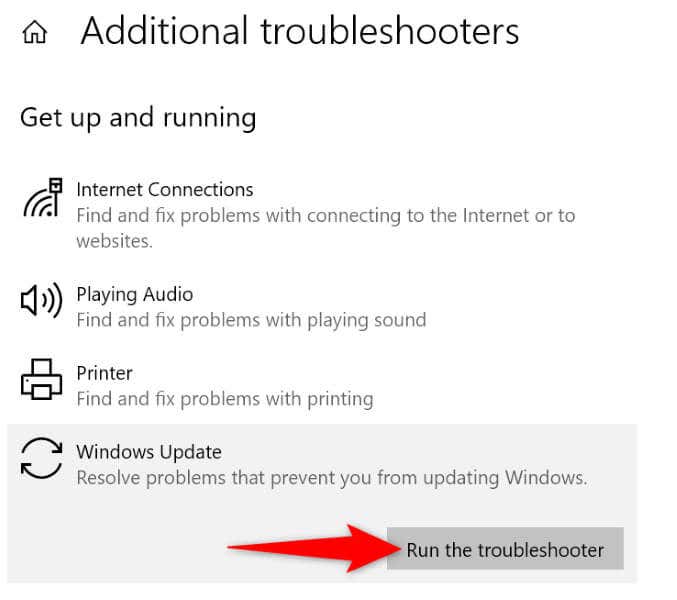
- Follow the on-screen instructions.
Clear the Windows Update Cache
If Windows’ downloaded update files are corrupted, that might be why you can’t install the updates. In this case, delete your Windows Update cache to resolve the problem. Windows will re-download the required update files.
- Open the Run dialog box by pressing Windows + R.
- Type the following in the box and press Enter:
services.msc - Find Windows Update on the list, right-click the service, and select Stop. Keep this window open, as you’ll return here shortly.
- Open Run again using Windows + R, type the following path in the box, and press Enter:
C:\Windows\SoftwareDistribution\ - Select all files in the folder by pressing Ctrl + A.
- Right-click a selected file and choose Delete (a trash can icon).
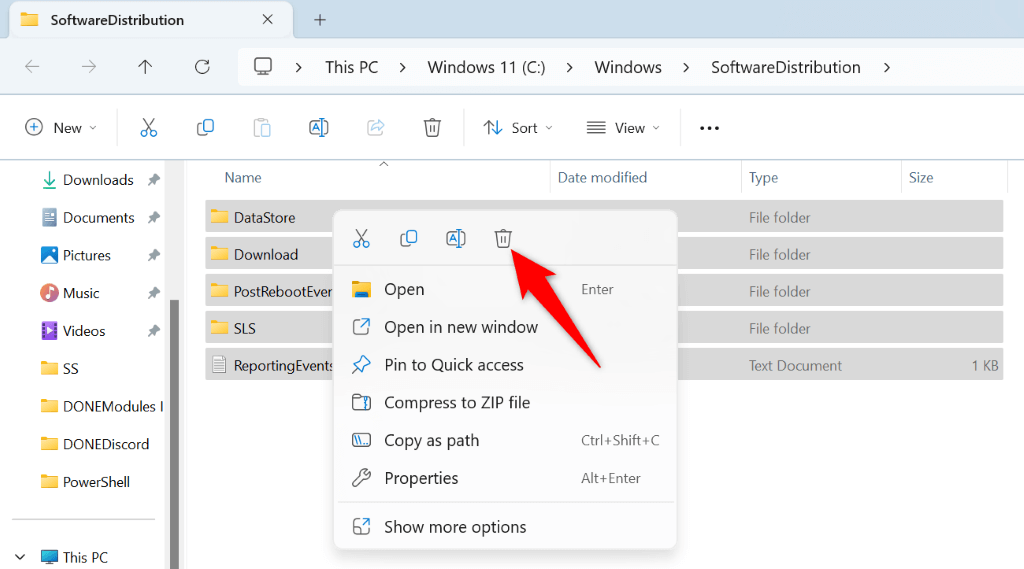
- Return to the Services window, right-click Windows Update, and select Start.
- Try to update your system.
Reset Windows Update Components
If Windows still fails to install an update and displays a 0xc1900223 error, the update components might be faulty. One way to fix these items is to reset them. You can use a batch file to bring these update components back to the default values.
- Launch a web browser on your PC and download the reset file for Windows 11 or Windows 10.
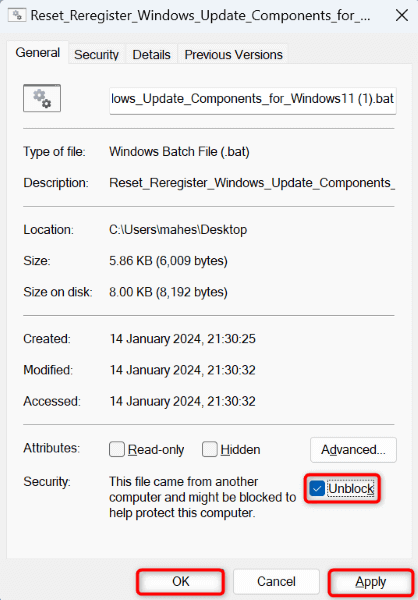
- Right-click the downloaded file and select Properties.
- Enable the Unblock option and choose Apply followed by OK.
- Launch the file.
- Select Yes in the User Account Control prompt.
- Follow the on-screen instructions in the reset tool.
Repair Windows’ Damaged System Files
When Windows’ system files get damaged, various PC features, including Windows Update, stop working. This might be the case with your system. Fortunately, you can use your machine’s built-in SFC (System File Checker) tool to automatically find and replace faulty files with working ones.
The tool runs from a Command Prompt window, automatically detects corrupted files, and replaces those files with default ones.
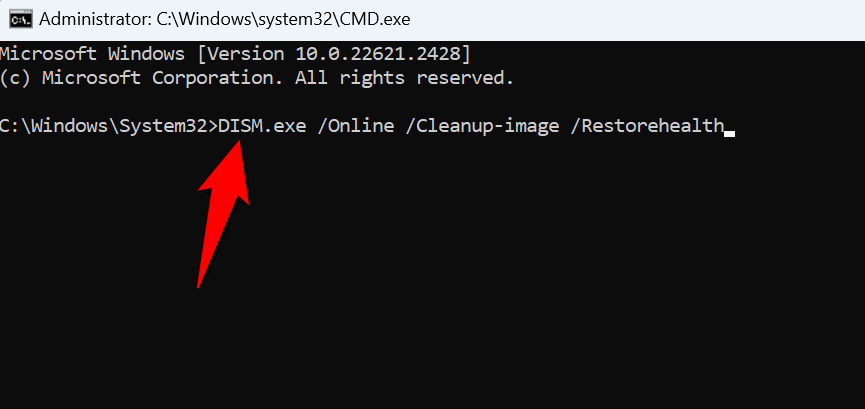
- Open Run by pressing Windows + R, type CMD in the open box, and press Ctrl + Shift + Enter. This launches Command Prompt as an admin.
- Type the following command on the open window and press Enter. This command will download the files needed to repair the damaged files.
DISM.exe /Online /Cleanup-image /Restorehealth
- After running the above command, run the following command to start fixing the corrupted files:
sfc /scannow - Restart your PC after repairing the faulty files.
Use Update or Installation Assistant to Download and Install a Feature Update
Usually, you encounter a 0xc1900223 error when a Feature update fails to install. Luckily, Microsoft offers a free tool called Installation Assistant for Windows 11 and Update Assistant for Windows 10 to help you manually download and install Feature updates on your PC.
On Windows 11
- Open a web browser, head to the Windows 11 Installation Assistant site, and select Download Now.
- Run the downloaded file.
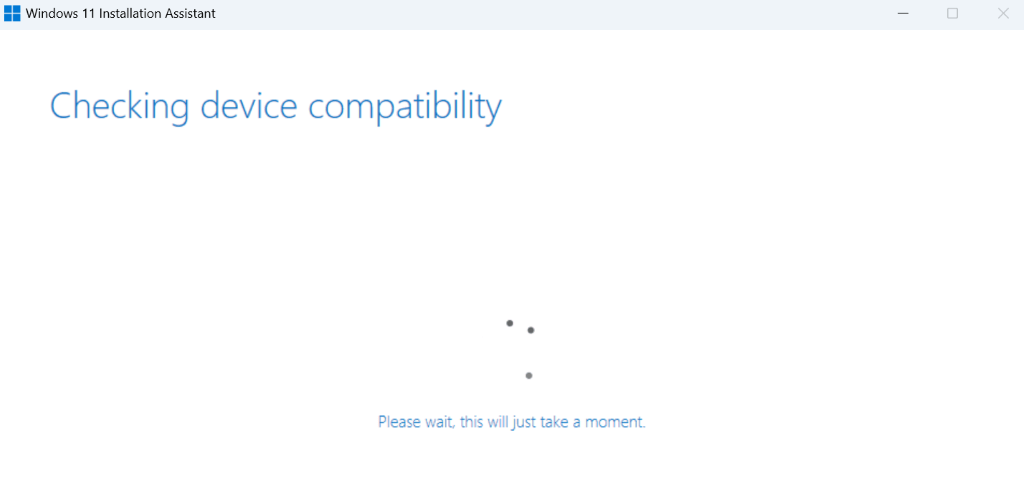
- Select Accept and install.
- Wait while the tool finds and installs the available updates.
- Select Restart to reboot your PC.
On Windows 10
- Launch a web browser, go to the Update Assistant site, and select Update now to download the tool.
- Launch the downloaded file.
- Allow the tool to find and install the available Feature updates on your PC.
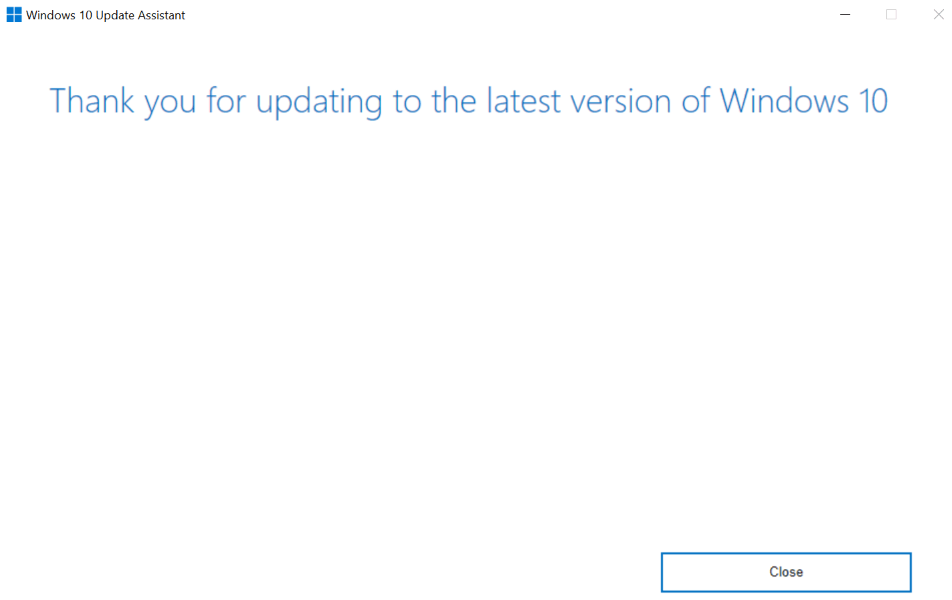
- Restart your PC.
Manually Download and Install an Update
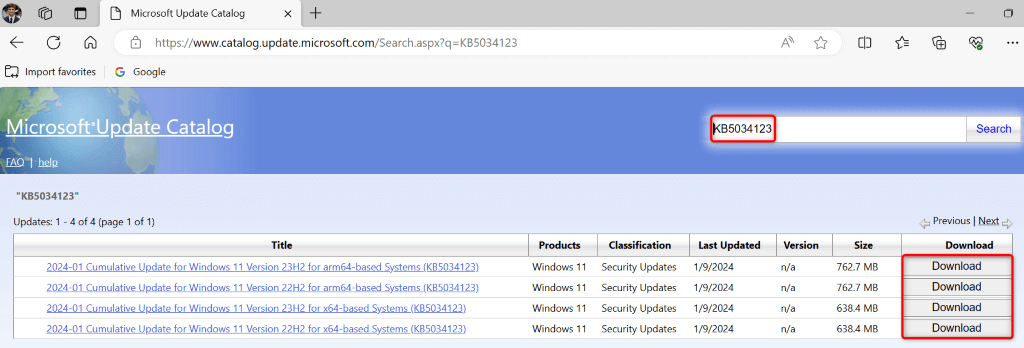
If it isn’t a Feature update but a regular update that has failed to install, use Microsoft’s online update catalog to manually download and install that specific update. This site hosts all the Windows updates, and you can download any update you want for your PC.
- On Windows 11, navigate to Settings > Windows Update. On Windows 10, go to Settings > Update & Security > Windows Update. Note the name of the update that fails to install; the name usually starts with KB.
- Launch a web browser and open the Microsoft Update Catalog site.
- Select the search box, type the update’s name, and press Enter.
- Select Download next to the specific update and save the update to your PC.
- Run the downloaded file to manually install the update.
- Restart your computer when you’ve installed the update.
Reset Your Windows PC
If you continue to get a 0xc1900223 error, your PC’s system configuration might be faulty. In this case, you can bring your configuration to the default values by resetting your Windows PC. You don’t lose your files when you do this, as Windows allows you to keep your files while resetting the settings.
On Windows 11
- Open Settings by pressing Windows + I.
- Navigate to System > Recovery in Settings.
- Select Reset PC next to Reset this PC.
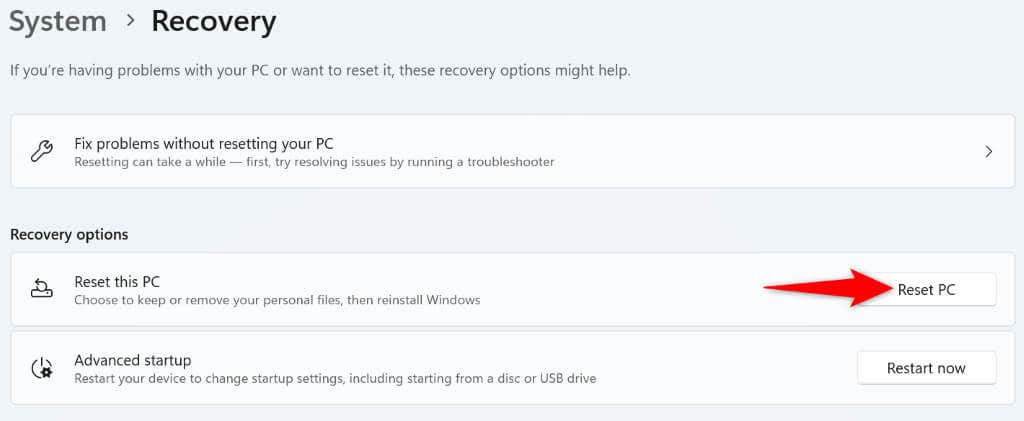
- Choose Keep my files and follow the on-screen instructions.
On Windows 10
- Launch Settings using Windows + I.
- Select Update & Security > Recovery in Settings.
- Choose Get started in the Reset this PC section.
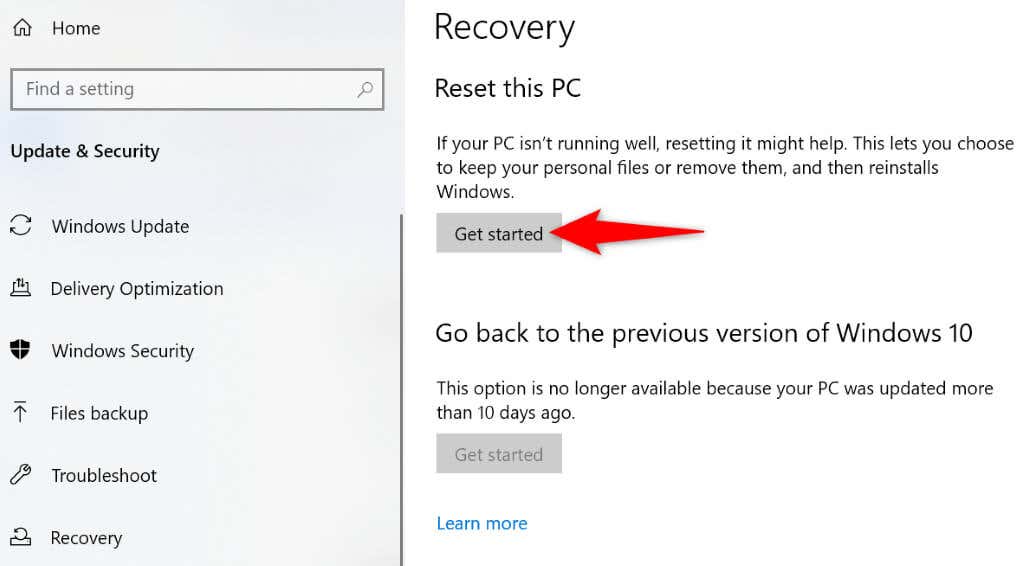
- Select Keep my files and follow the instructions.
Resolving a Failed Update Error 0xc1900223 Isn’t As Difficult As You Might Think
If your updates have failed to install and you’ve encountered an error, the sections above will guide you through the solutions you can use to fix your issue. Once you’ve applied these methods, Windows will install the available updates without displaying an error message. Enjoy an updated system!