A Windows 10 memory leak occurs when an app you were using didn’t return the resources to your system when you finished using that app. When this happens, you can’t work on other tasks on your PC as the PC doesn’t have enough RAM to work with.
In most cases, you can fix the Windows 10 memory leak issues yourself. You can close resource-intensive apps, disable certain startup apps, and perform similar tasks to fix a memory leak.
Restart Your PC
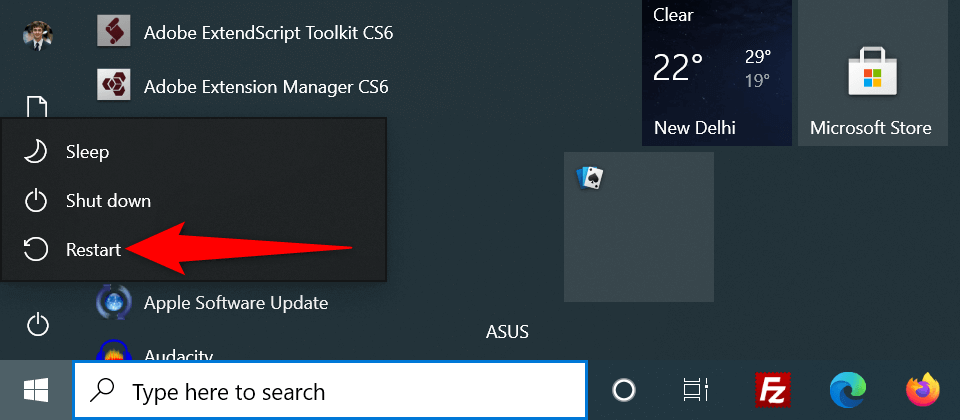
An easy way to clear the contents of your PC’s memory is to restart your PC. This should fix the memory leak issue in most cases, at least temporarily, until you can find a permanent fix.
- Open the Start menu on your PC.
- Select the power icon in the Start menu.
- Choose Restart to restart your PC.
Use Windows Memory Diagnostic to Fix a Windows 10 Memory Leak
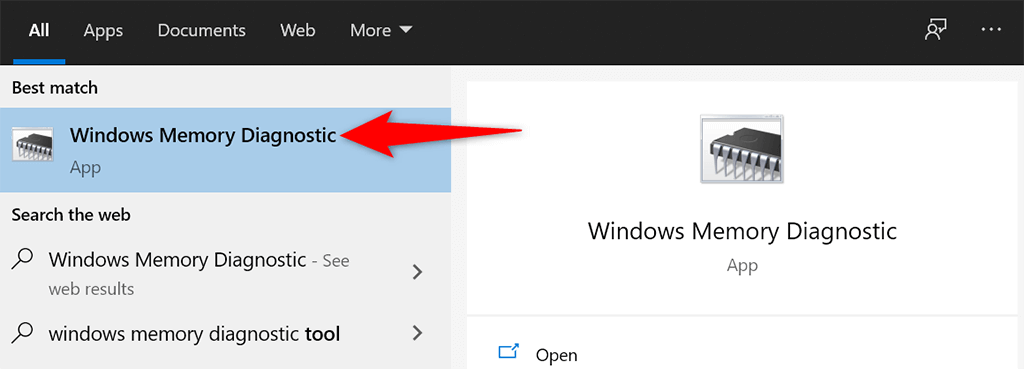
Windows 10 comes preloaded with a tool called Windows Memory Diagnostic. You can use this tool to find and fix issues with your PC’s RAM.
Since the tool automatically detects the issue with your memory, you don’t have to be computer-savvy to use the tool.
- Open the Start menu, search for Windows Memory Diagnostic, and select that tool in the search results.
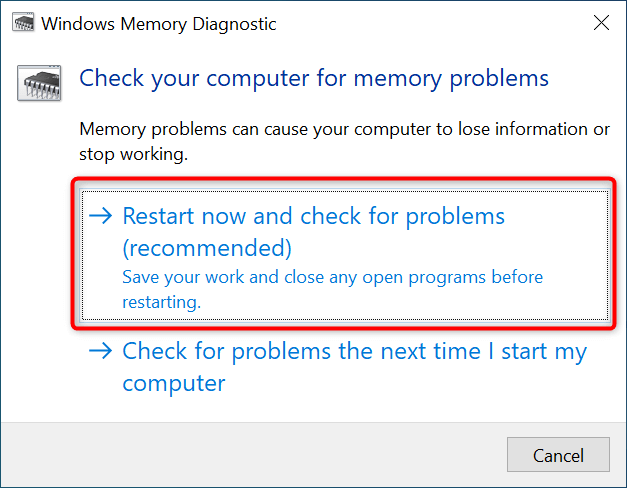
- Select Restart now and check for problems (recommended) in the tool.
- Your computer will restart, and the tool will try and fix your memory issues.
Close the Problematic App to Resolve the Windows 10 Memory Leak Issue
Most Windows 10 memory leak issues occur due to a problematic app that you’ve installed on your system. This app usually eats up all your RAM and leaves no memory for other apps to use.
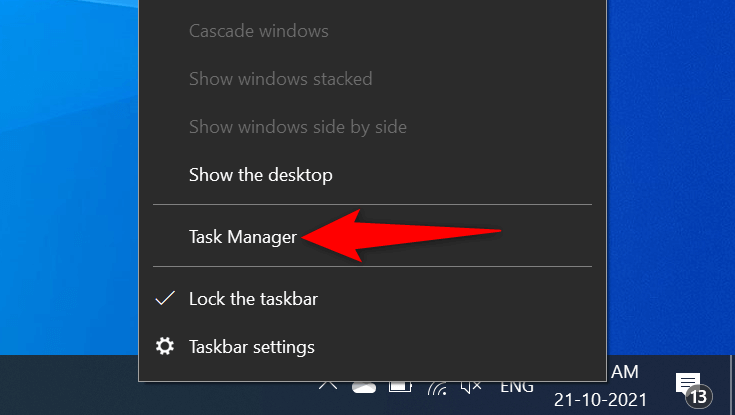
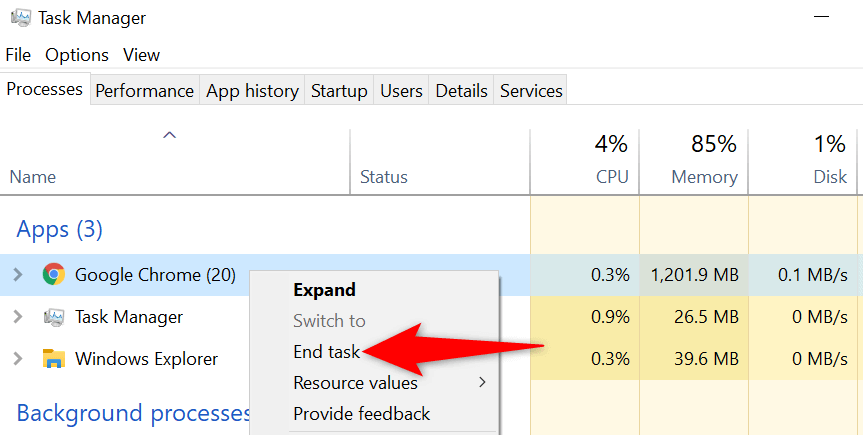
In this case, you can fix the issue by closing the problematic app on your PC. Task Manager should tell you what app is using what amount of RAM. If you find an app using an unusual amount of memory, that app might be the culprit.
- Right-click the Windows taskbar and choose Task Manager from the menu.
- Select the Processes tab in Task Manager.
- You’ll see a list of apps along with the memory amount they use. If you find an app using too much memory, right-click that app and select End task to close the app.
Repeat the above process for each app that uses a lot of memory. If your Windows 10 memory leak issue gets resolved by doing that, you know what apps are causing the problem. You can then manually uninstall those apps on your computer.
Disable Startup Programs
If your PC starts showing signs of a memory leak as soon as you turn on the PC, a startup app might be the culprit. These apps automatically launch at your PC’s boot.
In this case, you can remove the problematic app from the startup apps list. The app will no longer automatically open when you turn on your computer.
- Open Windows 10’s Settings app by pressing Windows + I keys simultaneously.
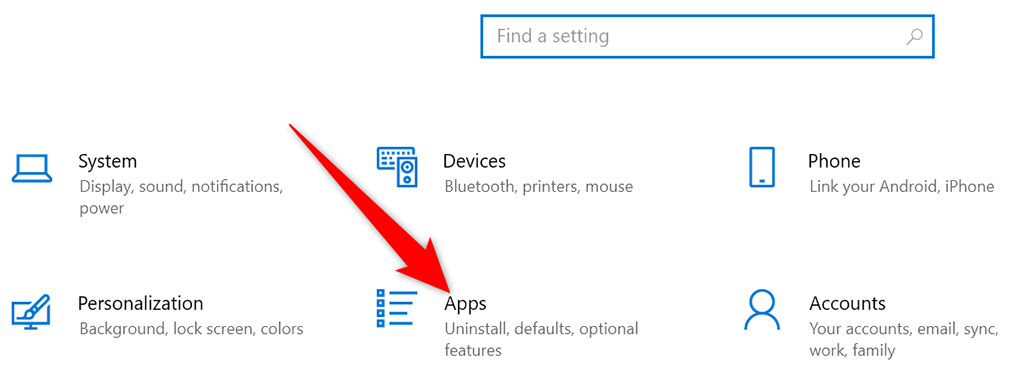
- Select Apps on the Settings window.
- Choose Startup from the sidebar on the left.
- Find the app you don’t want to launch at your computer’s boot on the right pane.
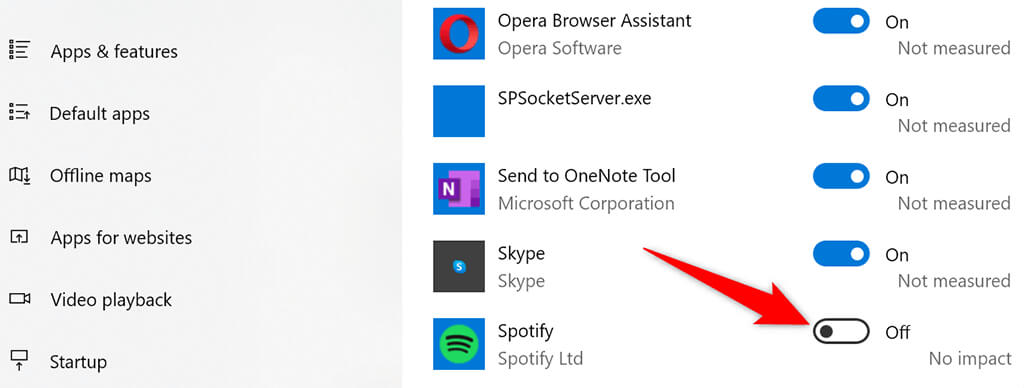
- Turn the toggle for that app to the off position. Repeat this process for each app you don’t want to launch when you turn on your machine.
Update Your Device Drivers
Outdated device drivers cause various issues, including Windows 10 memory leak issues. If this is the case with your PC, you should get all your drivers updated to the latest versions.
It’s free and easy to update drivers on Windows 10.
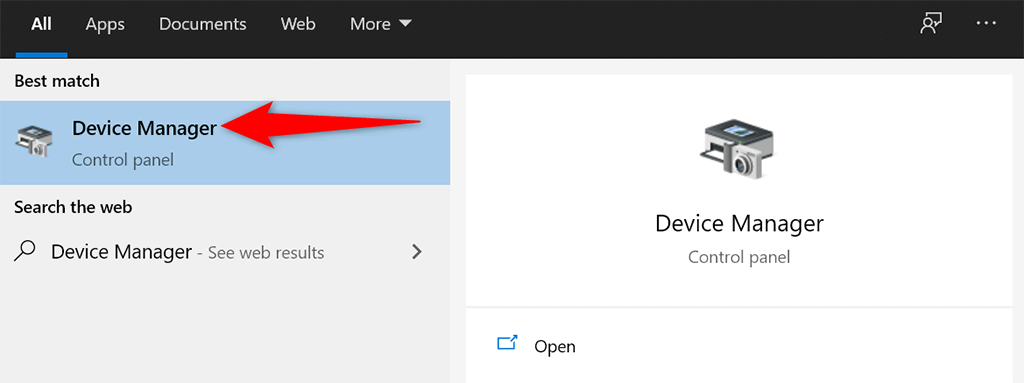
- Open Device Manager by accessing the Start menu, searching for Device Manager, and selecting that option in the search results.
- Find the device you want to update the drivers for on the Device Manager window. Usually, you need to update the graphics, sound, and network drivers to fix a memory leak problem.
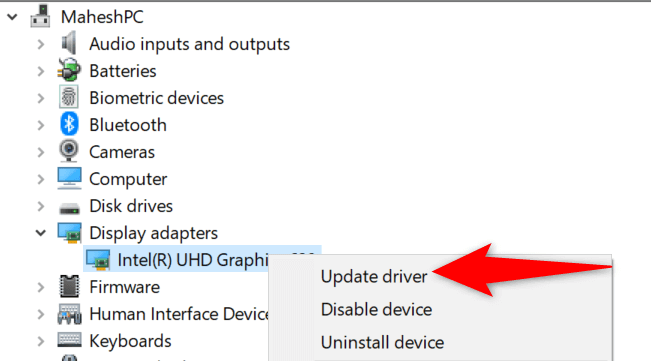
- Right-click your device and select Update driver.
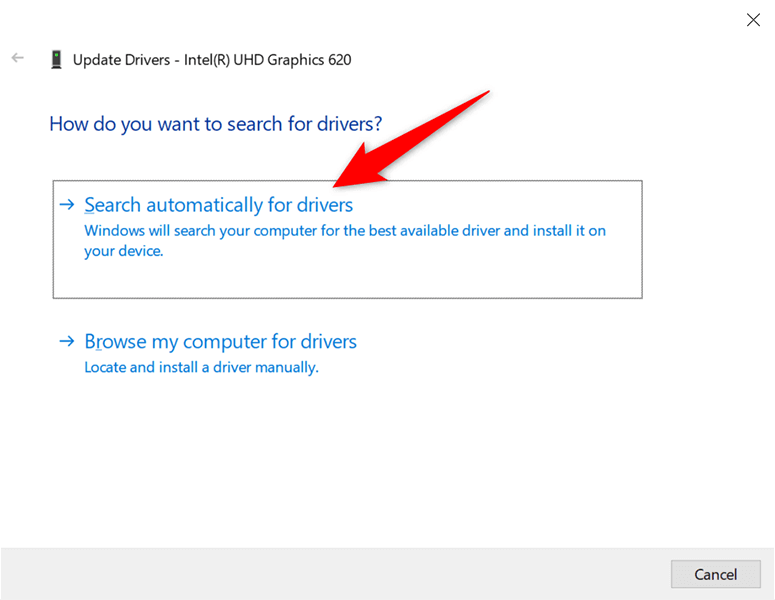
- Select Search automatically for drivers on the following window to let Windows 10 automatically find the latest drivers for your device.
- Install the new drivers if they are available.
- Restart your PC when the drivers are installed.
If you use an Nvidia graphics card, you can also manually update your drivers.
Run an Antivirus Scan to Get Around the Windows 10 Memory Leak Problem
Sometimes, a virus or malware ends up using your entire memory, which leads to a Windows 10 memory leak problem. In these cases, use your PC’s built-in antivirus tool to find and remove any viruses from your computer.
If you have a third-party antivirus installed on your computer, you can use that, too.
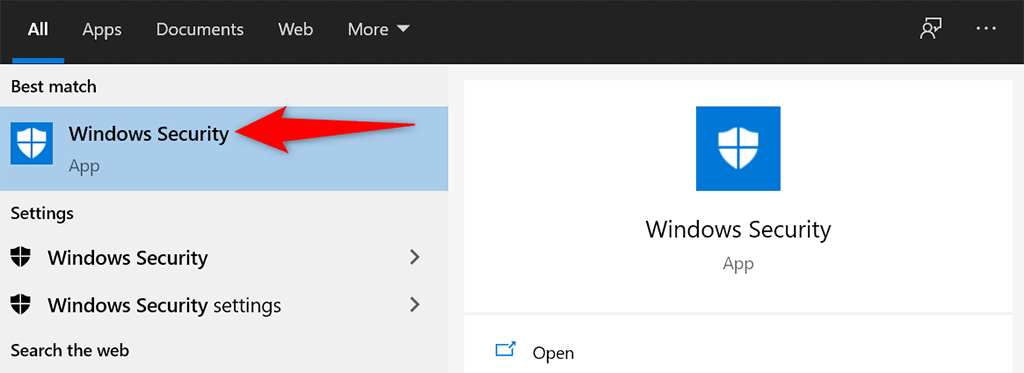
- Launch the Start menu, search for Windows Security, and select that app in the search results.
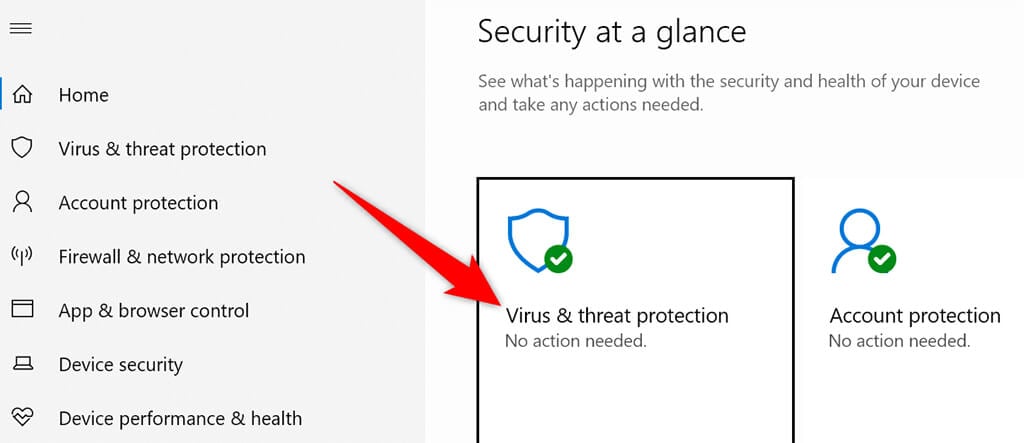
- Choose Virus & threat protection on the following screen.
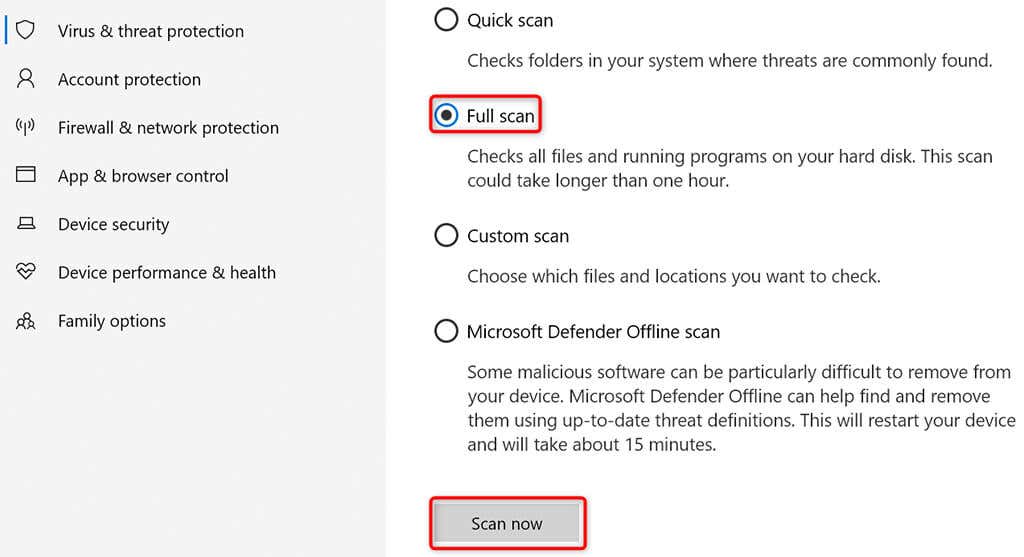
- Select Scan options on the right pane. Then, choose the Full scan option and select Scan now.
- Wait for the antivirus to scan your entire PC.
Disable Sysmain on Windows 10
Sysmain is a feature in Windows 10 that automatically preloads your frequently used apps in the RAM. This makes launching those apps faster.
But, if you ever experience any RAM-related issues, it’s worth turning off that feature to see if that makes any difference. You can always re-enable the feature later.
To turn off Sysmain:
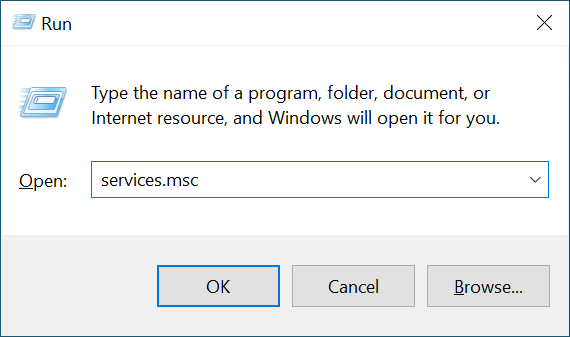
- Open the Run box by pressing Windows + R keys simultaneously.
- Type the following in the Run box and press Enter:
services.msc
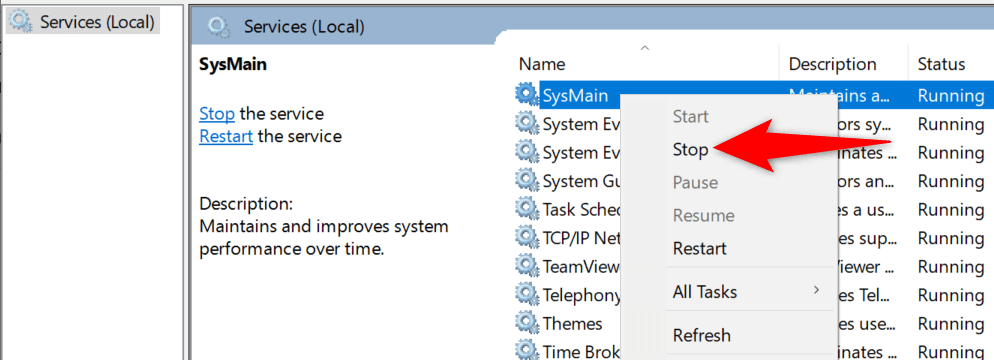
- Find Sysmain on the Services window, right-click the service, and select Stop.
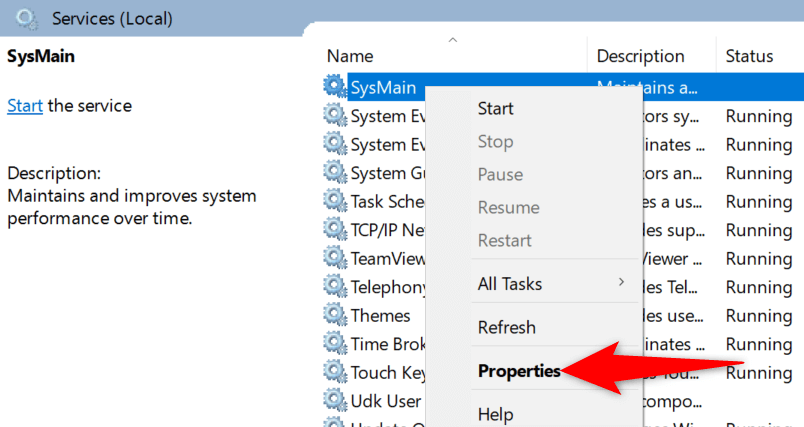
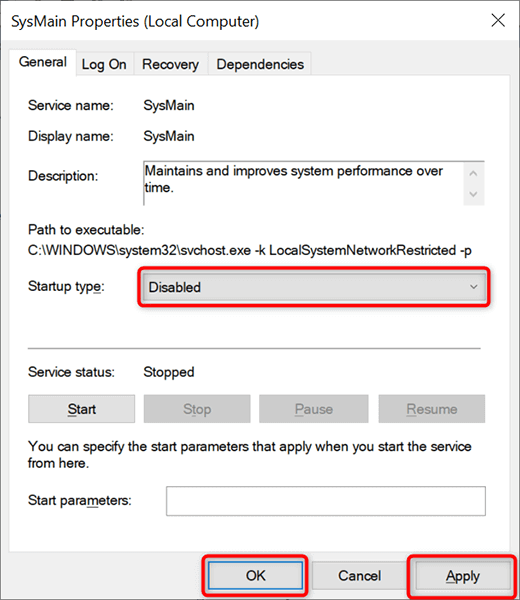
- To ensure the Sysmain service doesn’t run when you reboot your PC, right-click the service and choose Properties.
- Select Disabled from the Startup type dropdown menu. Then, select Apply followed by OK at the bottom.
- Close the Services window.
Your Windows 10 Memory Leak Problem Should Now Be Fixed
Memory leak issues are pretty common on Windows PCs. If you ever experience this problem on your machine, you now know what to do to get around it. In a nutshell, stay away from any untrusted apps, and you should be just fine.
Related Posts
- How to Fix Windows 11 Boot Loops After Jan 2026 Update
- How to Remove Copilot AI in Window 11? New Update Available in Beta
- January 2026 Patch Tuesday: 7 Things Windows Users Should Do Before and After Updating
- How to Fix Windows 11 December Update Bugs (File Explorer Flashes, WSL + VPN Issues)
- How to Repair a Corrupted User Profile in Windows 11
Mahesh has been obsessed with technology since he got his first gadget a decade or so ago. Over the last few years, he’s written a number of tech articles on various online publications including but not limited to MakeTechEasier and Android AppStorm. Read Mahesh’s Full Bio
