Windows 11’s sleep mode brings your PC to an idle state to conserve energy. Sometimes, you may find that your PC fails to enter this mode and remains on. This issue usually occurs when you’ve disabled sleep mode or have other problems with your PC’s power settings.
Other causes for the issue include the hybrid mode interfering with sleep mode, a screensaver keeping your PC on, and a connected device like a mouse waking up your PC. We’ll see how to fix these issues in this guide.
Make Sure Sleep Mode Is Enabled
When your Windows 11 PC fails to enter sleep mode, check and ensure sleep mode is turned on. You or someone else may have turned it off.
You can use the Settings app to review your PC’s sleep settings.
- Open Settings by pressing Windows + I.
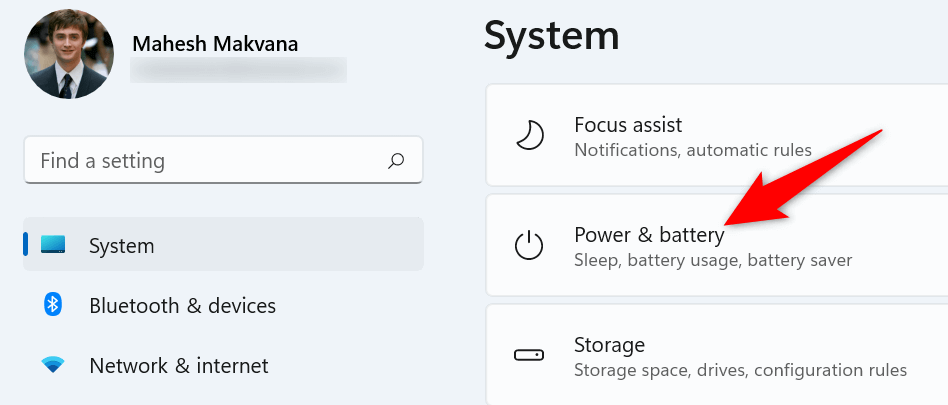
- Select System from the sidebar on the left.
- Choose Power & battery in the pane on the right.
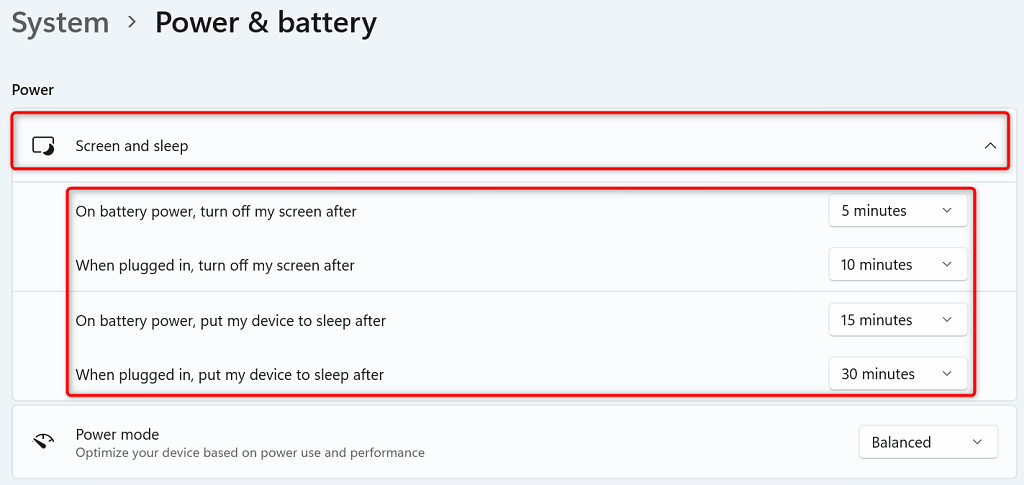
- Select the Screen and sleep option to expand the menu.
- Set a timer for each option displayed in the menu, so your PC goes to sleep mode.
Restore Your Power Plan’s Default Settings
Windows 11 allows you to create and change settings for various power plans. An incorrectly specified option in these plans may cause your PC not to enter sleep mode.
One way to get around this problem is to restore your power plan’s settings to the default. Doing so erases your customized options and brings those options back to the factory values. You can customize your plans after you’ve reset them.
- Launch Control Panel on your PC.
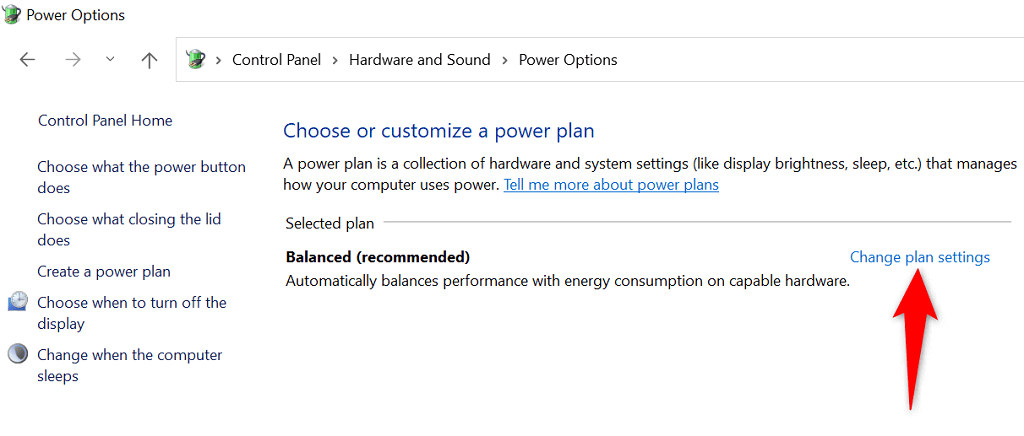
- Select Hardware and Sound > Power Options in the Control Panel.
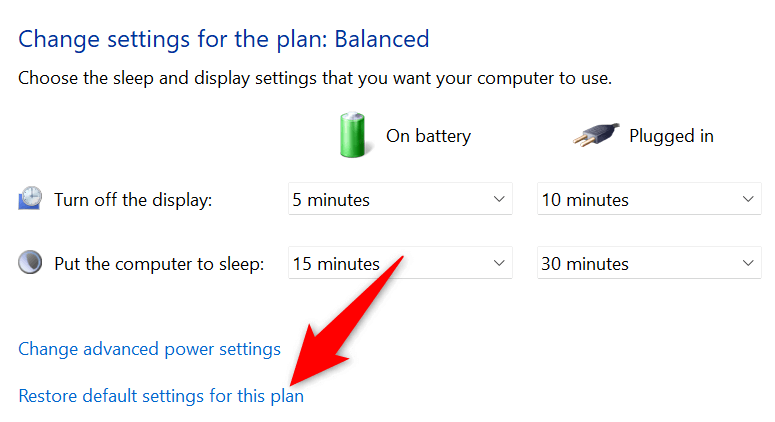
- Choose Change plan settings next to your current power plan.
- Select Restore default settings for this plan on the screen that opens.
- Choose Yes in the prompt to confirm your action.
Turn Off Hybrid Mode on Your Windows 11 PC
Windows 11’s hybrid mode brings hibernation and sleep mode together to help you save energy. When you experience problems putting your PC into sleep mode, it’s worth turning off this sleep combination feature to see if your issue gets resolved.
Later, you can activate hybrid mode if you want.
- Open Control Panel on your PC.
- Head to Hardware and Sound > Power Options.
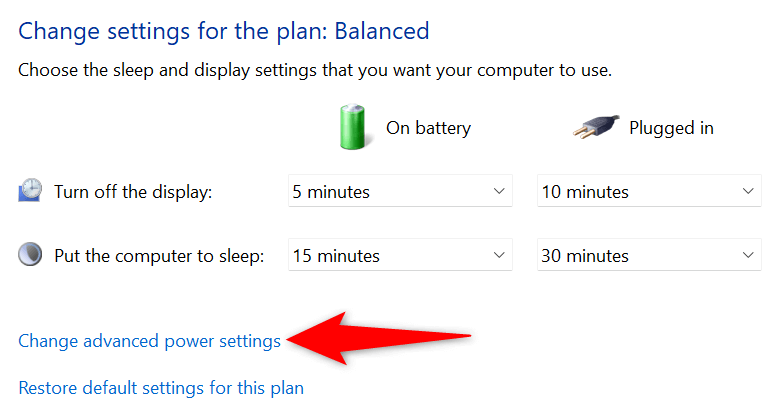
- Select Change plan settings next to your current power plan.
- Choose Change advanced power settings.
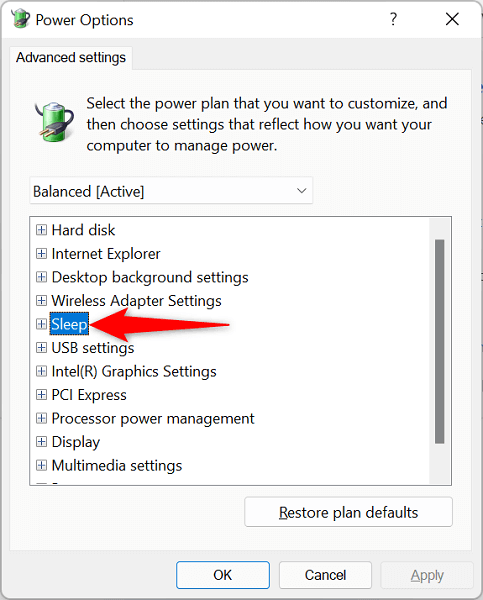
- Expand the Sleep menu in the window that opens.
- Select Off for both On battery and Plugged in options in Allow hybrid sleep.
- Choose Apply followed by OK at the bottom.
Disable Screen Saver on Your PC
Like the previous versions, Windows 11 includes various screen savers. It’s worth disabling these screensaver when you face difficulties putting your computer into sleep mode.
You can reactivate your screen savers at any time you want.
- Open Settings by pressing Windows + I at the same time.
- Choose Personalization from the sidebar on the left.
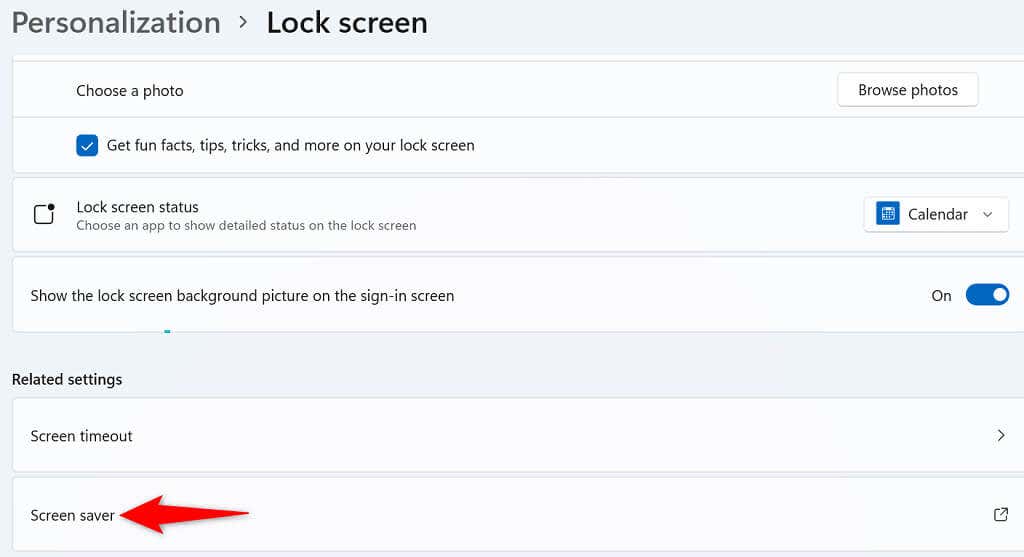
- Select Lock screen on the right pane.
- Choose Screen saver at the bottom of the screen.
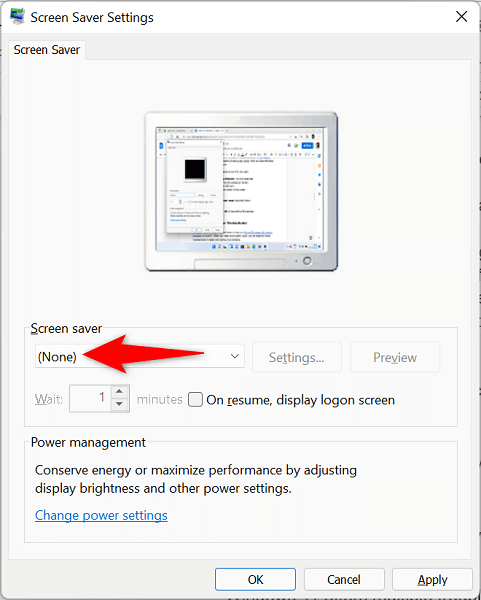
- Select (None) from the Screen saver drop-down menu.
- Choose Apply followed by OK at the bottom of the window.
Use Windows 11’s Power Troubleshooter
Windows 11 offers multiple troubleshooters to help find and fix issues on your PC. When sleep mode doesn’t work, use the system’s Power troubleshooter to detect and resolve your problems.
This troubleshooter runs on its own for the most part, so you don’t have to be tech-savvy to use the tool.
- Access Settings by pressing Windows + I simultaneously.
- Select System from the sidebar on the left.
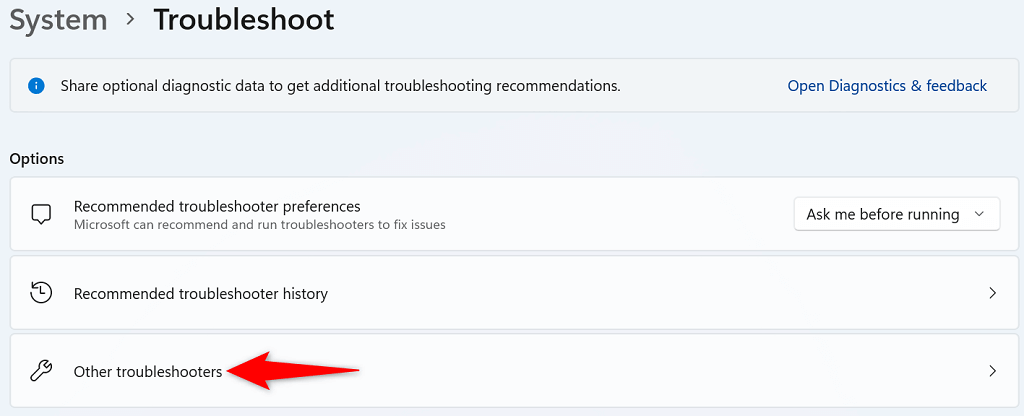
- Choose Troubleshoot in the pane on the right.
- Select Other troubleshooter.
- Select Run next to Power on the troubleshooter screen.
- Wait for the Power troubleshooter to detect and fix issues with your PC’s power settings.
Disallow Devices to Wake Up Your Windows 11 System
One reason Windows 11 fails to remain in sleep mode is that one of your connected devices is waking the system up from sleep. These devices are usually your keyboards, mice, and trackpads.
You can check if this is the case by revoking the ability to wake your PC from sleep from these devices. You can do this using Device Manager on your PC.
- Open the Start menu, search for Device Manager, and select Device Manager in the search results.
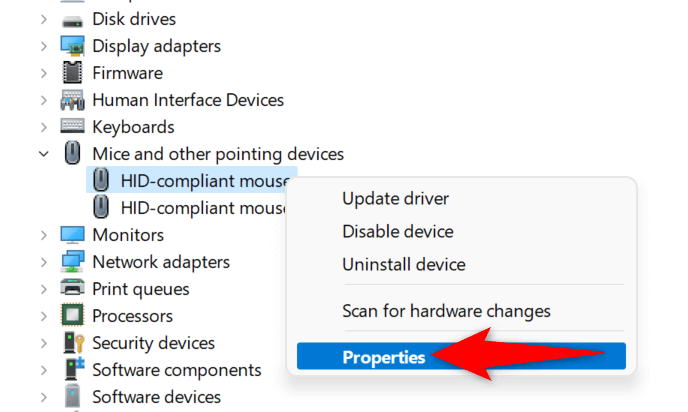
- Expand Mice and other pointing devices, right-click your mouse, and choose Properties.
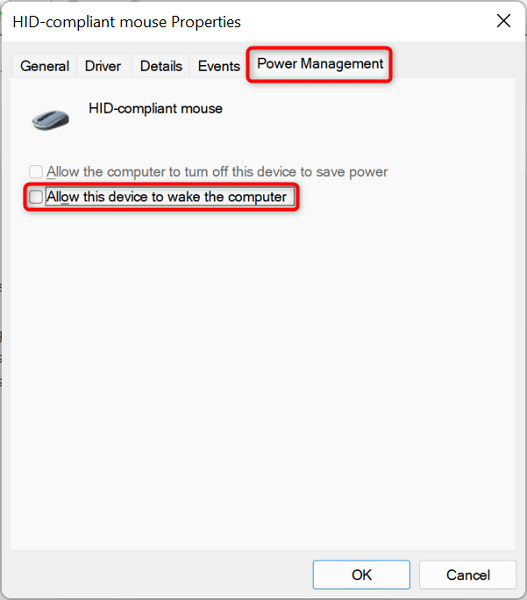
- Select the Power Management tab on the Properties window.
- Uncheck the Allow this device to wake the computer option.
- Select OK at the bottom.
- Repeat the above steps for your keyboard and trackpad, but one at a time.
Check Your Windows 11 PC for Viruses and Malware
If your Windows 11 PC still doesn’t go to sleep at the specified time, your computer might have a virus or malware. It’s unlikely, but still worth checking. These threats often cause various random issues on your PC, including making particular system features dysfunctional.
Luckily, you can use Windows 11’s built-in antivirus tool to find and remove viruses and malware from your computer.
- Launch Windows Security by opening the Start menu, searching for Windows Security, and selecting the tool in the search results.
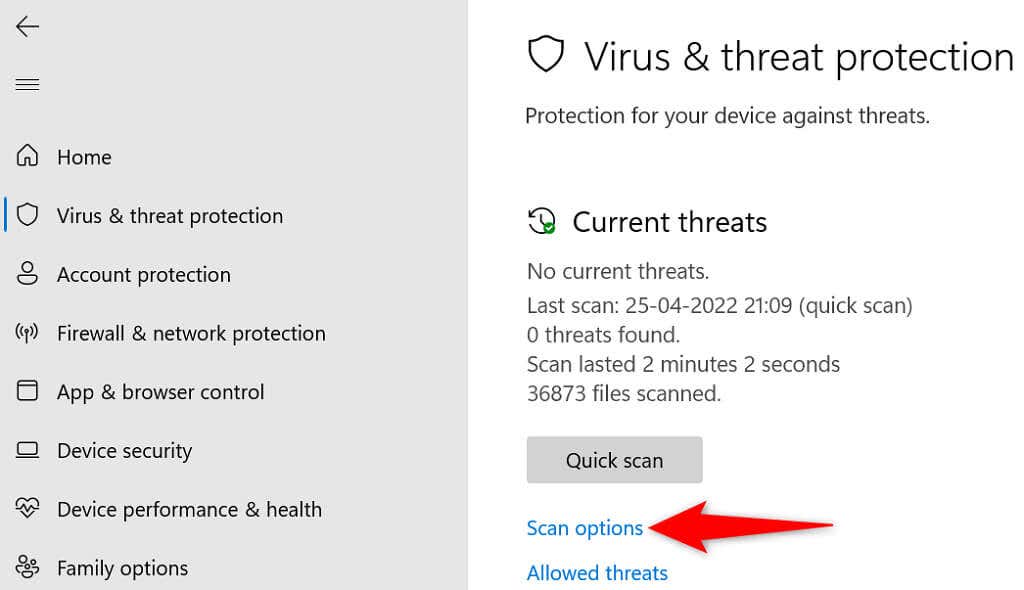
- Choose Virus & threat protection on the window that opens.
- Select Scan options.
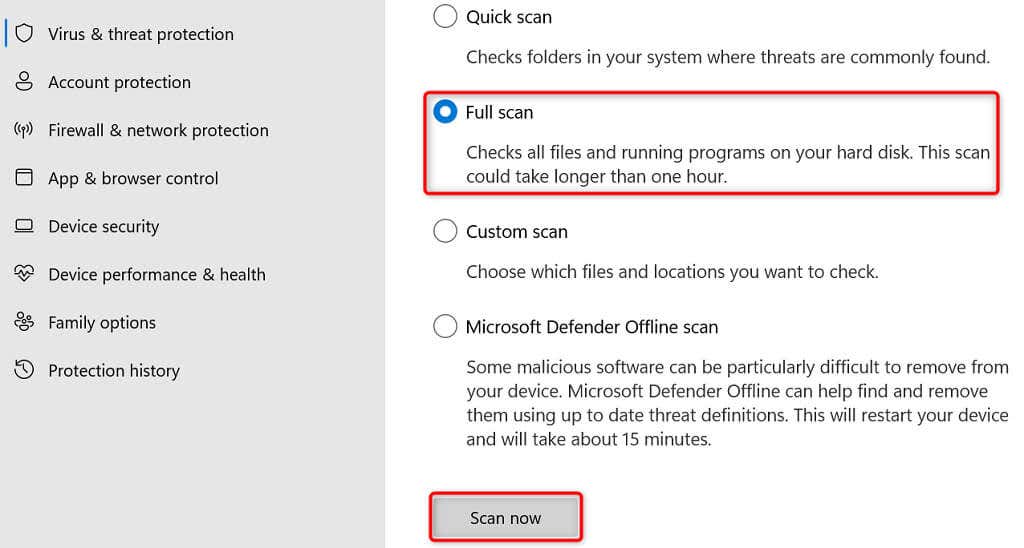
- Choose Full scan and select Scan now.
- Wait for the tool to detect and remove virus files from your computer.
Update Your Windows 11 PC
It’s also possible your system’s core files have a problem, causing your PC’s sleep mode not to work. You can fix issues like this by updating your PC to the latest version, as the newest version often offers fixes for various existing bugs and issues.
You can update your Windows 11 computer for free and with ease, as follows:
- Open Settings by pressing Windows + I keys simultaneously.
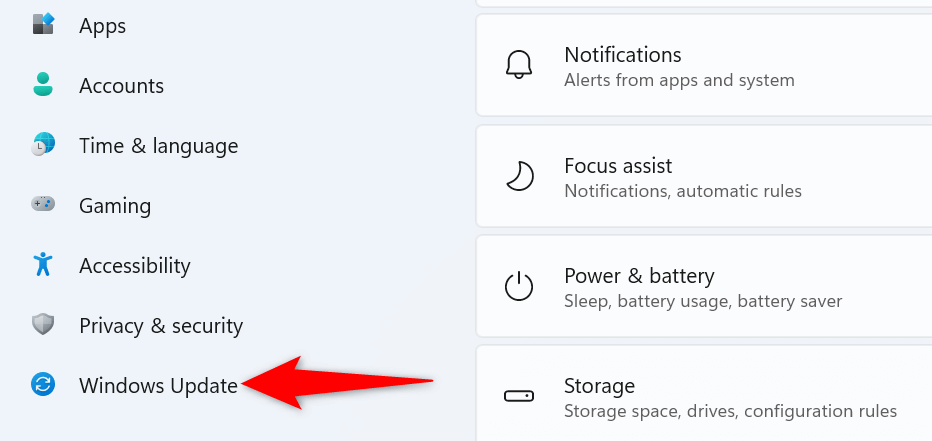
- Choose Windows Update from the left sidebar.
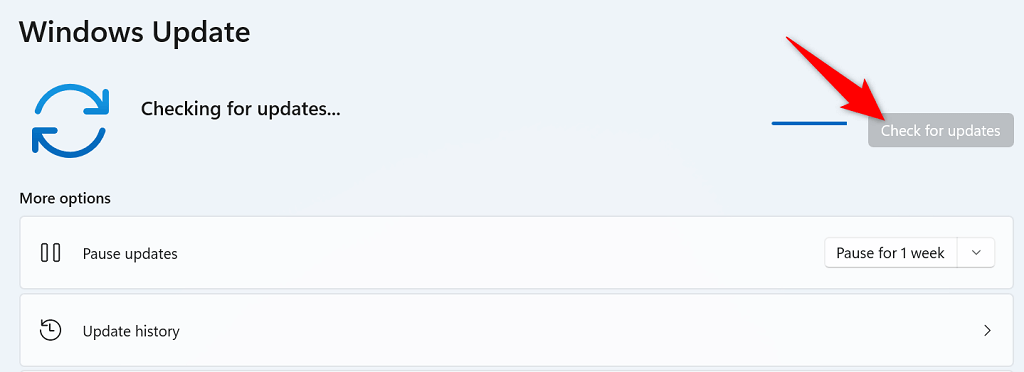
- Select Check for updates on the right pane.
- Download and install the available updates.
- Restart your PC when you’ve installed the updates.
If you ever experience problems making your PC enter sleep mode, use the effective methods outlined above to resolve your sleep mode issues. Once you’ve done that, your PC will enter sleep mode right at the specified time.
