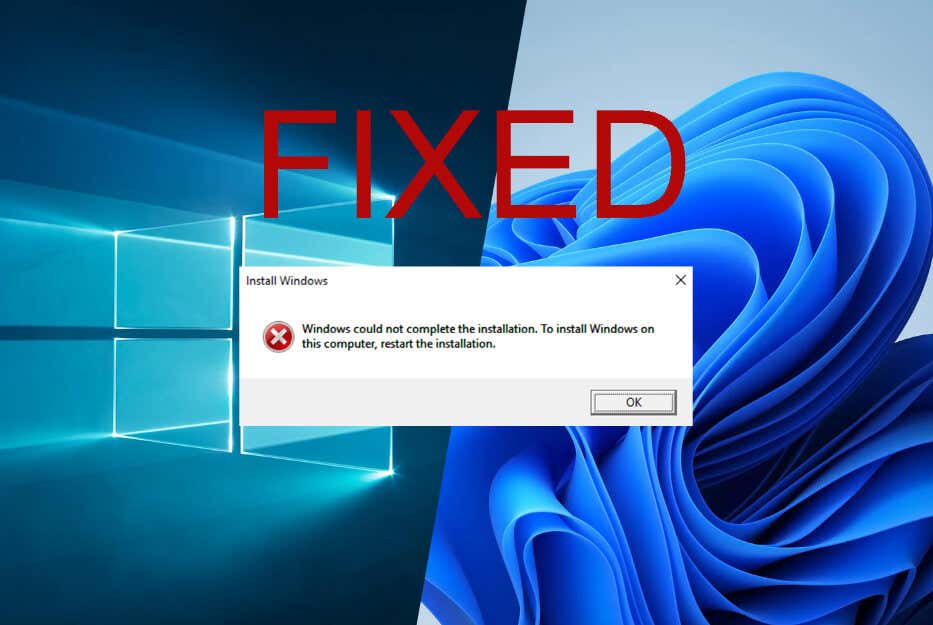
The “Windows Could Not Complete the Installation” error can result from corrupted installation files, hardware/driver issues, or conflicting software. Here’s how to troubleshoot it.
Many users report that when they try to install Windows on their computers, they get the error “Windows could not complete the installation.” This is a frustrating issue and can be quite scary because there’s no clear sign of what went wrong. Moreover, your computer will be completely useless without a functioning operating system. This article will help you troubleshoot the problem and get your computer back to functioning normally in no time. So let’s get straight to it.
What’s Causing the “Window Could Not Complete the Installation” Error?
There are several reasons you could see the error message “Windows Could Not Complete the Installation”. It can happen on both Windows 10 and Windows 11, and the reasons and the fixes are the same. The most notable problems behind this error are:
- Corrupted installation media, such as USB or a CD. This also includes physical damage to the device or media you’re using to complete the installation.
- Interrupted Windows installation before creating the user account.
- Hardware issues such as damaged RAM or Hard Drive can cause various installation errors including “Windows Could Not Complete the Installation”.
- Issues with Drivers are known to cause this particular error, especially if the installation media doesn’t contain the right drivers for the hardware components of your PC.
- Conflicting software or drivers already installed on your system can cause the installation process to fail.
Now that you know what’s causing the “Windows Could Not Complete the Installation” error, let’s see how you can fix it on your Windows 11 or 10 system.
1. Use Automatic Repair
You can access the Automatic Repair function when you boot your PC in recovery mode.
To do this on Windows 10 and 11:
- Turn your PC on and as soon as you see the Windows Logo, turn it off by pressing and holding the power button.
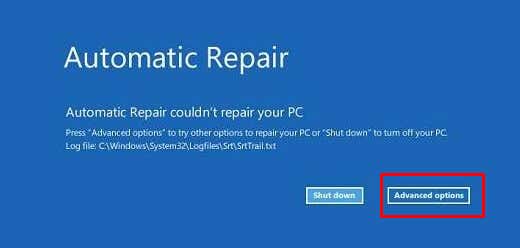
- Do this two or three times, until you see the message “Preparing Automatic Repair”.
- Once in the Automatic Repair screen, select Advanced Options.
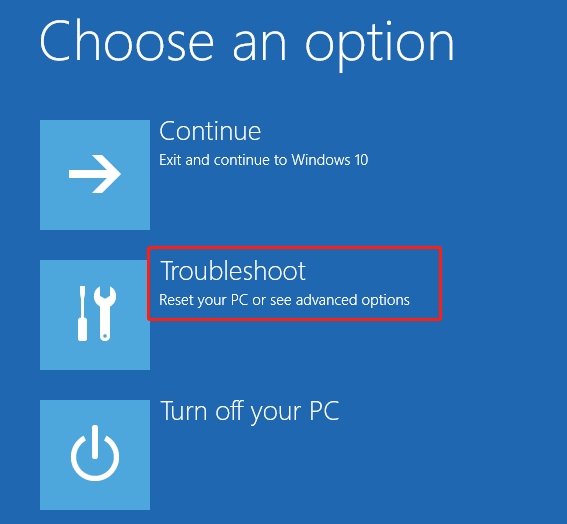
- Select Troubleshoot.
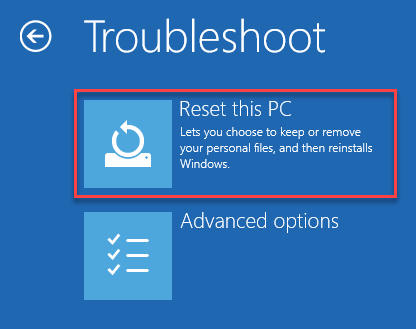
- Click the Reset This PC option.
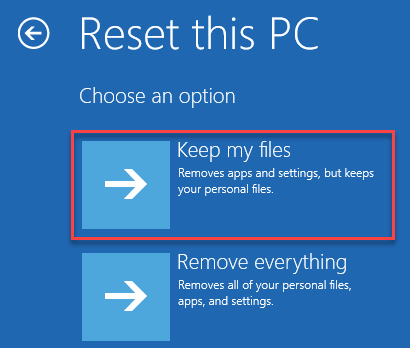
- In the Reset This PC screen select Keep my files.
- Select the account and enter your credentials.
- Select Reset to reboot the system.
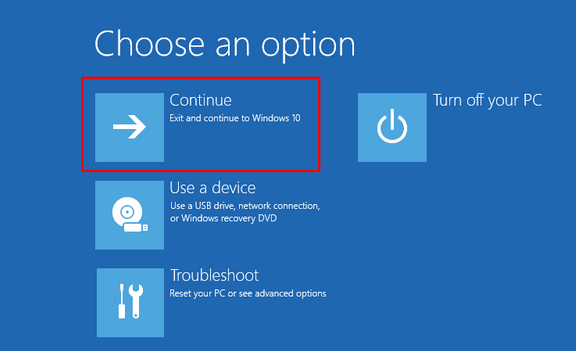
- Once your Windows system is up select Continue to proceed into Windows.
This should fix the problem and you can now try installing Windows again.
2. Use Administrator Account
If your PC keeps failing the Windows installation, try using the administrator account to install the system.
To do it:
- Press the Shift + F10 keys on your keyboard when you receive the “Windows Could Not Complete the Installation” error message. This will open the command terminal.
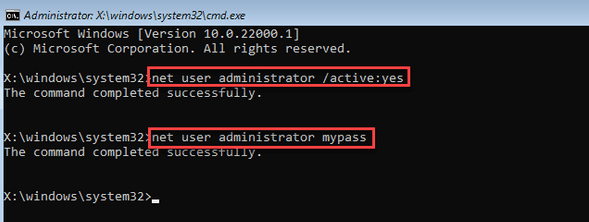
- In the CMD window type: net user administrator /active:yes and press the Enter key.
- Now type the next command: net user administrator mypass and press Enter on your keyboard.
- Tap OK on the error message to proceed.
The Installation window will reopen and you can now finish the Windows installation. However, if you don’t have an administrator account, you’ll have to enable it. Here’s how to do it:
- Once again press Shift + F10 on your keyboard when the error message pops up.
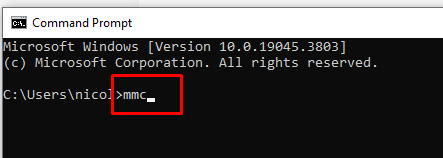
- In the Command Prompt window type the MMC command and press Enter.
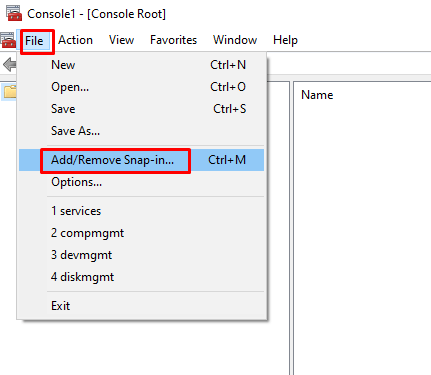
- When the Console opens up, click File in the menu bar.
- Select Add/Remove Snap-in… from the drop-down menu.
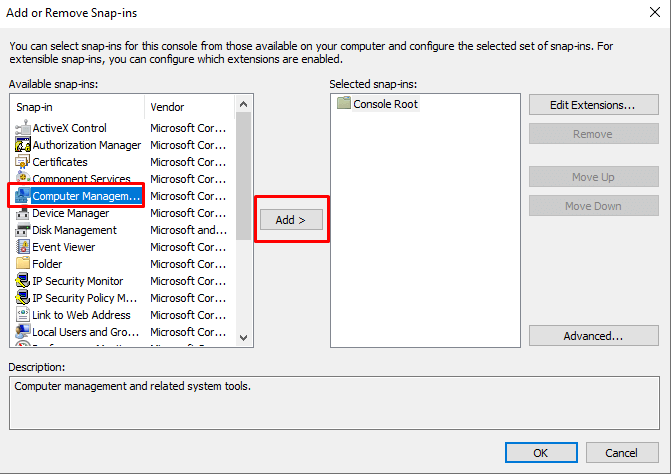
- Now select Computer Management from the left pane menu, and select the Add > button in the middle of the window.
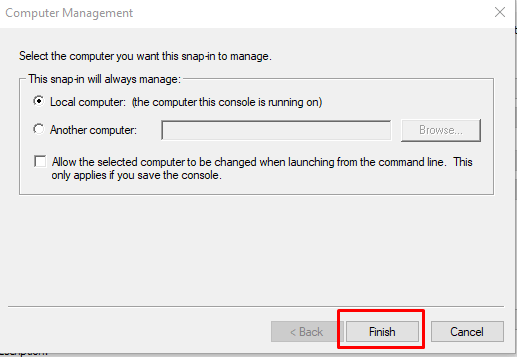
- Click Finish to continue.
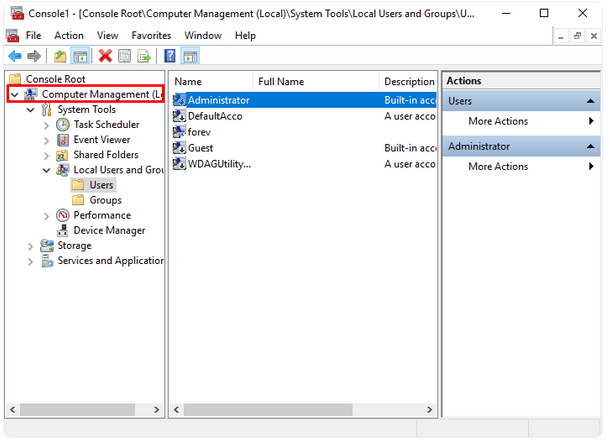
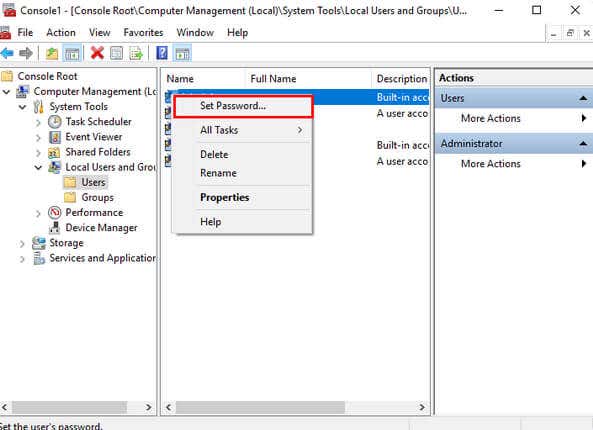
- Expand the System Tools > Local Users and Groups > Users in the left pane.
- This will list all users and groups on the console.
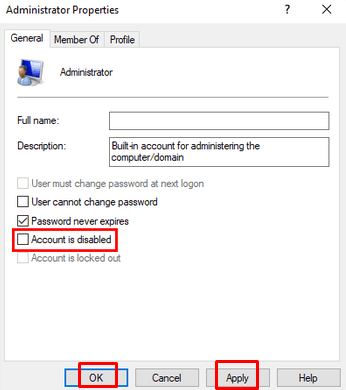
- Right-click the Administrators and select Properties from the menu.
- When the properties window opens, uncheck the Account is disabled box.
- Click Apply and then the OK button to apply the changes.
- Right-click the Administrators option again but this time select the Set Password… option.
- When the warning pop-up window opens, select Proceed.
- Type the New password and then repeat it in the Confirm password box.
- Select OK.
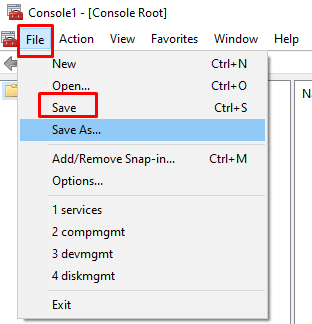
- To save all these settings, go to File in the menu bar again, and select Save.
Close the Computer Management window and retry installing Windows.
3. Change Password Requirement
If enabling an Administrator account didn’t solve your issue, try changing the password requirement. This could help you resolve the “Windows Could Not Complete the Installation” error.
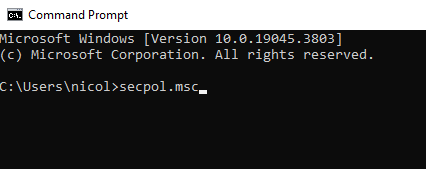
- Open the Command Prompt by pressing Shift + F10 on the error screen.
- Type secpol.msc command and press Enter.
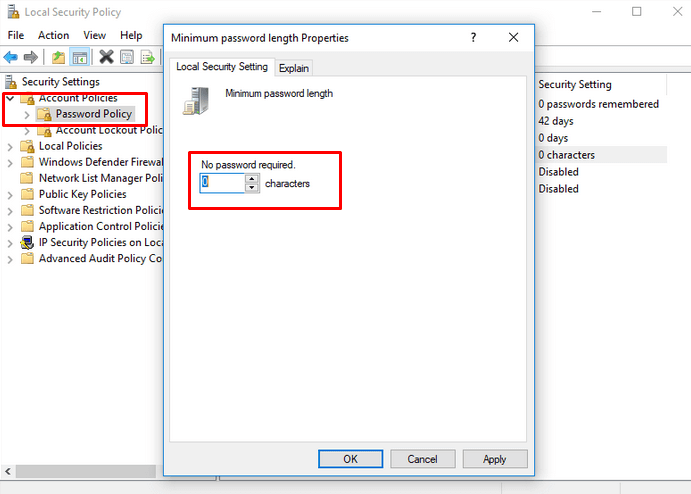
- When the popup window opens, expand the Account Policy in the left pane, and select Password Policy.
- In the Local Security Setting tab set the minimum password length to 0 and press OK to continue.
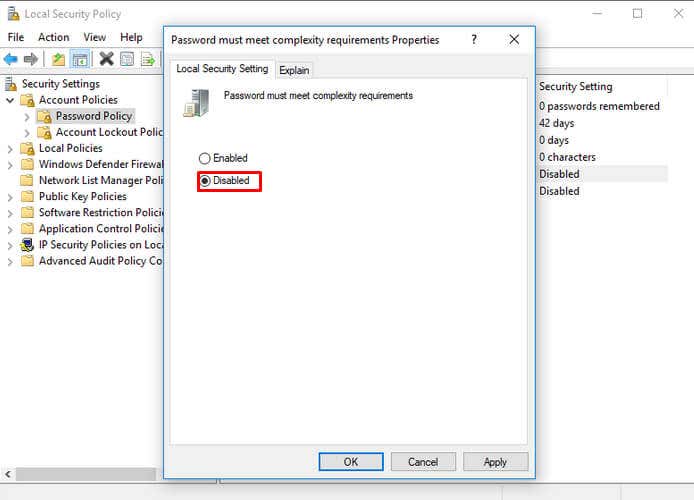
- In the next popup window select Disabled to disable the “Password must meet complexity requirements”, and select the OK button.
Restart your PC and try installing Windows again.
4. Run Account Creation Wizard
If none of the above-described methods helped you solve this Window installation error, you’ll have to run the account creation wizard. Here’s how:
- Open the Command Prompt by pressing Shift + F10 on the error screen.
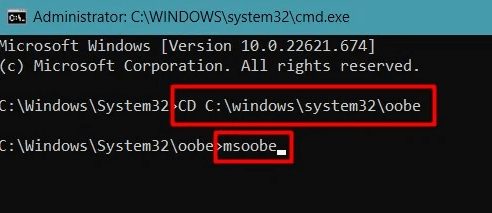
- Type the following command: CD C:\Windows\System32\oobe and press Enter.
- Now type the msoobe command and hit Enter again. This will open the Microsoft out-of-the-box experience.
- When the Setup Windows screen appears. Follow the on-screen instructions to set up the Windows. Select Start to start the Windows installation process.
5. Modify Registry Settings
If the “Windows could not complete the installation” error message pops up after SysPrep, you need to change the registry setting to resolve the issue. Follow these steps:
- Open the Command Prompt by pressing Shift + F10 on the error screen.
- Type regedit command and hit Enter.
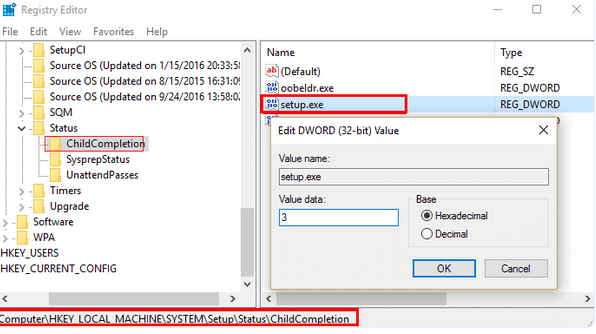
- Now that you’re in the registry editor navigate to the:
Computer\HKEY_LOCAL_MACHINE\SYSTEM\Setup|Status
| HKEY_LOCAL_MACHINE\SYSTEM\Setup\Status\AuditBot | Value: 0 |
| HKEY_LOCAL_MACHINE\SYSTEM\Setup\Status\ChildCompletion\setup.exe | Value: 3 |
| HKEY_LOCAL_MACHINE\SYSTEM\Setup\Status\ChildCompletion\audit.exe | Value: 0 |
| HKEY_LOCAL_MACHINE\SYSTEM\Setup\Status\SysprepStatus\CleanupState | Value: 2 |
| HKEY_LOCAL_MACHINE\SYSTEM\Setup\Status\SysprepStatus\GeneralizationSite | Value:7 |
| HKEY_LOCAL_MACHINE\SYSTEM\Setup\Status\UnattendPasses\auditSystem | Value:0 |
Changing the Registry Settings will allow your System to boot up properly and finish the Windows installation process.
6. Find Another Source for Windows Installation
It could be that you’re trying to install Windows 11 or 10 from a faulty media source, such as a scratched CD or a broken flash drive. If this is the case, simply changing the media source should help you.
For Windows 11 you can use the Microsoft Media Creation Tool and create a new bootable drive from which you can install Windows whenever you need.
