It’s painful when you try to install a new Windows OS from a USB drive and suddenly the installation stops, giving you the 0x8007025D error. Luckily, it’s possible to fix this error.
In this guide, we’ll explain five ways to fix the Windows installation error code 0x8007025D.
What Causes Error Code 0x8007025D?
The 0x8007025D error, also known as the “installation was canceled” error, occurs when installing a fresh Windows operating system using a bootable USB drive.
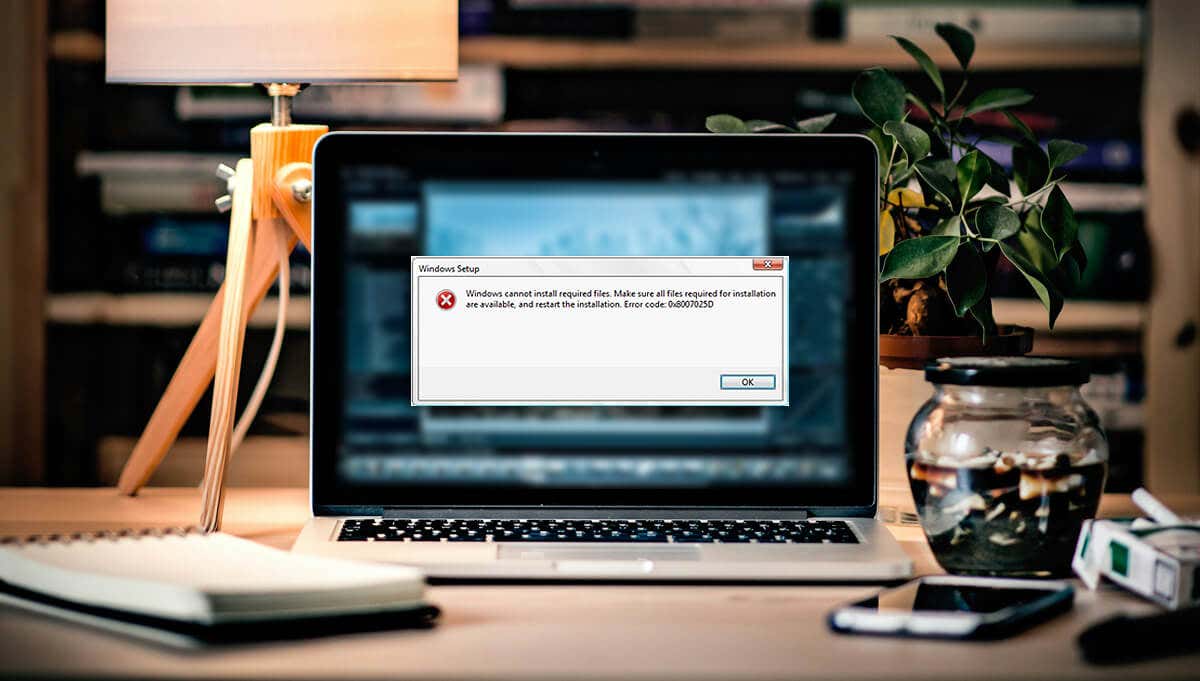
You know you’ve got this error if you receive the message: “Windows cannot install required files. Ensure all files required for installation are available, and restart the installation. Error code: 0x8007025D.”
The most common cause for this error code is trying to install the Windows operating system onto an SSD drive that’s too large. For some reason, Windows occasionally experiences a bug that prevents the OS from being installed on such drives.
However, the exact cause is unknown – some users also report corrupted hardware (like RAM sticks). Other reasons might include corrupt installation files, a bad USB drive, or a bad HDD or SSD sector.
Note: In this article, we’ll assume that you know how to create a bootable USB drive and how to use it to install Windows on your device. However, if this is all new to you, check out how to create a Windows 10 or Windows 11 bootable USB stick before continuing with this troubleshooting guide.
How to Fix the Windows Installation Error Code 0x8007025D
Here are five things to try when troubleshooting the 0x8007025D error code:
1. Check Your Hardware for Faults
First, ensure your HDD or SSD drives are functioning correctly, without faults. If your drive sectors are corrupted, you may have issues creating a fresh install of Windows 10 or Windows 11. You can easily check the health of the hard drive in both Windows 10 and 11.
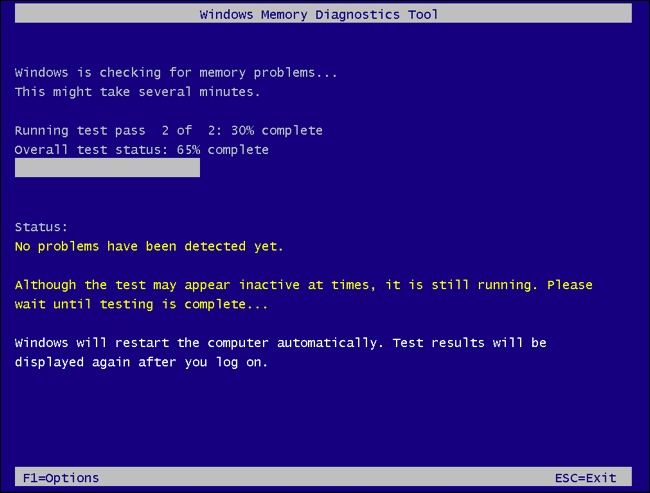
Secondly, test for bad memory (RAM). As mentioned, a failing RAM stick is often blamed for error 0x8007025D. If one of your RAM sticks is experiencing issues, disconnect it and then try to install your OS from the bootable USB again.
Some users have succeeded by removing a single stick and attempting the installation. If that doesn’t work, replace that stick, remove the other, and try again.
Note: It’s also important to disconnect all other external devices, including other USB drives, hard drives, and peripherals. These can interfere with the installation process, causing the 0x8007025D error to appear.
2. Reduce the Drive Partition Size
There’s a known Windows bug where the operating system fails to install on larger drives, especially over 120 GB. To resolve this, you could try reducing the partition size of your drive and then installing Windows to that partition. Here’s how:
- Create a backup of the data on your drive before continuing.
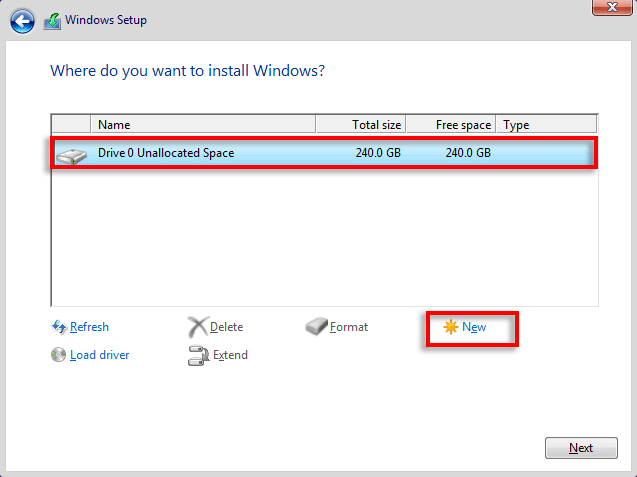
- Boot Windows from the USB drive and create a smaller partition on your hard drive or SSD. To do so, when the “Where do you want to install Windows?” screen appears, select your drive, then press New. Make sure this partition is 110 GB large.
- Install the OS onto this smaller partition.
Windows’ built-in troubleshooter scans your PC for possible errors and may help discover what is causing the problem with installing your fresh version of Windows. To use the troubleshooter:
- Press the Windows key + I to open Settings.
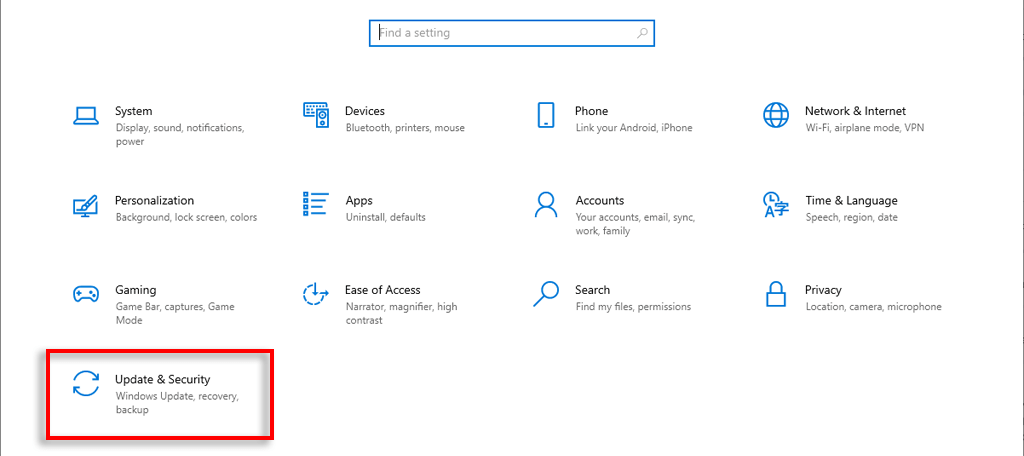
- Select Update & Security.
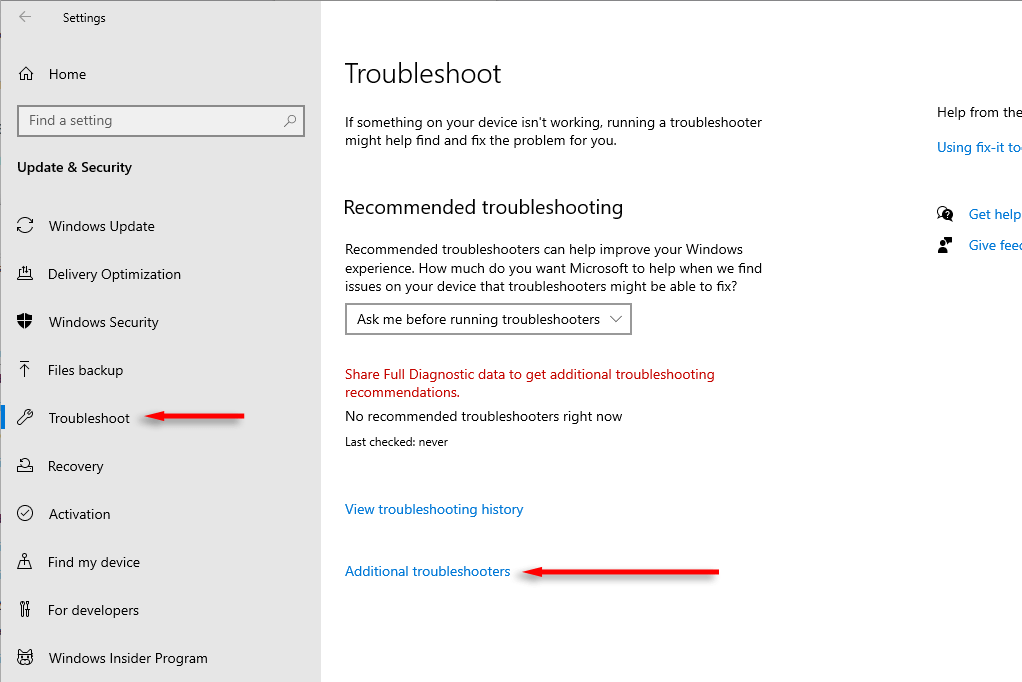
- Choose the Troubleshoot tab, then select Additional troubleshooters.
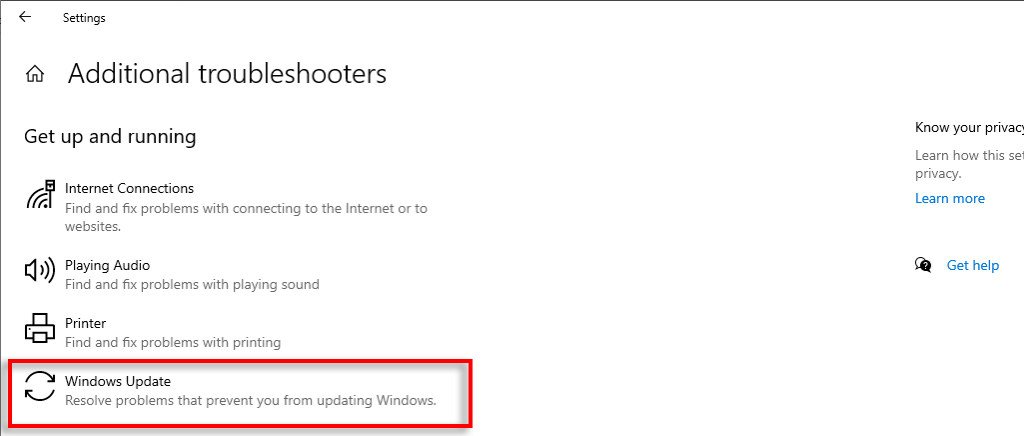
- Press Windows Update, then select Run the troubleshooter.
- Follow the on-screen instructions to let the troubleshooter determine what is causing the problem on your PC.
If the troubleshooter returns no issues, move on to the next step.
2. Try Another USB and Re-Download the ISO Image File
A bad USB or ISO image file are two of the most common causes of problems while reinstalling the Windows operating system. To check that these aren’t the cause of your error code, try using a different USB drive. Re-download the Windows installation file from the official Microsoft website, then transfer this to the new USB drive and try again.
Note: If you’re using a USB 2.0 flash drive, plug it into a USB 2.0 port – some users have reported that this resolves the error or at least gets you further through the process.
3. Update Your BIOS (If It Needs It)
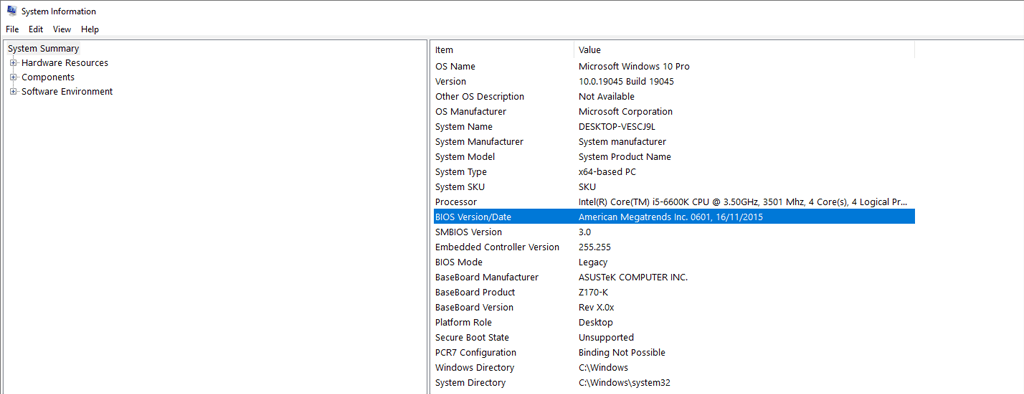
A few users have claimed that updating their motherboard’s BIOS completely resolved the 0x800702d error. However, this is only likely to help if your BIOS is severely out of date. To check whether there’s an available BIOS update for your PC:
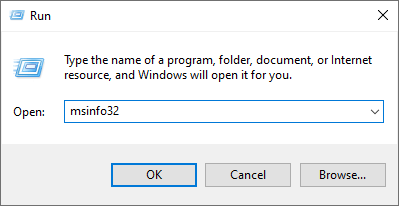
- Press Win + R to open the Run dialog box.
- Type msinfo32 and press Enter.
- Select System Summary.
- Check your BIOS Version/Date in the system information window, then compare this against the support page for your motherboard manufacturer. If a later BIOS version is available, download it from the manufacturer’s website and install it.
Fresh Install, No Worries
Experiencing error codes is never fun, especially when it prevents you from using your computer. Hopefully, this article has helped you resolve the 0x8007025D error code, and you were able to install a fresh version of Windows with no problems.
