If you’re experiencing errors when you run graphically intensive apps like those required for video editing or 3D modeling, you may not have enough VRAM. Luckily, there are some things you can do to increase your VRAM before you fork out the cash to upgrade your graphics card.
This tutorial will tell you everything you need to know about increasing VRAM on your Windows PC.
What Is VRAM?
Video Random Access Memory (VRAM) is what your PC uses to store image data. This, along with your GPU processor, renders the pixels on your display monitor.
This is one reason why integrated graphics cards aren’t very powerful — they don’t have their own dedicated VRAM. Instead, they have to share the system RAM to work. Dedicated GPUs, on the other hand, do have their own VRAM.
Many errors can occur if you don’t have enough VRAM for the programs you are running. The most straightforward approach to this is to purchase a new, high-end, dedicated graphics card with a greater amount of VRAM than your current one. This is not always an option for users with integrated graphics, and it can be very expensive.
Fortunately, you can increase your VRAM via Windows settings. However, it’s important to note that increasing your VRAM may not fix your problems. Likewise, you need to be careful with how much you allocate.
Are There Risks to Increasing Dedicated Video RAM?
When you increase your VRAM, you reallocate system RAM to VRAM. If your system RAM is too low, you will encounter random freezing and crashing issues. This means that when increasing VRAM through your system, you need to ensure enough system memory for your PC to remain functional.
How to Increase Dedicated VRAM in Windows 10 and 11
There are a few ways to increase the dedicated VRAM on your PC. However, before proceeding, you should check the amount of VRAM and total available graphics memory you already have on the system. Whether you’re trying to increase VRAM on Windows 10 or Windows 11, the process is the same.
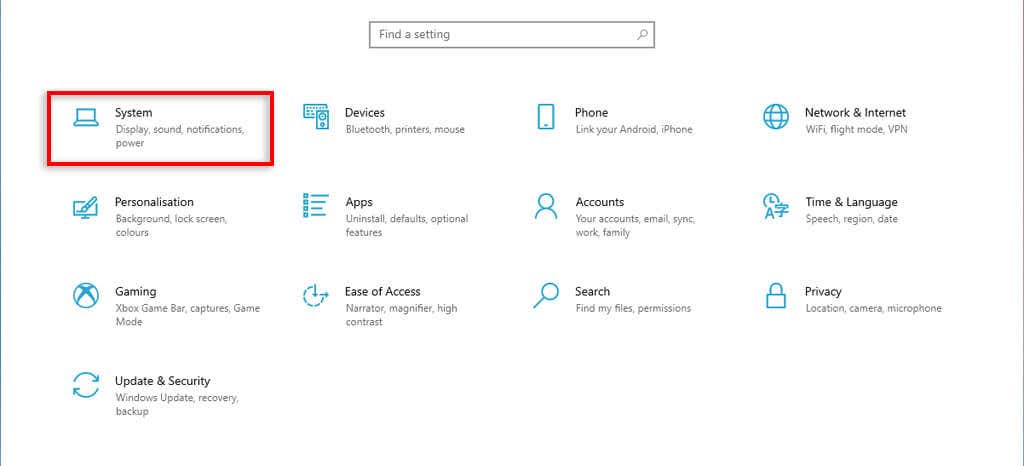
- Open the Start Menu and navigate to Settings.
- Go to System.
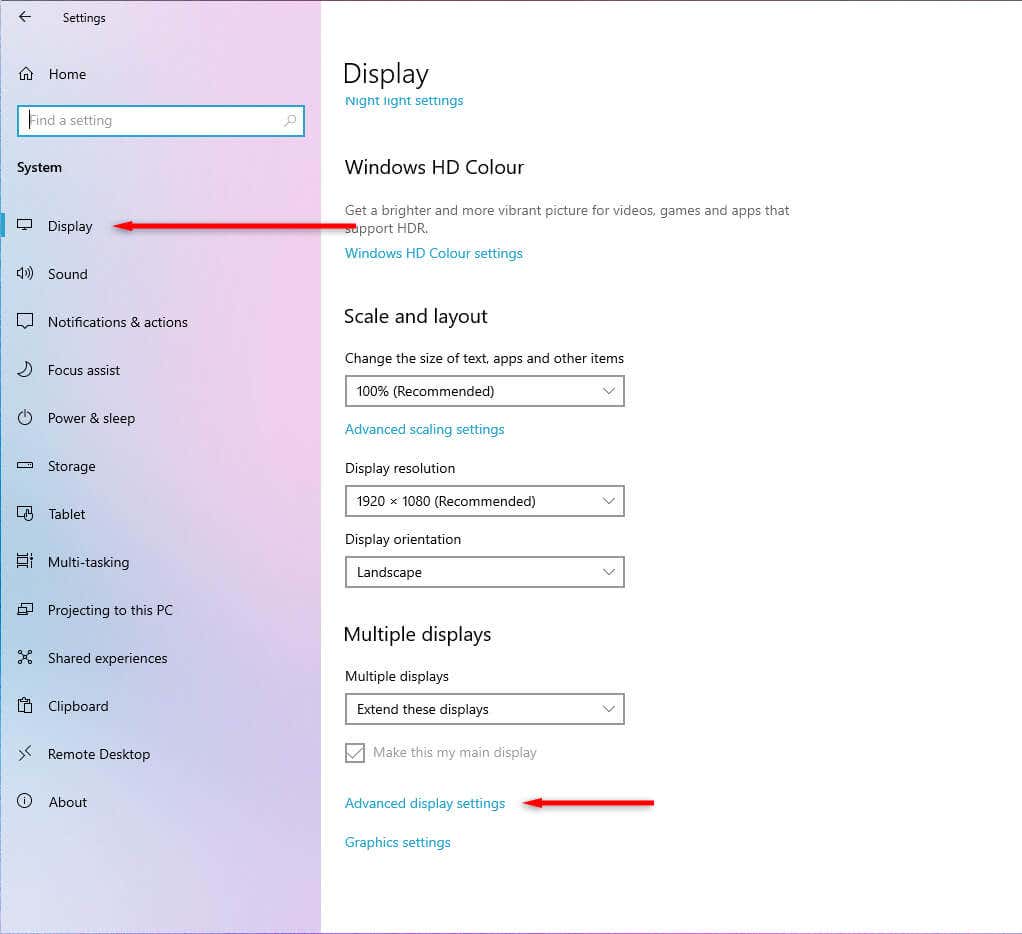
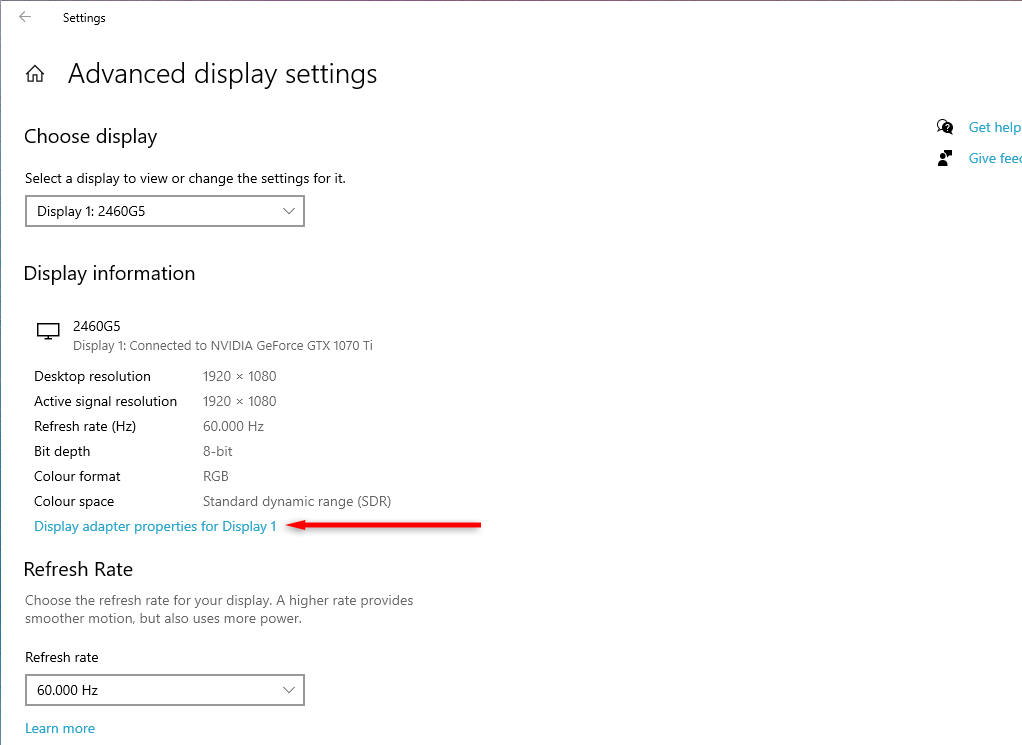
- In Display, scroll to the bottom of the page and select Advanced Display Settings.
- Select Display Adapter Properties For Display 1.
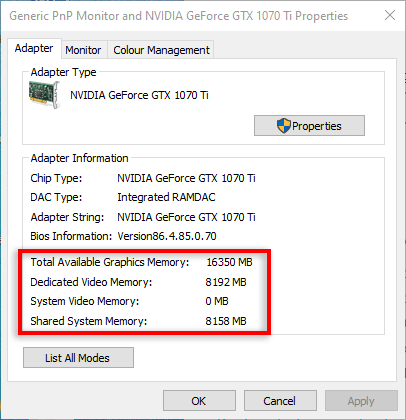
- In the pop-up window, look at how much VRAM (Dedicated Video Memory) and Shared System Memory you have.
If you don’t have a lot of shared system memory available, it is unwise to alter the memory allocation to increase your VRAM.
How to Increase Your VRAM From the Motherboard BIOS Settings
The BIOS is the firmware that initializes your hardware and provides runtime services to your Windows operating system. Here, you’ll find the basic settings that let you change VRAM.
- To access the BIOS, you need to restart your computer.
- As it’s restarting, wait for the Windows logo to appear. Then, press the F2, F5, F8, or Del key repeatedly until you enter the BIOS settings.
Note: If this doesn’t work for you, your motherboard may use different keys to open the BIOS settings. Go to the manufacturer’s website or search online for your BIOS keys.
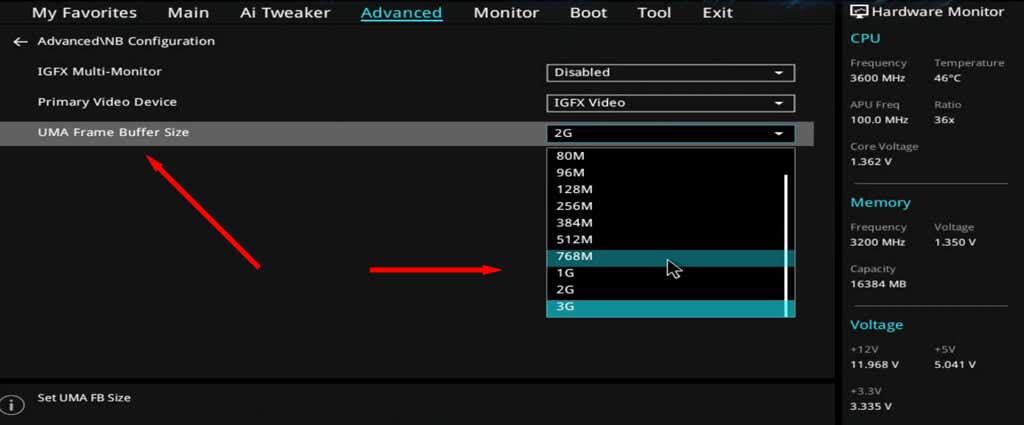
- In the BIOS menu, locate an option named along the lines of Graphics Settings, Video Settings, DVMT pre-allocation, Advanced Chipset Features, UMA Frame Buffer Size, or VGA Share Memory Size. The specific name will alter depending on your motherboard manufacturer.
- In the drop-down menu, increase the amount of pre-allocated VRAM allocated, then save and exit. Make sure you restart your computer to allow the changes to take effect.
How to Increase Your VRAM Via the Registry Editor
You can also increase your VRAM using the Windows Registry Editor. Here’s how:
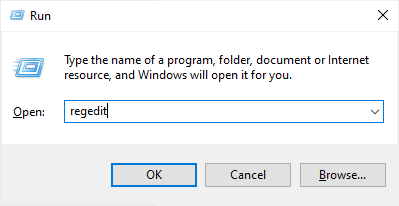
- On the keyboard, press the Windows key + R to open the Run dialog box.
- Type regedit and select OK.
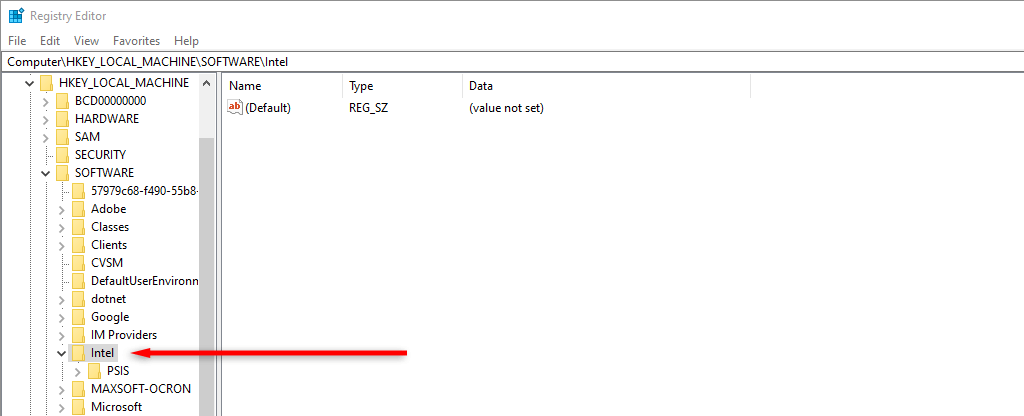
- In the menu on the left-hand side, navigate to the following path: HKEY_LOCAL_MACHINE\SOFTWARE\Intel.
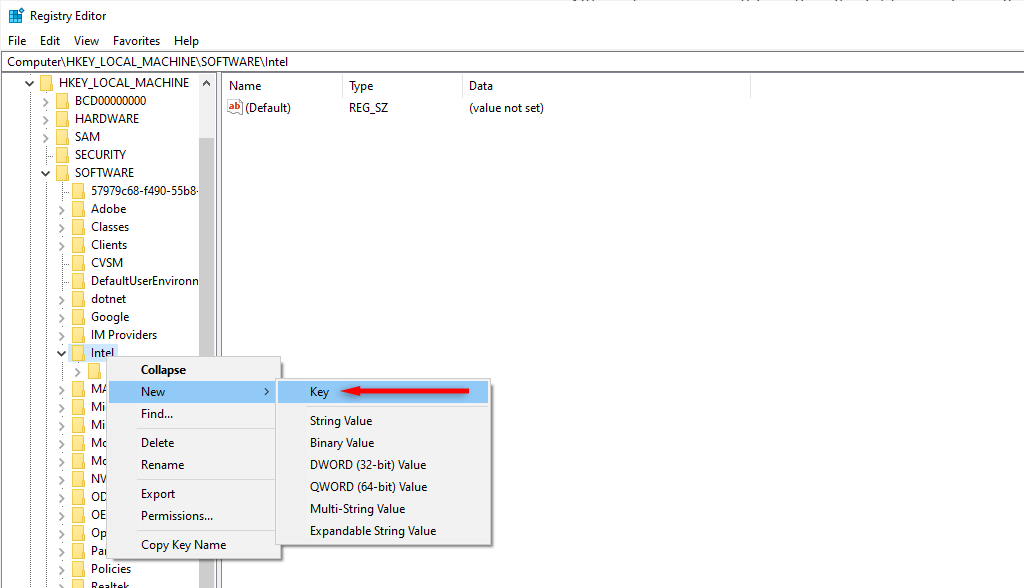
- Right-click the Intel folder, then choose New Key.
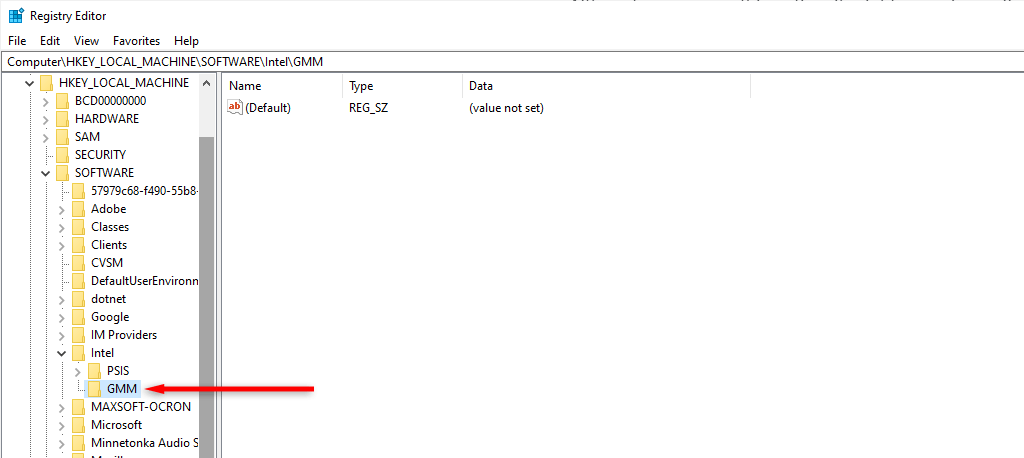
- Name the new folder “GMM.”
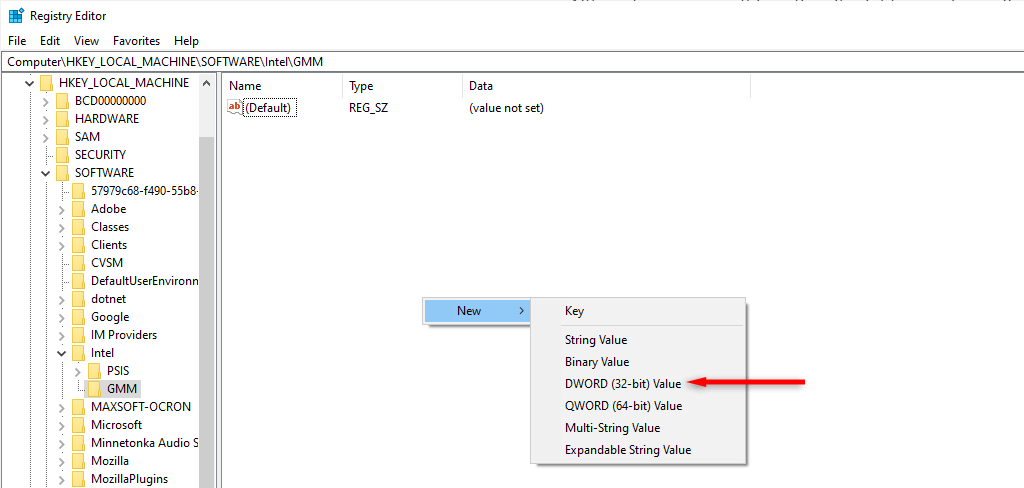
- Make sure that you are in the new GMM folder. Then, right-click the free space in the right pane. Select New > Dword (32-bit) Value.
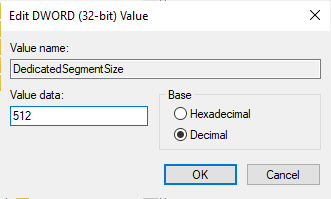
- Name it “DedicatedSegmentSize.”
- Double-click DedicatedSegmentSize. Under Base, select Decimal and type “512” in the Value data box. Click OK.
- Restart your computer to allow the changes to take effect.
If you would like to undo this setting at any point, simply go back to the registry editor and delete the GMM folder under Intel.
Upgrade Your Graphics Card
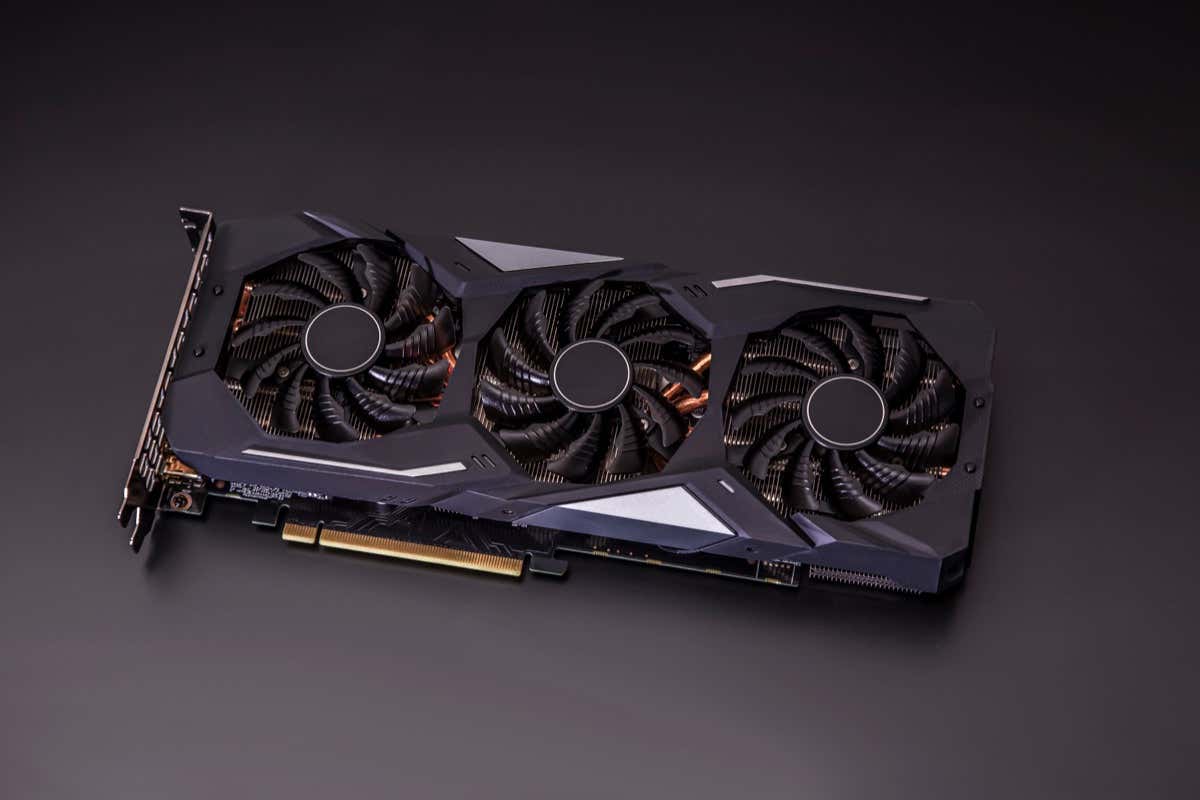
If your Windows PC is still not running efficiently, you will need to upgrade your graphics card. If you want a computer that can handle advanced graphics, it’s best to look at computers with good graphics processing units.
Video cards from gaming PC brands such as NVIDIA and AMD Radeon are built to handle more intense graphics than the integrated Intel HD graphics that tend to come with a standard PC.
Increasing VRAM in Windows
Now you know how to increase VRAM in Windows 11. If the software methods aren’t working for you, a PC with more graphics capabilities will enhance your experience more than you realize.
