Microsoft Windows function keys (the F1 to F12 keys in the top row of your keyboard) can perform multiple tasks, depending on how you use those keys. You can lock or unlock these keys to make them do various tasks. We’ll show you how to do just that in Windows 10 and 11.
By default, your keyboard’s function keys perform the tasks printed on them. For example, the F2 on most keyboards decreases the volume level from your speakers. You can make these keys perform the tasks assigned to F1, F2, and so on, by locking and unlocking them.
Why Lock or Unlock Your Windows Function Keys?
Whether to keep your Fn keys locked or unlocked depends on what features you prefer to use. If you use the keys’ printed functions more than the actual F1 to F12 features, keeping the keys unlocked is a good idea. If you tend to use the F1 to F12 features more often, lock your function keys so you can use those features with a single keystroke.
You can alternate between function key usage by pressing and holding down the Fn key on your keyboard and then pressing a function key.
Use the Fn Key to Lock or Unlock Function Buttons
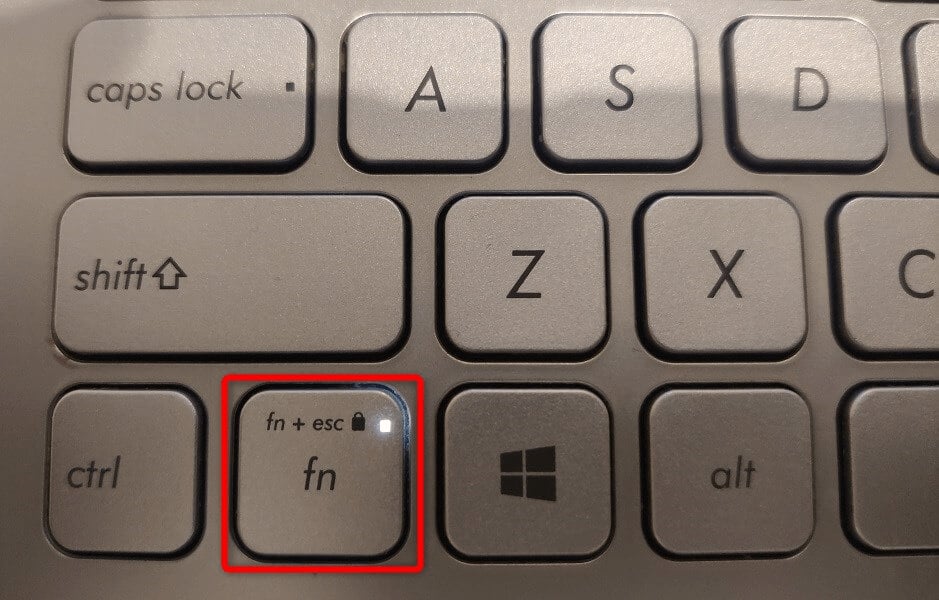
One way to lock or unlock your function keys is to use your keyboard’s Fn button. Most keyboards have this button, and it allows you to change your function keys’ default behavior.
For example, you can lock your function keys, so the standard F1 to F12 features work by pressing the Fn + Esc buttons at the same time. Your Fn key’s light will turn on, indicating your Fn lock is applied. You can fix the Esc key if it’s not working.
If you’d like to use the function keys’ printed features, unlock your keys by pressing Fn + Esc at the same time. The padlock light will turn off, indicating the keys are unlocked.
Lock or Unlock the Function Keys With Windows Mobility Center
Windows Mobility Center is a built-in Windows utility you can use to perform basic tasks on your PC. This tool can change your screen’s brightness, mute or unmute your sounds, and even lock or unlock your function keys.
You can use this tool to make your function keys perform the standard F1 to F12 tasks or the tasks printed on the keys. Note that not all the PCs offer the function key option in Windows Mobility Center. If this is the case with you, use an alternate method to change these keys’ behavior on your computer.
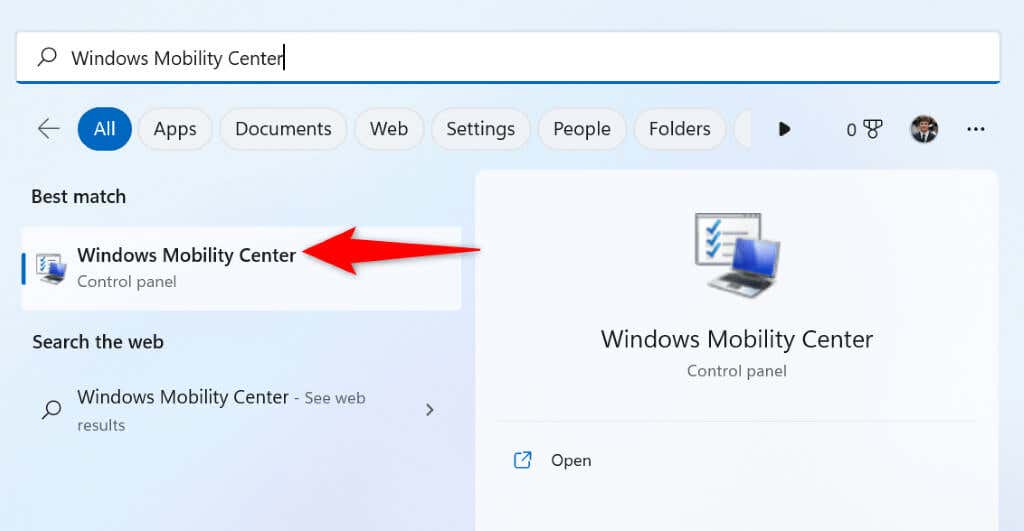
- Launch the Start menu, search for Windows Mobility Center, and select the tool in the search results.
- Find the Function Key Row section in the tool.
- Choose the drop-down menu in the section and select Function key to make the keys perform the standard functions or Multimedia key to make the buttons perform the features printed on them.
- Close Windows Mobility Center when you’ve changed the settings.
Use Windows BIOS/UEFI to Change the Function Keys’ Behavior on Your Laptops or Desktops
You can use Windows’ BIOS/UEFI interface to decide what your function keys do. You might want to use this method if your keyboard doesn’t have an Fn key and you can’t access the function key feature in Windows Mobility Center.
This BIOS/UEFI method lets you quickly and easily change whether your keys perform the printed tasks or the standard operations.
Step 1: Access BIOS/UEFI in Windows
The first step is to access the BIOS/UEFI screen on your Windows system. Follow the steps for your Windows version below to get to that screen on your PC.
On Windows 11
- Open Settings by pressing Windows + I.
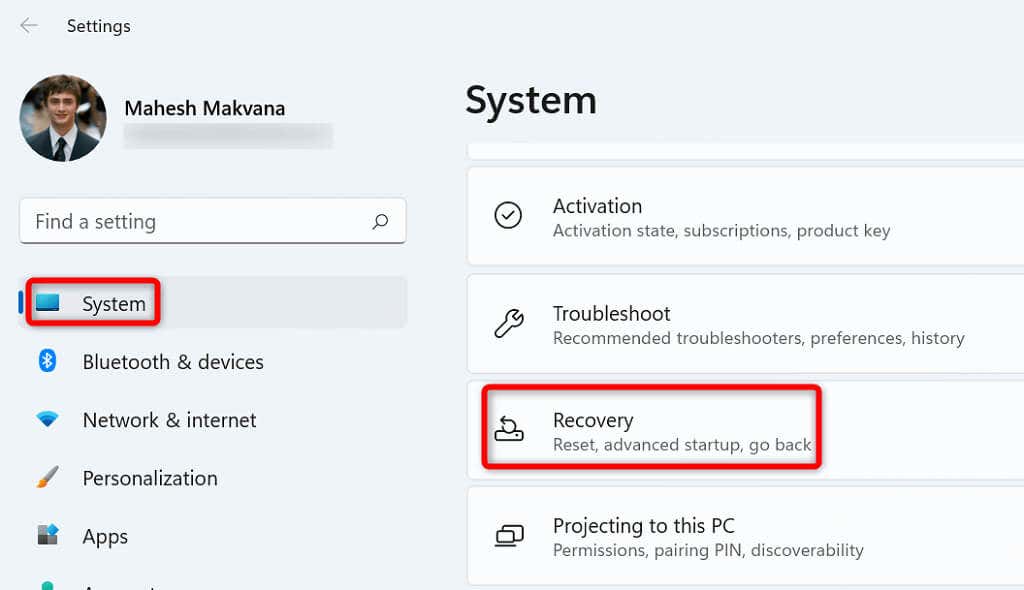
- Select System in the sidebar on the left.
- Choose Recovery in the pane on the right.
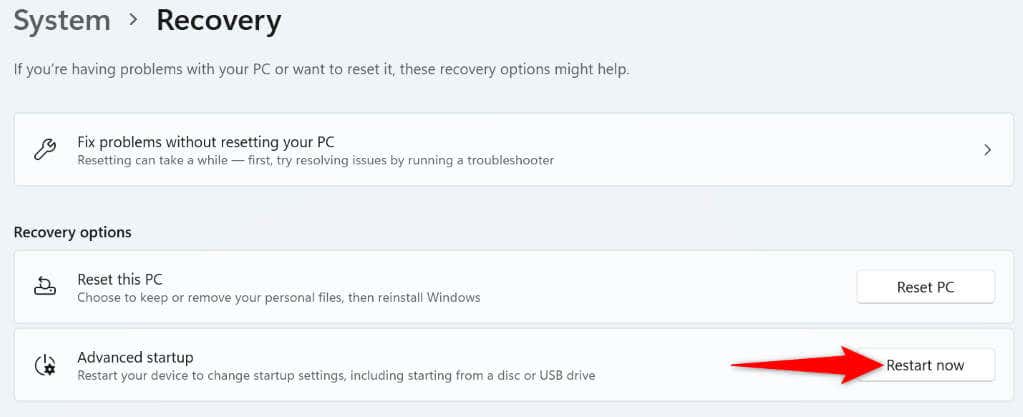
- Select Restart now next to Advanced startup.
- Choose Restart now in the prompt to reboot your PC.
On Windows 10
- Launch Settings by pressing Windows + I.
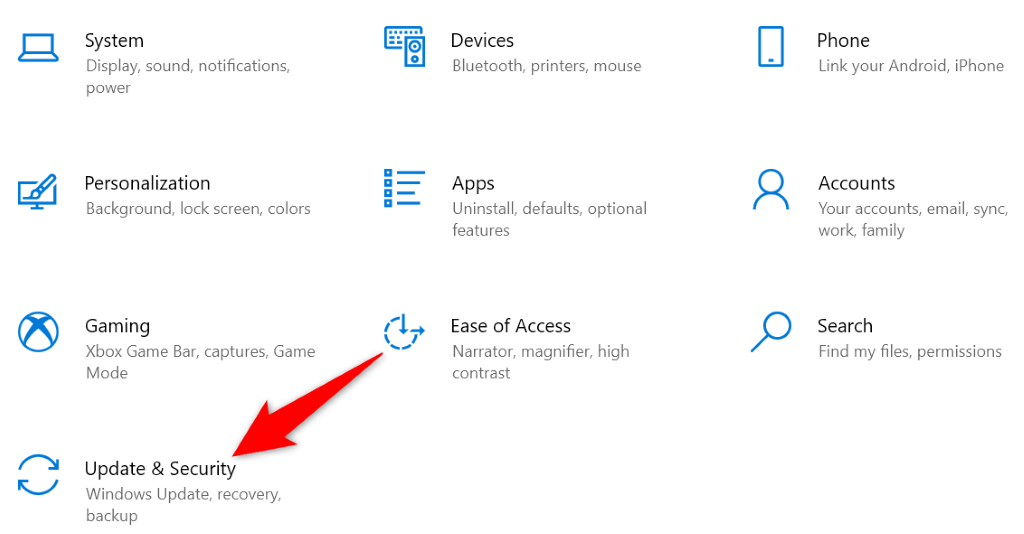
- Select Update & Security in Settings.
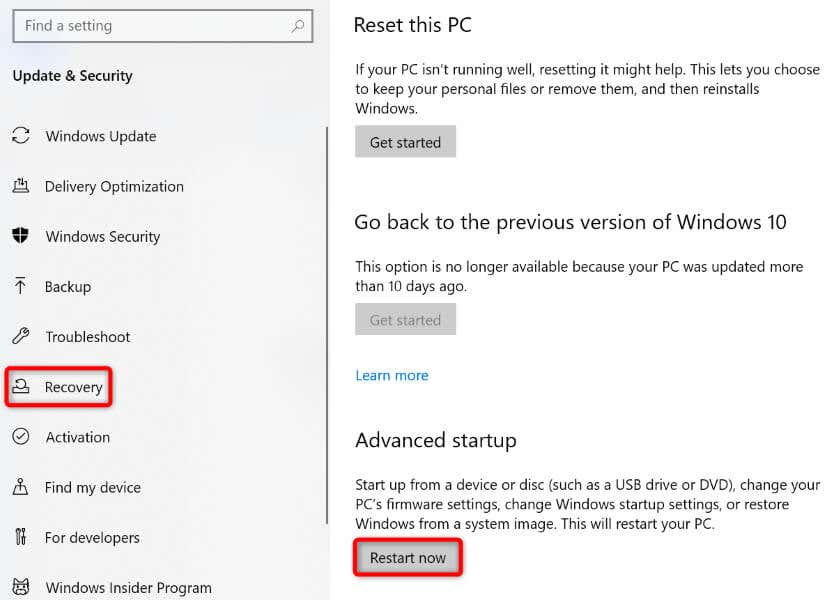
- Choose Recovery in the sidebar on the left.
- Select Restart now under Advanced startup on the right.
Step 2: Change Function Keys Behavior
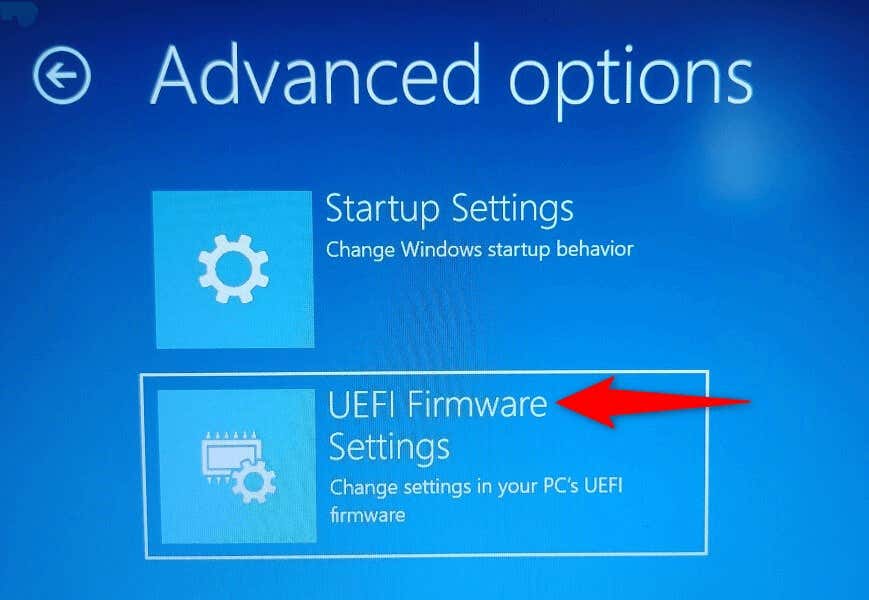
- Navigate to Troubleshoot > Advanced options > UEFI Firmware Settings and choose Restart.
- Access the Main tab and highlight the Function key behavior option using arrow keys.
- Select Function Key if you want your Fn keys to operate as the standard function keys, or choose Media Key if you wish your function keys to perform the tasks printed on them.
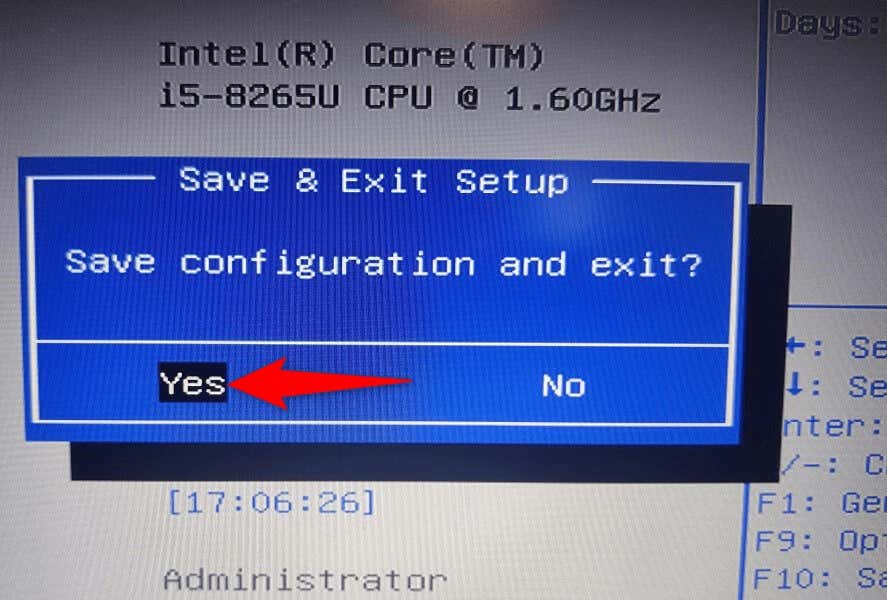
- Save your BIOS settings by pressing the F10 key on your keyboard.
- Select Yes in the prompt to confirm your choice.
- Your PC will restart.
Your function keys will now work as you specified in your BIOS/UEFI.
Make Function Keys Perform Standard or Multimedia Functions on Your PC
Windows gives you the flexibility to choose what you’d like your keyboard’s function keys to do. You can make them perform the standard operations, like opening an app’s help window with F1, or make them run multimedia tasks, like reducing or increasing your volume levels.
You can lock or unlock your Fn keys using the methods outlined above, and then use your keys’ default functions on your Dell laptops, Lenovo machines, or any other Windows-based computers. Enjoy!

