HYPERVISOR_ERROR is a blue screen of death (BSOD) error that causes your Windows PC to crash. If you’ve run into this error and your machine often displays a blue screen, we have a few solutions you can use. These methods will help fix the problem on your Windows 11 computer.
If you’re curious why the error occurs, a few reasons are that the Hyper-V feature isn’t running, the Hyper-V service is malfunctioning, your PC has outdated device drivers, the BIOS requires an update, and more.
1. Enable (or Re-Enable) Hyper-V on Your PC
When you encounter a Hyper-V error, ensure you’ve enabled the feature on your PC. If the feature is turned on, disable and re-enable the feature to fix minor issues.
- Open the Start menu, find Turn Windows features on or off, and select that item.
- Enable Hyper-V or Windows Hypervisor Platform on the open window.
- Turn on Virtual Machine Platform as well.
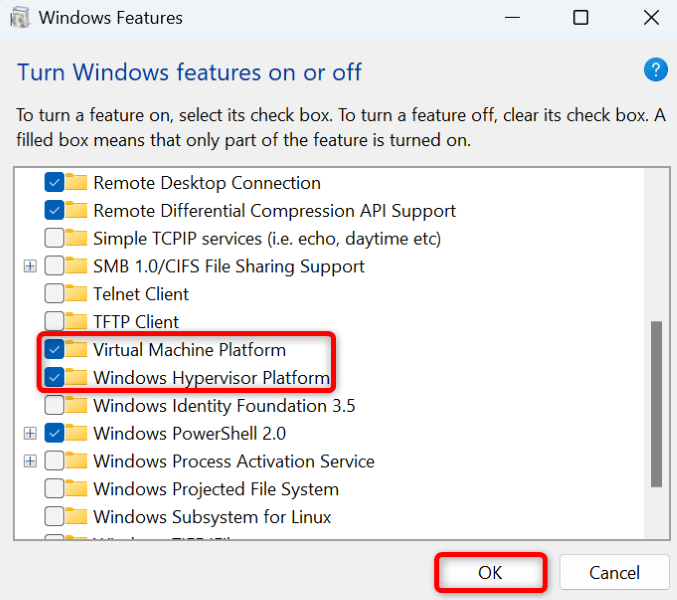
- Select OK at the bottom.
- Let Windows activate the selected features on your PC.
- Select Restart now to turn your PC off and back on and bring the changes into effect.
2. Use the Windows Memory Diagnostic Tool
Another reason you have a Hyper-V error is that your PC’s Random Access Memory (RAM) has issues. In this case, use a built-in Windows utility to find and fix memory issues.
- Open the Start menu, find Windows Memory Diagnostic, and launch the tool.
- Select Restart now and check for problems (recommended) in the tool.
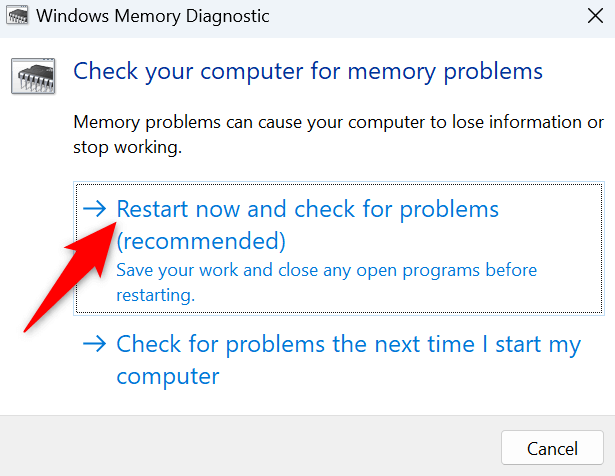
- Wait for your PC to reboot. The tool will then start checking and fixing RAM issues.
3. Restart Hyper-V Services
If the Hyper-V related services are malfunctioning or haven’t started, that might be why you’ve received the above error. Give those services a restart on your PC to fix the minor glitches with them.
- Open the Run dialog box by pressing Windows + R.
- Type the following command in the open box and press Enter:
services.msc - Find the services related to Hyper-V, right-click each service, and select Restart.
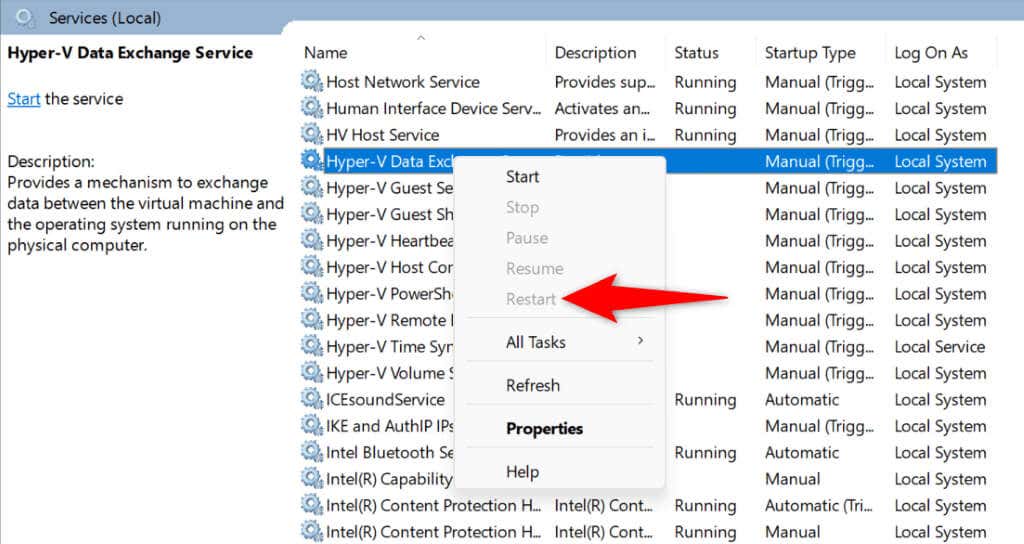
- Wait for the services to restart.
- Close the Services window.
4. Check Your Drive for File System Errors
If your drive has file system errors, that can cause your PC to crash with a Hyper-V error. In this case, use a built-in utility on your computer to find and fix file system-related issues.
You can use the built-in tool from a graphical interface and the command line.
Graphical Option
- Open File Explorer by pressing Windows + E.
- Right-click the Windows installation drive and select Properties.
- Access the Tools tab and select Check in the Error checking section.
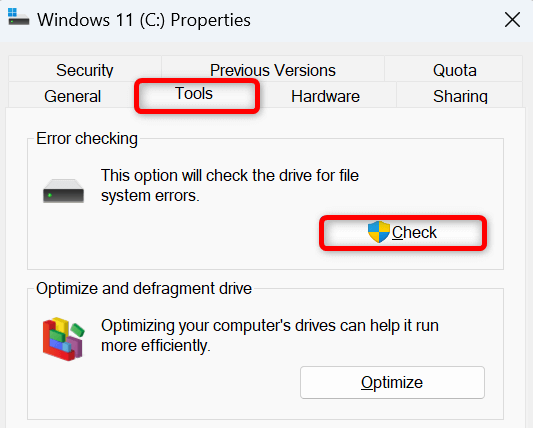
- Select Scan drive to scan the drive for issues.
Command Line Option
- Open the Start menu, search for Command Prompt, and select Run as administrator.
- Choose Yes in the User Account Control prompt.
- Type the following command on the CMD window and press Enter:
chkdsk /F
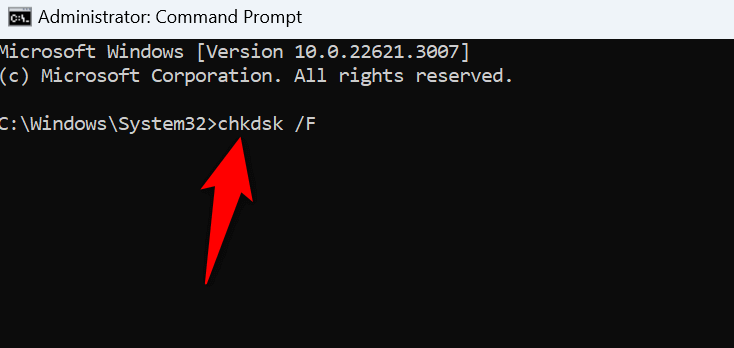
- Wait for the utility to find and fix file system errors.
5. Update Device Drivers
If your PC has outdated device drivers, those items can cause various conflicts on your system. One way to deal with this problem is to bring your obsolete drivers up to date. You can use Windows Update to update your drivers.
- Open Settings by pressing Windows + I.
- Select Windows Update in the left sidebar.
- Choose Advanced options on the right pane.
- Select Optional updates.
- Enable the boxes for all the available updates and choose Download & install.
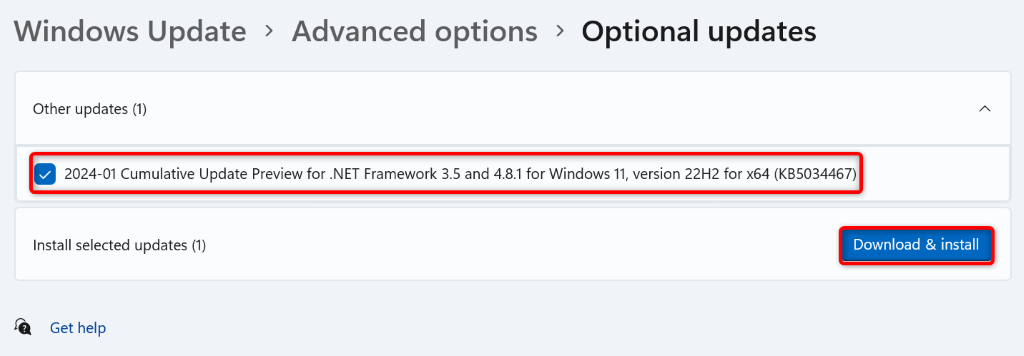
- Restart your PC after installing the latest updates.
6. Update Windows 11
If you’re running an old Windows 11 version, your system might have bugs, leading to a Hyper-V error. In this case, install the available system updates to fix your issue.
- Right-click the Start menu icon and select Settings.
- Choose Windows Update in the left sidebar.
- Select Check for updates on the right pane.
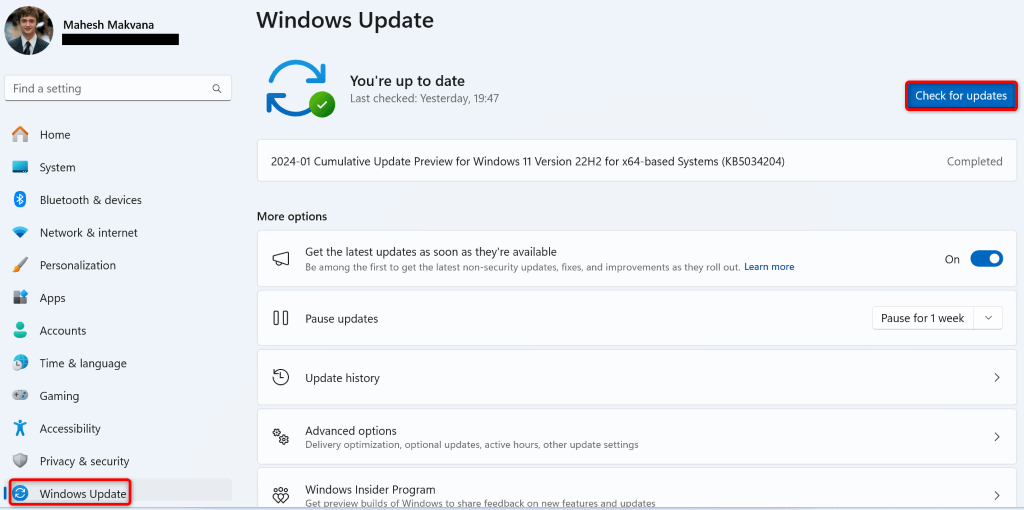
- Download and install the available updates.
- Reboot your PC.
7. Fix Corrupted Windows 11 System Files
If Windows 11’s system files are damaged, that can cause many problems on your PC. This is because your system relies on the operating system’s core files to function. The system doesn’t work as expected if the core files are missing or corrupted.
Luckily, you can fix Windows’ faulty system files by using a built-in tool called System File Checker (SFC).
- Open Run by pressing Windows + R.
- Type the following command in Run and press Ctrl + Shift + Enter.
CMD - Select Yes in the User Account Control prompt.
- Type the following command and press Enter to download the files required to repair the damaged system files:
DISM.exe /Online /Cleanup-image /Restorehealth
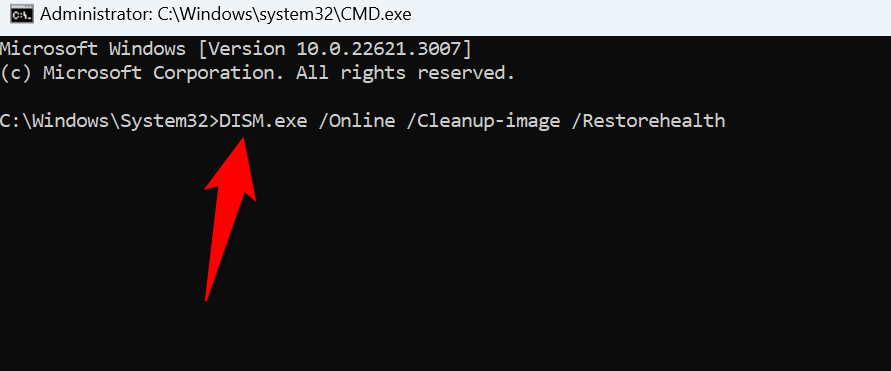
- Next, run the following command to begin fixing the bad system files:
sfc /scannow - Restart your PC after fixing the corrupted core files.
8. Clean Boot Windows
Sometimes, Windows runs into a HYPERVISOR_ERROR error not because the system has a problem but a third-party app is interfering. In this case, clean boot Windows so your system only loads the essential files, allowing you to verify if third-party apps are the problem.
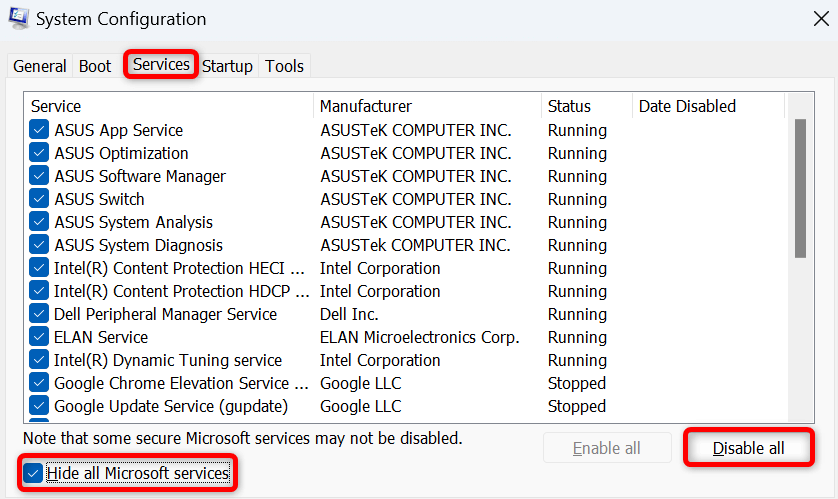
- Open Start, find System Configuration, and select that item.
- Open the Services tab, enable Hide all Microsoft services, and choose Disable all.
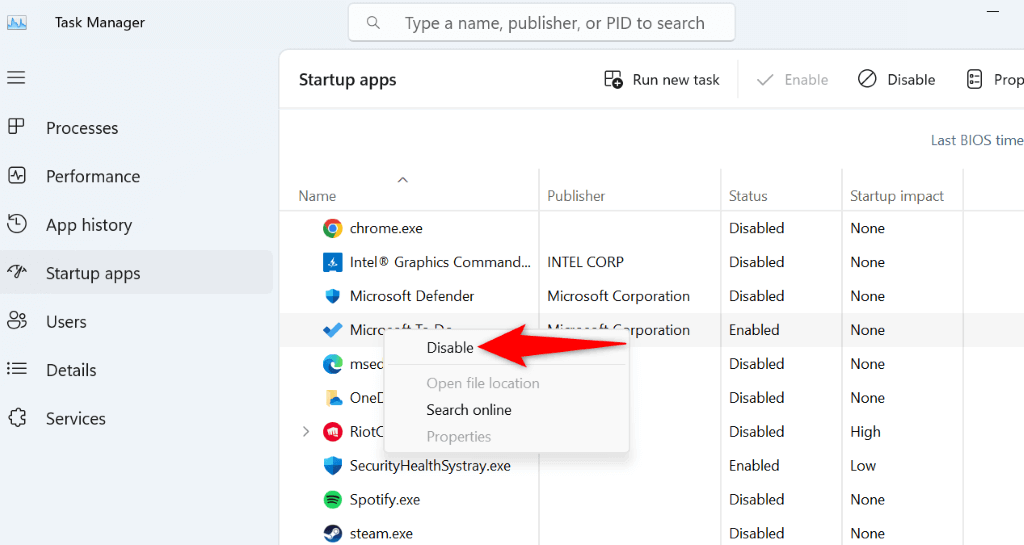
- Access the Startup tab and select Open Task Manager.
- Right-click each app whose Status column says Enabled and choose Disable. This will prevent the startup apps from automatically running.
- Quit Task Manager and select Apply followed by OK on the System Configuration window.
- Restart your PC.
If you don’t encounter the error in clean boot mode, a third-party app is likely the culprit. Review your installed app list and delete the apps you find suspicious. You can do that from Settings > Apps > Installed apps.
9. Update BIOS
The last solution is to install the available updates for your computer’s BIOS. It’s very rare that an outdated BIOS system causes a Hyper-V error, but it’s worth updating the BIOS if an update is available.
We have a guide that discusses if you should update your BIOS. Check it out to learn more about BIOS and how you can update it.
Get Around a BSOD Error on Your Windows 11 PC
Windows 11’s HYPERVISOR_ERROR is daunting as it causes your machine to crash and display a blue screen. However, you shouldn’t panic, as there are multiple ways to deal with this problem. Follow the methods outlined in the guide above, and your issue should be resolved. Your PC will then stop crashing, letting you resume your tasks.
Related Posts
- Sluggish Windows 11 PC? Try These 5 Windows 11 Tricks to Free up Virtual Memory
- How To Turn Off Notifications On Windows 11?
- How to Fix Windows 11 Boot Loops After Jan 2026 Update
- How to Remove Copilot AI in Window 11? New Update Available in Beta
- January 2026 Patch Tuesday: 7 Things Windows Users Should Do Before and After Updating
Mahesh has been obsessed with technology since he got his first gadget a decade or so ago. Over the last few years, he’s written a number of tech articles on various online publications including but not limited to MakeTechEasier and Android AppStorm. Read Mahesh’s Full Bio

