When your PC suddenly slows down because of a random process, it can be easy to assume it’s malware – but occasionally, it’s because of a legitimate Windows program. LSALSO.exe is one such Windows process that often malfunctions, causing extremely high CPU usage.
In this article, we’ll explain what the LSALSO.exe process is, why it causes high CPU usage, and how to fix it.
What is LSALSO.exe?
LSALSO.exe (or LSA Isolated) is a legitimate Windows executable file that’s associated with Microsoft’s Credential Guard & KeyGuard process. It’s an essential process known as a “trustlet”. This is a secure process that helps the Windows operating system complete system calls.
LSALSO.exe exists in a secure environment called Virtual Secure Mode (VSM) as an Isolated User Mode (IUM) process. VSMs are a security feature introduced in Windows 10 that ensures that processes within different Virtual Trust Levels (VTLs) can’t access memory in other VTLs. Essentially, this prevents inappropriate access (protecting against malware and other security issues).
The Local Security Authority (LSASS) manages system policy, user authentication, and handles sensitive data like password hashes and Kerberos keys. The LSALSO.exe process ensures that the system can communicate between different VTLs. In short, LSALSO.exe runs in VTL1 and shares encrypted communication with LSASS.exe in VTL0, preventing malicious code from running in VTL0.
Why Does LSALSO.exe Have High CPU Usage?
While LSALSO.exe is a secure and trusted Microsoft Windows process, it’s often associated with high CPU usage. This is usually caused when drivers or other applications try to load a Dynamic Link Library (DLL) file into LSALSO.exe. Occasionally during this process, the system destabilizes, causing increased system usage.
However, there are other potential causes of high CPU usage in LSALSO.exe, including,
- Malware. Hackers often design malware to masquerade as system executable files. If your system has been infected with malware that’s disguised as LSALSO.exe, all you’ll see is increased CPU usage linked to that executable.
- Corrupted system files. File corruption and other common glitches can cause processes like LSALSO.exe to malfunction.
- Outdated drivers. Increased CPU usage in LSALSO.exe is often caused by drivers that are trying to load their programs. Updating old drivers can resolve this issue.
- An overloaded system. Trying to run too many processes at once can lead to high CPU usage.
How to Fix LSALSO.exe High CPU Usage
Here are 5 ways to fix the LSALSO.exe process when it’s causing high CPU usage:
1. Verify the LSALSO.exe Process
The first step is to make sure whether the LSALSO.exe process is legitimate or not. To do so:
- Press Ctrl + Shift + Esc to open the Task Manager.
- Right-click LSALSO.exe and select Properties.
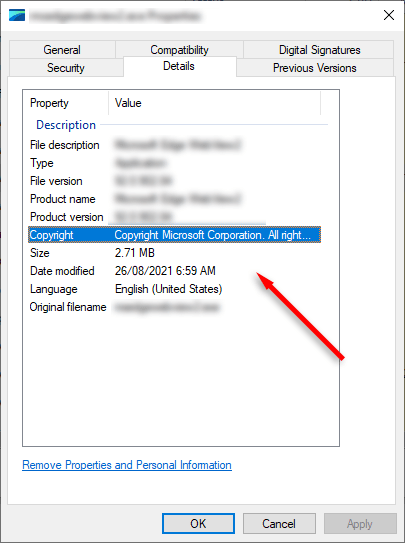
- Select the Details tab and ensure that next to “Copyright”, it says Microsoft Corporation. All Rights Reserved. If it says something else here, it’s likely malware masquerading as the real process.
Either way, it’s a good idea to scan your PC for potential malware and viruses. Open your antivirus software and scan your PC. If you don’t have a third-party antivirus installed, you can use Windows Defender as follows:
- Press the Windows key + I to open Settings.
- Select Update & Security.
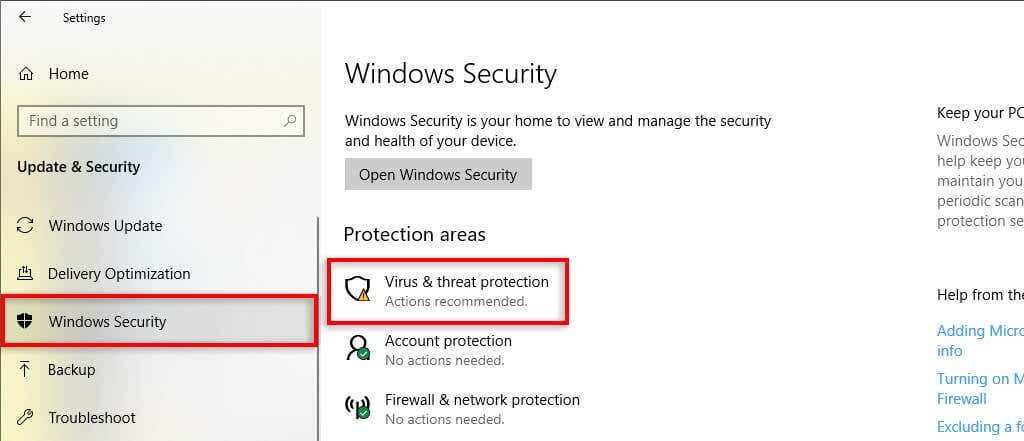
- Select Windows Security.
- Choose Virus & threat protection.
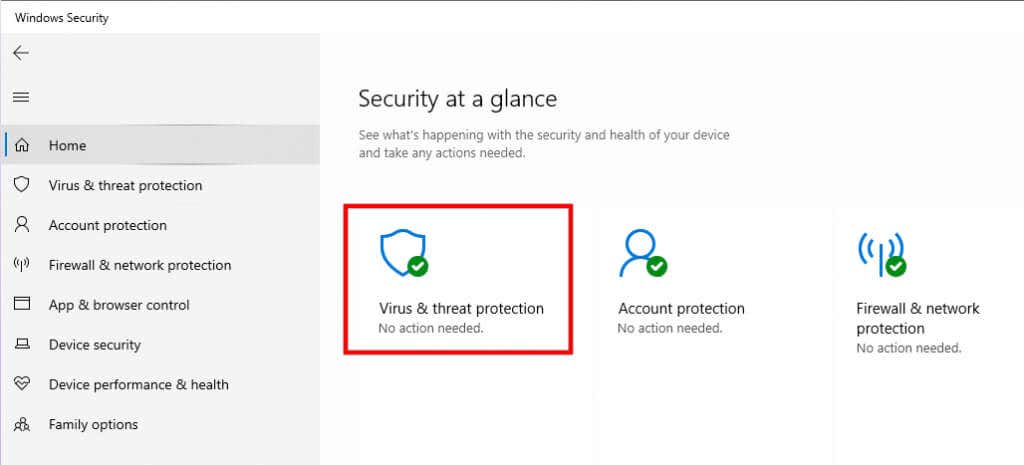
- Select Virus & threat protection.
- Choose Quick scan.
2. Use the Process of Elimination to Find the Cause
Unfortunately, it isn’t possible to use the Windows Debugging Tools to check for the causes of LSAISO.exe CPU spiking. This means that you’ll have to use the process of elimination to remove applications and drivers that could be at fault.
The first step is to disable as many applications as possible until the LSALSO.exe file stops spiking. To do so:
- Press Ctrl + Shift + Esc to open the Task Manager.
- Select the Processes tab, then scroll through the list.
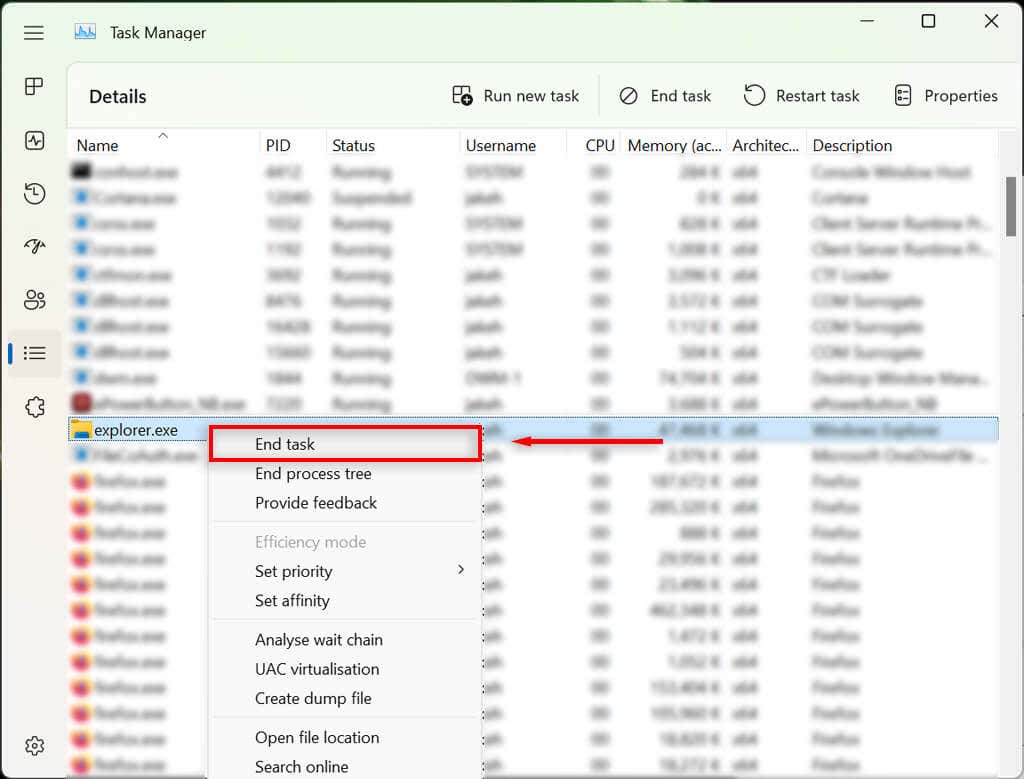
- Right-click each task and select End Task. Focus on non-Windows processes to avoid causing additional issues.
If ending a certain task stops the LSALSO.exe from spiking, you know what you’re dealing with. It may be a one-off, in which case you won’t need to do anything. However, if it happens again (with the same process), you should update or uninstall that application to prevent future incidents.
3. Update Your Drivers
If the LSALSO.exe task is still showing high CPU usage, it’s time to disable or manually update your drivers.
To do so:
- Press Ctrl + R to open the Run dialog box.
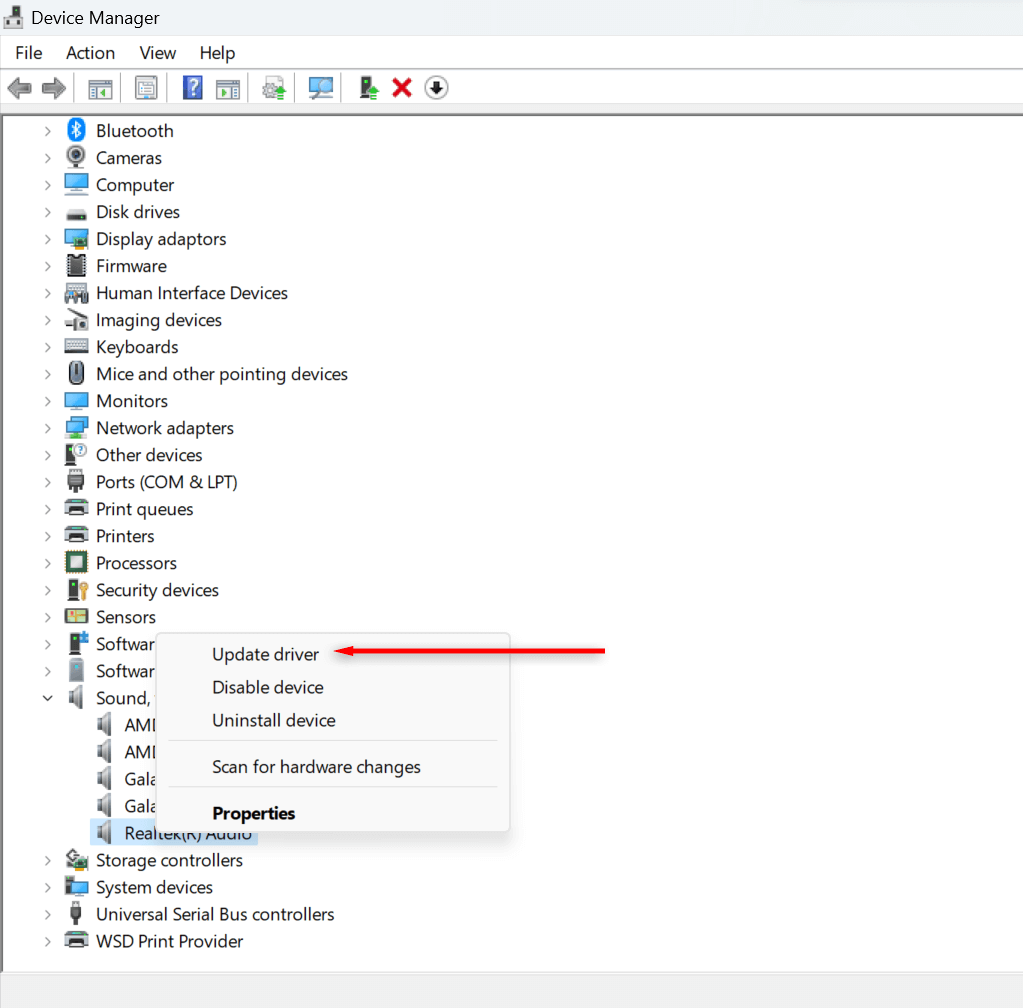
- Type “devmgmt.msc” and press Enter. This will open the Device Manager.
- Scroll through and expand each category. Then, right-click on each application and select Disable driver, then check whether LSALSO.exe still has high CPU usage.
- If you find the application at fault, right-click it and select Update driver. Select Automatically find drivers, and let the wizard complete the installation.
4. Check for Queued APCs
While you can’t use Windows’ debugging tools to find faulty applications, you can use them to determine whether a driver is at fault.
First, download and install the Windows Debugger (WinDbg). If your version of Windows is prior to the Windows 10 Anniversary Update, you’ll need to install Visual Studio and download the right version of the Windows Driver Kit (WDK).
Next, you need to create a kernel memory dump during the CPU spike. This will help you determine which driver is at fault.
To do so:
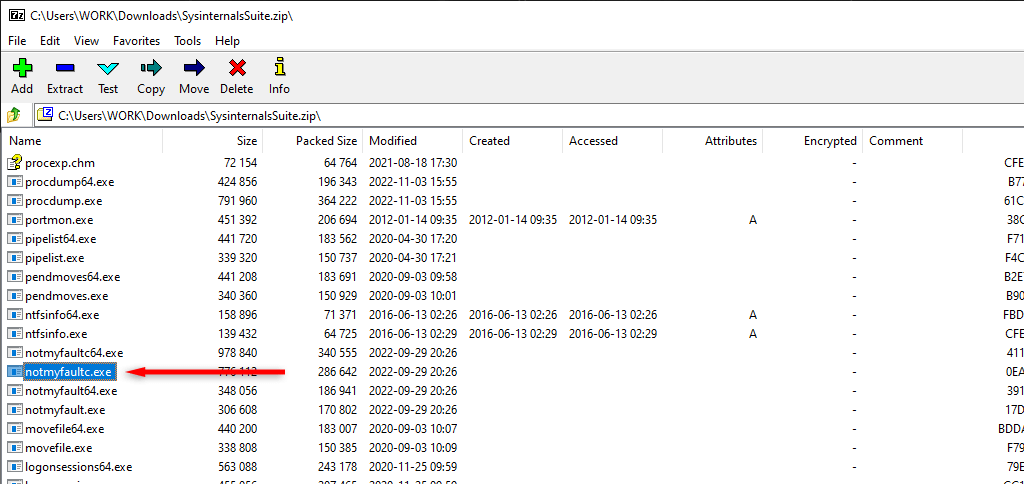
- Download the Sysinternals Suite.
- Unpack the NotMyFault.exe kernel dump tool.
- Open the Control Panel.
- Select System and Security.
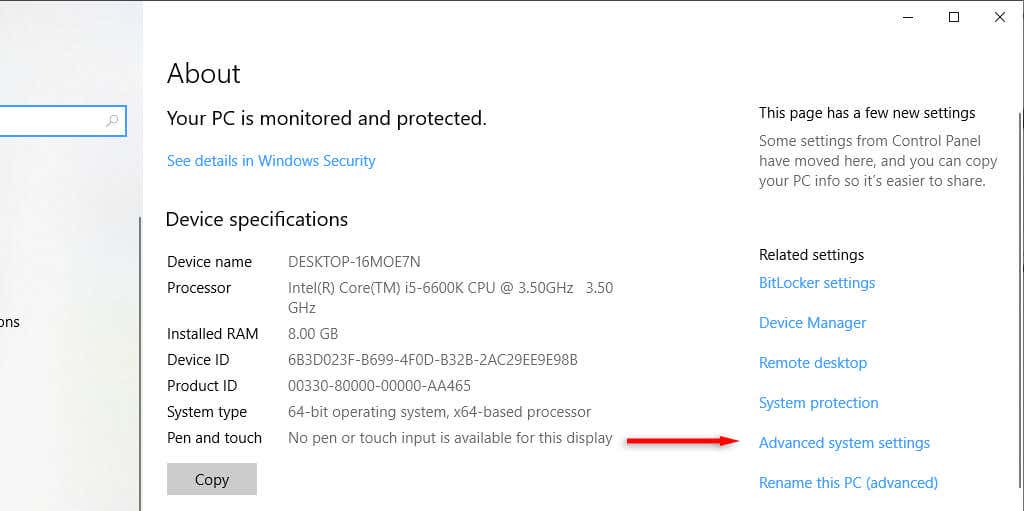
- Select System.
- Select Advanced system settings.
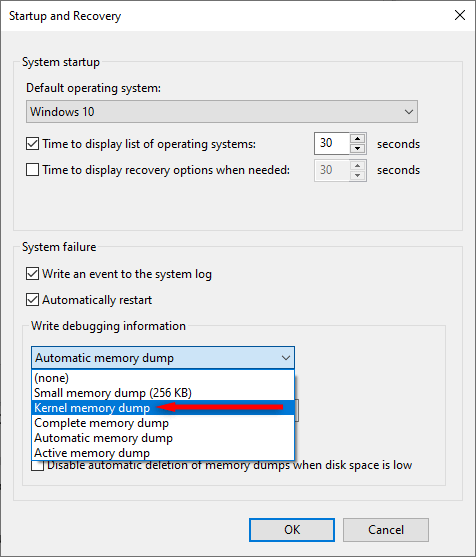
- In the Advanced tab, under Startup and Recovery, select Settings.
- In the Startup and Recovery dialog box, select Kernel memory dump.
- Note the Dump File location, then select OK.
- Run WinDbg.exe as an administrator.
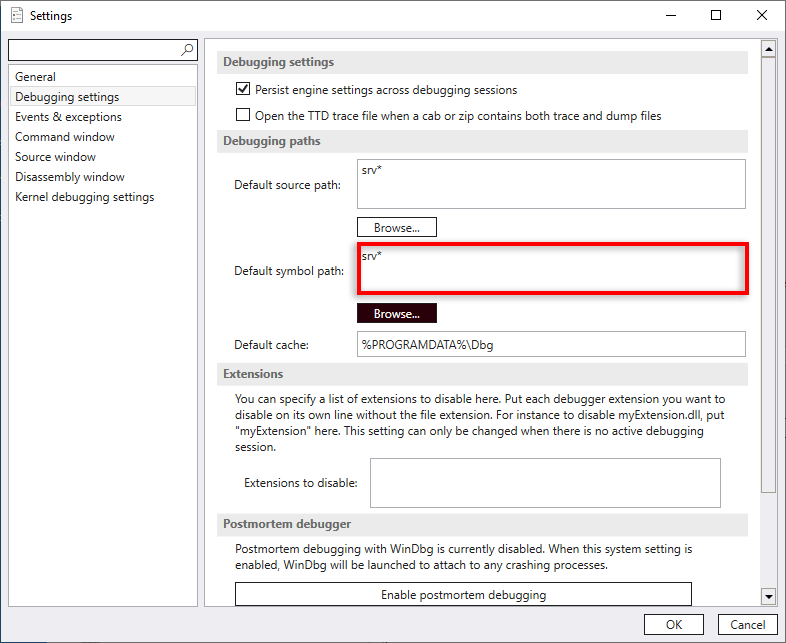
- Select File > Settings.
- Select Debugging settings.
- Next, you need to tell the debugger where to look for its symbol file path. Add the following path next to “Default symbol path” and select OK: https://msdl.microsoft.com/download/symbols
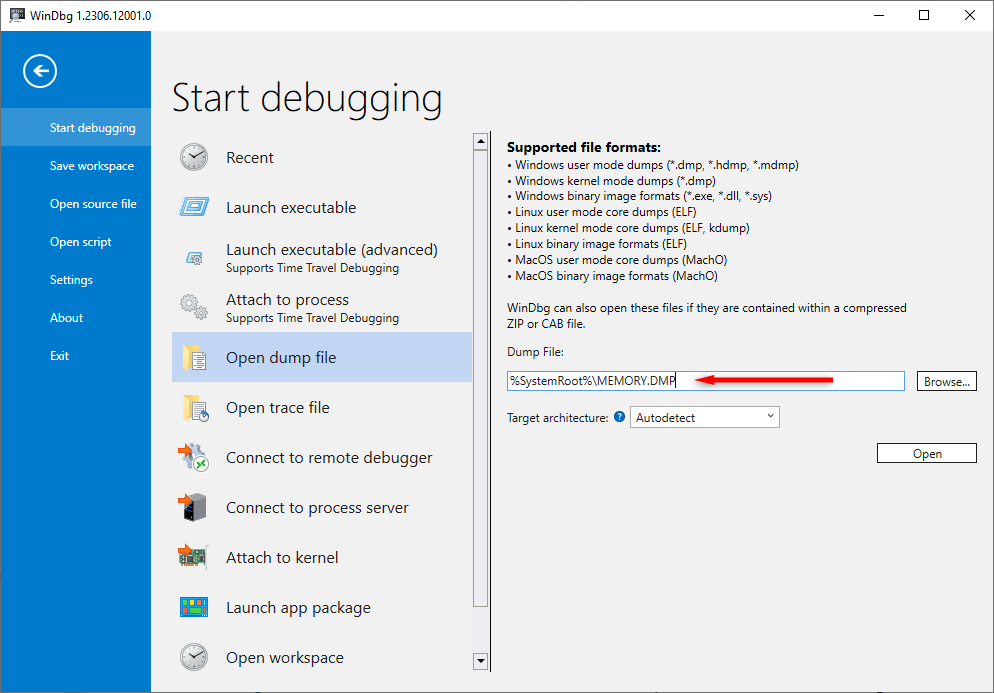
- Select the File menu then select Open dump file. If it doesn’t open, make sure you run WinDbg as an administrator and manually browse for the file. It’s located in C:\Windows.
- Browse to the Dump File location that you noted previously and select Open. Make sure that the .dmp file here has been created today by checking the date in Properties.
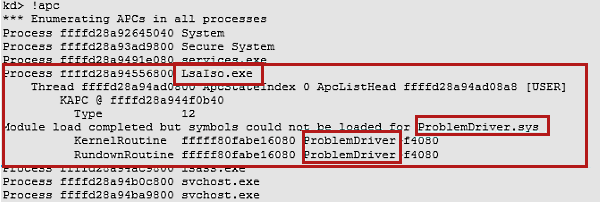
- Back in WinDbg.exe, in the Command window, type “!apc” and press Enter.
- Analyze the dump file and look for “LSALSO.EXE”. If a driver is listed under LSALSO.exe, it will appear as “Problem Driver.sys (with its actual name in place of “Problem Driver”).” If a driver is listed here, it means that it’s created an APC queue. To fix it, reinstall the driver or contact the driver manufacturer to troubleshoot further.
If no driver is listed under LSALSO.exe, it means there are no queued APCs.
5. Reset Windows
If the above methods didn’t help you resolve the high CPU usage issue, you could try resetting Windows to its factory defaults. Often, this fixes any residual issues with drivers and other applications and returns the LSALSO.exe process to its default state.
Check out our in-depth guides on how to factory reset Windows 10 and Windows 11.
Reduce CPU Usage For Better Results
There’s nothing worse than having a random process chew up your system resources for no obvious reason. Hopefully, this troubleshooting guide has helped you resolve your issues with LSALSO.exe and get your PC running like normal once again.
